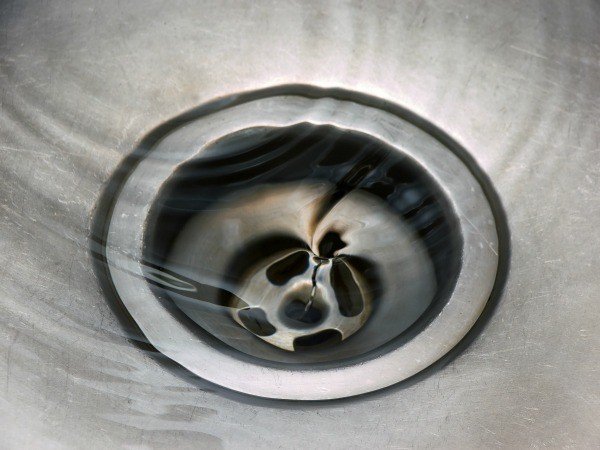
The slow draining sink is a very common household problem, but you can fix it quite easily. A sink that drains too slowly is usually caused by the accumulation of trash and bunch of junk in the pipes. Do you ever face a situation with slow draining kitchen sink not clogged? The sooner you notice that the drain is “Acting funny” or no longer drain rapidly you should take action to clean a drain before it becomes a serious problem.
How to unclog your kitchen sink without calling a Plumber
By following one of the methods below, there would be no need to call a plumber. Now you can unclog your kitchen sink on your own in less than an hour by using inexpensive tools such as Plunger and Snake Auger. You also need to keep several other items handy such as a bucket or a plastic bin that fits under your drain, rubber gloves, and other such articles.
Method 1
How to Unclog SLOW DRAINING KITCHEN SINK NOT CLOGGED -USE A PLUNGER
A plunger is a tool used to remove blockages in drains and pipes. It consists of rubber suction-cup with an attached stick. The stick is usually made of wood or plastic.
First, fill the sink partially full of hot water. Then position the plunger over the drain then plunges up and down vigorously for about 20 seconds and see if the water starts to drain and continue using the plunge until the clog is clear.
Method 3
How to Unclog SLOW DRAINING KITCHEN SINK NOT CLOGGED With CAUSTIC SODA
Caustic Soda (Sodium Hydroxide) can be used to unclog your kitchen sink. Pour 3/4 gallon of cold water into a bucket then add 3 cups of caustic soda and stir it well. It will begin to fizz and heat up. Pour it into the clogged drain and leave it for 20-30 minutes, then flush the drain with boiling water. Repeat the process if necessary. Sodium Hydroxide can cause nasty chemical burn so always use caution when handling it.
METHOD 3
How to SLOW DRAINING KITCHEN SINK NOT CLOGGED Using SALT AND BAKING SODA
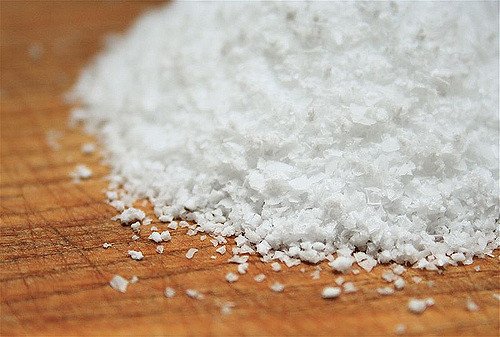
First mix 1/2 cup of salt with a half cup of baking soda and pour down the blocked drain. Leave it for 10-20 minutes. Then flush the drain with boiling water. Salt Baking soda and boiling water will produce a chemical reaction that will dissolve some of the dirty blockages.
METHOD 4
How to SLOW DRAINING KITCHEN SINK NOT CLOGGED USING BAKING SODA AND VINEGAR
The first step is to remove the standing water. Pour about a cup of baking soda into the drain and an equal quantity of white vinegar. The solution will bubble. Then wait about 15 minutes. Next flush hot water to see if the clog clears. Repeat the process if necessary.
METHOD 5
P-TRAP
It may be important to clear the P-Trap to remove the clog.Place a bucket underneath the drain to catch any debris that may fall out. Unfasten the P-Trap from the drain pipe and clear the stuck material. Then replace and run water through it.
METHOD 6
USE A PLUMBER’S SNAKE
If neither the plunger nor the cleaning of drain unclog the sink, then Plumber’s snake also known as Snake Auger can be used to report this. Plumber’s snake is a flexible auger that is used for cleaning sink and bathtub drains. Plumber’s snake is often reserved for severe clogs that cannot be loosened with a plunger. Plumber’s snake is usually about 1/4 – inch thick with the handle on one end. They are long enough to reach the clogs that are deep within a drain pipe. The Snake Auger will help you gain access to the clogs so that you can pull it out.
How to Prevent Draining Clogs
There are many reasons for a drain to clog. Try to prevent the problems before it happens. Slow drains, the bad smell can create trouble in your main drains. Therefore, check it periodically. If your main sewer line becomes clogged or plugged, you will be left without a workable plumbing system. Clogs need to be prevented.
You can prevent future clogs in the following ways.
Clean your sink on a regular basis and check the pipe fitting properly from top to bottom.
Don’t dump solid objects down the drain. Washing heavy products down the drain can cause clogs, therefore, throw all the solid objects in the trash
Once a week pours boiling water down your drain to clear away any residue and use filtered clean water.
Never pour grease, oil down the drain. Heavy oil, grease rich gravies should be thrown in the trash.
Don’t try to wash any garbage material in the sink.
If your kitchen drain clogs frequently and these methods do not work, then you should call a Professional to resolve your matter.
Changing a futile trash disposer might appear intimidating. There is a reasonable fear about power as well as water, the unacquainted sink association as well as sufficient drain fixtures to make leakages an actual probability. Then there are the difficulties of contrast shopping as well as the doubt that the job might run into real money. Thus lastly, useless disposers do not frequently leak and escape, however, not at the start. Thus it is easy to set things off. So let’s take a look at the easy way of how to replace a garbage disposal.
If theses noises familiar, then you will be glad to recognize that substituting a disposer is simple. Through today’s plastic leftover kits and tools, leakages are rarely a problem as well as the electrical networks are likewise rapid plus easy. Before you purchase, however, it pays to inspect your previous old unit to ensure that it is not merely jammed and blocked.
How to Replace a Garbage Disposal
STEP 1: SWITCH OFF ELECTRICITY
Start by switching off the electricity power to the unit on the service panel. Eliminate the shelter from the base of the disposer, release and loosen the ground bolt as well as remove both cable connectors.
STEP 2: LOOSEN AND RELEASE THE BOLTS
In this step, release the hose clamp on the dishwasher and discharge pipe as well as pull the hose pipe from its fixtures and fitting. To unfasten the drain support, release the screws that fix the drain projection to the disposer.
STEP 3: ELIMINATE THE PREVIOUS UNIT
Disposers attach to the basin sewer fittings in many ways certain practice threaded plastic and soft nuts, further large hose pipe clamps, however, the mounting ring Association is the most public. To eliminate the disposer, maintenance it from underneath as well as revolving the large, 3-tab mounting ring at the first counter-clockwise up until the unit drops away. Eliminate the rest of the drain association by untying the three nut bolts as well as snooping off the retentive ring. Push the sewer out by the basin hole as well as clear away several old putty or caulk.
STEP 4: PUT ON PUTTY
To put in the new and fresh drain association, you first need to roll a knoll of plumbers putty on the stand up until you have a 10-inch long piece and ½ inch thick. Now you need to stick this putty around the underneath of the sewer as well as press the sewer or drain firmly into the basin hole.
STEP 5: FINISH THE DRAIN
To stop the drain association, slip the cardboard washer as well as backup and standby ring on the sewer spud.
STEP 6: SNAP THE RING
In this step follow through the rising projection as well as the retentive ring. Snap the retaining or retentive ring on the sewer spud.
STEP 7: TIGHTEN
Tighten up the nut bolts through a positioned screwdriver up until best of the putty squeezes or crushers out as well as the sewer senses snug and warm in the basin.
STEP 8: WIRE IT UP
It is typically easier and informal to wire the fresh and original disposed of beforehand you fit it. If the previous fitting was ended deprived of flexible and elastic conduit or pipe, currently is the period to upgrade.
Initiate by winding the previous box connector keen on the base of the fresh new disposer.
STEP 9: FINISH IT UP
Take along the circuit cables as well as a conduit or pipe into the connector plus save the conduit. Link the black color circuit cable as well as the black lead in single cable connector, plus the white color circuit cable as well as the white lead in another. Bind and fix the circuit ground cable below the green color ground bolt as well as a substitute the cover.
STEP 10: FITTING THE NEW AND FIRST-HAND UNIT
New and first-hand disposers come along through a dishwasher release nipple in place, on the other hand, the nipple comes plugged inside the case you do not have a dishwasher. If you aim is to practice the dishwasher fitting, push the plug or switch out through a screwdriver as well as approach into the disposer to recover it.
STEP 11: FITTING THE NEW UNIT
Lift up the disposer to the basin sewer as well as involving the tabs of the mounting and rising ring. Once the ring in progress, slip-up a screwdriver into any of the tab slots as well as revolves the ring in a clockwise direction up until it undersides out.
STEP 12: FITTING THE FRESH AND FIRST-HAND UNIT
In this step to plumb and aligned the disposer’s sewer outlet opening, fit the rubber seal washer properly over and above the flange finish of the soft and plastic cross piece, after that slide and slip the metallic flange protection on from the new end. Tip up the bottoms of the metallic flange hooked on its slit in the disposer as well as tighten up the fastening screw bolt by the top side of the flange.
STEP 13: INSTALLING P-TRAP
In the last step, you need to trim as well as the crosspiece to the dimension and length, link it to the sewer tee as well as fit the P trap.
The air in your home is full of pollutants, such as smoke from cigarettes, cigars, and pipes; grease from the kitchen; and dust. Homeowners often show negligence while repairing and cleaning home stuff when they rent out their homes. It is the duty of the owners to keep the installed furniture, sanitary and electricity issues well maintained regularly. It does not mean that tenant is free from any responsibility and care. However, regular maintenance is must to prevent any harm and damage to the furniture and other important things in a home. Here are the rights ways for how to clean old wood furniture at home easily.
If you are living as a tenant, it is also your duty to keep house damage free and show courteous approach to the homeowner. You are an employee, and you have to accept the commands of your employer.
Cleaning furniture requires lots of time, or you can split the cleaning process of few days processes. Make a work plan and give each room one day for cleaning.
Now how to get the hold on professional cleaning of old wood furniture at home. You should arrange a proper cleaning toolbox finely equipped with wiping tools.
This tool arsenal must have followed things:
Two ragged pieces
Dishwashing liquid
Detergent soap
One near duster or spare wall paint brush
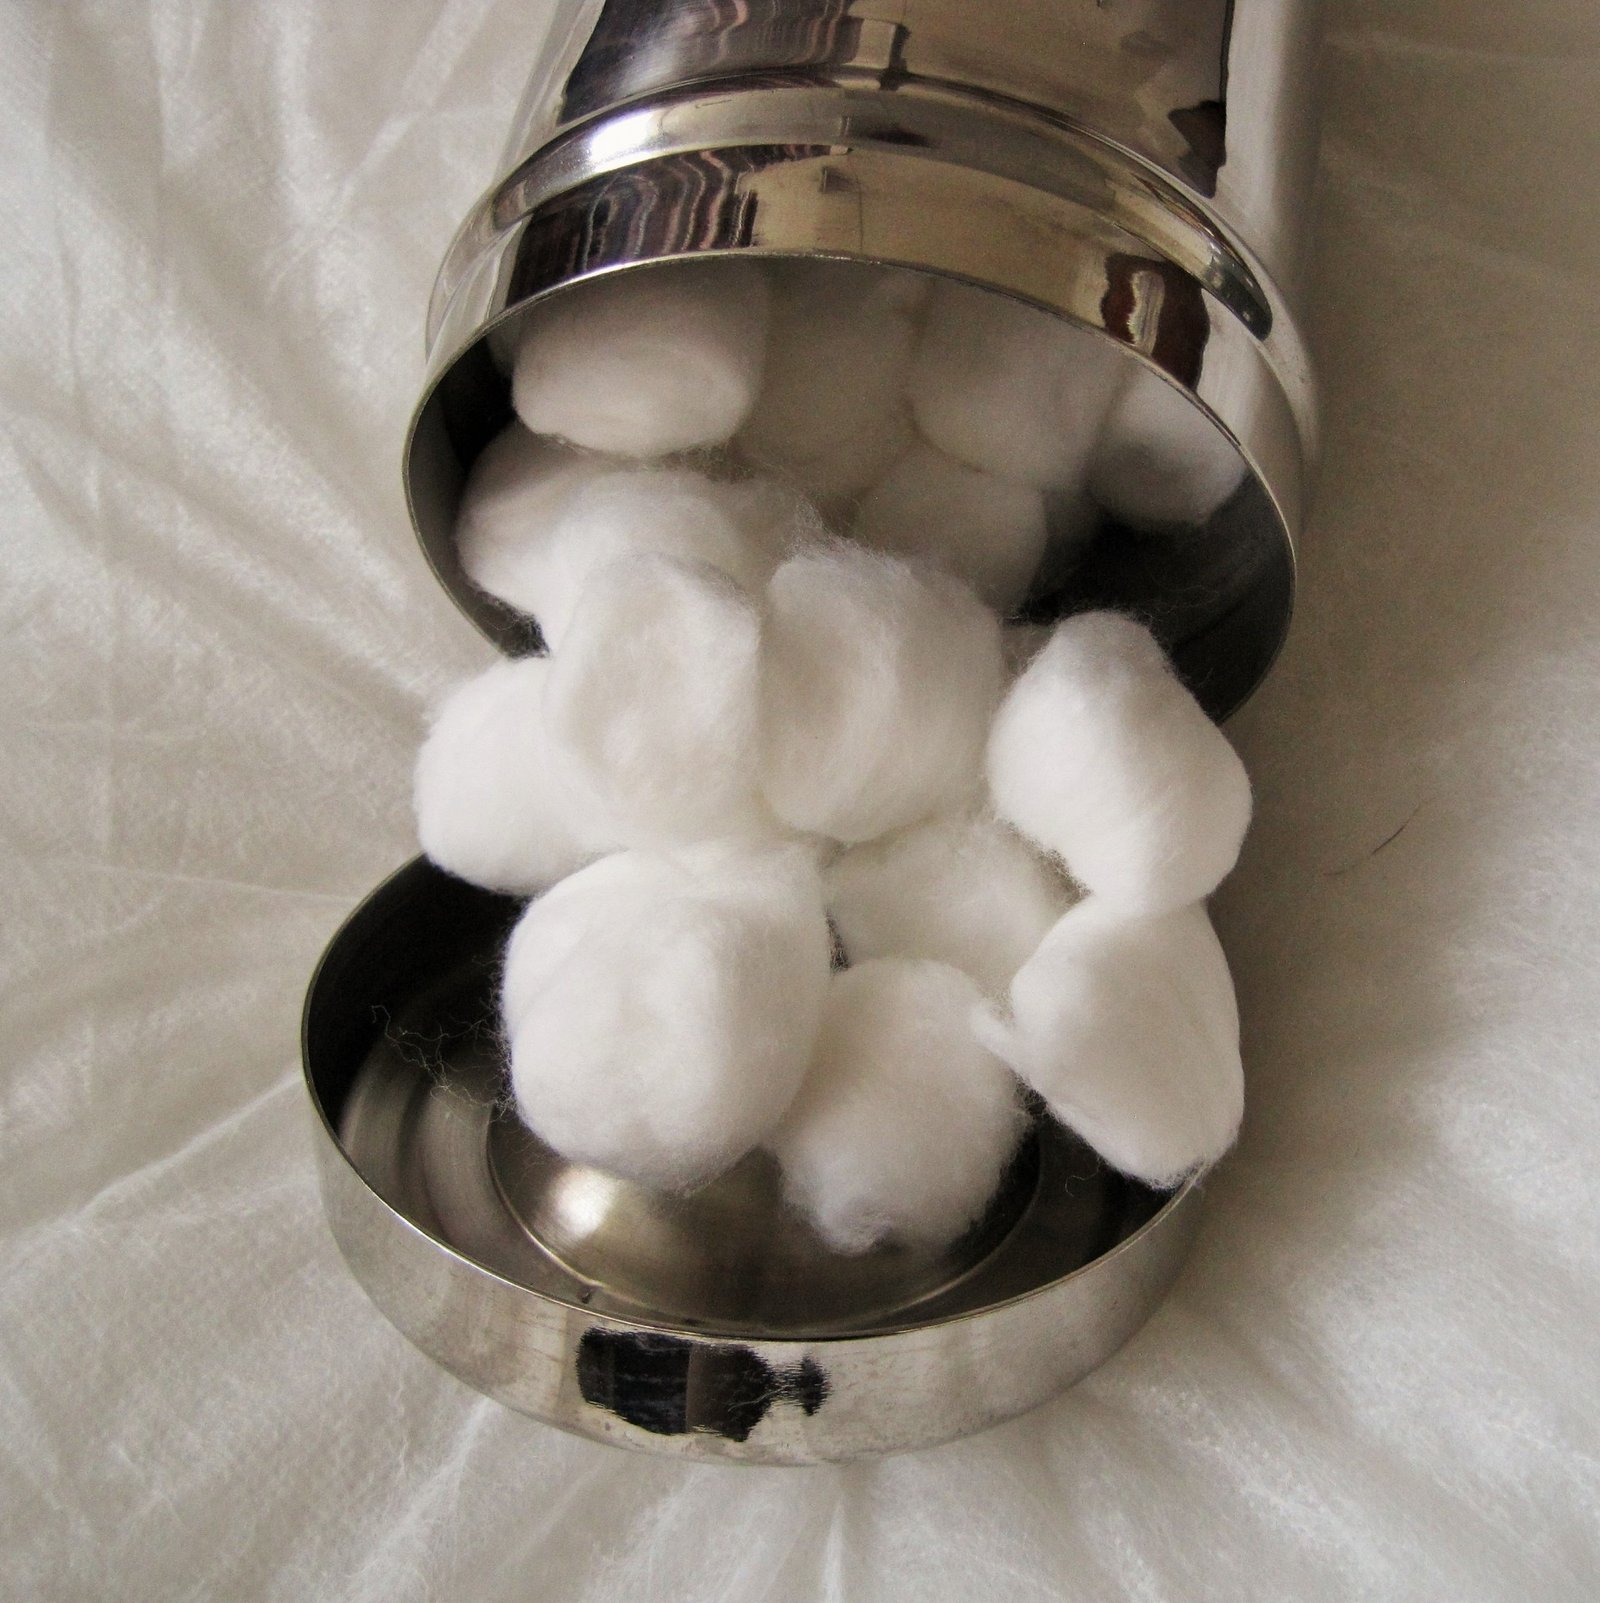
Cotton balls
Wood Polisher
Commercial wood cleaner (If available/ optional)
The Right Ways for How to Clean Old Wood Furniture like a Pro
Duster/ Spare Wall Painting Brush
We usually show negligence while dusting other areas of a home and leaving wooden furniture. It sounds a bit rude, and we let them stay without brushing off the dirt on them. So, if you want to start cleaning an old furniture in your home, start with a duster. It could be an extra piece of soft cloth or a wall paintbrush (never used for paint before).
Brush off the dirt and make sure you didn’t leave any part of it without dusting. Make it dust free that following procedures will get easier.
Dilute Soap Liquid in Water
These ingredients are almost easily available in every home, and one can use it with stressing out. You can take a liquid soap/detergent/dishwashing liquid and mix it well in the water, so it makes a soapy fluid.
Take one broken piece of soft cloth moisture it in a liquid, squeezed it and swiftly rub to clean the furniture. Make sure you don’t scrub harshly, this will harm or even damage the originality of your old wooden furniture. Reach every single corner and part so that no place remains free of liquid.
Cotton Balls for complex parts of your Furniture
Cotton balls will reach those parts of your furniture where hand barely to approach. Lightly moisture a cotton ball in the soapy liquid and clean the complex parts of your furniture.
Wipe off with a Clearwater
Once you finished cleaning with detergent liquid, wipe off with clean rag cloth moisture in clear water. You don’t need to overflow water on your furniture, so it leaves stains of water after drying.
Wood polish to give your Furniture a New Life
If you are struggling in cleaning your old wooden furniture and still it doesn’t provide any change, make a use of wood polisher. Carefully, read and application directions before you seal of the bottle. Build courage to do the process and do that according to the provided instructions.
Wood polish will bring a new life to your old furniture with an entirely new shine. High-quality wood never loses its worth no matter how old it got.
Trisodium Phosphate solution (optional)
Trisodium phosphate (TSP) is a well-responding wood cleaner, usually used by the painters to clean mold and amassed dirt from the exterior walls. It can be utilized on exceptionally filthy furniture. However I would suggest it just on painted, enameled, or varnished pieces; and not on polishes, shellac, or veneer wraps up. This chemical can provide profound results of the old rusted furniture laying in the store room for years.
Step 1: Preparing the Mixture
Make a blend of two tablespoons of TSP and one quart of warm water.
Step 2: Applying the Mixture
Since it is an effective concoction, you should wear rubber gloves and eye protection specs when preparing this chemical solution. You don’t need a compound smolders, and regardless of how cautious you might be, any fluid can sprinkle or splatter.
Prevention is Better than Cure
Environment/Climate
UV or bright light is harming to old fashioned furniture. Daylight can corrupt original finish of the wood. Antique furniture ought to be set out in direct daylight, and draperies or curtains should be used to block direct sunlight. Furniture may turn opaque or gets to fade with direct exposure to sunlight.
Abstain from setting your antique furniture before warming and cooling vents, radiators, chimneys or stoves. The heat can shrink the wood spaces, polishes, trims, and marquetry.
Your antique furniture is additionally influenced by the measure of dampness noticeable all around. Changes in relative moistness can make wood to expand and contract. The expansion and compression can affect the movability of the drawers and doors to drag or get to be distinctly stuck in their opening.
Along humid season can cause mold growth, decay, and even insect infestation. The utilization of a humidifier or dehumidifier is prescribed to help keep up the relative moistness and limit the unfavorable impacts that dampness can have on your wooden old fashioned furniture.
Pest’s Habitat
Longed untouched wooden material, clothes, leather and other items can welcome insects or pests to reside. Old wood furniture needs to be checked regularly to prevent any damage by the pests. Creepy crawlies, for example, beetles or termites eat their way along the grains of wood until they live.
Keep an eye on your wooden furniture and keep it safe by preventing from the smooth passage of the pests and other chronic harm.
Grandma’s furniture in a home and you certainly don’t want to push it off even if it is old-fashioned. Disposing of is not a remedy to get rid of this antique beautiful wooden pieces in your home. Old wood is like an old vine, the more it gets old more it becomes precious. Here are five best ways to clean old wood furniture.
We do not want you to throw away your precious wooden pieces due to its dust and dirt cleaning factor. Now you can make your furniture dust free from simply these easy-to-do steps in your home without calling a professional or even not by using some chemical cleansers.
Here are the best ways to clean old wood furniture to bring back their shine and lost charm.
Five Best Ways to Clean Old Wood Furniture
Spare wall paint brush
While starting this operation, you must need an extra thick hair wall paint brush to remove dust from your wooden furniture. It could be your wooden cupboard, chairs, bed, dressing table or any wooden material that you want to clean after so many days or even months.
Take a spare wall paint dry brush and start brushing the dust stuck on the cupboard since long. Go to every inch and corner of the cupboard to make sure that you will not find dirt particle living inside.
Mild and soft cleanser
This cleanser is required to remove stubborn dirt on your furniture. Go for a mild cleanser as harsh chemical formulas may bring harm to your precious wooden furniture. Active chemical methods can fade the color and even scratches off the wood polish. Do consult with the expert first before buying a mild cleanser.
The best way to go with is using a hand wash or dishwashing soap diluted in the water. It makes a slight texture and won’t harm your furniture.
Dip any soft cloth in the diluted solution and squeezed it off then swiftly rub the surface of the furniture. Avoid scrubbing as it may cause harm. Move that piece of cloth in the direction of wood grains.
Toothbrush or hair color brush
If your wooden furniture got some creative yet intricate designs and its hard for your hand to reach there? Make a use of a spare toothbrush or even a hair dying brush with a small face can work. The ultimate advantage of using such brushes is that it would reach out those areas where your hand is unable to enter.
Dip a toothbrush in your cleaning solution. Following the grain, scrub down hard-to-reach areas until dirt and grime are gone.
Pat it down with a dry piece of cloth:
Once you are finished with cleaning, pat or wipe off it with a soft slightly moistened rag cloth. Remember, do not rub or scrub harshly to lose its excellent finishing and original worth.
Use a wood polish
If you think that your furniture is fading and losing its polish, make sure you bring in the wood polish stuff. Doing this activity may require training and tactics to adopt while performing this as polishing is not a piece of cake for those who never use it before.
Carefully read the terms and application directions written on wood polish pack. Once you clear with the directions, try little on any spare wood twice to perform this activity like an expert, not a beginner.
Preventing the Damages
In the wake of repairing your wooden stylish old furniture, it is essential to counteract future scratches and harm to keep up its significance. Accordingly, wood furniture needs cleaning regularly or at least twice or thrice a week if dust factor is minimum in your area. Build up free expandable soft cloths are essential to your cleaning toolbox. These fabrics will expel tidy without sending it airborne. Glue or fluid wax made particularly for wood will include a harder complete than run of the mill furniture shower and finish, and your Natural Oil Soap will set up your furniture for wax application.
Cleaning a wood complete may incorporate finishing, patching and touching up surface scratches with a specific end goal to give an old bit of wood furniture a new life in your home.
Be vigilant when cleaning, and screen the Wood Furniture as you go. As you clean scratches, some more profound chips and gouges will seem to tell you precisely what you will require revamping your wooden items. Never use too watery elements as these may cause harm.
Use Tips for Furniture Care
• Abstain from setting wooden furniture opposite to window or direct daylight.
• Abstain from setting collectibles close aerating and cooling and warming vents.
• Try not to put your antique furniture close to chimneys and stoves.
• Blotch up spills promptly.
• Tidy regular use of a build up free material.
Never use wood polish so frequent as stripping and revamp discharged the original finish of your wood and harms the patina also. Once expelled, it can never be recuperated. Examples of wear showing the historical backdrop of utilization are likewise lost amid revamping.
This fact should never be ignored that old-fashioned furniture has noteworthy financial, imaginative or original worth. The idea that expelling the complete from any old-fashioned or collectible household item damage the worth is just overstated by the simple interpretation of the remarks, for example, this seen on public television shows.
You need to look for an expert suggestion before performing this activity on your own at home. As old wooden pieces are precious and made from the finest wood. As usual, it is best to fail for alert while considering performing this operation on your wooden pieces or repairs to your old fashioned furniture.
This is a very embarrassing situation when you arrange a meeting, a party or family get to gather, and your toilet gets clogged. So it is necessary to know how to unclog a toilet without a snake. It is an awful feeling when you and your guest face this frustrating situation. Immediately some questions click into your mind such as:
How can I unclog toilet within a short time?
Is my toilet flush is not working properly?
Do I frequently check pipeline of my toilet?
So, it is time not to think and worry. Let’s start working on it and follow the mentioned below methods that you can use to unclog a toilet without a Snake.
Reasons of Toilet Clogs
The soap, hairs, detergents and other stuff flows down your toilet and over the time accumulate in the inner walls of the pipes and thus creates the clog. A clogged toilet is irritating and frustrating. Regular monitoring of the toilet is essential. You should watch carefully what you are flushing and pour hot water on a regular basis is also beneficial and may prevent future clogs.
There are several ways of removing the blockage from the toilet. Using the Plumber’s Snake is the fastest method, but not everyone has Snakes to deal with clogged toilet. Snake is a dangerous tool as well as it can damage the pipes. Further operating the Snake effectively is not possible for everyone.
There are other ways to unclog the toilet by using the household items. These methods would be cheaper and easy, but they will also be time-consuming.
How to Unclog a Toilet Without a Snake
Following are five easiest and efficient solutions for how to unclog a toilet without a snake.
Method 1
Hot Water Trick
Heat the water on the stove before the water comes to a complete boil, take it off the stove. Then pour it into the toilet bowl. However, this method will be successful for minor clogs only. Moreover, here the main thing is to pour the water quickly but not so fast that you splash yourself.
If this method does not work, then you should try another one.
Method 2
Baking Soda and Vinegar
Baking Soda has cleaning power which gently wears away strains. When it mixes with vinegar, it produces carbonic acid that boosts the corrosive action of vinegar. This method is also easy. First, gather the ingredients that are required for this process which is Baking Soda and Vinegar.
Process
Scoop 1 cup of Baking Soda in the toilet bowl and then very slowly add 2 cups of Vinegar. Allow the mixture to sit for a while and then flush your toilet with hot water. Distilled white vinegar is commonly used, but any vinegar will work.
Method 3
Using Dish Soap And Boiled Water
If you do not want to involve in a messy work, then you should use this method. Dish soap is easily available in our homes, restaurants even in offices. It is the cheapest way to unclog your toilet.
Process
First, take a bucket of hot water and some dish soap. Dish soap may help to loosen the clog Squirt a bunch of dish soap in the toilet bowl then add a bucket of warm water. Wait for almost 30 – 40 minutes. If the water in the toilet is slowly going down, then you are successful otherwise repeat the process over again, but remember this method will not work for hard obstruction, such as toys.
Method 4
Unclogged Toilet by using Chemicals
There are several ways to unclog a toilet faster but using chemicals for unclogging is top of them. Chemicals are readily available in our homes and can be managed easily.
Step 1
Go to the grocery or hardware store to buy a bottle of drain cleaner. In the markets, chemicals are available that help you out to unclog a toilet.
Step 2
Gently pour the bottle of chemical and wait for some minutes. Keep safe yourself and your children and also keep away children from the toilet.
Step 3
After waiting for some time, check whether your toilet is functioning properly. If it does not then you will have to wait a little longer. The toilet should drain once the clog is cleared.
Method 5
Using Wire Hanger
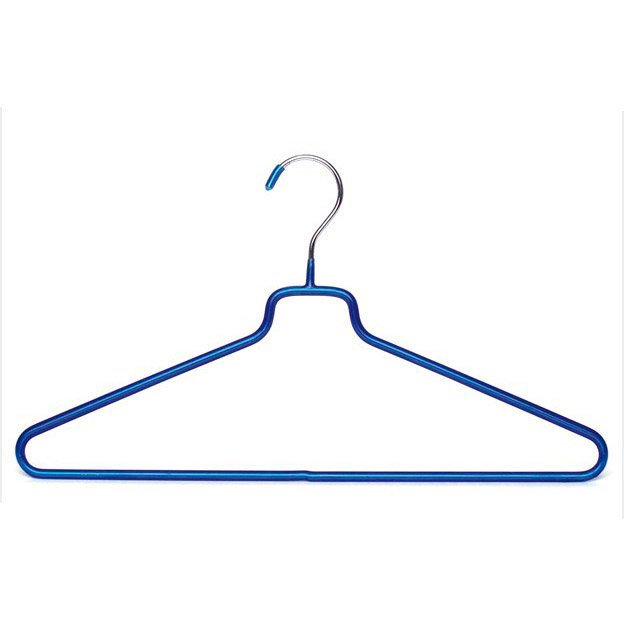
You can make your own Auger out of wire hanger and use that to remove the blockage.
Process
First, unbend the wire hanger leaving a hook at the end. Wear the rubber gloves and insert the hanger into the drain opening in the bottom of the toilet bowl carefully.
When you encounter the blockage, you can either dislodge the blockage or pull out the blockage with the hook at the end of the hanger.
Once the clog is cleared flush the toilet properly, Repeat the process if necessary.
Now you know how to unclog a toilet without a snake. Hopefully, this valuable information may save you from any future embarrassing situations. However, if none of the above methods work it is definitely the time to call a professional Plumber.
So you have blocked drains? Try not to stress, it happens! Sinks can get stopped up for various reasons—the stream of water can be hindered by anything from food washes off of plates to grease to hold up foreign objects, hair, and even bathing soap deposits. We are going to share Seven proved home remedies for unclogging drains quickly at home.
Don’t go systematic instantly or call your plumber. There are a few systems you can attempt with a specific end goal to clear the clog before falling back on a handyman. What’s more, good for you—you most likely as of now have all that you requirement for do-it-without anyone else’s help for clog removal.
Before you begin, analyze your drain clog cause and its sensitivity. If it is a partial blockage or would you say that drain is totally blocked? If the water from you drain is passing through pipes but in slow motion, this means that you have a partial clogging. In case the drain(s) is fully clogged, it would be hard for water to flow down to the drain as normal.
Home Remedies For Unclogging Drains
Don’t crack your head or put yourself in trouble, just follow these magically approved home remedies for unclogging drains.
1. The wire coat hanger
If you have a spare wire coat hanger in your home, make some use of it right away. Simple but exceptionally efficient method to unclog the drains of your kitchen, toilets, and garden. Straighten your hanger and bend it from one end to give it a shape of a hook. Push that wire into the drain and start fishing. You must be able to extract undesired substances blocked in the drain like hair and other nasty stuff.
2. Dishwashing Detergent
This remedy effects best when got mixed with hot water. As this solution has a tendency to wash away, any grease found the drain. It acts as a lubricant and helps break up of any greasy stuff inside. Once you pour this solution into the drain make sure that your next step would a use of a plunger.
3. Wet/Dry Vacuum
If you have a wet and dry shop vacuum, it can turn into an excellent device to unclog channels. Initially, set it to vacuum fluids. Conceal the vent to prevent a mess. At that point, make the most secure seal you can over the drain. You might need to get inventive and adjust an old plunger headset for this process. With the vacuum turned on its most elevated setting, it can be sufficiently compelling to draw the obstruct the pipe and into the vacuum pack. It does not generally work. However, it has justified shot option.
4. Plain Hot Water
Hot water stimulates in the drain pipes and unclog undesired particles out of the pipe and straight into the gutter. A hot water remedy could be an excellent choice for those who think that their sink or toilets drains are not sufficiently clogged. Hard elements resistance will not be pulled out with just hot water. For that purpose, you need a snake wire or a plunger.
5. Baking soda and white Vinegar liquid
This chemical formula works best in the bad times of drains. These ingredients are accessible in almost every home so, it makes another perfect remedy.
A bucket of hot boiled water
Table salt
Baking soda
Vinegar
Mix all these ingredients in a hot water bucket and pour down in the clogged drains for overnight. You will see a significant water flow in the morning.
6. Sodium Hydroxide formula
For this process, you may need some rubber gloves and eye protection glasses. This method typically called as ‘caustic soda’ which can bring about frightful compound smolders. You can find this chemical at your nearby stores, however dependably use precautioning measures stated in it
Pour 3/4 gallon of frosty water into a clean container, and add an adequate amount of caustic soda in the water. Mix it well with an old wooden spoon. It will start to bubble and warmth up. Empty it into the blocked drain and leave for 20-30 minutes, then flush the drain with boiling water. Repeat this process under the supervision of any expert if it is necessary.
7. Drain opener
If you are not a well-off risk taker, you may find a real drain opener in the superstore. Bring the best quality drain opener so that you do not need to settle drain clog repeatedly.
For slow draining bathtub: it is dependably an or more when the water drains out of your sink or bath at best possible pace. That additionally makes it a tremendous frustration when it does not. There are some ways your sink or tub could have turned out to be clogged, and the main reasons could be; free hair, build up of food particles or even shower salts. Their delicate scent can inevitably transform into something far less tasteful as they get to be held up in the drain.
Things to Remember
The initial step before you begin blending chemicals is just to lift up the drain cover. Frequently build-up of hair and other upsetting things will get to be held up underneath here, halting the stream of water. Unblocking the bath drain can be as basic as cleaning up this flotsam and jetsam.
You can use plunge or plumbing snake before you sneak out for chemical drama. Chemical formulas should be done under the supervision of an expert or previously done by some person. You can fix this problem with the help of a plunger if the clogging is not that worst.
You have invested in large and beautiful wooden furniture, but consequently, that furniture set is getting dull and darken day by day due to dirt and dust. But you neither want to spoil up your whole investment nor do you want to buy new furniture and so now you are getting worried. How to make this wooden furniture set new again without investing a huge amount in that? Here are various effective methods on how to clean wood furniture with vinegar and oil.
So, here’s the easiest and economical way to solve out your query. This will not only help to make your furniture look new, but it will also extend the life of your favorite furniture set. It’s a very simple, safe and environmentally friendly approach; you can all do this only with the help of vinegar and oil. Isn’t interesting? As vinegar is also known as the cleaning agent, so before using it on the wooden part just try it on the little part which is not so visible as to know the result. If you do not notice any damage or discoloration to the furniture, then it means it is safe to use the vinegar. For valuable and antique pieces you may want to consult the Professional for proper cleaning of the part.
Below are the different ways with the appropriate description on how to clean wood furniture with vinegar and oil.
How to Clean Wood Furniture with Vinegar and Oil- METHOD 1
Cleaning of Wooden Surface with the Help of Vinegar
Vinegar is not only money saving but it is a fantastic natural way to clean the household items, and it’s an eco-friendly product. So, below are some easy steps to clean up the wooden surface with the help of vinegar and to make your old, dirty wooden surface to look new and more beautiful just like new one!
STEPS OF CLEANING THE FURNITURE WITH VINEGAR:
STEP 1
Cleaning materials
Just gather all the materials which will be useful in cleaning the wooden surface which includes small pieces of cloth, a bucket full of water, vacuum cleaner and of course vinegar.
STEP 2
Remove all the stuff
If you’ve kept the showpiece or any other stuff such as pillows, cushions, lamps on the wooden furniture, remove them all, if something is attached then unfix it so that you can easily start-up your work. Make sure before starting that you have removed everything from the piece that needs to be cleaned.
STEP 3
Clean up the dust
Clean the dust from the wooden furniture which you want to make it new with the help of vacuum cleaner and a cloth. Remove all the dust from it. If space is not easily accessible, then you can also use the piece of cloth, moisten it and use it gently and smoothly for removing dust but make sure dust is removed correctly from the furniture.
STEP 4
Start-up with the vinegar
Take half cup of white vinegar and a half bucket of warm water and mix it well. If the surface is larger than double the quantity of both vinegar and water. After mixing it well, you can use spray bottled and fill in the mixture in that bottle and use it on the small piece of cloth, or you can use a soft piece of cloth dip it in the mixture, squeeze it properly and can use on the wooden surface. Then clean it in a circular motion with the help of the wet cloth. But make sure and be careful of excess water as it can result in damage. Continue the process until the entire piece has been cleaned and if the piece of cloth becomes dirty rinse it out or take a new piece of cloth.
Caution: Don’t use the dirty cloth again and again it will ruin the whole process as well as your toil.
STEP 5
Remove moisture
Now, after the process just take a clean piece of cloth rub it gently in a circular motion to get a shiny surface. Try to remove the water from the furniture as much as possible. If you do not get the desired result i.e. the shiny surface, don’t get sad just repeat the fourth step again. However, don’t forget to clean up the moisture from the wooden furniture. Otherwise, the case will be all different.
BENEFITS OF USING VINEGAR TO CLEAN THE FURNITURE
Following are the advantages of using vinegar for cleaning the furniture:
The first and foremost advantage is that the Vinegar is cheap and it is readily available at homes. You do not have to pay real money to buy branded cleaning products if you have such handy materials already with you.
Secondly, Vinegar is, of course, safe while many cleaning products are not. They have chemicals which can cause problems when breathing in and could be harmful to eyes.
Last but not the least, this method is straightforward and efficient.
METHOD 2
Not just this, there’s another simple and easiest way through which we can clean and as well as polish the surface that is, with the help of vinegar and oil. As vinegar is just the cleaning agent but oil contributes to polish the furniture and make it look more beautiful and shiny. So, the question arises how to use it together? It is just simple!
Cleaning of Wooden Surface with the Help of Vinegar and Oil
To make wooden furniture polish at home, follow the below given steps, but make sure you first apply it on the small part which is not visible as to see the result.
Ingredients:
Olive oil
White vinegar
Preparation:
1)Take 1 cup of olive oil.
2)¼ cup of vinegar.
3)Mix it well, before using.
How to use?
1) Spray it onto the soft cloth.
2) Then, apply it onto the wooden surface with the help of small piece of cloth
3) Then wipe dry.
Caution: Don’t spray the mixture of vinegar and oil directly onto the wooden surface it will cause damage.
ADVANTAGES OF ABOVE METHOD
Following are the benefits of using vinegar and oil to enhance the beauty of your furniture:
It is cheaper than store bought cleaners and is safe to use around kids and pets.
Vinegar and oil not only help to clean and polish the wooden furniture but it also contributes to fix the scratches on the wooden surface.
Vinegar and oil results in an effective polish and can be stored for a longer time, and it is entirely harmless.
Some more information about Wooden Furniture
Furniture and wood stuff are part of our everyday lives. Some are useful, such as a chair at the dining table and others are aesthetic, such as an antique statue or models and still others may have an emotional or symbolic importance as mementos, such as a chest that has been in the family for years. Whatever their nature or purpose are, if they are important to us they deserve the best care and importance in our lives, and we should provide best to them. Always invest in
Always invest in high-quality wood furniture. Good quality wood furniture always has a long life and remain with us for years and years. If you want to keep your wood furniture long life, cares them and dust it regularly. Dust in gentle oval motions going with the grain of the wood. Always dust your wood furniture with soft and lint-free cotton cloth. Avoid rough or irritating materials of fabrics to clean your furniture.
During moving furniture at home offices, hotels and other places, do it very gently to avoid damaging. Always use lifts instead use stair to move, it will save your wood furniture to crack. Always move wood furniture when it became compulsory to move, otherwise avoid moving. Do read guidelines when you are moving your wood furniture.
If the wood furniture minor mishap occurs, most can be adjusted or minimized with the proper products. In the market water mark and tint, remover products are easily available to help reduce or remove damage when it occurs. Always give your time to clean your valuable wood furniture.
WHY WOODEN FURNITURE EXPERIENCE DUST AND DAMAGE:
Some reasons contribute to damage to your furniture. The most common are neglect in caring for the Furniture.
Wood collects dust and grease from the environment. It has a tendency to lose its shine because of wear, and if it would not be regularly cleaned and polished, then it has a tendency to absorb oil and water and thus can easily get stained.
Dusting, Cleaning, Polishing of the wooden furniture is essential to maintain its shine and to prevent it from the damage.
The furniture also needs to be adequately covered to protect it from moisture, humidity, light that could result in the destruction of wooden furniture.
TIPS FOR RESTORING THE SHINE AND BEAUTY OF YOUR WOODEN FURNITURE:
Furniture requires special care to remain intact and elegant. Here are the tips which you can follow:
Dusting the furniture daily or 2 to 3 times in a week is beneficial. It will ensure that the furniture does not accumulate dust and remains clean. Dusting will restore the furniture appearance and shine.
Protect the wood from water and other liquids such as alcohol as it can leave a stain on the furniture which spoils your furniture beauty.
Keep your furniture out of the sun or at least try to minimize exposure as UV light is very dangerous and it can destroy and shrink the wood, which will cause cracks.
So, therefore:
1.Don’t leave the furniture outside.
2.Don’t place the furniture near a window where it may be exposed to sunlight.
Polish your wooden furniture each year to maintain its luster and to protect the surface from moisture and dust.
You must not use soap and water on a regular basis as it can stain and damage the wood.
CONCLUSION
The two methods described above i.e. vinegar and vinegar with oil, are the easiest, simplest and under budget, a technique to make your wooden furniture clean and polish. It can be done easily at home and gives the same result as chemical polish. Just try this, and you will notice the great change. It will give a new look to your furniture and will increase the beauty of your home too.