Tag: home remedies

  • How to Remove Old Oil Stains from Clothes- Home Remedies

    It’s nothing worse than to see your clothes bloated with spots of grease and oil all over. We give our clothes to the laundry and we presume that our clothes will become spot free again. However, we are just presuming and it doesn’t actually happen. Removing grease and old oil stains out of clothes is not a cup of tea. You can’t simply get over this until you completely clean the splashes of oil on your clothes. So the question is how to remove old oil stains from clothes with home remedies?

    how to remove old oil stains from clothes

    How would you feel when you call some guest over your place for dinner and gets unexpected grease marks on your clothes? Of course, it will make your nerves down and awful. Be careful while cooking oily food. You should keep Apron while cooking to prevent oil stains out of the clothes.

    Oil is also the source of one of the toughest stains to remove from clothes, fabrics, concrete, and more. But it doesn’t have to be. Old oil stains are removable if treated properly with appropriate measures. It doesn’t only happen with a person who cooks, even the kid’s clothes are attacked by this greasy creepy marks as they intentionally love to clean their hands and mouth with their shirts. Well, this is how you can save your child doing all this and also how quick you can save your time in removing stubborn grease stains.

    How to Remove Old Oil Stains from Clothes

    Let’s look at how to remove old oil stains from clothes with home remedies in most simple ways.

    Here are some different yet easy and quick ways for how to remove old oil stains from clothes.

    How to Remove Old Oil Stains from Clothes with Corn Starch and Soapy Water ( Fabric Speical)

    How to Remove Old Oil Stains from Clothes with Corn Starch and Soapy Water ( Fabric Speical)

    These ingredients fight best to remove old oil stains from clothes. Sprinkle the starch on the affected oil zones of the fabric and let it stay for few minutes or not more than an hour. Brush it off with a baby brush and dab the soapy water on the stain and try to scrub gently so that it won’t get messier. Place your fabric under the fan to dry.

    Important note

    If the cloth material is like polyester that wouldn’t regularly be washed in boiling hot water, extend the pretreated affected oil stained part of the fabric over a bowl and pour a constant flow of boiled water specifically onto the stain and after that wash it with chill water.

    You should clearly examine the affected area of the fabric before you start any process and drying it. You can repeat this process if you need. Never put an oil recolored area of clothing in a dryer, the high warmth will make the oil much more hard to remove.  How to Remove Old Oil Stains from Clothes Using Hairspray (It is also the unused remedy for stain removal )

    How to Remove Old Oil Stains from Clothes Using Hairspray (unused remedy for stain removal)

    How to Remove Old Oil Stains from Clothes Using Hairspray (unused remedy for stain removal)

    Hair sprays are usually neglected by many of us unless we get any party invitation. Hairspray is one of the effective remedies ever to remove the old oil stains out of the clothes. If you found any stain on your clothes, simply spray that area with a hair spray and leave it for half an hour or not more than an hour. Wash it with a plain water and let it dry. If you found any reasonable results after such process, you can repeat it completely vanish the old oil stains out of the clothes. Make sure you can use this for the stained fabric.

    How to Remove Old Oil Stains from Clothes (Dry Clean Fabric Special)
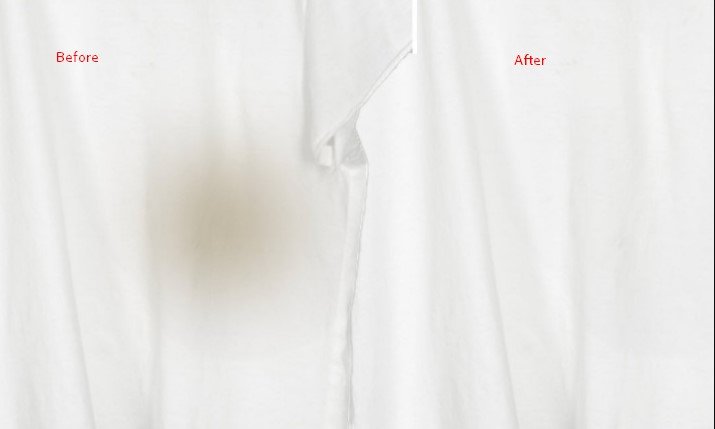
    How to Remove Old Oil Stains from Clothes (Dry Clean Fabric Special)

    At the point when that oil spills on your most favorite shirt or coat, utilize a dull blade or edge of your MasterCard to lift away the solids. Smudge away however much of the slick fluid as could be expected with a dry white paper towel, a loaf of white bread or you can sprinkle the stain with cornstarch or baby powder. In case the oil stain is little, you might have a choice to remove the old oil stain from the clothes by using only stain removal products available off the racks. A stain expulsion pen won’t be successful in removing the oil.

    Precautions to Prevent Oil Stains on the Clothes

    Removing stubborn old oil stains out of the clothes is a bit time-consuming method and one should need enough spare hours to fix this problem. If you are the one who has kids in the home, you might have experienced certainly unbearable things in your home. The kids usually unintentionally place their greasy hands on their clothes and on their mother’s favorite silk maxi gown. It is troublesome for a mother to look after her kid or that stain at the same time. However, we have discussed some quick and effective methods to remove old oil stains from the clothes.

    You must wear an apron while cooking food, even if you are in your favorite PJs. This will avoid your dress and your skin from any burn from the splashes of grease and oil while cooking.

    • Keep the flame on medium so your food doesn’t pop ups the oil splashes to your clothes.
    • Keep a fair distance from a burner.
    • Eat healthy food, avoid deep fried foods all the time.
    • If you want to cook on high flames, cover your pan with a lid and move it with its handle.
  • How to Clean a Hairbrush

    We often overlook to pick the right hairbrush for our hair type and we go with the same from a long time. We don’t feel any botheration changing this tool as it gets messed up inside if not cleaned and replaced with a new one. Different hair type requires a different type of hair brushes, Richman said. We usually see different types of brushes placed in a can in the saloons, but never happened to actually know about them and their productivity. You can only know when brush uses on your hair. Do you how to clean a hairbrush for best performance and long-life?

    how to clean a hairbrush

    What types of hair texture have you? Rough, curly, sleek, bob, thick or any other? Make sure you are using the right type of hair brush for your hair to keep your hair alive and healthy. It is also important to know how to clean a hairbrush once a week so that you get rid of hair residue and grime stored in the scalp of your hair brush. There are different online tutorials about how to clean hair brush at home, you can find out different methods to deal with it. If your hairbrush has of age now and lost its bristles and became weak, you should consider replacing it with a new one according to your hair type.

    Choose Best Hair Brush for Your Hair

    Selecting one that is optimal for your hair type will give you better results. Here we have discussed some main hair brushes for your hair types and how and when you can use them. First, we will start with the brushes suitable for all hair types and will also discuss how to clean a hairbrush at home with simple methods.

    1. Sculpting Brush

    Sculpting Brush

    This brush is suitable for all hair types and especially when you are trying to style your wet hair. If you are up to an event and running of time, you can pick this brush for your blow dry at home without sparing extra bucks over it. You can clean the hairbrush easily as it has less smooth bristles and they won’t damage and pull your hair from your scalp.

    2. The Vent Brush (Plastic)

    The Vent Brush (Plastic)

    It has thick but soft and smooth bristles. The vent brush works best at times of detangling and blow-dries at home. It has more bristles than sculpting brush which makes easier to detangle even your dry hair. This brush was famous in the 90s and used in styling different celebrities with short bobs. It usually results best for short or bob styles and not longer than that. There are easy methods to clean hair brush of this type available online.

    3. The Thermal Brush

    The Thermal Brush

    It works best for thick, coarse and long hair for a blowout. If you are a working woman and can’t pull some time out to facilitate your hair, this thermal brush will treat you well in that case. You can make softer looking hair with the best hairstyle with this brush at home without breaking your bank. It functions like a metal round brush with the heated metal base.

    4. The Boar Textured Bristled Brush

    The Boar Textured Bristled Brush

    Normally this brush is used in long and thick hair to make them in an even tone and softer. Marcia Brady brushed her hair 100 times before bed to make it detangle and smooth, and keeping in mind that we don’t prescribe going to such awesome lengths, she was on to something: Natural hog swarms help empower the scalp, circulating oils through the hair while detangling. Hog is likewise the way to getting the delicate, brushed-out surface of vintage waves.

    What are Boar Bristles Brushes?

    The main function of this brush is to brush off the grime stored on the scalp due to which our scalp looks messy and untidy. Boar bristle brush has a tendency to remove all the grime from the surface the scalp and makes it clean.

    Best Hair Brush for Frizzy Hair

    “Thick hair is at times testing, and many women don’t know how to give their regular surface a chance to radiate through without harming it from styling tools. In the event that you have thick, wavy hair, make sure to pick a brush that holds up to your solid locks.

    It’s best to utilize a wet brush or a wide-tooth brush on your hair when it’s wet and you’re anticipating giving it a chance to dry actually,” These brushes are extraordinary on the grounds that the bristles are wide-set and will help detangle without pulling off your hair. Furthermore, they help with smoothing before you start the styling procedure.”

    How to Clean a Hairbrush

    Every person has different scalp and hair texture and one cannot compare her hair texture with other. As technology has made our standards of living easier than before however, we are more prone to damage as well. Our body is build up of natural oils and minerals and so that our scalp and hair. We must take due care while considering any treatment and hair duo for our hair. We usually take treatments and show negligence in taking care of our hair after treatment.  Often we listen to the preventions and tips but we always make it unheard. Make sure you clean hair brush every time you use it.

    We use wrong brushes according to our hair texture which results in hair damage and fall at the same time. Keep things safe and simple by adding little or precautions and measures to take for safe and healthy hair.

  • How to Clean a Toaster Oven Inside

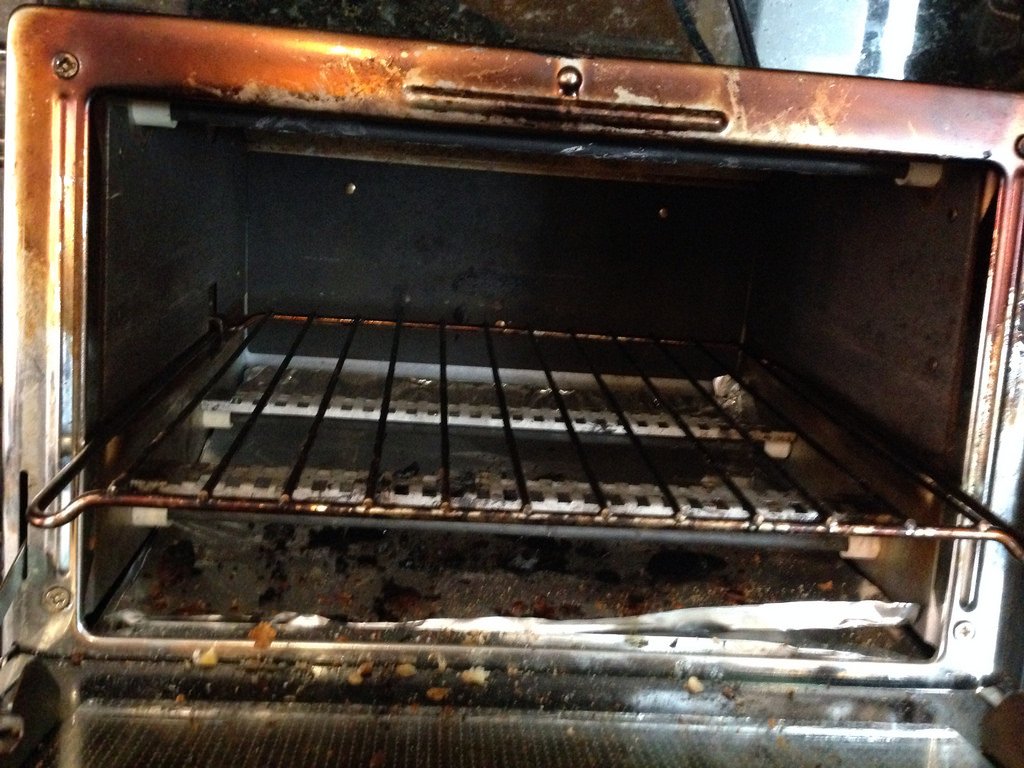
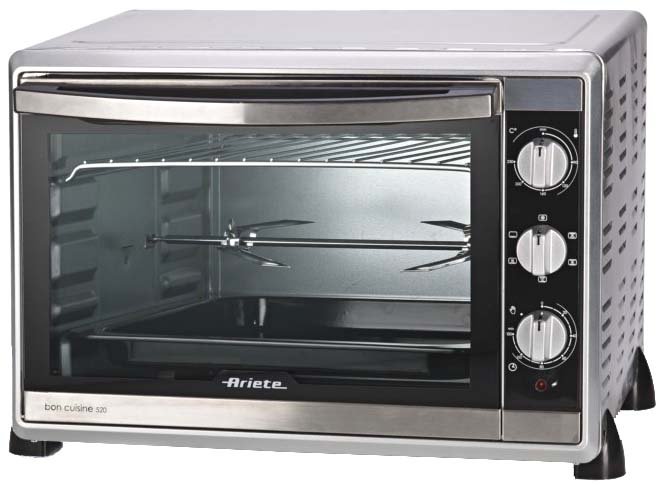
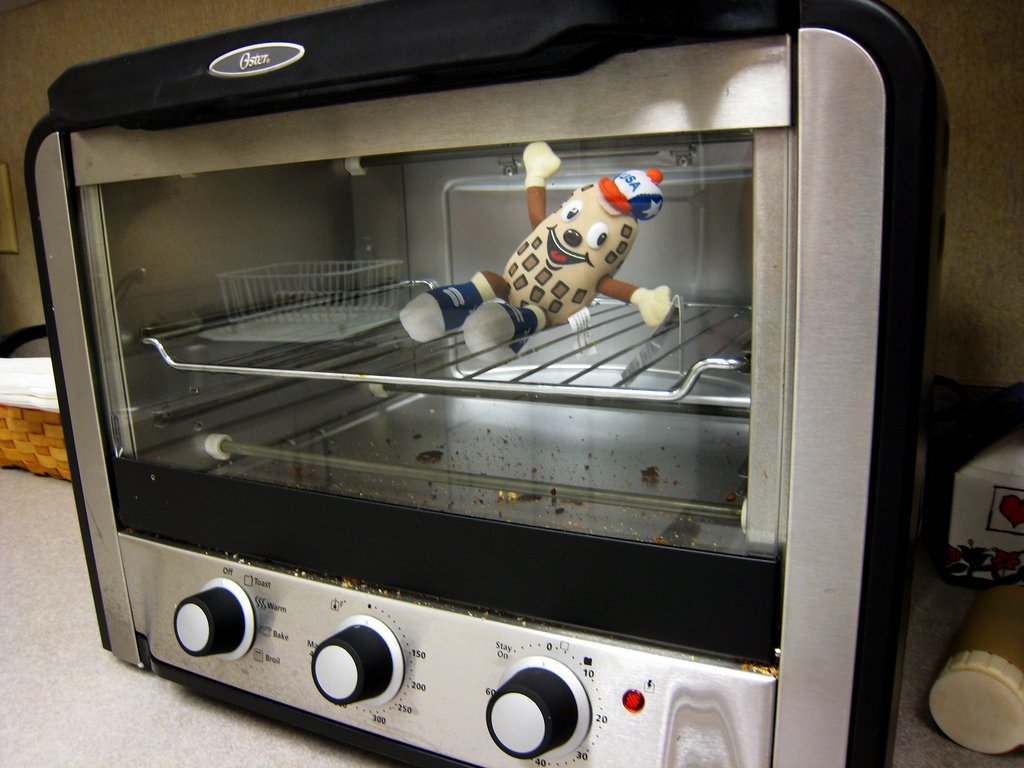
    How many of us pay attention to cleaning the toaster oven once in a while? A kitchen is a place where greasy and food sparkles can interact with the appliances placed within its vicinity. You have only two options. Whether you wrap them with a plastic covering or clean them at least once a week. This way the kitchen appliances will stay clean and tidy. But what if we have to clean the inside of these appliances such as toaster oven? Yet, we have also the solution to your this problem. In this article, we have discussed the quick and simple ways for how to clean a toaster oven inside and outside.

    Find out the material of your toaster, as most toasters have stainless steel interior with a plastic exterior. You need to know the cleaning methods suitable for both materials. This is of utmost importance to know that you have completely unplugged the buttons and electric supply while performing such task.

    There are different ways for how to clean a toaster oven inside and outside at home.Try not to open the toaster to clean it thoroughly as you can even do it without a need of separating its parts.

    How to Clean a Toaster Oven Inside and Outside?

    How to Clean a Toaster Oven Inside and Outside ?
    How to Clean a Toaster Oven Inside- First Method

    Before we even discuss cleaning the toaster, proceed, reach over and unplug that appliance. Alright. What’s more, in the event that you simply wrapped up an enormous clump of toast, you most likely need to hold up a couple of minutes before beginning.

    Pop the base plate off – over the sink, unless you truly appreciate clearing. Put the toaster aside and shake the plate over the sink to evacuate as much toast grime from it. Wash the tray well and put aside to dry. Presently take your dry toothbrush and tenderly breadth out any scraps sticking to within the toaster.

    Be cautious, if you break a wire, there’s a decent possibility will need to uneven toast. As of now have a toaster that exclusive half works? You can also learn the manual of your toaster that how to clean the toaster at home, read the instruction carefully. You might need to flip around the toaster and brush around the edges of where the piece plate fits, as well.

    Shake, shake, shake your toaster over the sink until it stops down-pouring pieces or you get exhausted. Wipe down the outside of your toaster with the sodden cloth and you’re ready.

    How to Clean a Toaster Oven Inside- Second Method

    How to Clean a Toaster Oven Inside- Second Method

    Clean the Toaster Oven thoroughly with a Clean Cloth

    There is no need to go so deeply, you can start by simply cleaning with a neat cloth( make sure the cloth is grease free).

    Take off the tray at the bottom of the toaster oven.

    Take the try off the toaster and shake it in the sink or a dustbin to remove grime and toast debris from it. Clean the toaster by placing it upside down and with the help of a spare toothbrush, scrub inside the toaster to remove the sticky or stubborn material from the walls of the toaster.

    Spare toothbrush with soft bristles is helpful to clean the toaster from inside without harming its sensitive grill wires inside.

    Clean the Toaster Oven thoroughly with a Clean Cloth

    Make a cleaning mixture to clean the toaster from outside

    Once you are done with its interior cleaning, you can definitely go further to clean the exterior of the toaster easily. We know toasters come in different materials ranging from plastic to stainless exterior.

    Never use a steel wool for scrubbing purpose even for the stubborn stain marks.

    You might have aware of a universal cleaning mix available on millions of online cleaning mix tutorials. For traditional cleaning purpose, we will use dishwashing liquid in a lukewarm water and of course the sponge for scrubbing.

    Make a mixture and soak the sponge in it to completely suck the mix inside of sponge.

    Now start scrubbing and cleaning the exterior walls of the toaster. Do not make it too wet so it starts dripping. Clean the toaster all over with the help of the sponge and do not let the water drip inside toaster as it will harm you and make a short circuit when plugged in.

    After scrubbing all over, take a clean cloth ( preferably white) soak in the plain water and wring it. Now start wiping off the soapy material from the toaster, you will see that the toaster is getting a clean surface. Now place it under the fan to make it dry instantly so that it won’t get wet marks on it.

    Keep Toaster Oven Clean after every use

    Regardless of whether you tend to consume your toast or Pop Tarts, your toaster is prone to carbon and debris buildup after some time. You can either give it a chance to sit until it begins smoking or bursts into flames or you can give your toaster a thorough cleaning at least once a month.

    Keep Toaster Oven Clean after every use

    It doesn’t take enough time to clean the toaster once a month or if you are using too frequently, you can choose cleaning duration of every week. The toaster is a friendly kitchen appliance and doesn’t have any complex parts and tools to remove the debris and crumb from its bottom tray.

    There’s essentially no real way to keep the scraps from coming. If you clean after every use, there will be no need to clean and spend extra time on it’s cleaning. Make it simple and easy by cleaning your appliances once you have used them.

  • How to Remove Paint from Plastic

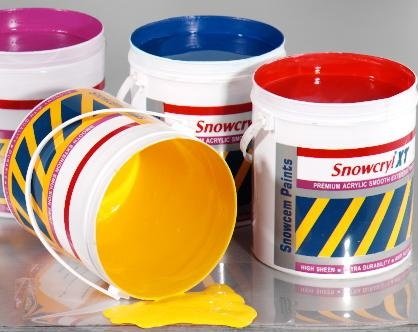
    Paint provides a new look to homes and provides with a perfect interior and exterior space. It is an important component in giving a tip-top look to the rooms and even plastic furniture if looks dull. Giving a shine and enhanced environment to space, paint can be used to renew any product or material. While doing home improvement tasks, if the paint drips off the walls and covers the plastic switchboards, chairs, tables or other plastic surfaces, don’t feel panic. Spray paints can even spoil the outdoor patio furniture with its splattering and might seem hard to wipe off. Using simple ways to achieve the cleaning task can provide you with ease and comfort. Here are some easy ways for how to remove paint from plastic.

    How to Remove Paint from Plastic

    The tricks for how to remove paint from plastic seems easier if you choose the right chemical for that. The method used to remove paint depends on the plastic item, either too big or small. When the paint job is done at home it drips down on the plastic surfaces and switchboards. It may even spoil the outdoor furniture if the spray paint splashes on the sides, don’t feel despair in this situation. Some simple tricks can remove the paint from plastics; it may take longer to remove if the paint has been dried. DIY home tricks can be applied which will leave your plastic in a pristine condition. The home improvement techniques when applied and paint coverage made, it can be banished with the help of tricky tasks.

    It is a bit tricky to remove paint from plastic as compared to stripping paint from wood, ceramic, metal or other materials. Plastic cleaning requires more care and attention as scratching it can discolor the material or easily damage it. Make sure to use those products on the plastic which are safe to use and can easily be used as paint removals. Some solution can be effective for wood or metal surfaces but do not work easily on plastic. They can even damage or worse off the plastic by melting it or damaging the product. Some plastic-safe solvents need to be used in the paint removal process so it will not cause damage to the product.

    how to remove paint from plastic
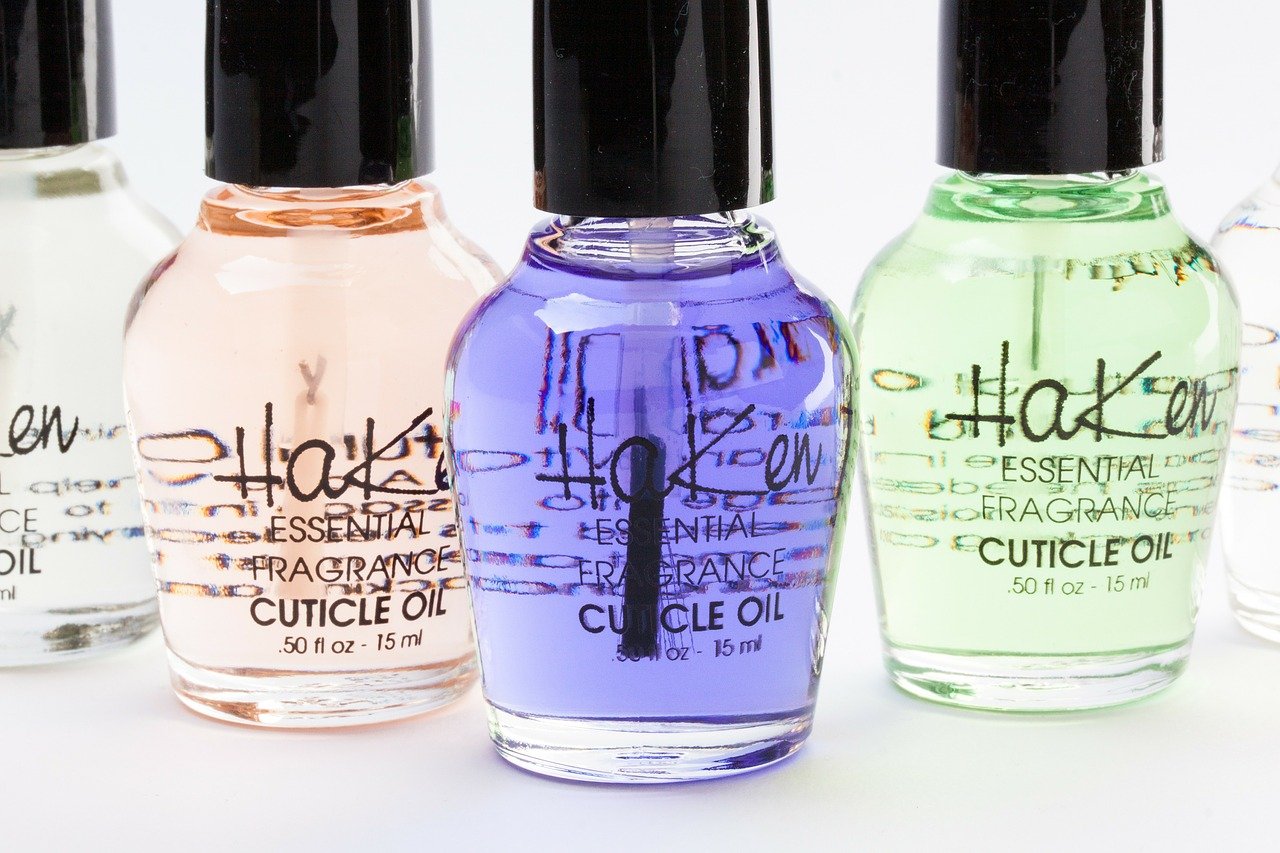
    In a case of removing an excessive spray paint from any plastic surface, one can treat it with a nail polish remover, apply it wet a towel and wash the surface thoroughly and then apply a coat of wax to restore the shine of plastic.

    How to Remove Paint from Plastic

    Treat the plastic surfaces by gently scraping away the drips of paint with a scraper. Vegetable oil can soften the paint and help to remove it effectively. For tough spots try out denatured alcohol or nail polish remover but make sure to do a patch test before applying. Some solvents can damage the plastic, avoid using such chemicals. Dishwashing soap can be used with warm water to rinse off the traces of any solvent on the plastic surfaces.

    Gather your supplies and bring your gadgets to treat the plastics carefully without causing any damage to them. Some necessary tools and required materials are as follows.

    • Paint scraper
    • Paper towel
    • Water
    • Bucket
    • Work gloves
    • Nail polish remover
    • Vegetable oil
    • Rubbing alcohol
    • Razor blade
    • Dish washing soap (mild)

    How to Remove Paint from Plastic Using a Paint Scraper

    Sometimes a paint scraper can be used to remove the paint from plastic, but this may not be the condition every time. For this purpose, a plastic putty knife or razor blade can be suitable. Make sure not to scratch the surface hard, it will cause the risk of damage to the plastic. When removing a thick dried paint coat, it is recommendable to use razor blade otherwise avoid it. Remember safety while doing any cleaning method or scrapping process.

    How to Remove Paint from Plastic Using a Nail Polish Remover

    How to Remove Paint from Plastic Using a Nail Polish Remover

    Use a nail polish remover to remove paint from the plastic materials. Pour a sufficient amount of nail polish remover on the paint. Use a paper towel to rub it gently. In case if the paint can’t be removed easily from the plastic surface, use more solvent and then rub it.

    How to Remove Paint from Plastic with Scrubbing

    How to Remove Paint from Plastic with Scrubbing

    Scrubbing the area where paint has been splattered can even remove the paint easily. Using a detergent on a sponge with warm water can wipe off the remaining residue chemical or paint from the plastic.

    How to Remove Paint from Plastic Using Vegetable Oil

    How to Remove Paint from Plastic Using Vegetable Oil

    Vegetable oil is one of the recommended ingredients to remove the paint, as it is a skin-safe substance. It will help moisten or may loosen the paint on the plastic and will help to remove splashed paint stains on the surface. Place a small amount of oil on the rubbing towel and apply on the affected area, this will allow paint to come away. If this method doesn’t work effectively after several attempts, try using another stronger solvent for this. Be persistent while doing the cleaning task and it will reward you at the end of the task.

    How to Remove Paint from Plastic Using Denatured Alcohol

    How to Remove Paint from Plastic Using Denatured Alcohol

    When paints are hard to remove with a nail polish remover or vegetable oil, go for a stronger solution for this and use denatured alcohol for effective paint removal. It only works for latex-based paints and not oil-based. It involves some health risks while using alcohol as a solvent.

    Before applying this solvent protect your hands with rubber gloves and face with a face mask. Work in a ventilated area to allow sufficient air movement inside the workspace. Try to do a small patch test before applying it thoroughly and make sure it will not damage the plastic. Once applied, the paint will start to scrap off, since using a putty knife can remove it easily then. Scrub the area afterward to remove any residue material left behind. You can add more alcohol if it does not work at the first attempt until it comes off into the rag.

    Using chemicals is bit risky and cautious too, but you can avoid this inconvenience with careful considerations while performing this task. Just keep doing the methods and you will get a paint-free surface without doing much effort.

  • How To Clean Aluminum Pots

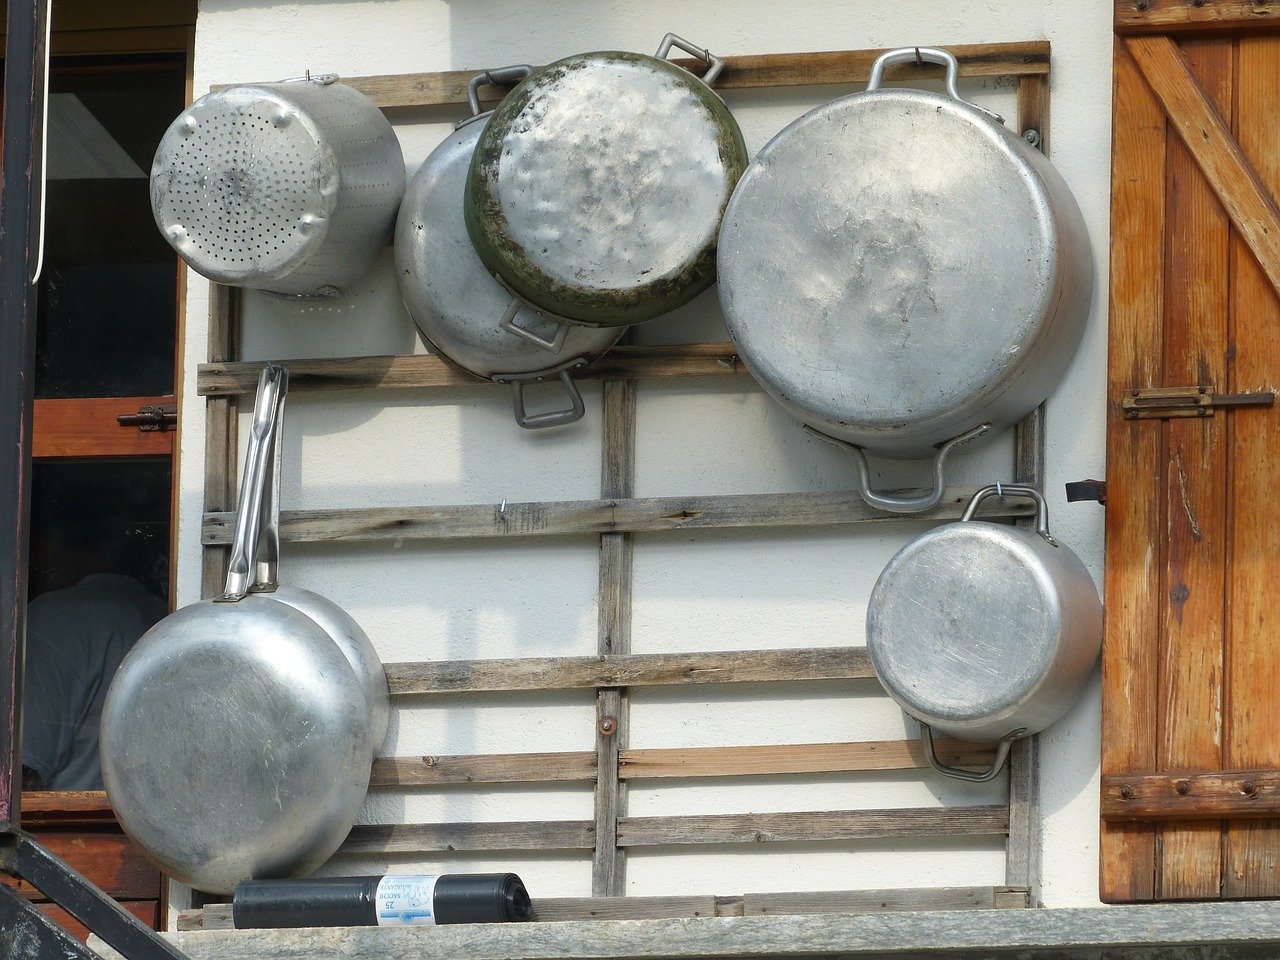
    Aluminum is one of the plentiful metals available on the earth. It’s a soft and light metal used for multiple purposes. Sometimes it is mixed with other metals to make its properties stronger like magnesium, zinc, and copper. Aluminum is used for different purposes like electric works, siding, paints, wheels, motors, gutters etc. Mainly aluminum is used to make household items like Pots, tables, and pans.

    Multiple coating on surface replies to Oxygen exposure. Aluminum pots are often used to cook food at home so it develops a undesired coating on the surface of the pot and leaves stubborn stains to clean and restore its shine and beauty. Do you want to know how to clean aluminum pots easily? Let’s share some useful ways on how to clean aluminum pots and pans at home.

    How to Clean Aluminum Pots

    More clean pots you use more comfortable you feel while cooking and washing the aluminum pots. Sometimes burnt cooked food leaves unpleasant and stains on its surface which becomes so hard to clean and return back its shine like it was purchased brand new. If we don’t take corrective action at the right time so our pots will turn into dull gray and may be its permanent to remove.

    How to Clean Aluminum Pots

    Hence, there are numerous ways to clean out dirt and debris on the surface of aluminum pots but we have to pick few which work out the most effective and efficient and provide us the best-desired solution forever. There are various ways to clean out aluminum pots at home which are not only easier but effective too.

    How to Clean Aluminum Pots

    How to Do it

    • Wash out all the dust or dirt visible and layered on the pots. Fill it out with warm water and leave it for few minutes as required or until it makes stains weaker then wash it out with soap. Escape from the aluminum oxide by washing out grease first. You can use a scratch pad to remove all grease on the surface and from the surrounding edges.


    • How to clean out burnt food on the underneath surface of the pots. Pour some water into the pot and boil it for the five to ten minutes then rub it with long sharpen flat edge spatula made of wood. Repeat the process until it gets clean.


    • Always never use harsh items to remove the nastiness on the surface on the pots. Use soft plain steel wool. The disadvantage of using harsh abrasive is that it leaves permanent scratches on the pot which is so difficult to remove in the near future.


    • Cleaning with Acid. Though it is uncommon practice to use this method. It can be effective to enhance the look of the aluminum pots. Fill out the pot with water by adding two tablespoons of vinegar, cream tartar or lemon juice. Let the water boil in the pot for at least fifteen minutes. It also plays a crucial role to remove the dirt or burnt cooked stains.


    • If above-mentioned method a is a bit hard to apply so just pick a lemon and slice it to rub on the surface of the aluminum pots gently. Lemon juice is also same effective but rubbing too hard can be hazardous for the look of pots.


    • Never use chemicals to clean it up because using chlorine bleach or other acids can be harmful to the human skin as it causes to skin, eye and lung irritation. It can also cause diarrhea or vomiting. Use simple and homemade remedies or natural things.


    • There are also various items to increase the brightness of the aluminum pots and it also works as a cleanser. It’s not only biodegradable but also environmental friendly items and nontoxic. It is popular as Aluminum Cleanser and brightener.


    • Baking soda is also useful to eradicate grease on the surface and edges of the pot.


    • Creamer of tartar can also be effective so add two tablespoons of creamer tartar in the quarter of the water and boil for the ten minutes until the mixture dissolved in the water.


    • There is a traditional and easy method to clean the burnt food or debris or shine the brightness of the pot is rubbing tiny chunks of sand with wool steel can easily clean out but rubbing too hard can leave permanent scratches on the surface of the pot.


    • Tomatoes, lemons, and apples are also effective for cleaning aluminum pots. They also work like natural acid which is non-toxic and less harmful but it’s uncommon in practice by household wives.

    CONCLUSION

    In short, there are various unique and old methods for cleaning aluminum pots. But always choose the best possible and feasible method which provides more effective outcome with a permanent solution to all of our queries. Choosing not only economical method which not only cleans the dirt or debris of gray lines or greasy texture but it is also appropriate to the human health.

    CONCLUSION

    There are various acids which are effective to clean the aluminum pots. But they are really harmful to the human health. They may not only create skin issues but also eyes irritation issues. So we have to look at all of the other health factors and side effects of the adopted method. A fine grade of steel wool and pad is handy for its benefits. Vinegar and creamer tartar mixture is greatly effective to achieve our goal. While lemon juice method is not only economical but also homemade remedy and equally effective.

  • How to Clean Grease Off Stove Hood

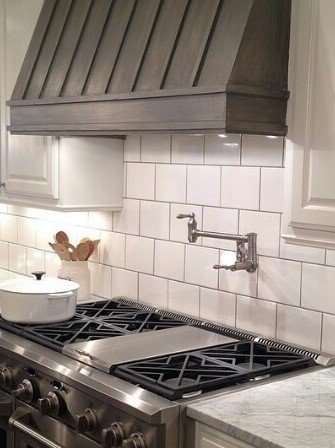
    Your range hood channel takes a great deal. The majority of that oil and smoke from your day by day cooking gets consumed by the channel, particularly in the event that you cook with stainless steel cookware, abandoning it looking corroded, dry, and only straight up gross. Would you need to cook or engage in a kitchen where your range channel is truly canvassed in rottenness? We thought not. In case you’re hoping to clean your range channel yet don’t know where to start, we don’t censure you. It’s a dark piece of the kitchen that you’re never truly instructed how to clean. All things considered, never fear! The biggest problem is how to clean grease off stove hood right?

    How to Clean Grease Off Stove Hood

    To stay away from your channels getting to where they are, making a point to check your fan channels consistently. In the event that you want to profound sear sustenance, you ought to check considerably MORE routinely, in light of the fact that chances are your channel isn’t looking so hot.

    Moving on, It began with a worn out light. I was making a flame broiled cheddar sandwich for myself on the stove when the light over the stove went out. Since I have this thing about expecting to perceive what it is I’m cooking, I needed to put the cheddar sandwich on hold while I went looking for another globule.

    As I was changing the globule I sadly saw the state of the underside of the hood over my stove. YUCK! Kinda wish I hadn’t done that. Typically all I see is front of the stove hood, which I figure out how to keep entirely perfect. Well, don’t let that trick you, underneath sneaks a monster!

    How to Clean Grease Off Stove Hood

    I more likely than not taken a gander at that thing a hundred times and not mulled over how filthy it must be – until today that is. So slight change of arrangements for the evening. I completed the barbecued cheddar sandwich and went to counsel with my companion Google.

    How to Clean Grease Off Stove Hood

    Pull out your greatest pot, fill it with water and heat it to the point of boiling. At that point include 1/2 measure of heating pop, gradually! Truly, you need to include it about a tablespoon at any given moment since it promptly bubbles up alarmingly! (The bubble goes immediately.) Then bring your built up with oil channel and submerge it in the pot. (All things considered, 1/2 of it in any case.)

    For an initial couple of minutes, I viewed in interest as the bubbling water went to deal with the oil. I could see it simply softening off. In any case, my interest soon swung to sicken as I keep on watching my channel “cook” in the water.

    The Cleaning Process

    I couldn’t trust how much oil simply kept rising to the surface! I at long last concluded that I ought to discharge this pot o’ muck, and give the vent another treatment with a perfect pot of water and additionally preparing pop. So I took out the vent, and dumped the oil smooth out in the lawn (I wasn’t going to dump it down my sink!) When I got back in I chose to have a go at flushing the vent with truly high temp water out of the tap before bubbling it once more, however it worked out that is all it took to get whatever remains of the oil out. I continued flushing until the water ran clear, and that was that.

    In the wake of giving the vent a chance to dry for whatever remains of the day propped up on top of the stove, I returned it to its home and it was a quite extraordinary feeling knowing it was presently an oil free zone.

    All things considered, it truly was a straightforward settle – one that could have been a great deal more terrible had it included a hand-to-hand battle with the oil.

    Come to consider it, the main time my hands touched oil was taking the sift through in any case.

    How to Clean Grease Off Stove Hood- The Simple Way

    How to Clean Grease Off Stove Hood- The Simple Way

    Be that as it may, to manage the channel you have now, attempt this basic system:

    You Need:

    • OxiClean
    • Hot water
    • Bucket

    You can use many other products here, such as dish soap or even hot steam, but this method works extremely well.

    1.  Fill up a basin with bubbling high temp water.
    2. Add a couple scoops of OxiClean.
    3. Place the channel in the blend and leave in for 10-30 minutes.
    4. Scrub with a swarm brush if need be.
    5. Dry and supplant the channel.
  • How to Remove Rust from Stainless Steel Sink

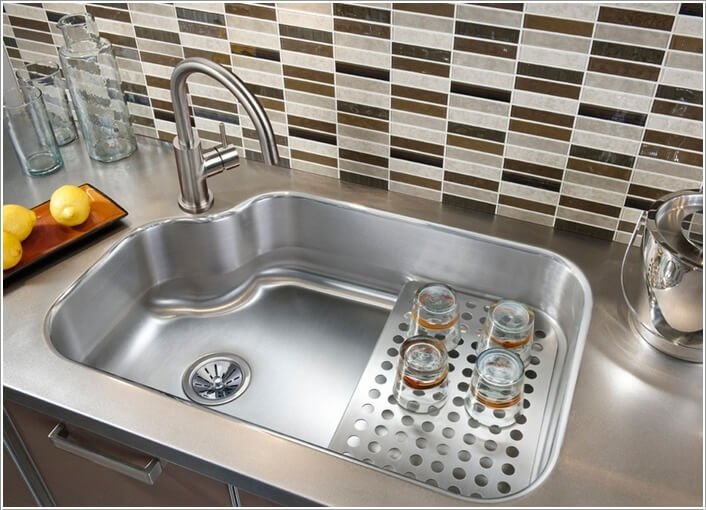
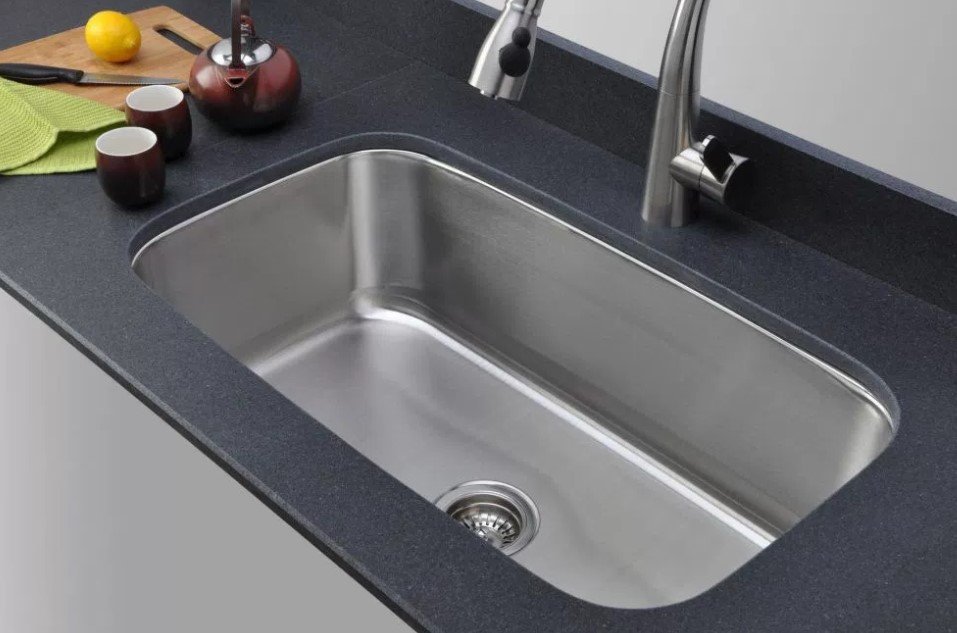
    It is fact that Stainless steel and tenacious rust is each kitchen darling’s foe. Every kitchen lover wants to know how to remove rust from stainless steel sink? What’s more, since we’ve all been there (gracious, have we ever), we thought it just appropriate to impart to you some accommodating tips that make freeing your sink of that unattractive rust super simple. I’m talking everything from lemon juice to lighter liquid keeping your kitchen shining clean.

    How to Remove Rust from Stainless Steel Sink

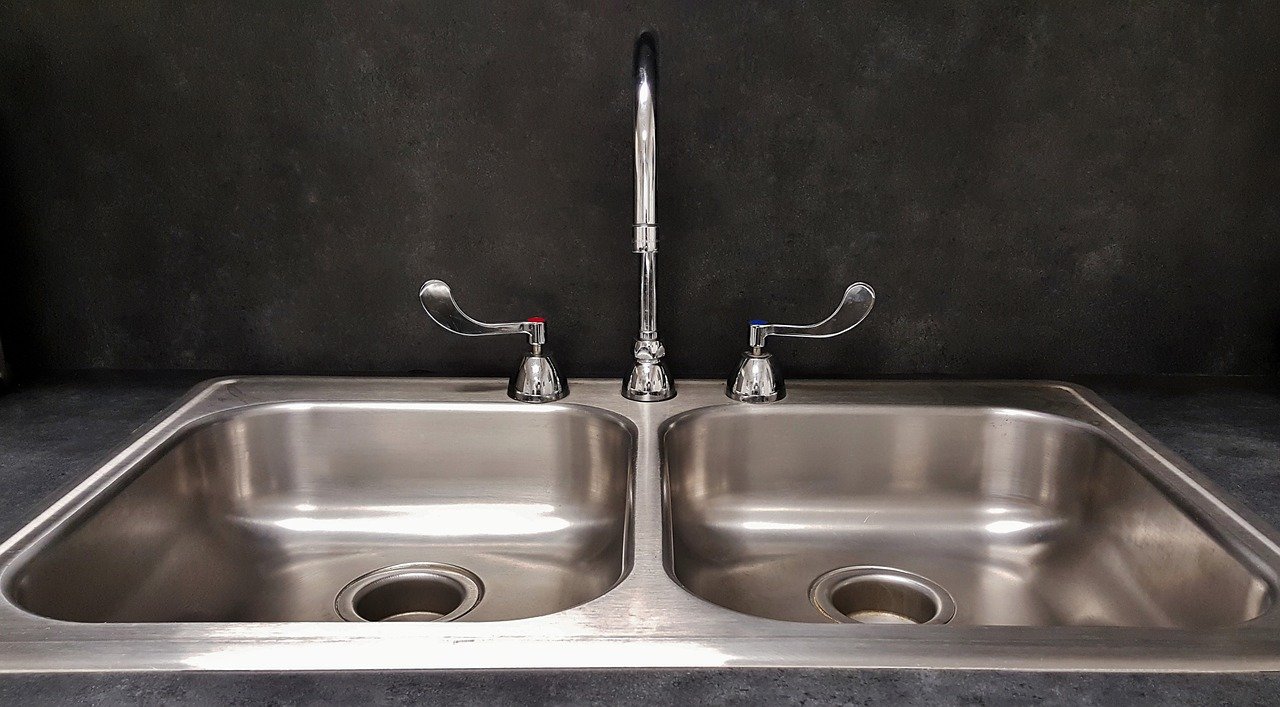
    In spite of its name, stainless steel rusts. Be that as it may, if your stainless steel sink is eroded, there’s no compelling reason to supplant it at this time. With a touch of know-how and simple cleaning deceives, you can evacuate rust in a glimmer.

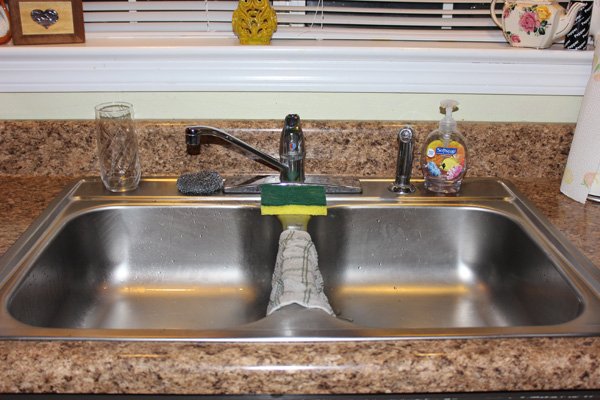
    Nothing’s more terrible than washing plates after supper in a corroded sink. While stainless steel doesn’t rust as effectively or in an indistinguishable way from standard steel, in spite of prevalent thinking, it is not recoloring verification. Stainless steel kitchen sinks are at times significantly more helpless to rust when other wet articles, for example, cast press container, utensils or flatware are left in the sink for drawn out stretches of time. The metal responds with the water and Galvanic Corrosion happens, prompting the staining you see on the sink’s surface zone.

    There are more than 150 evaluations of stainless steel, and some are more inclined to consumption than others. As a rule, the higher the chromium content, the more improbable the steel will rust. Check with your maker or guarantee to decide the chromium substance of your stainless-steel sink, and if looking for a substitution, make sure to settle on a high chromium number.

    How to Remove Rust from Stainless Steel Sink

    How to Remove Rust from Stainless Steel Sink

    Fortunately, you don’t have to purchase another sink to handle rust at this point. Attempt these simple, natively constructed cleaning answers for making your stainless-steel shimmer:

    How to Remove Rust from Stainless Steel Sink with Vinegar

    How to Remove Rust from Stainless Steel Sink with Vinegar

    Simply pour a liberal measure of vinegar onto a delicate scouring pad* for an eco-accommodating contrasting option to cruel chemicals. The stain will lift instantly.

    How to Remove Rust from Stainless Steel Sink with Lemon

    How to Remove Rust from Stainless Steel Sink with Lemon

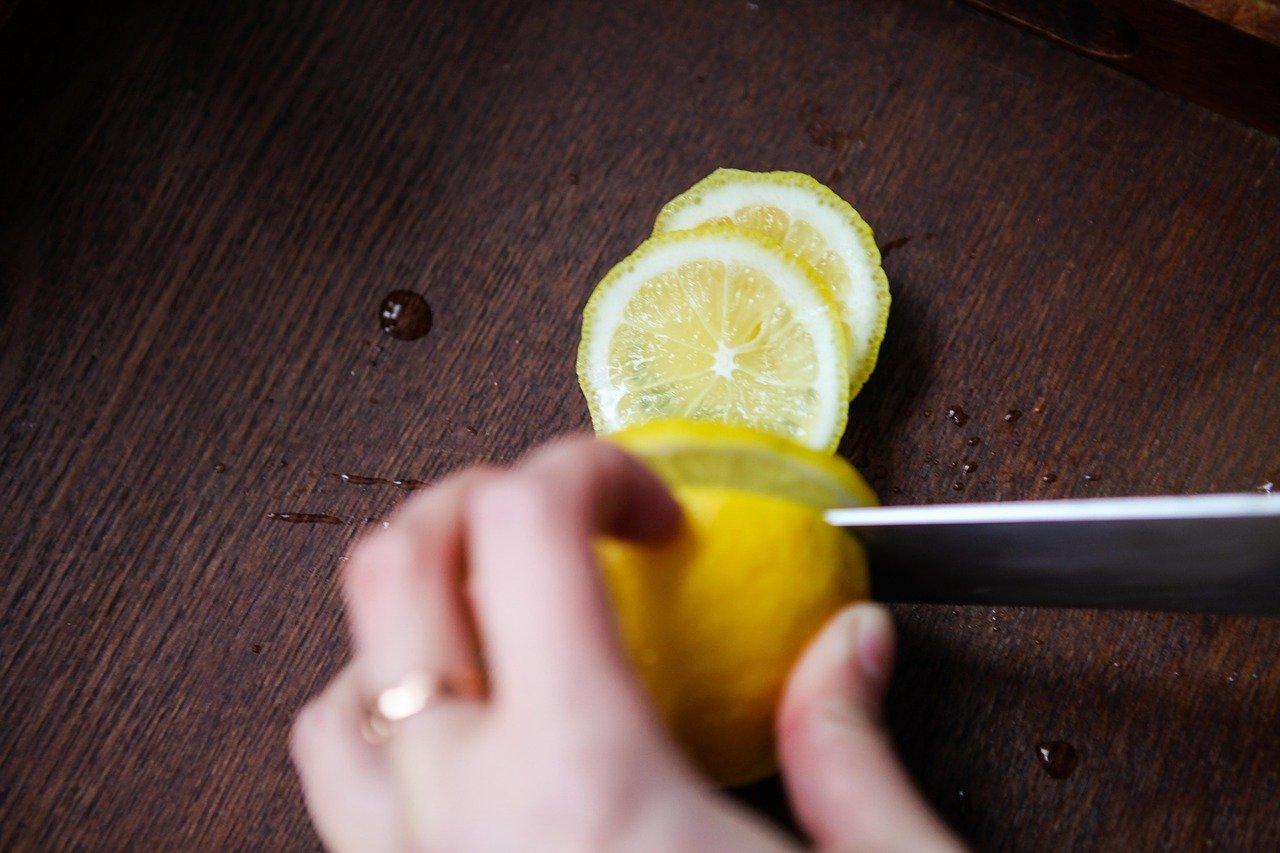
    Lemon squeeze and preparing pop: Create glue from equivalent amounts of lemon squeeze and heating pop, and then clean with a moist wipe. For harder stains, leave the glue on for 15-30 minutes, then wipe clean.

    Lemon squeeze and cream of tartar: Mix one tablespoon of cream of tartar with a couple drops of lemon juice to make glue, then smooth it on rust spots and rub it in overwhelmingly with a delicate wipe.

    Club pop: Buff rust scrapes with a pop hose material.

    Lighter liquid: If all else comes up short, take a stab at pouring lighter liquid on a perfect material and scouring the rust spots clean. For security, remember that lighter liquid is exceptionally combustible and can be lethal for the earth, so utilize this choice if all else fails – and never around an open fire (ensure all adjacent stove burners are off).

    In the blink of an eye by any means, your stainless sink will sparkle brighter than that cast-press pot – simply keep the two far from each other to stay away from more rust later on.

    How to Remove Rust from Stainless Steel Sink Easily

    Here are a couple of things to attempt to expel rust stains from stainless steel.

    Attempt Comet or Bar Keepers Friend. I had one and it got it out of mine.

    On the off chance that that doesn’t work Try CLR. Give it a chance to sit for somewhat then clean.

    If it doesn’t work then make a glue of lemon squeeze and salt and let it sit on it over
    night and after that delicately rub.

    If it doesn’t work then you can simply have a go at sending it out with 600 coarseness sandpaper. This worked truly well on my porcelain sink that nothing would get it out.

    Try not to let rust run widespread in your home. Battle the nosy stain with these surefire techniques and your ledges and apparatuses will soon flicker at the end of the day

    For Little Stainless Steel Rust Spots

    For Little Stainless Steel Rust Spots

    STEP 1

    When evacuating just a couple of ignoble spots from the side of a skillet or the front of your dishwasher, blend a glue from 1 tablespoon of preparing pop and some water. (For bigger rust spots, skip ahead to the following arrangement of steps.) Baking pop is an extremely gentle rough, so you can sit back and relax realizing that you’re vanquishing erosion in a totally synthetic

    STEP 2

    Rub the glue onto your stainless steel surface toward the grain utilizing a delicate, clean fabric.

    STEP 3

    Finally, wash and tenderly wipe the influenced zone with a moist paper towel.

    For Serious Stainless Steel Rust

    For Serious Stainless Steel Rust

    STEP 1

    Rinse the bigger surface region—be it the bowl of your sink or a segment of your stainless steel counters—completely to expel any garbage and hose the surface. Quickly after, sprinkle a layer of heating pop over it, making a point to coat the whole rusted district.

    STEP 2

    Let the layer of preparing pop to sit for between 30 minutes and 60 minutes.

    STEP 3

    Roll up those sleeves and begin scouring! You can scour with a delicate swarm brush, or—in case you’re crisp out of cleaning brushes—utilize an old toothbrush that you may have put something aside for these kinds of cleaning purposes.

    STEP 4

    Rinse and precisely dry with a paper towel.

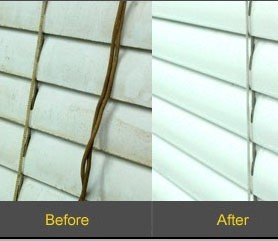
  • How to Clean Vertical Blinds

    Vertical blinds are long, narrow strips that hang from the head rail used to serve a purpose to control light. But they are also used as decor and lavish lifestyles. Vertical blinds are used in the offices and homes nowadays but it’s mostly seen in the office conference rooms or in the officer’s rooms. Vertical blinds have its own pros and cons but it mainly depends on your preferences. Some people assume that vertical blinds are not easy to clean and it’s also less suitable for the wide windows. While some people prefer vertical blind as an ideal solution. Because they provide a large view from the windows and doors and also controls lights. So, let us find best solutions on how to clean vertical blinds easily at home.

    Vertical blinds are available in the market in a variety of colors. It can be either fabric or wood or hard vinyl. It’s available at an affordable cost but investing little more than the low cost of the buying of vertical blinds will provide long terms relief need to buy a new one. Because of higher the price you pay higher the quality you get but keeping in mind that vertical blinds are not made for every window.

    How to Clean Vertical Blinds

    The most difficult task after purchasing is how to clean vertical blinds in the best way. There are numerous best ways to clean vertical blinds which are necessary to follow by one because cleaning represents them inside and outside and if these are neat and clean so your house looks marvelous and sophisticated and your house represents you. Best ways how to clean vertical blinds are as follows.

    How to Clean Vertical Blinds
    • Do not use hot water to clean fabrics vanes because it loosens the size of blinds or shrinks after drying. Many people use clothing dryer but it’s also not the best way tp clean vertical blinds. You need to handle it more carefully and soft towel is effective for cleaning the moisture gently. Later on, let them dry by air completely by re-hanging them.
    • Make your habit to dust vertical blinds on the daily basis because it is the best way to make it cleaner on the long term basis. Use a duster by moving it around the vertical blinds from the upside till downside for each slat. It is also preferred to use dusting detergent spray to remove the dust completely if required. The requirement to clean the vertical blinds also depends on its intensity of dirt level, if blinds are much dirtier so clean it with vacuum firstly then perform dusting and washing steps further.
    How to Clean Vertical Blinds
    • After dusting clean the vertical blinds through different means such as vacuum cleaner with side brush attached to it, lamb’s wool duster, a rubber dry sponge and a soft cloth. Clean it by using vacuum cleaner brush from the top to bottom gently and the best way to clean vertical blinds are suggested to clean it while it hanging because this is the easiest way and less effort. Then again use lamb’s wool duster to clean it from the top till bottom for each slat. Rubber dyer sponge is highly recommended for the wood or hard vinyl to clean out debris or stubborn dirt on it.
    • After performing above mentioned steps wash the vertical blinds but there are various items required in the washing process. These items are buckets, vertical blind washing tool, soap or detergent, water, and towels. Washing vertical blind is not an easy task, place clothes under the vertical blind to absorb all dirt without making a messy floor.
    How to Clean Vertical Blinds
    • 5- You need to fill two buckets. Fill one bucket with warm water by adding pieces of soap or drops of detergent to clean the vertical blinds. Fill another bucket with cool and fresh water if you fear about the color fastness of the blinds. Dip cleaning tool in the soapy water and place the blinds slat between two sides of the cleaning tool. Now gently clean from the top to bottom. Use a sponge for the cleaning and squeeze it out. Repeat this process as many times as it is required to remove any stain or dirt on the vertical blinds. Wash each slut in the soapy water then dry each slat with a soft towel.
    • 6- Then leave the vertical blinds to dry in the air fully after the washing step. To avoid any water spots on the vertical blinds, use a fan to speed up the drying process.
    How to Clean Vertical Blinds
    • The easiest way to wash vertical blinds is not to remove from the windows. Because stiff fabric can be difficult to wash in the bathtub. Secondly marking the front side and giving the number to blinds are also a difficult and time-consuming task to reinstall them like before.
    • The last step is reinstalling the vertical blinds after cleaning it in the best way. Reinstalling also requires care to handle. After opening the blinds lift each vane up and off the hook and bend down.
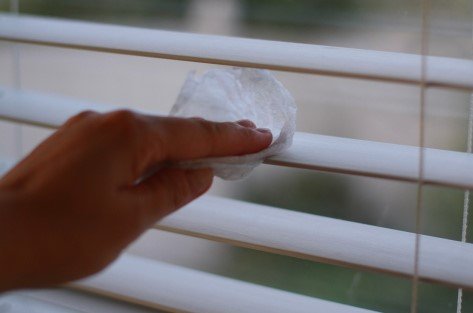
    How to Clean Vertical Blinds

    CONCLUSION

    So these are the best ways on how to clean vertical blinds easily at home. If you perform dusting on daily basis or cleaning on the weekly basis by vacuum, it will help you to prevent damage and dirt from the blinds.

  • How to Clean Walls Before Painting

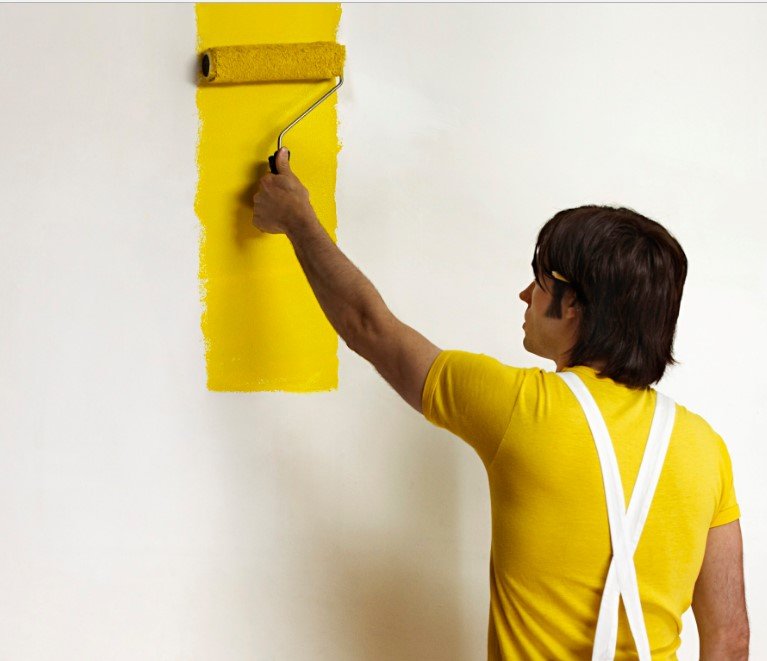
    Tired of the same colored walls? Planning a makeover of your house and it needs a paint job? The painting may not seem as much of a hassle as the proper process to achieve perfectly painted walls. The first thing you can do is check whether you even need to clean the walls before painting. So let’s find out how to clean walls before painting properly.

    How to Clean Walls Before Painting

    You need to check a small section of the wall to see the possibility of cleaning walls. However, if cleaning is necessary then you cannot skip it at any cost. Painting the walls without prepping them will result in uneven and streaky walls. To make the paint look extra good, you need to know how to clean walls before painting.

    How to Clean Walls Before Painting

    How to Clean Walls Before Painting

    Clear up the Room

    Clear up the Room

    The first step to cleaning the walls is to clean the space of the room’s wall you are planning to paint. Remove furniture and additional things from the wall. You can just throw a blanket/clean sheet on top of it to prevent paint from falling on it during the painting.

    Dust the Walls

    Dust the Walls

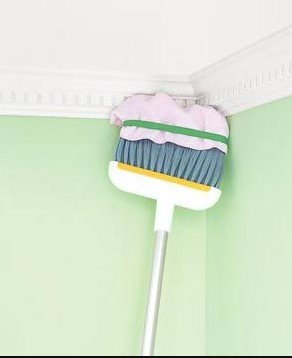
    This is a very important step; dusty walls can cause the paint to apply streaky on the walls. In order to prevent that, use a feather duster or any clean cloth to cleanse dust or from the walls. It is also important to get rid of any cobwebs on the corner of walls or anywhere you can see them. Cleaning the walls of any dust will keep your paint and the brush, which you are using to paint the walls completely clean.

    Remove Mold

    Remove Mold

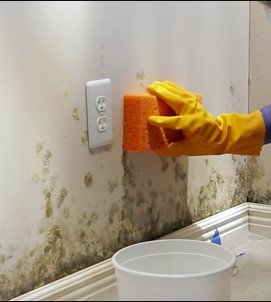
    If your house or room is not well ventilated and there is a possibility of it being damp for some reason, a possible leakage or due to rainfall, that is the strongest reason that could cause mold to appear on the walls of the room. The best way to prevent the building of mold on walls, you need to be a 100% positive that your house is well ventilated. But if that is not the case, there are several ways to get rid of the mold. First is to make a solution of 4 parts water with 1 part HTH (chlorine); another method is to make a solution of 4 parts water and 1 part JIK (sodium hypochlorite).

    Using either of the two solutions, what is required next is to spray the solution on the wall where there is the appearance of mold or you feel that it is going to build up on the wall eventually. Once you have done that, keep a check that the area with the mold is completely drenched with the solution and it requires a few hours for the solution to do its job of reacting against the mold and eventually getting rid of it. Once that is done, you have to rinse the surface of the wall with clean water, making sure no residue of the solution is left behind.

    How to Get Rid of Old  Wallpaper/Paint on Walls Before Painting

    In past, wallpapers were used to be all the rage and everyone at least had one room covered with wallpapers. Nowadays, wallpapers are rarely used to decorate rooms. To remove old wallpapers, always use a special wallpaper remover. The wallpaper remover contains special chemicals to break down the glue used to paste the wallpaper on the walls. If you try and use anything else apart from the special wallpaper remover, it is possible that glue will be left behind. Remember it can cause issues with the painting later on. However, If not during the painting, then surely after some time the glue will cause the paint to become discolor and fade.

    How to Get Rid of Old Wallpaper/Paint on Walls Before Painting

    There are different ways to repaint walls, change color or change the formula of the wall paint. If you have no plans to change the paint formula, then just clean the walls in a regular way. However, if you want to change the formula from glossy/regular to a matte finish then surely it will take some time and efforts.


    For the perfect matte finish, you need to use fine grade sandpaper and scrub down the old paint. It creates a huge mess and requires a protective mask to avoid breathing in any paint particles. Then when you are done with the whole process, you can go ahead and paint with the matte finish paint.

    How to Get Rid of Old Wallpaper/Paint on Walls Before Painting

    How to Clean Walls Before Painting- Final Words

    When you are done with the different cleaning processes, you need to do a final cleaning of the wall. Regular walls can be easily cleaned with diluted washing liquid with water. But walls such as the kitchen walls need some elbow grease. Kitchen walls have oil and grease on them and require a strong washing liquid to break down the stubborn greasiness. Cleaning the walls before painting, you need to be positive that there are no residues left behind from the previous processes. Also, be very careful about the walls being totally dry before you start with the painting.

    How to Clean Walls Before Painting- Final Words

    These are the several methods for how to clean walls before painting them. You need to do these steps before every painting a wall to get best and long lasting painting results.

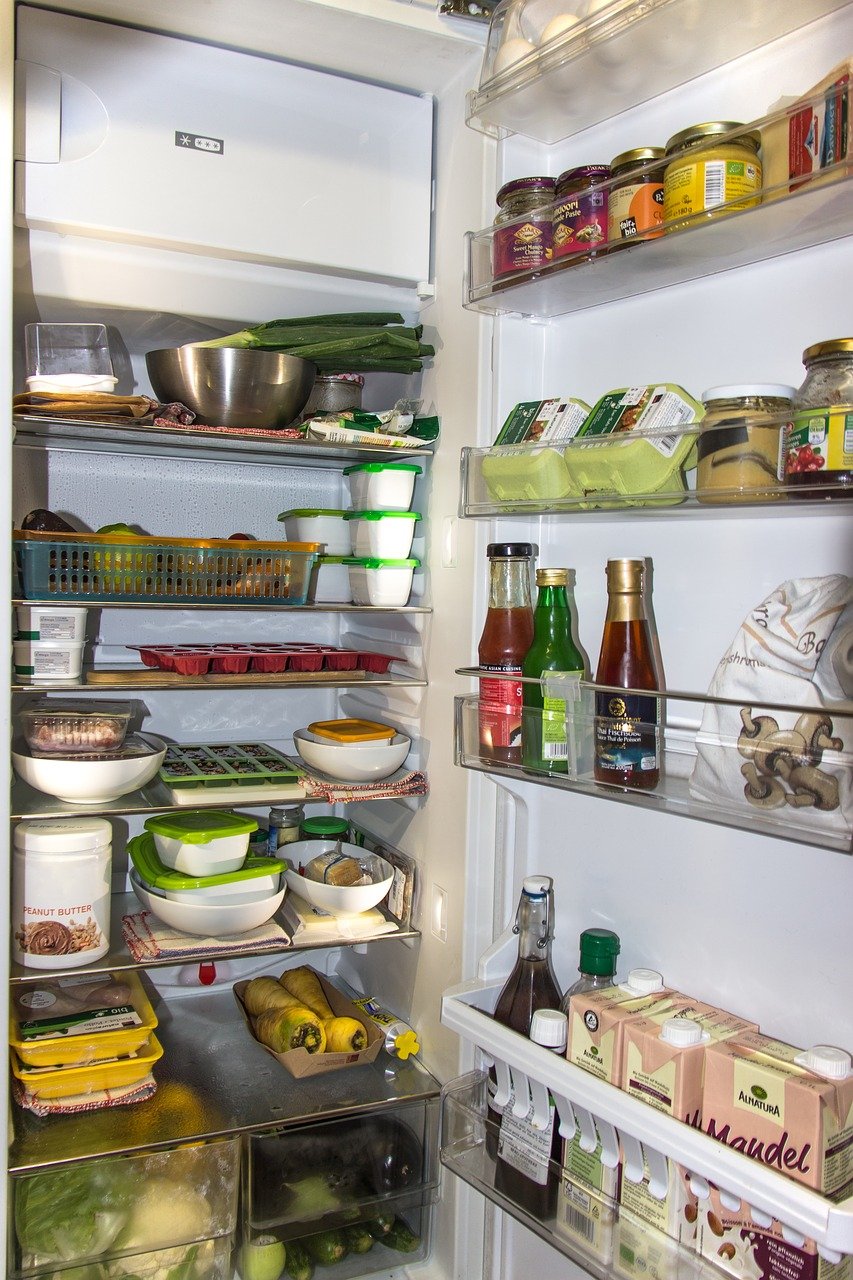
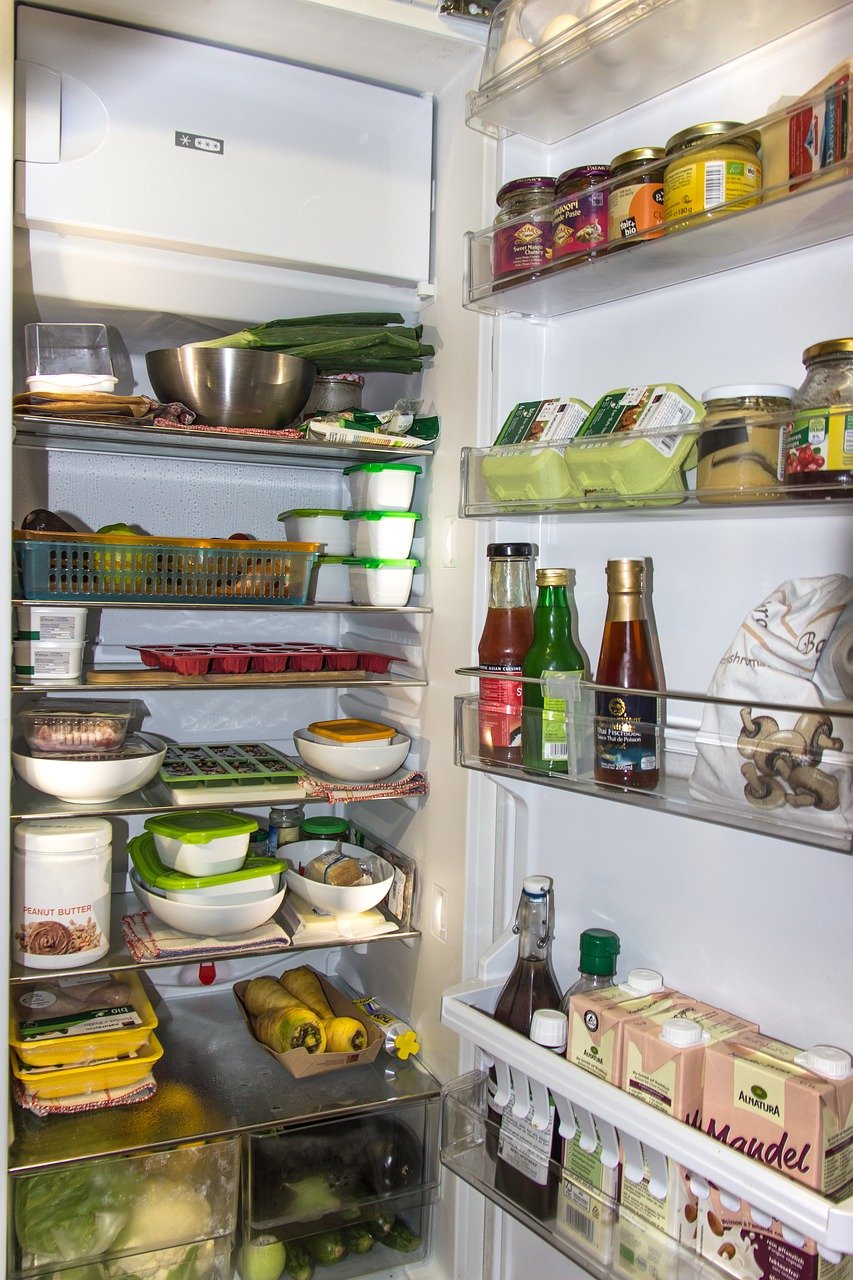
  • How To Clean a Refrigerator That Smells

    A refrigerator is one of the most electronic equipment in which you store food, fruits, frozen foods, meats, fish, chocolates, drinks, sauces and ice cream and so many other perishable items. A refrigerator is the biggest blessing for us in a modern age. We can’t store the frozen items outside because it will cause rotten and smelled and we, not enough space outside. But sometimes refrigerator smell really awful and need to be cleaned properly. So let’s find the best answer for how to clean a refrigerator that smells.

    How To Clean a Refrigerator That Smells

    Refrigerator not only stores all multiple varieties of items but it also cools down and we can use it when required. But all electronic equipment requires maintenance so as refrigerator requires great maintenance so that items never leave a smell or turn rotten. There are different best ways to clean a refrigerator especially that smells.

    Advantages of Refrigerator

    Advantages of Refrigerator

    • It is a great way to keep food cool.
    • It also keeps away perishables items from spoiling.
    • Enables to stores for the long period of time such as weeks or months.
    • Also maintainability of the freshness of the eatable items.
    • Freezer component freezes items at freezing temperature.
    • It saves food from spoilage.

    Disadvantages

    Disadvantages

    • It requires heavy electricity consumption.
    • Electricity breakdown can cause perishable items to spoilage and smells.
    • Though it is expensive to afford for poor people.
    • It’s not considered economic friendly.
    • Great repair and maintenance are attached to the refrigerator cooling problems, ice making malfunction, motor replacement.
    • Cost required for the repair and maintenance.
    How To Clean a Refrigerator That Smells- Initial Steps

    How To Clean a Refrigerator That Smells- Initial Steps

    •Very first step is to turn off the refrigerator and unplug it in a manner to avoid any harm.

    •Secondly, remove all the items from the fridge.

    •Discard all expired food may be it is the main cause of the smell.

    •Later on, place food to keep in a cooler by adding ice as it will be outside for some time.

    •Then make a mixture of baking soda and warm water which will work effectively.1/2 cup of baking soda into warm water is preferred.

    •Next step is to take out all shelves, bins and any other removable parts.

    •Wash all the parts which you took out and leave to dry.

    •Carefully clean out the drip tray which contains dirty water.

    •Lastly, remove the grill from beneath the doors.

    How To Clean a Refrigerator That Smells

    How To Clean a Refrigerator That Smells

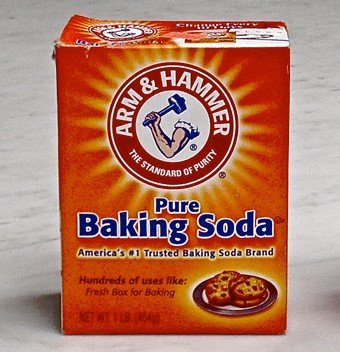
    How To Clean a Refrigerator That Smells with Baking soda

    How To Clean a Refrigerator That Smells with Baking soda

    Use baking soda to escape from the unpleasant smell. Pace the baking soda sheet across the refrigerator then close the doors of the fridge until smell vanishes. Later on throw away baking soda.

    Dump baking soda on a sponge and scrub the sides, shelves, and all parts inside the fridge then rinse with a clean, wet sponge.

    In a manner to get an effective result on the regular basis keep an open box of baking soda in your fridge at all times.

    For the cleaning purpose add up 1/2 cup of baking soda into water and clean by using it.

    How To Clean a Refrigerator That Smells with Salt

    How To Clean a Refrigerator That Smells with Salt

    Remove all the food and also racks from the fridge. Now mix up a salt in 1 gallon or with warm water. Use the mixture with a sponge to clean the inside of the refrigerator.

    Benefits of using mixture are like it won’t scratch the surfaces and it’s also chemical free.

    Cotton Balls

    Cotton Balls

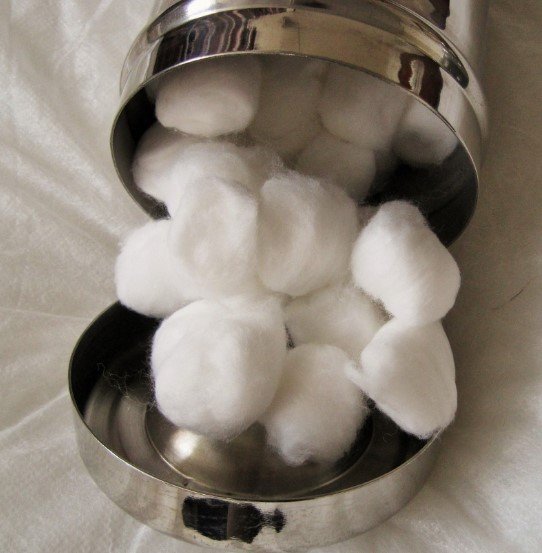
    Use cotton balls with vanilla extract and keep it on a shelf because it serves as a deodorizer.

    Lemons

    Lemons

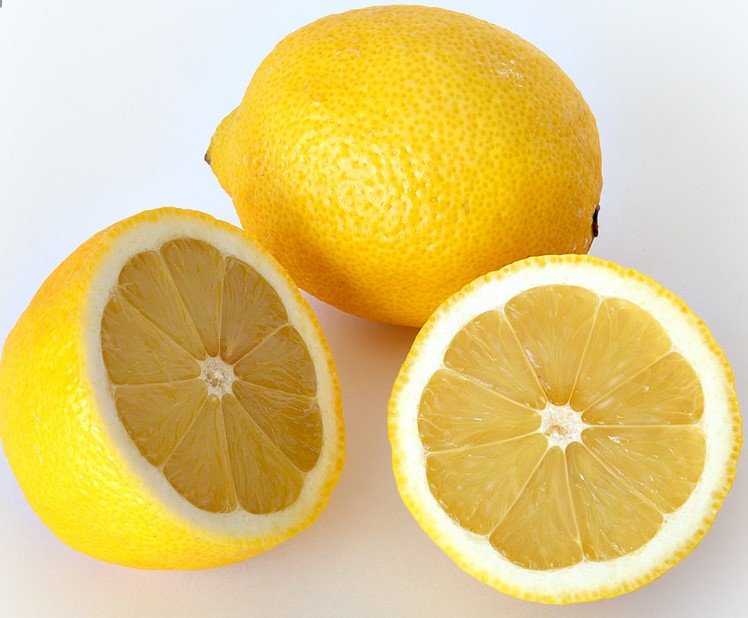
    Lemons are naturally effective remedies. Use lemon juice on the cotton balls and place it in the refrigerator for many hours.

    Plastic Lids

    Plastic Lids

    Plastic lids are effective to clean the mess on the fridge shelves. It is preferred to keep lids under food containers.

    Vanilla Extract

    Wiping down the fridge after scrubbing with vanilla essence is the ideal way to vanish smell.
    You can also dip cotton balls for the long terms time in the fridge.

    Vinegar

    Vinegar

    Wash refrigerator with water by adding white vinegar to it and clean gently outside and inside of the fridge. Add white vinegar which counterbalances smells and works like baking soda does.
    It is preferred to keep an open bowl of white vinegar in the fridge mixing with water is also effective.

    Oats as an odor absorber

    Leave a bowl of oats out in your fridge and this will be useful to vanish bad smells.

    Coffee grounds

    Placing dry, fresh coffee grounds in shallow bowls is effective.

    Or keep the coffee grounds on the different levels of a refrigerator. This way will enable to remove smell in few days.

    WD-40

    WD-40

    After washing fridge spray WD-40 then wipe them away with a rag or sponge.

    Be careful to wash off all the WD-40 before returning food to the fridge.

    Conclusion

    Refrigerator serves several functions to of storing, cooling and freezing food, beverages, meats etc. it has become a necessity of life nowadays. In the summers break down of electricity causes various losses of food stored inside and won’t be able to maintain freshness for the longer period of time in the absence of electricity for many hours.
    Sometimes food leaves smell all over the fridge and smell taste also is felt in water kept for cooling in the fridge or felt in other food items ad may cause food spoilage.

    How To Clean a Refrigerator That Smells
    A fridge will smell bad due to its contents. Going vegetarian is the best solution to avoid any smell because meat and dairy items may quicker rotten or spoiled or leave smell than vegetarian items. Therefore, we need to follow multiple ways to clean the refrigerator that smells such as removing all food outside, cleaning shelves and drawers by the paste of water and baking soda. It will eradicate all smell.
    Vinegar, salts and fresh coffee grounds also serves the same functions to clean the refrigerator and its smell too.
    These tips can be adopted on the daily basis which is effective and appropriate. All tips are by using natural things so no harm to use it.