Blog

  • Sunroom Windows: Types, Glass Options, Energy Efficiency & Climate Performance

    Sunroom windows are specialized glazing systems designed to maximize daylight while managing insulation, ventilation, and seasonal temperature swings. The right system depends on whether the room is 3-season or 4-season, your climate zone, frame material durability, and glass performance ratings like U-factor and SHGC.

    What are sunroom windows and how are they different from regular house windows?

    Short answer: Sunroom windows are designed for higher glass exposure and seasonal climate variability compared to standard house windows.

    Unlike typical residential windows installed in insulated wall cavities, sunroom windows often occupy larger surface areas and face direct solar exposure for extended hours. This changes thermal load dynamics.

    Key differences:
    • Greater glass-to-wall ratio
    • Higher solar heat gain exposure
    • Increased condensation risk
    • Often part of modular enclosure systems

    Using standard house windows in a sunroom can lead to overheating in summer or heat loss in winter if performance specs are not matched to exposure.

    Most people assume sunroom windows are just “more windows.” That assumption causes performance problems.

    A traditional home window is surrounded by insulated framing and integrated into a wall system designed for thermal buffering. A sunroom window often makes up 50–80% of the wall area. That changes:

    • Heat load dynamics
    • Air pressure behavior
    • Condensation risk
    • Structural stress from wind

    Because glass becomes the dominant surface, its thermal characteristics matter exponentially more than in a conventional room.

    In colder climates, improper glazing turns the sunroom into a cold sink. In warmer climates, it becomes a greenhouse. That is why sunroom windows must be specified differently than bedroom or kitchen windows.


    What types of sunroom windows are available?
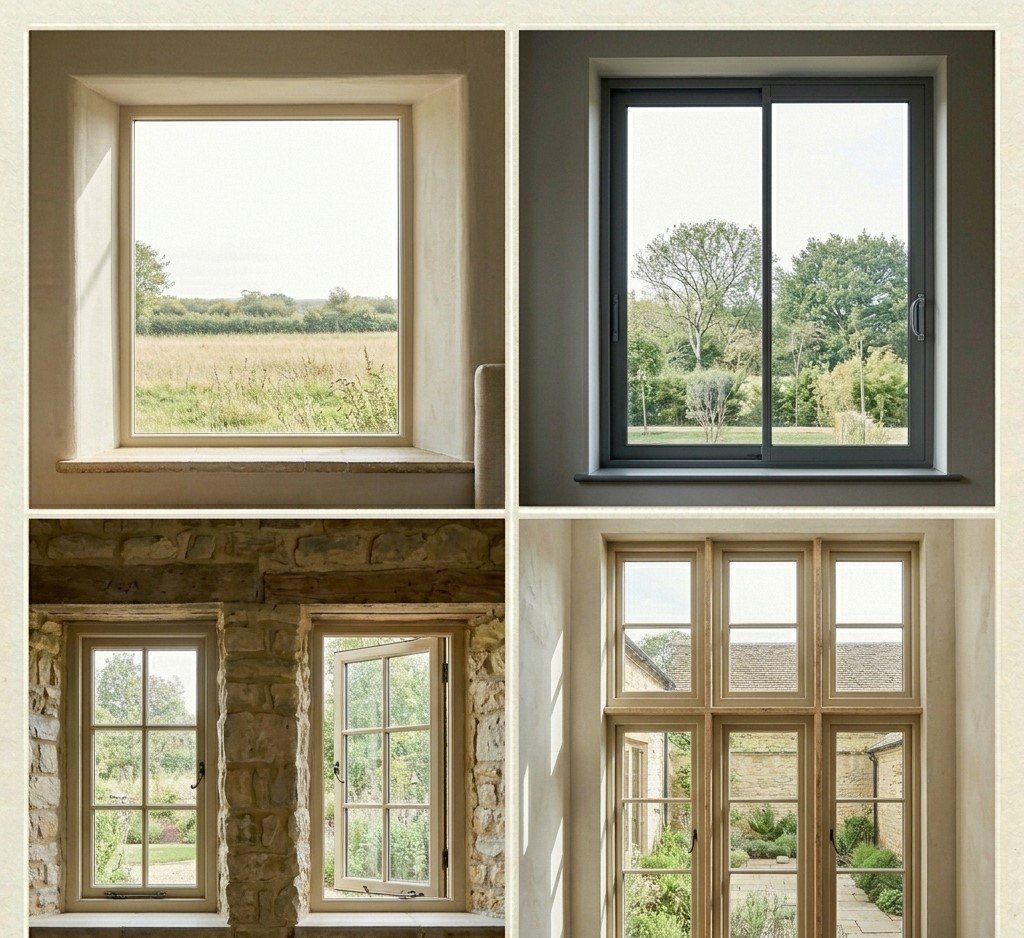
    Sunroom Windows

    Short answer: Fixed, sliding, casement, double-hung, and floor-to-ceiling panels are most common.

    Fixed Windows

    Do not open. Maximize light and insulation. Best for controlled climates.

    Sliding Windows

    Horizontal operation. Good ventilation with moderate energy efficiency.

    Casement Windows

    Hinged, crank-operated. Provide excellent airflow and tight seals.

    Double-Hung Windows

    Vertical sliding sashes. Balanced ventilation option.

    Floor-to-Ceiling Panels

    Used in panoramic sunrooms. Highest daylight gain but require high-performance glass.

    Beyond basic style categories, selection should be based on air exchange goals and structural configuration.

    Ventilation Strategy Modeling

    • Fixed + Casement combination improves airflow control.
    • Sliding windows work well for screened sunrooms but leak more air in winter.
    • Stacked operable windows allow seasonal adaptation.

    In humid climates, ventilation capacity reduces mold risk. In dry climates, excessive ventilation increases dust infiltration.

    The “type” is not aesthetic. It is environmental strategy.

    Ventilation Comparison Table

    TypeVentilationSeal StrengthEnergy EfficiencyBest Use
    FixedNoneExcellentHigh4-season rooms
    SlidingModerateGoodMedium3-season
    CasementHighExcellentHighClimate-variable
    Double-hungModerateGoodMediumMild climates

    What are sunroom windows in simple terms?
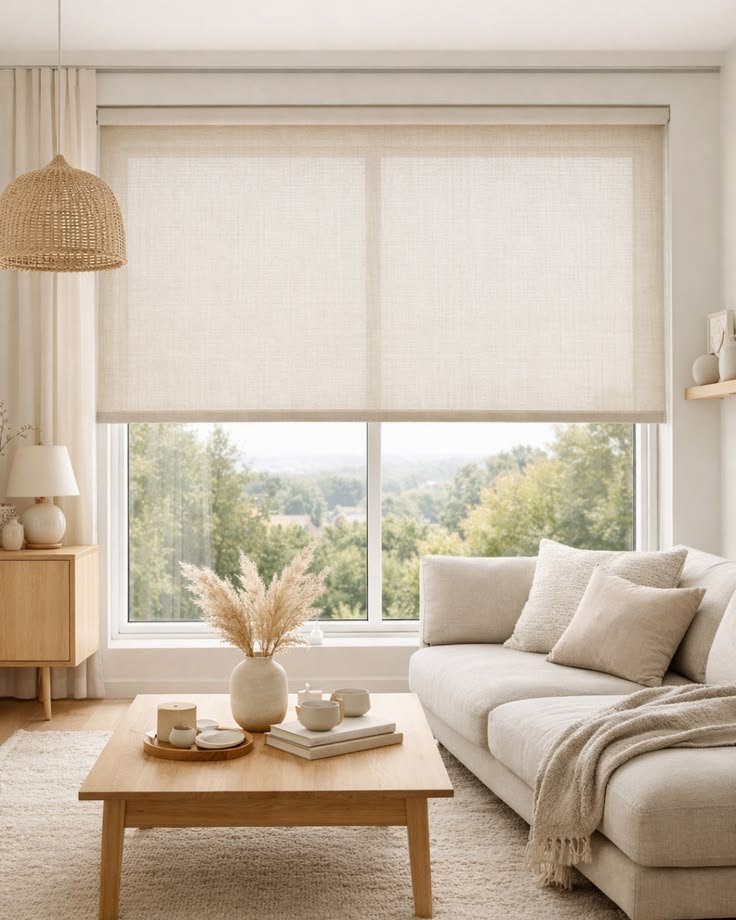
    Sunroom Windows

    Sunroom windows are high-exposure glazing systems designed to maximize natural light while controlling heat gain, heat loss, condensation, and ventilation. Their performance depends on climate, orientation, glass specifications like U-factor and SHGC, and whether the room is 3-season or 4-season. Wanting more information on “What is a Sunroom overall in simple terms?“, head on out to our complete sunroom design guide breaking down on its different aspects, features and metrics.

    Sunroom Windows in 8 Practical Rules

    • Match U-factor to winter temperatures
    • Match SHGC to summer sun exposure
    • Design ventilation intentionally
    • Consider orientation before choosing glass
    • Use insulated glazing for 4-season rooms
    • Choose corrosion-resistant frames in humid areas
    • Plan for seal lifespan of 15–20 years
    • Verify local building code compliance

    If You Live in…

    • A cold climate → prioritize low U-factor and insulated frames
    • A hot climate → prioritize low SHGC and shading
    • A humid climate → prioritize ventilation and condensation control
    • A mixed climate → choose balanced SHGC and double-pane Low-E
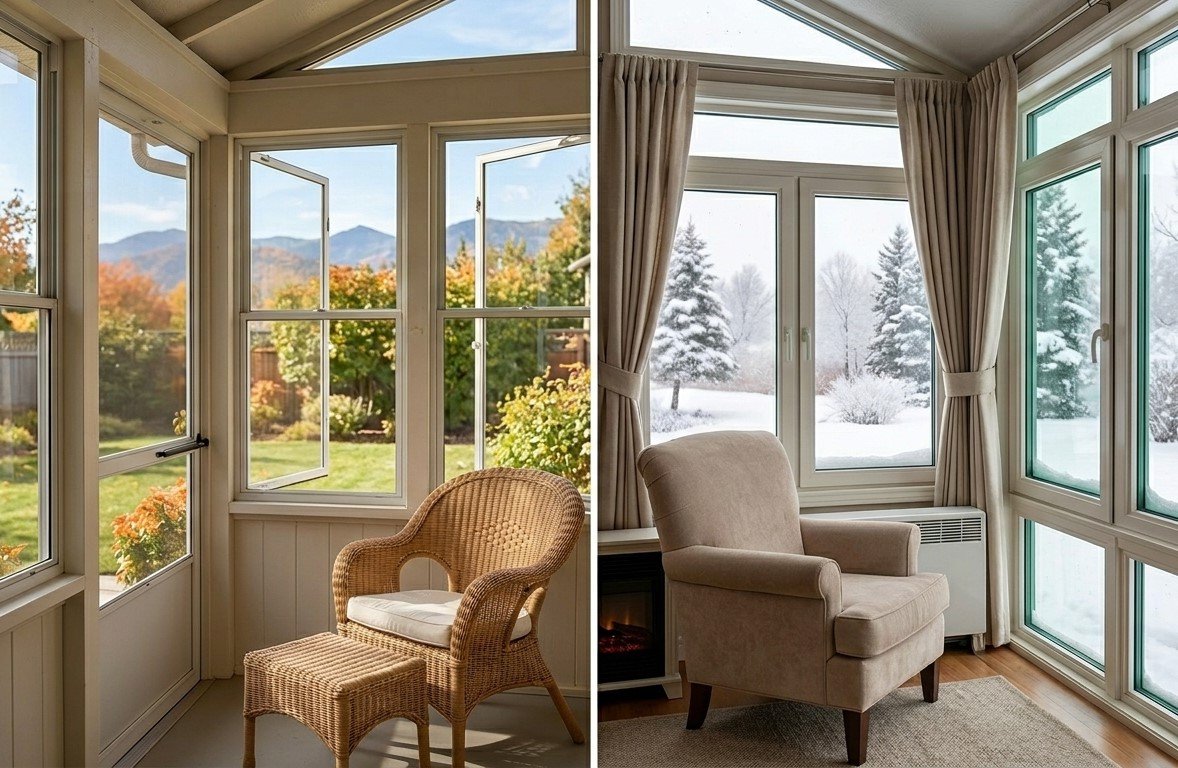
    Sunroom Windows

    What is the difference between 3-season and 4-season sunroom windows?

    Short answer: 3-season windows focus on airflow and light. 4-season windows prioritize insulation and thermal control.

    3-Season Sunroom Windows

    • Usually single or double pane
    • Minimal insulation
    • Not designed for freezing climates

    Ideal for spring through fall

    4-Season Sunroom Windows

    • Double or triple pane
    • Low-E coatings
    • Insulated frames
    • Compatible with HVAC systems

    4-season windows require lower U-factor ratings and controlled SHGC to prevent energy loss.

    The difference is insulation performance under thermal gradient stress.

    In a 3-season room, glass only needs to block wind and moderate rain. Insulation is secondary.

    In a 4-season room, glass must manage:

    • Interior heat retention in winter
    • Solar heat control in summer
    • Condensation resistance
    • HVAC compatibility

    A double-pane window with a U-factor of 0.30 performs dramatically better in winter than a single-pane unit with a U-factor above 1.0.

    Failure to account for this difference leads to heating bills that rival full home additions.

    3-Season vs 4-Season Sunroom Windows (Quick Comparison)

    Feature3-Season4-Season
    InsulationMinimalHigh
    Glass TypeSingle or Basic DoubleDouble or Triple Pane
    HVAC CompatibleNoYes
    Winter UseLimitedFull
    CostLowerHigher

    Understanding Window Ratings (In 30 Seconds)

    • U-factor measures heat loss. Lower is better in cold climates.
    • SHGC measures solar heat gain. Lower is better in hot climates.
    • STC measures sound reduction. Higher reduces outside noise.

    The Most Common Sunroom Window Mistake

    Choosing glass based on price instead of climate and orientation.

    This often causes:
    • Overheating in summer
    • Condensation in winter
    • Higher energy bills

    Sunroom Windows Are Not Ideal When:

    • The structure cannot support insulated glass weight
    • No ventilation is possible
    • West-facing exposure lacks shading in hot climates
    • Budget does not allow insulated glazing for 4-season use

    Which frame materials are best for sunroom windows?
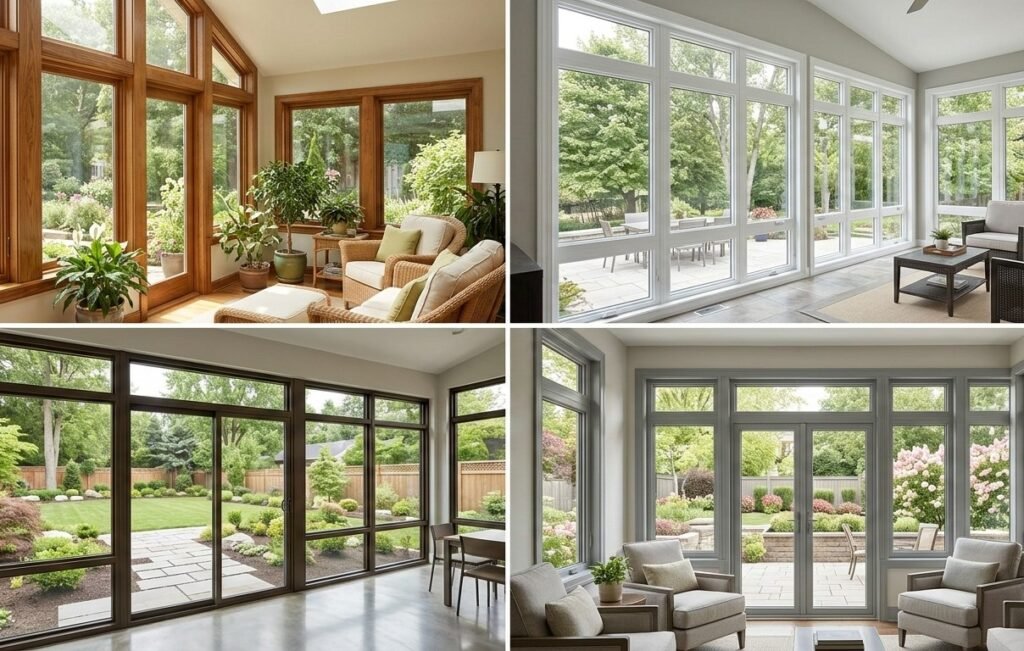
    Sunroom Windows

    Short answer: Vinyl and aluminum dominate, but climate dictates the best option.

    Vinyl

    • Low maintenance
    • Strong insulation
    • Affordable
    • Ideal for cold climates

    Aluminum

    • Lightweight
    • Slim profile
    • Conducts heat more easily
    • Better in warm climates

    Fiberglass

    • High durability
    • Stable in extreme climates
    • Higher cost

    Wood

    • Strong insulation
    • High maintenance outdoors

    Frame selection affects condensation resistance and lifespan more than aesthetics alone.

    Frames create thermal bridges.

    Aluminum frames transfer heat quickly. In hot climates, that may not matter. In cold climates, it causes interior condensation.

    Vinyl frames insulate better but may expand and contract more in extreme heat.

    Fiberglass frames offer high dimensional stability and thermal performance but at higher cost.

    The choice is not about durability alone. It is about thermal conductivity vs environmental stress.


    What glass options work best for sunrooms?
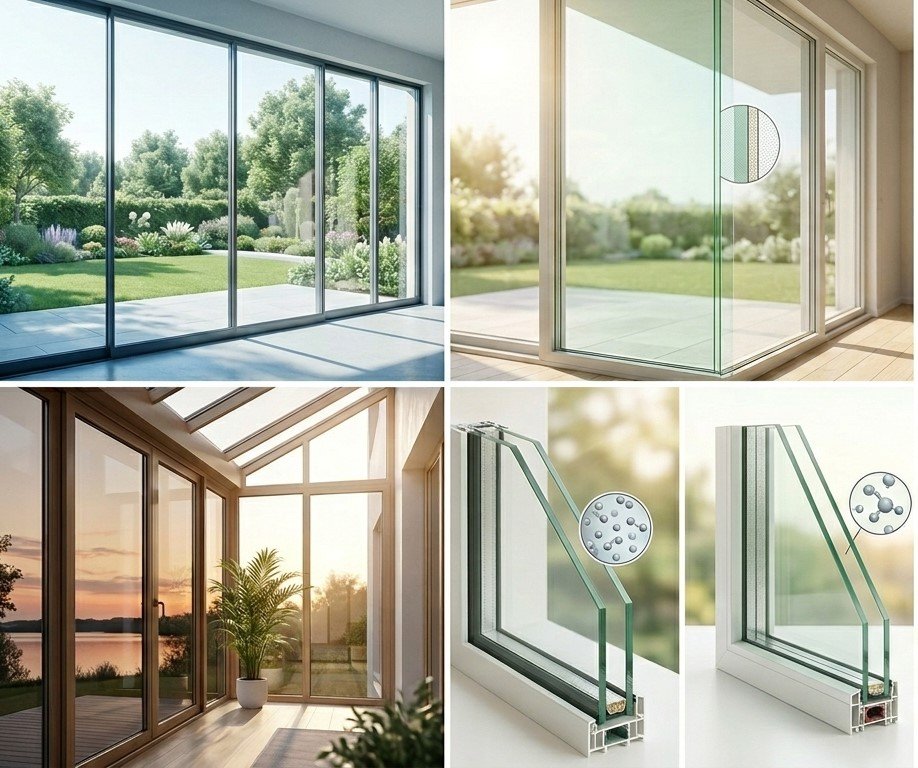
    Sunroom Windows

    Short answer: Double-pane Low-E glass with argon gas is the standard for energy efficiency.

    Single Pane

    Low cost. Minimal insulation. Best only for mild climates.

    Double Pane (IGU)

    Two glass layers separated by spacer. Reduces heat transfer significantly.

    Triple Pane

    Highest insulation. Suitable for extreme cold climates.

    Low-E Coating

    Reflects infrared heat while allowing visible light.

    Argon Gas

    Improves insulation between panes.

    Glass technology is where sunroom performance is won or lost.

    Low-E Coating Types

    There are two main types:

    • Hard-coat Low-E (better for colder climates)
    • Soft-coat Low-E (better for solar control)

    Soft-coat Low-E provides lower SHGC, reducing overheating.

    Spacer Technology

    Warm-edge spacers reduce condensation along glass edges. Standard aluminum spacers increase edge heat loss.

    Gas Fills

    Argon is common. Krypton is higher performance but more expensive.

    These micro-decisions significantly affect comfort and condensation control.

    Glass Performance Table

    FeatureControls Heat LossControls Heat GainImproves Comfort
    Low-EYesYesYes
    Argon GasYesPartialYes
    Triple PaneYesYesYes
    Tinted GlassNoYesModerate

    Understanding U-factor (heat loss rate) and SHGC (solar heat gain) is essential for climate matching.

    Are sunroom windows energy efficient?

    Short answer: Yes, when properly specified for climate and seasonal use.

    Energy efficiency depends on:
    • Glass layers
    • Frame insulation
    • Seal quality
    • Installation precision

    A 4-season sunroom with insulated glazing can reduce heating loss by up to 30–50% compared to single-pane systems.

    Energy efficiency depends on solar orientation.

    A north-facing sunroom may lose more heat than it gains in winter. A south-facing sunroom may gain excessive heat in summer.

    Optimizing SHGC:
    • Cold climates benefit from moderate SHGC to capture winter sun.
    • Hot climates require lower SHGC to prevent overheating.

    Energy efficiency is not one-size-fits-all. It is climate-matched engineering.


    How do sunroom windows affect temperature control and overheating?
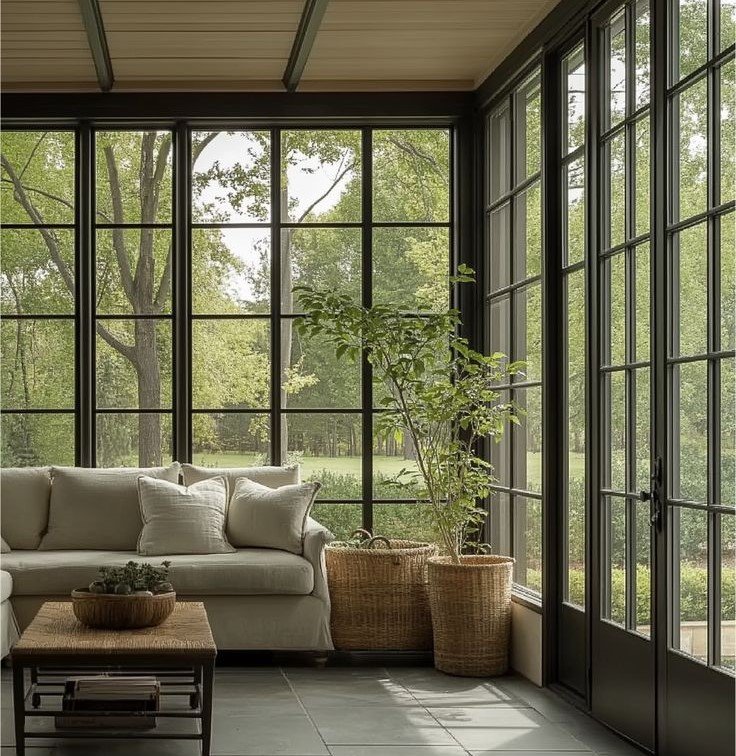
    South-facing sunrooms can overheat rapidly.

    Factors influencing overheating:
    • High SHGC glass
    • Lack of cross ventilation
    • No shading solutions
    Solutions:
    • Low-E coatings
    • Solar control glass
    • Operable windows for airflow
    • Exterior shading systems

    Proper glazing selection prevents greenhouse effect buildup.

    Sunrooms amplify solar radiation.

    Direct sunlight through glass can increase interior temperature by 15–25°F above outdoor ambient levels if unmanaged.

    Learn more about Sunroom Heating and Cooling with all the different metrics, costing along with varied examples to help understand it to an expert level.

    Solutions include:
    • Exterior shading systems
    • Tinted or reflective glass
    • Ventilation planning
    • Ceiling fans for thermal circulation

    Passive control reduces reliance on mechanical cooling.

    Do sunroom windows provide ventilation and airflow?

    Yes, depending on window style.

    Casement windows allow up to 100% sash opening. Sliding windows allow 50% opening. Cross ventilation requires openings on opposing walls.

    Stack effect ventilation can also be used in taller sunrooms to exhaust hot air upward.

    Ventilation must be designed, not assumed.

    Cross ventilation requires:
    • Operable windows on opposing walls
    • Vertical variation in height to create stack effect
    • Adequate opening area ratio

    Minimum recommendation:
    Operable area equal to at least 10–15% of total floor area for effective airflow.

    Without airflow planning, moisture accumulates even in insulated systems.

    How much do sunroom windows cost?

    Cost varies by size, glass type, and frame material.

    Estimated ranges:
    • 3-season systems: $300–$700 per window
    • 4-season insulated windows: $600–$1,500 per unit
    • Full sunroom glazing systems: $8,000–$25,000+

    Installation complexity increases cost significantly.

    Beyond base price, cost includes:
    • Glass performance upgrades
    • Custom sizing
    • Structural reinforcement
    • Permits
    • Installation labor
    • Energy code compliance
    Hidden cost drivers:
    • Non-standard shapes
    • Large floor-to-ceiling panels
    • High wind rating requirements

    Always evaluate cost per square foot of glass, not per window alone.


    Do sunroom windows require permits or meet building codes?

    In many regions, yes.

    Code considerations:
    • Tempered safety glass requirements
    • Energy efficiency ratings
    • Structural wind load
    • Hurricane impact zones

    Permit requirements vary by country and local jurisdiction.

    Many regions classify 4-season sunrooms as habitable space.

    This may trigger:
    • Energy code compliance
    • Structural inspection
    • Egress requirements
    • Safety glazing mandates

    Tempered or laminated glass is often required below certain heights for impact safety.

    Ignoring compliance can complicate resale.

    How long do sunroom windows last?

    Lifespan varies by material and seal quality.

    • Vinyl frames: 20–30 years
    • Aluminum: 15–25 years
    • Glass seals: 15–20 years average

    Seal failure is the most common reason for replacement.

    The glass seal is the weak point.

    Double-pane units rely on perimeter seals to contain insulating gas. UV exposure and temperature cycling eventually degrade seals.

    Signs of failure:
    • Fogging between panes
    • Visible condensation inside glass layers
    • Reduced clarity

    Seal lifespan averages 15–20 years.

    Frame longevity may exceed glass longevity.

    Can you replace sunroom windows without rebuilding the structure?

    Often, yes.

    Retrofit replacement depends on:
    • Frame compatibility
    • Structural integrity
    • Glass sizing

    Energy upgrades can usually be performed without full rebuild.

    Replacement feasibility depends on frame integration.

    Modular sunroom systems often allow panel replacement without structural modification.

    Site-built sunrooms may require reframing.

    Upgrading from single-pane to double-pane often improves comfort dramatically without altering the entire room.


    What common problems occur with sunroom windows?
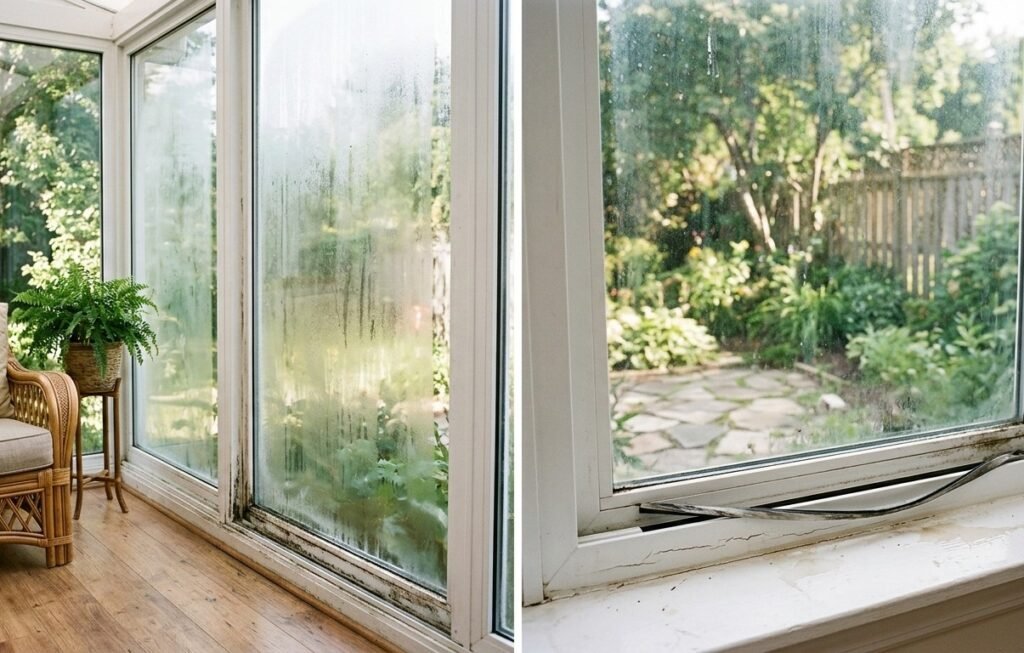
    Most common issues:
    • Condensation
    • Seal fogging
    • Drafts
    • Overheating
    • Glare

    These issues usually trace back to improper glass selection or installation shortcuts.

    Condensation

    Caused by interior humidity and cold glass surface temperature.

    Seal Fogging

    Caused by perimeter seal failure.

    Overheating

    Caused by high SHGC and poor ventilation.

    Glare

    Caused by high visible transmittance and direct sun angles.

    Each problem traces back to glass specification or airflow planning.

    Are sunroom windows worth the investment?

    For many homeowners, yes.

    Benefits:
    • Increased usable living space
    • Higher property appeal
    • Enhanced natural lighting
    • Potential resale value improvement

    Properly specified sunroom windows improve comfort and long-term usability.

    Financial ROI is one factor. Lifestyle ROI is larger.

    A 4-season sunroom expands usable square footage without full structural expansion.

    Energy-efficient glazing reduces comfort complaints.

    Property resale often benefits when sunrooms are classified as climate-controlled space.


    How do sunroom windows perform in different climate zones?

    Sunroom window performance is dictated by climate stress patterns, not marketing labels. The same glazing package behaves differently in Arizona, Toronto, Dubai, or London.

    Performance must be modeled across four environmental stress variables:
    1. Temperature extremes
    2. Solar radiation intensity
    3. Humidity levels
    4. Wind pressure and precipitation

    Ignoring any one of these produces comfort imbalance.

    Sunroom Window Climate Fit Matrix

    Climate TypeIdeal U-FactorIdeal SHGCFrame RecommendationVentilation PriorityCommon Risk
    Cold / Snow≤ 0.300.35–0.45Vinyl / FiberglassModerateCondensation
    Hot / Desert0.30–0.40≤ 0.30Aluminum / FiberglassHighOverheating
    Humid / Coastal≤ 0.350.30–0.40Vinyl / Corrosion-resistant AluminumHighMoisture buildup
    Mixed / Temperate0.30–0.350.35–0.45Vinyl / FiberglassModerateSeasonal imbalance

    Cold & Snow-Dominant Climates

    Primary challenge: heat retention and condensation prevention

    In regions where winter temperatures drop below freezing, glass surface temperature becomes critical. If interior glass temperature falls below dew point, condensation forms.
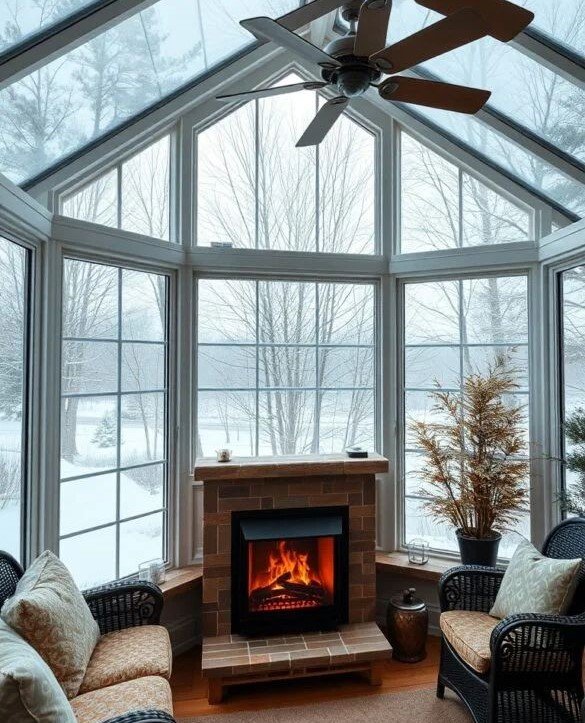
    Required specifications:

    • U-factor of 0.30 or lower
    • Double or triple pane
    • Argon or krypton gas
    • Warm-edge spacers
    • Thermally broken frames

    Hidden insight:

    Triple-pane glass reduces heat loss but also reduces solar gain. In extremely cold but sunny regions, moderate SHGC can help passive solar warming during winter.

    Design must balance insulation and sunlight harvesting.

    Hot & High-Solar Climates

    Primary challenge: solar heat gain control

    In desert or equatorial regions, overheating becomes the main risk. Glass can act like a magnifying lens.

    Required specifications:

    • Low SHGC (0.25–0.35 range)
    • Solar control Low-E coating
    • Exterior shading devices
    • Cross ventilation design

    Hidden insight:

    Interior blinds alone do not stop heat gain. Solar heat passes through glass before blinds block visible light. External shading is far more effective. Orientation awareness matters more than window size.

    Humid & Coastal Climates

    Primary challenge: moisture and corrosion

    High humidity increases condensation frequency. Coastal salt accelerates frame degradation.

    Required specifications:

    • Corrosion-resistant frames
    • Insulated glass to reduce surface cooling
    • Operable windows for airflow
    • Proper flashing and drainage

    Hidden insight:

    Condensation is not always a sign of failure. It may indicate indoor humidity imbalance. Ventilation design must be paired with glazing choice.


    Mixed & Temperate Climates

    Primary challenge: seasonal adaptability

    These regions experience both heating and cooling demands.
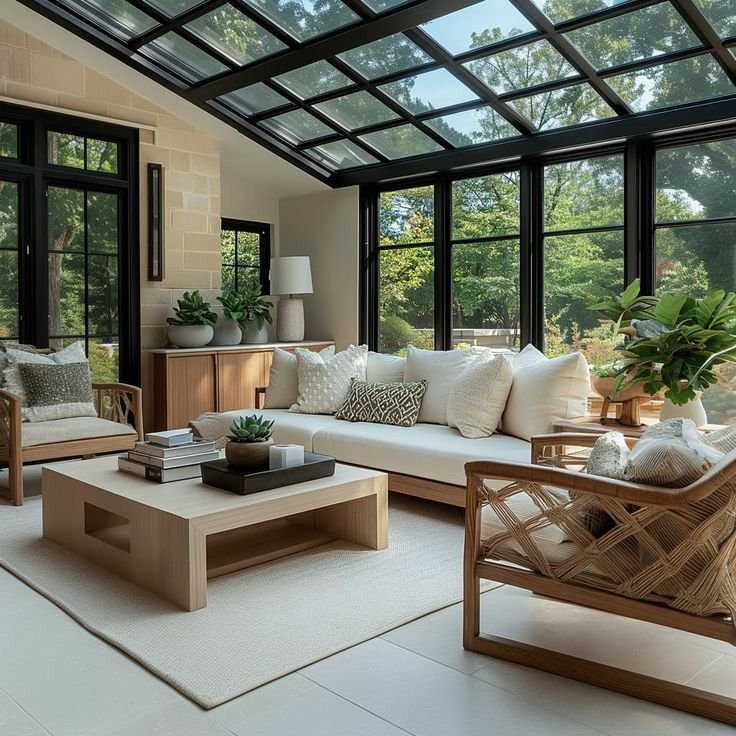
    Required specifications:

    • Balanced SHGC (around 0.35–0.45)
    • Double-pane Low-E
    • Operable ventilation

    Hidden insight:

    Balanced performance often outperforms extreme insulation in mixed climates. Overspecifying glass can reduce natural solar heating in winter.

    Performance should match annual average exposure patterns.

    How do sunroom windows impact condensation and moisture control?

    Condensation occurs when warm moist air contacts a cold surface.

    Glass temperature is the controlling variable.

    What influences surface temperature?

    • Outdoor temperature
    • U-factor
    • Frame conductivity
    • Air leakage

    Dew Point Dynamics

    If interior humidity is 50 percent and glass surface temperature drops below dew point, condensation forms.

    Lowering indoor humidity to 35–40 percent in winter reduces condensation risk significantly.

    Hidden engineering reality

    Edge-of-glass condensation is common due to spacer conductivity. Warm-edge spacers reduce this localized heat loss.

    Condensation management is as much about indoor humidity control as it is about window selection.


    What safety features should sunroom windows have?
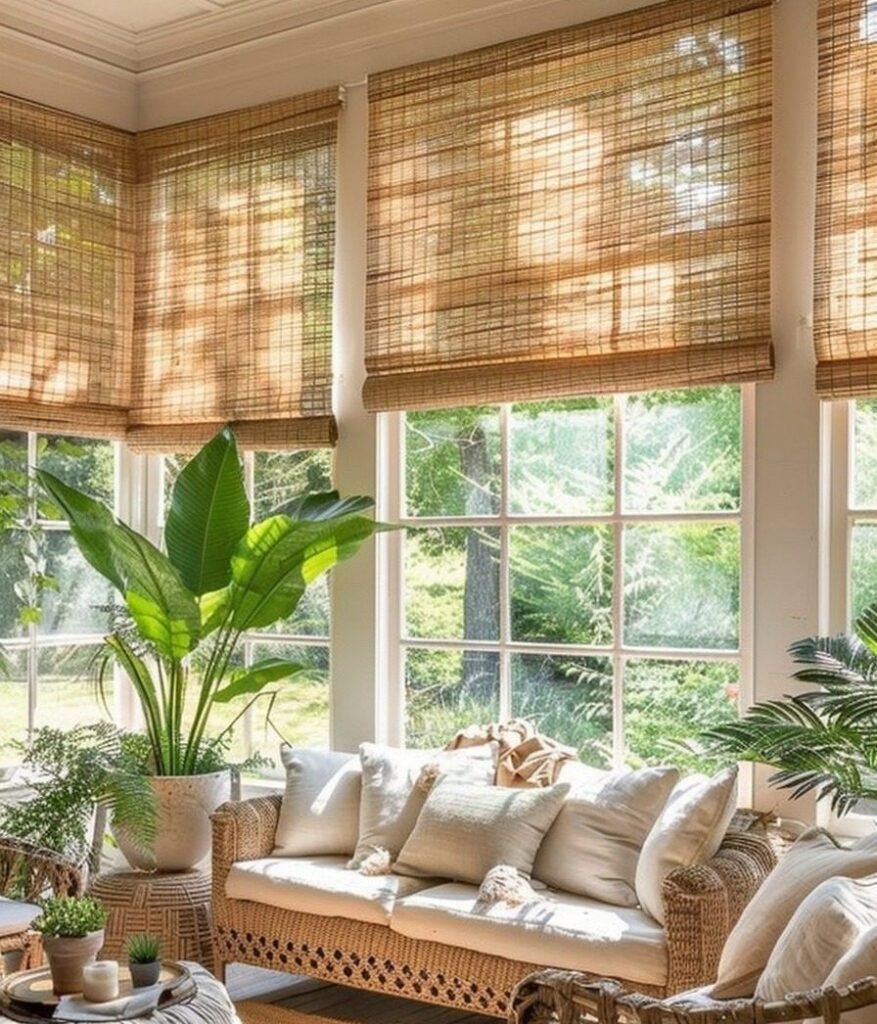
    Safety glazing is often required by building codes when glass extends close to floor level.

    Tempered Glass

    Heat-treated for strength. Breaks into small blunt fragments.

    Laminated Glass

    Contains interlayer that holds fragments together upon impact.

    Impact-Rated Glass

    Designed for hurricane zones and high-wind areas.

    Structural Load Resistance

    Sunroom glazing must withstand:

    • Wind pressure
    • Snow load on integrated structures
    • Thermal expansion

    Hidden insight:

    Large glass panels increase structural stress. Frame reinforcement is often overlooked but critical.

    Security locking systems matter for ground-level sunrooms.

    How do sunroom windows influence noise reduction?

    Glass thickness and layering influence sound transmission.

    STC (Sound Transmission Class)

    Higher STC reduces noise infiltration.

    Double-pane windows improve noise reduction over single-pane. Laminated glass provides further acoustic dampening due to interlayer absorption.

    Urban settings benefit significantly from laminated insulated units.

    Hidden insight:

    Air gaps of varying thickness improve sound isolation. Identical glass thickness layers transmit similar frequencies more easily.

    Acoustic comfort adds value beyond thermal comfort.


    What maintenance do sunroom windows require?
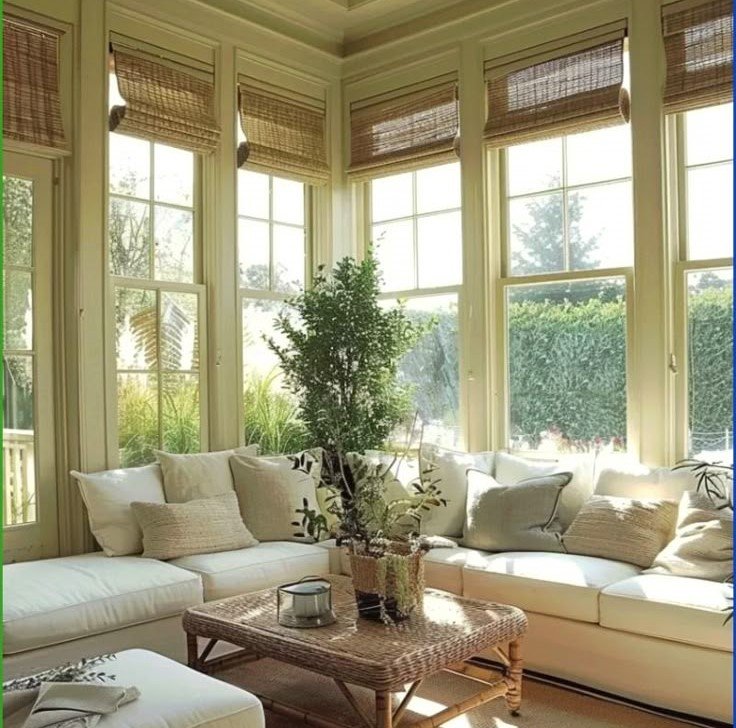
    Maintenance prevents performance decline.

    Routine Care:

    • Clean tracks and seals
    • Inspect caulking annually
    • Check drainage holes
    • Inspect frame expansion gaps

    Seal Longevity:

    Gas-filled units degrade over time. UV exposure accelerates seal aging.

    Signs of performance decline:

    • Fogging between panes
    • Draft sensation
    • Visible warping

    Preventive inspection extends usable life.

    How do sunroom windows affect interior furnishings and UV exposure?

    Ultraviolet radiation degrades:

    • Fabrics
    • Wood finishes
    • Flooring
    • Artwork

    Low-E coatings block a large portion of UV rays. However, visible light still enters.

    Hidden insight:

    UV exposure damage is cumulative. Even moderate daily exposure over years leads to noticeable fading.

    Selecting UV-protective glazing protects interior investments.


    How does sunroom window orientation affect performance?
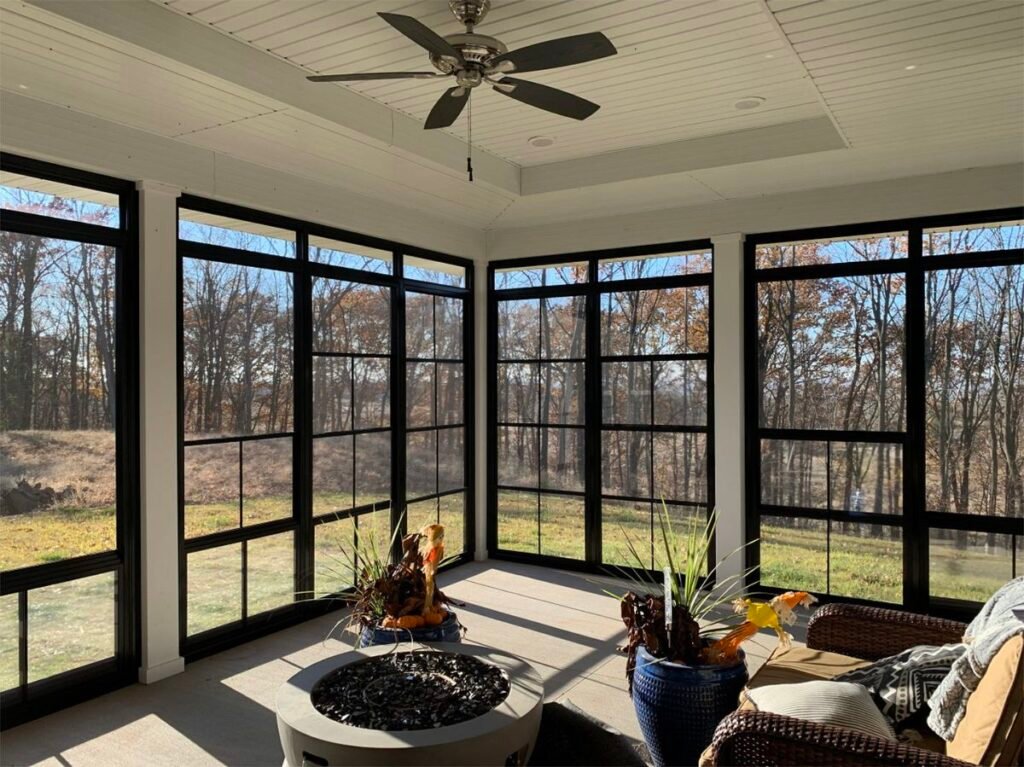
    Orientation is one of the most overlooked design variables.

    South-Facing

    High winter gain. High summer overheating risk.

    North-Facing

    Lower solar gain. Greater heat loss risk in winter.

    East/West

    Morning and afternoon glare challenges.

    Correct SHGC specification must align with orientation.

    Sunroom Orientation Decision Matrix

    OrientationWinter ImpactSummer ImpactGlass StrategyRisk Level
    South-FacingStrong passive gainHigh overheating riskModerate SHGC + shadingMedium
    North-FacingHeat loss dominantMinimal overheatingLow U-factor priorityHigh (cold climates)
    East-FacingMorning glareMild overheatingLow SHGC + blindsMedium
    West-FacingAfternoon heat spikeHigh glareLow SHGC + exterior shadingHigh (hot climates)

    Hidden Insight

    South-facing sunrooms in cold climates can reduce heating load.
    West-facing sunrooms in hot climates are the hardest to manage.

    Orientation is a larger performance variable than window size.

    Why Condensation Happens in Sunroom Windows (And How to Prevent It)

    Sunrooms have a higher glass-to-wall ratio than typical rooms. That means more surface area exposed to exterior temperature swings. If you want more information on how insulation and glazing work together in sunrooms, head onto our Sunroom Guide where it is discussed to full length.

    Why Do Sunroom Windows Condense More Than Regular Windows?

    Condensation forms when warm interior air contacts glass whose surface temperature falls below the dew point.

    In winter:

    • Exterior air is cold
    • Glass surface cools rapidly
    • Interior humidity touches cold glass
    • Moisture forms

    Sunrooms are more vulnerable because they cool faster overnight.

    What Increases Condensation Risk?

    • High U-factor glass
    • Aluminum frames without thermal breaks
    • High interior humidity
    • Poor air circulation
    • Edge-of-glass spacer conductivity

    Edge condensation often appears before center-glass condensation.

    That’s a spacer issue, not just glazing thickness.

    Frame-Driven Condensation Risk Table

    Frame TypeWinter Surface TemperatureCondensation Risk
    Aluminum (no break)Very ColdHigh
    Aluminum (thermal break)ModerateMedium
    VinylWarmerLow
    FiberglassWarmVery Low

    This is why aluminum frames fail in cold climates without thermal breaks.

    How to Prevent Condensation in Sunroom Windows

    1. Choose lower U-factor glass
    2. Use warm-edge spacers
    3. Avoid non-thermal-break aluminum in cold zones
    4. Improve ventilation
    5. Control indoor humidity

    Condensation is a design failure, not a random event.

    Sunroom Window Frame Material Comparison (Structural + Thermal)

    What Is the Best Frame Material for Sunroom Windows?

    Frame material affects:

    • Thermal bridging
    • Expansion stability
    • Seal longevity
    • Structural rigidity
    • Condensation risk

    It is not just aesthetic.

    Frame Material Comparison Table

    Frame TypeThermal PerformanceExpansion StabilityMaintenanceClimate FitLifespan
    VinylHighModerateLowCold / Mixed20+ yrs
    FiberglassVery HighVery StableLowAll climates25+ yrs
    Aluminum (no break)LowVery StableLowWarm only20+ yrs
    Aluminum (thermal break)ModerateVery StableLowMixed / Hot20+ yrs
    WoodHighModerateHighMild15–20 yrs

    Thermal Bridging Explained Simply

    Metal conducts heat faster than vinyl or fiberglass.

    In cold climates, aluminum frames without thermal breaks:
    • Lower interior surface temperature
    • Increase condensation
    • Reduce comfort near windows

    Fiberglass expands at similar rates to glass, which reduces seal stress over time.

    That improves lifespan consistency.

    When Frame Material Matters Most

    Frame choice matters more in:

    • Cold climates (condensation risk)
    • Mixed climates (expansion stress)
    • Humid climates (corrosion risk)

    It matters less in mild coastal climates.

    Window Failure Timeline

    Seal failure tends to appear between years 12–20 depending on climate, spacer quality, and installation accuracy. Early fogging at edges often indicates spacer degradation rather than glass breakage. Thermal stress and frame expansion are primary contributors.

    When sunroom windows may not be the best choice

    Sunroom windows are not universally appropriate.

    1. Extreme Budget Constraints

    If insulation and climate control are unaffordable, a simple screened enclosure may be more practical.

    2. Severe Heat Zones Without Shading Options

    In desert climates with full west exposure and no shading, glazing alone cannot prevent overheating.

    3. Structural Limitations

    Older patio structures may not support insulated glass weight without reinforcement.

    4. No HVAC Integration in Cold Climates

    Installing high-performance windows without heating integration may still produce uncomfortable winter conditions.

    5. High-Humidity Environments Without Ventilation

    Without airflow design, condensation becomes unavoidable.

    How do sunroom windows integrate with HVAC systems?

    4-season sunrooms often connect to home HVAC.

    Key considerations:
    • Insulation level
    • Air return pathways
    • Load calculations

    Oversized glazing without load adjustment stresses HVAC systems.

    Mechanical integration must be planned.

    What are the long-term replacement considerations?

    After 15–20 years, glass seals may fail.

    Retrofit strategies:
    • Replace insulated glass only
    • Upgrade to higher-performance units
    • Reassess climate needs

    Planning for eventual replacement reduces long-term cost surprises.
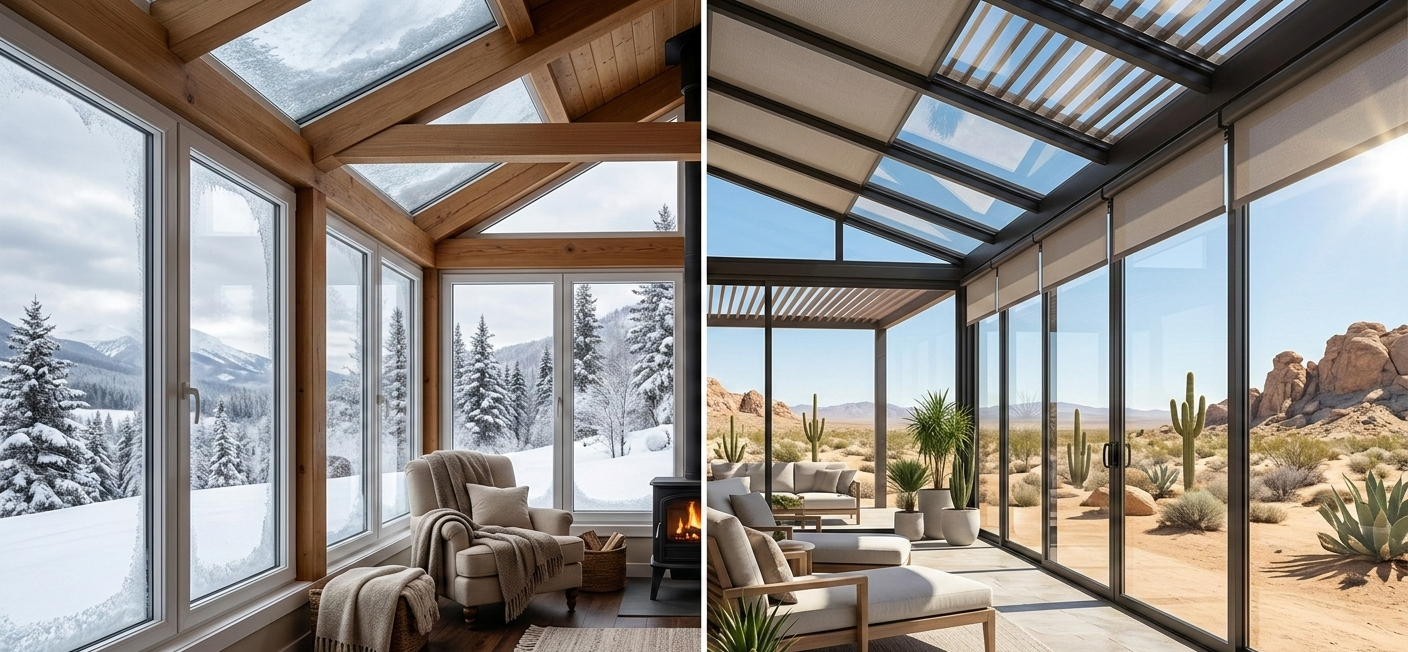

    Real-World Case Study: Cold Climate vs Hot Climate Sunroom Window Design

    Abstract advice is useful. Applied examples are decisive.

    Below are two real-world modeling scenarios showing how the same sunroom size performs differently depending on climate and glazing decisions.

    Case Study 1: Cold Climate Installation (Toronto, Canada)

    Scenario

    • 220 sq ft sunroom
    • South-facing exposure
    • Intended as 4-season usable space
    • Winter lows: -15°C (5°F)
    • Summer highs: 28°C (82°F)

    Problem

    Homeowner wanted panoramic glass but was concerned about winter heating costs and condensation.

    Specification Used

    • Double-pane insulated glass with soft-coat Low-E
    • U-factor: 0.28
    • SHGC: 0.40
    • Argon gas fill
    • Vinyl insulated frames
    • Warm-edge spacers
    • Two operable casement windows for ventilation

    Why These Specs Were Chosen

    • Low U-factor minimizes winter heat loss.
    • Moderate SHGC allows passive solar gain during winter sun exposure.
    • Vinyl frames reduce condensation risk at edges.
    • South-facing orientation benefits from winter solar heating.

    Outcome

    • Winter interior temperature maintained within 2–3°C of main home zone with HVAC integration.
    • Minimal condensation observed even during peak winter.
    • Heating cost increase was moderate but manageable.

    Key Insight

    In cold climates, a slightly higher SHGC can be beneficial when sun exposure is strong and consistent. Over-specifying ultra-low SHGC glass would have reduced helpful winter heat gain.

    The design leveraged climate instead of fighting it.

    Case Study 2: Hot Climate Installation (Phoenix, Arizona)

    Scenario

    • 220 sq ft sunroom
    • West-facing exposure
    • Intended as 3-season room with occasional summer use
    • Summer highs: 43°C (110°F)
    • Strong afternoon sun

    Problem

    Previous owner installed standard double-pane glass. Room overheated rapidly in summer and was unusable by midday.

    Replacement Specification

    • Double-pane solar control glass
    • U-factor: 0.33
    • SHGC: 0.24
    • Aluminum thermally broken frames
    • Exterior shading screens added
    • Sliding + casement mix for airflow

    Why These Specs Were Chosen

    • Low SHGC drastically reduced solar heat gain.
    • Solar control coating reflected infrared heat.
    • Exterior shading prevented direct solar radiation.
    • Ventilation allowed hot air escape during evenings.

    Outcome

    • Peak interior temperature reduced by approximately 8–10°F compared to previous system.
    • Space usable into early afternoon.
    • Cooling demand significantly reduced.

    Key Insight

    In hot climates, SHGC matters more than U-factor. Over-focusing on insulation while ignoring solar gain creates overheating problems.

    Orientation amplified the heat load. Glass had to compensate.

    Comparative Performance Summary

    VariableCold Climate StrategyHot Climate Strategy
    Primary RiskHeat LossOverheating
    Glass PriorityLow U-FactorLow SHGC
    Frame PriorityInsulatedThermally Broken
    Ventilation RoleModerateHigh
    Solar GainHelpful in WinterProblematic in Summer
    HVAC IntegrationEssentialOptional but Helpful

    What These Case Studies Prove

    1. The same room size performs completely differently depending on climate.
    2. Glass performance metrics must match orientation and regional exposure.
    3. Overheating and condensation are specification errors, not inevitabilities.
    4. Sunroom comfort depends on climate alignment more than window style.

    Quantified ROI Example: Energy Cost Modeling for Sunroom Windows

    Sunroom windows influence energy use through two channels:

    1. Heating load in winter
    2. Cooling load in summer

    To understand return on investment, we compare two realistic glazing scenarios in the same 220 sq ft 4-season sunroom.

    Scenario A: Basic Double-Pane (Standard Glass)

    • U-factor: 0.48
    • SHGC: 0.55
    • Aluminum frame (non-thermally broken)
    • No exterior shading

    Estimated annual heating + cooling impact (cold-to-mixed climate):
    Additional $480–$650 per year in energy use compared to insulated main house envelope.

    Primary loss drivers:

    • Winter heat escape through higher U-factor
    • Summer heat gain from high SHGC

    Scenario B: High-Performance Insulated Glazing

    • U-factor: 0.28
    • SHGC: 0.35
    • Vinyl insulated frame
    • Warm-edge spacer
    • Moderate ventilation design

    Estimated annual heating + cooling impact:
    Additional $220–$320 per year relative to main home envelope.

    Annual Energy Savings Difference

    Approximate savings from high-performance glazing:

    $260–$330 per year

    This assumes:

    • Cold-to-mixed climate
    • HVAC-integrated sunroom
    • Average energy costs

    Cost Difference Between Systems

    Typical upgrade cost from basic to high-performance glazing in a 220 sq ft sunroom:

    $2,000–$3,500 additional upfront investment

    Simple Payback Estimate

    If energy savings average $300 per year:

    • $2,500 upgrade ÷ $300 annual savings
      = ~8.3 year payback period

    After that point, savings become cumulative.

    15-Year Horizon View

    Over 15 years:

    $300 × 15 years = $4,500 in energy savings

    Minus $2,500 upgrade cost
    = $2,000 net positive return (excluding comfort value)

    This does not account for:

    • Increased property value
    • Reduced condensation-related damage
    • Extended HVAC lifespan due to lower load

    Comfort ROI (Non-Financial but Critical)

    Energy savings are measurable. Comfort is harder to quantify but equally important.

    High-performance glazing reduces:

    • Cold drafts near glass
    • Temperature swings
    • Condensation damage
    • Overheating complaints

    Comfort improvements increase room usability, which effectively expands functional square footage.

    In resale scenarios, a properly insulated 4-season sunroom may be classified as conditioned living space, increasing property appeal.

    Important Modeling Notes

    Energy modeling varies by:

    • Climate zone
    • Orientation
    • Utility rates
    • Occupancy patterns
    • Ventilation design

    The numbers above are representative averages, not universal guarantees. However, the principle holds:
    Improved U-factor and optimized SHGC meaningfully reduce long-term operating costs.

    Pre-Installation Checklist

    • Confirm 3-season vs 4-season usage
    • Check local building codes
    • Match glass specs to climate
    • Ensure proper ventilation plan
    • Budget for insulated glazing if year-round use

    Final Summary

    Sunroom windows perform best when glass specifications match climate, orientation, and room usage. In cold regions, prioritize insulation. In hot regions, prioritize solar heat control. Proper ventilation and frame selection determine long-term comfort and durability. Want to know the entire dynamics of a Sunroom, check out our full sunroom system overview.
    FAQ Section

    Are sunroom windows insulated?

    4-season models are insulated. 3-season models often are not.

    Do sunroom windows reduce UV damage?

    Low-E coatings block significant UV exposure.

    Can I use standard house windows in a sunroom?

    Not recommended unless rated for high solar exposure.

    Are sunroom windows hurricane-rated?

    Impact-rated models are available in hurricane zones.

    Do they increase home value?

    Year-round sunrooms often increase resale appeal.

    Can condensation be prevented?

    Proper insulation and ventilation reduce condensation risk.
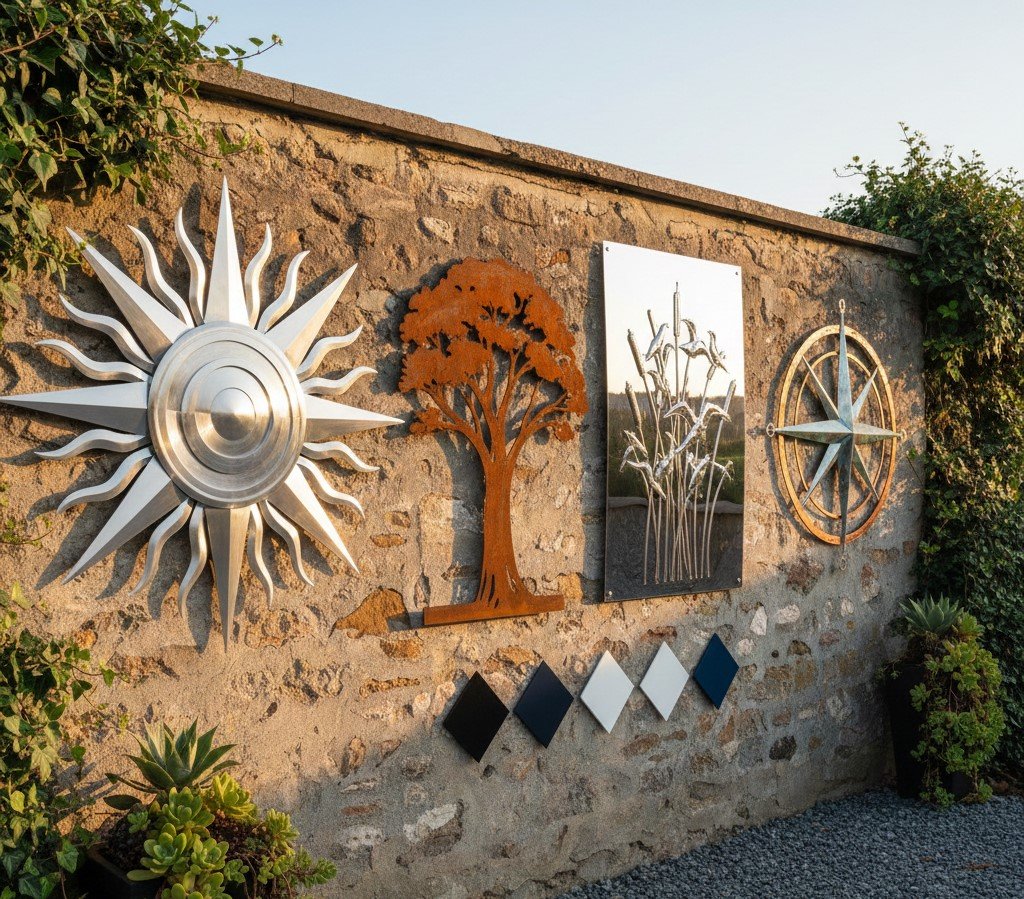
  • Outdoor Metal Wall Art: Materials, Rust Resistance, Coatings & Long-Term Durability

    Outdoor metal wall art is decorative metal artwork designed to withstand weather exposure. Its durability depends on material choice, protective coatings, and climate conditions. Aluminum, corten steel, and powder-coated steel perform best outdoors when selected and maintained correctly.

    Outdoor Metal Wall Art — Key Takeaways (30-Second Read)

    • Outdoor metal wall art must be material-matched to climate, not just labeled “outdoor.”
    • Aluminum is the safest choice across most regions due to natural corrosion resistance.
    • Corten steel is designed to rust intentionally and must be placed carefully to avoid staining.
    • Powder-coated steel performs well only when coatings remain intact and airflow is maintained.
    • Most failures start behind the artwork, caused by trapped moisture and poor mounting.
    • Climate factors like salt air, UV intensity, freeze-thaw cycles, and humidity matter more than price.
    • Proper mounting with standoff gaps and corrosion-safe fasteners doubles lifespan.
    • Outdoor metal wall art is low maintenance, not maintenance-free.

    What is outdoor metal wall art and how is it different from indoor pieces?

    Outdoor metal wall art is specifically engineered to survive rain, humidity, sunlight, and temperature changes. Unlike indoor pieces, it must resist corrosion, paint failure, and structural fatigue caused by weather exposure.

    Indoor metal wall art often uses similar base metals, but the difference lies in surface treatment, coating thickness, and mounting design. Using indoor-only metal art outdoors is one of the most common causes of rust complaints and early failure.

    Outdoor-rated metal wall art prioritizes protection first, appearance second.

    Outdoor metal wall art is not simply indoor art placed outside. It is engineered for continuous environmental stress. Rain, UV radiation, wind vibration, temperature swings, and airborne pollutants all act on the surface simultaneously.

    The primary difference lies in failure tolerance. Indoor metal art assumes stable conditions. Outdoor metal wall art assumes damage will eventually attempt to occur and is designed to delay, localize, and slow that damage.

    Outdoor-rated pieces typically use:

    • Thicker base metal to resist flexing
    • Fully sealed edges to prevent moisture ingress
    • Coatings designed for UV and thermal cycling
    • Mounting systems that allow airflow and drainage

    This difference is why visually similar pieces can age very differently outdoors.


    Which metals are best for outdoor metal wall art?

    Outdoor Metal Wall Art

    Short answer: aluminum, corten steel, and coated steel.

    Choosing the correct metal is the single most important decision for outdoor longevity.

    Aluminum (Best all-around outdoor performer)

    Aluminum forms a natural oxide layer that prevents further corrosion. It does not rust, even when scratched. This makes it ideal for:

    • Coastal environments
    • High-humidity regions
    • Covered or uncovered exterior walls
    • Installations where maintenance access is limited

    Its lighter weight also reduces stress on masonry and fasteners.

    Corten steel (Intentional weathering)

    Corten steel is selected for aesthetic corrosion, not protection through coating. The rust layer stabilizes and slows further oxidation.

    Important realities:

    • Early-stage runoff can stain concrete or stucco
    • Not ideal for areas with constant water exposure
    • Requires acceptance of visual change over time

    Corten is architectural, not decorative. It works best when the environment complements its aging process.

    Powder-coated steel (Controlled exposure solution)

    Powder-coated steel performs well only while the coating remains intact. Once compromised, rust can spread beneath the surface.

    Best use cases:

    • Covered patios
    • Exterior walls with minimal rain exposure
    • Regions with moderate climate stability

    Steel allows sharper designs than aluminum but demands inspection discipline.


    Metals that should generally be avoided outdoors

    Outdoor Metal Wall Art

    Bare iron, untreated steel, and decorative indoor metal pieces should not be used outdoors. These materials corrode quickly when exposed to moisture and sunlight, even in mild climates.

    If the product description does not clearly state outdoor suitability, assume it is indoor-only.

    Avoiding the wrong metal prevents 80% of outdoor failures.

    Bare iron

    Iron oxidizes aggressively outdoors. Even sealed iron deteriorates quickly once the seal is breached.

    Decorative indoor steel

    Indoor steel art often uses thin coatings designed for appearance, not endurance.

    Mixed-metal constructions without isolation

    Different metals in contact can cause galvanic corrosion when moisture is present.

    If the manufacturer does not explicitly state outdoor rating, assume indoor-only.

    How rust actually forms on outdoor metal wall art

    Rust is oxidation caused by moisture and oxygen interacting with iron-based metals.

    In outdoor settings, rust accelerates due to:

    • Rain and condensation
    • High humidity
    • Salt in coastal air
    • Scratches or chips in protective coatings

    This is why coating integrity matters more than metal thickness.

    Rust begins microscopically. Moisture enters through:

    • Micro-cracks in coatings
    • Cut edges left untreated
    • Fastener holes
    • Contact points with damp walls

    Once oxygen and moisture reach bare steel, oxidation spreads laterally beneath coatings. This is why rust often appears far from the original chip.

    Corten steel is the exception because its oxide layer is self-limiting. Traditional steel is not.

    Understanding this mechanism explains why edge sealing and airflow matter as much as coating thickness.


    Outdoor coatings explained: what really protects metal?

    Outdoor Metal Wall Art

    Short answer: coatings are the real defense, not the metal alone.

    Powder coating

    Powder coating is baked onto the metal, creating a thick, even layer. It resists UV fading, chipping, and moisture penetration. Matte powder coatings perform best outdoors because they hide wear better than gloss.

    Powder coating is electrostatically applied and heat-cured. It provides:

    • Uniform thickness
    • Strong adhesion
    • UV resistance when formulated correctly

    Failure usually begins at edges or impact points.

    Galvanization

    Galvanized steel is coated with zinc to prevent corrosion. It performs well outdoors but limits color options and design flexibility.

    Sealants and clear coats

    Clear sealants are often used on corten steel or decorative outdoor pieces. They slow corrosion but require reapplication over time.

    No coating is permanent. Maintenance expectations must be realistic.

    Coatings are sacrificial barriers. They fail slowly so the metal does not fail quickly.

    Does outdoor metal wall art fade in sunlight?

    Yes, but quality coatings fade slowly and evenly.

    Sunlight degrades pigments through UV exposure. Fading is gradual and unavoidable, but it can be managed.

    Key factors:

    • Dark colors absorb more heat
    • Matte finishes show fading less than gloss
    • UV-stabilized powder coatings last significantly longer

    Uniform fading is acceptable. Patchy fading indicates coating inconsistency.


    How climate affects outdoor metal wall art lifespan

    Outdoor Metal Wall Art

    Climate is the single biggest variable.

    Humid and coastal climates

    Salt and moisture accelerate corrosion. Aluminum and corten steel perform best here. Powder-coated steel requires closer inspection and maintenance.

    Hot and dry climates

    Heat stresses coatings and accelerates fading. Lighter finishes and thicker coatings perform better.

    Cold climates

    Freeze-thaw cycles can cause micro-cracks in coatings. Proper drainage and sealed edges matter more than material thickness.

    Desert climates

    UV and heat stress coatings. Thermal expansion can cause cracking over time.


    Outdoor metal wall art climate-zone decision matrix

    Outdoor metal wall art does not fail uniformly across the world. Climate determines material stress, coating decay speed, and maintenance burden more than brand or price.

    Use this matrix to match material and design choices to real environmental conditions.

    Coastal climates (salt air, high humidity)

    Typical conditions

    • Salt particles in the air
    • Persistent humidity
    • Accelerated electrochemical corrosion

    Best materials

    • Aluminum (top choice)
    • Corten steel (with runoff awareness)

    Materials to avoid

    • Powder-coated steel without marine-grade coating
    • Bare or decorative steel

    Finish guidance

    • Matte finishes preferred
    • Avoid thin clear coats
    • Expect faster aging even with correct materials

    Hidden risk

    Salt creeps into microscopic coating defects and continues corroding even after surfaces dry. This makes edge sealing and fastener quality critical.

    Maintenance reality

    Annual inspection is non-negotiable. Aluminum dramatically reduces long-term risk in coastal zones.


    Humid tropical climates (rainfall, heat, vegetation)

    Typical conditions

    • Frequent rain
    • Warm temperatures
    • Organic debris buildup (pollen, leaves)

    Best materials

    • Aluminum
    • Corten steel (with airflow)

    Materials to avoid

    • Flush-mounted steel
    • Designs with horizontal water traps

    Finish guidance

    • Powder coating acceptable only with proper airflow
    • Avoid recessed crevices that collect moisture

    Hidden risk

    Organic debris retains moisture and creates corrosion hotspots behind the artwork, even if the front looks clean.

    Maintenance reality

    Cleaning is less important than keeping airflow paths open. Standoff mounting is essential.


    Hot, dry climates (intense sun, large temperature swings)

    Typical conditions

    • High UV exposure
    • Day–night temperature shifts
    • Low humidity

    Best materials

    • Aluminum
    • Powder-coated steel with UV-stable pigments

    Materials to avoid

    • Thin coatings
    • Dark gloss finishes in full sun

    Finish guidance

    • Light or neutral colors age more evenly
    • Matte finishes hide thermal stress better

    Hidden risk

    Thermal expansion and contraction slowly fracture coatings. This happens invisibly before rust appears.

    Maintenance reality

    Visual inspections for cracking matter more than cleaning. Heat stress, not moisture, is the enemy.


    Cold and freeze-thaw climates (snow, ice, seasonal moisture)

    Typical conditions

    • Freeze–thaw cycles
    • Snow melt exposure
    • Condensation during temperature changes

    Best materials

    • Aluminum
    • Galvanized or high-quality powder-coated steel

    Materials to avoid

    • Poorly sealed steel edges
    • Designs that trap water at the bottom

    Finish guidance

    • Sealed edges and drainage paths are critical
    • Avoid flush mounting against masonry

    Hidden risk

    Water expands when frozen, widening microscopic coating failures. This accelerates corrosion internally.

    Maintenance reality

    Spring inspections are crucial. Catch damage after winter before it propagates.


    Mild temperate climates (moderate rain, limited extremes)

    Typical conditions

    • Balanced humidity
    • Limited temperature extremes

    Best materials

    • Aluminum
    • Powder-coated steel
    • Corten steel (design-driven choice)

    Materials to avoid

    • Untreated indoor-only metals

    Finish guidance

    • Broad flexibility
    • Aesthetic choice matters more than survival here

    Hidden risk

    Complacency. Mild climates still corrode metal slowly if drainage and airflow are ignored.

    Maintenance reality

    Low effort, but not zero. Even mild climates benefit from yearly checks.

    Climate-driven material selection summary table

    Climate ZoneSafest MaterialAcceptable AlternativeHighest Risk Choice
    CoastalAluminumCorten steelCoated steel
    Humid / TropicalAluminumCorten steelFlush steel
    Hot / DryAluminumUV-stable steelDark gloss finishes
    Cold / Freeze-thawAluminumGalvanized steelPoorly sealed steel
    Mild / TemperateAluminumPowder-coated steelIndoor-only metal

    This table compresses decades of outdoor failure patterns into one glance.


    How climate should influence design choice (Not just material)

    Material alone is not enough. Climate should influence design geometry.

    • Wet climates benefit from open designs with negative space
    • Hot climates benefit from thinner profiles to reduce heat stress
    • Windy regions benefit from multi-point mounting designs
    • Cold climates benefit from downward-draining shapes

    Design that ignores climate fails even when the material is correct.


    Region-specific examples: how outdoor metal wall art behaves in the real world

    Outdoor metal wall art succeeds or fails based on regional exposure patterns, not just general climate labels. Below are concrete, geography-based examples that reflect how metal behaves in practice, not theory.

    United States (by major exposure zones)

    Coastal United States (California coast, Florida, Carolinas)

    Primary threats
    • Salt air corrosion
    • Constant humidity
    • Wind-driven moisture
    What works best
    • Aluminum wall art with standoff mounting
    • Corten steel used away from white stucco or concrete
    What fails most often
    • Powder-coated steel mounted flush to walls
    • Decorative steel with thin coatings
    Hidden insight

    Even when rain is minimal, salt in the air alone corrodes steel. Many failures occur on shaded walls where moisture lingers longer.


    Southwestern US (Arizona, Nevada, inland California)

    Primary threats
    • Intense UV radiation
    • Extreme day–night temperature swings
    What works best
    • Aluminum
    • Powder-coated steel with UV-stable pigments
    What fails most often
    • Dark gloss finishes
    • Thin coatings that crack under heat stress
    Hidden insight

    In desert regions, coatings fail from thermal fatigue, not rust. Cracks form first, corrosion follows later.


    Northern US & Canada (Midwest, Northeast)

    Primary threats
    • Freeze–thaw cycles
    • Snow melt and condensation
    What works best
    • Aluminum
    • Galvanized steel with sealed edges
    What fails most often
    • Steel with unsealed lower edges
    • Art mounted where snow accumulates beneath it
    Hidden insight

    Damage accelerates in early spring when melting snow repeatedly wets and dries the same surfaces.


    United Kingdom & Western Europe

    UK, Ireland, Netherlands

    Primary threats
    • Persistent dampness
    • Limited drying cycles
    What works best
    • Aluminum
    • Corten steel with good airflow
    What fails most often
    • Flush-mounted steel
    • Designs with horizontal ledges
    Hidden insight

    Corrosion often starts on the backside of the artwork because walls stay damp longer than the air.


    Southern Europe (Spain, Italy, Greece)

    Primary threats
    • Strong sunlight
    • Coastal salt exposure
    What works best
    • Aluminum
    • Light-colored powder-coated steel
    What fails most often
    • Dark finishes in direct sun
    • Steel without UV-rated coatings
    Hidden insight

    UV degradation shows before rust. Fading is the early warning sign.


    Middle East (Gulf & arid regions)

    UAE, Saudi Arabia, Qatar

    Primary threats
    • Extreme heat
    • Wind-borne sand
    • Coastal salt air in many cities
    What works best
    • Aluminum (dominant choice)
    • Minimalist designs with fewer crevices
    What fails most often
    • Steel art with complex cutouts
    • Glossy finishes that show abrasion
    Hidden insight

    Sand acts as a micro-abrasive, slowly wearing down coatings even without rain.


    South Asia:

    Pakistan, India (urban & semi-urban)

    Primary threats
    • Monsoon humidity
    • Dust accumulation
    • Air pollution
    What works best
    • Aluminum
    • Powder-coated steel with standoff mounts
    What fails most often
    • Flush-mounted steel
    • Poor fasteners that corrode faster than the art
    Hidden insight

    Pollution particles accelerate corrosion by holding moisture against surfaces longer than clean dust.


    Southeast Asia

    Malaysia, Indonesia, Thailand

    Primary threats
    • Constant humidity
    • Biological growth (mold, algae nearby)
    What works best
    • Aluminum
    • Open designs with strong airflow
    What fails most often
    • Dense steel designs
    • Art mounted near vegetation
    Hidden insight

    Metal may survive, but surrounding biological growth can trap moisture and create localized corrosion zones.


    Australia & New Zealand

    Coastal Australia

    Primary threats
    • Salt air
    • Strong sun
    What works best
    • Aluminum
    • Marine-grade powder coatings
    What fails most often
    • Decorative steel imported without climate adaptation
    Hidden insight

    Australian sun accelerates both fading and coating brittleness faster than many regions.


    Africa

    North Africa (Mediterranean & desert edges)

    Primary threats
    • Heat
    • Dust
    • Coastal salt in some regions
    What works best
    • Aluminum
    • Corten steel in architectural settings
    What fails most often
    • Thin painted steel
    Hidden insight

    Dust buildup is more damaging than rainfall because it traps moisture overnight.


    Why region-specific thinking matters (Mentor synthesis)

    Two homes can have identical metal wall art.
    One lasts 20 years.
    The other fails in 4.

    The difference is rarely the product.
    It’s exposure alignment.

    Most buyers ask, “Is this outdoor-safe?”
    Experts ask, “Is this safe here?”

    That distinction is why region-specific guidance separates authority content from décor blogs.

    Where outdoor metal wall art works best

    Outdoor metal wall art performs well on:

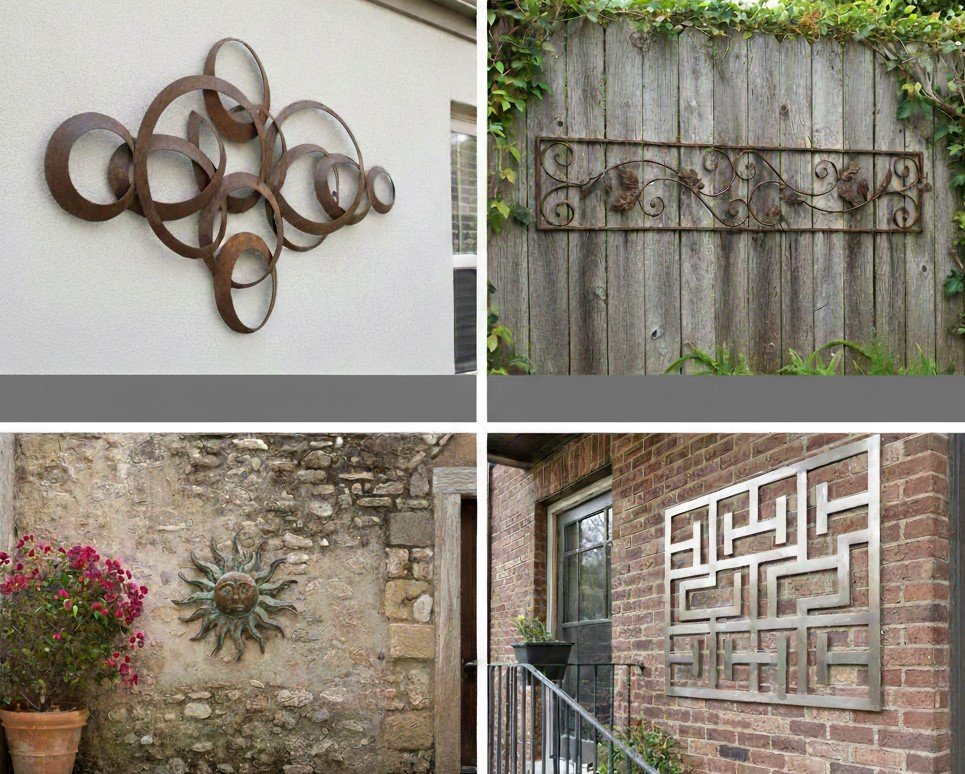
    • Exterior feature walls
    • Garden walls and fences
    • Patios and courtyards
    • Covered verandas and balconies

    Fully exposed walls require the highest-grade materials and coatings.

    Outdoor metal wall art performs best when:

    • Installed on vertical, well-drained surfaces
    • Not exposed to constant water flow
    • Protected from ground splashback
    • Positioned where airflow is unrestricted

    Covered patios extend lifespan dramatically without compromising visual impact.


    Mounting outdoor metal wall art safely

    Outdoor mounting must account for wind, vibration, and moisture.

    Outdoor mounting must address three forces:

    • Gravity
    • Wind uplift
    • Moisture accumulation

    Best practices:

    • Use stainless steel or galvanized fasteners
    • Avoid trapping water behind the artwork
    • Use standoff mounts to allow airflow
    • Secure heavy pieces into masonry or studs

    Improper mounting shortens lifespan more than weather alone.

    Maintenance expectations for outdoor metal wall art

    Outdoor metal wall art does not fail suddenly. It fails quietly and progressively. The purpose of maintenance is not to keep the art looking new, but to interrupt corrosion pathways before they become structural.

    What most guides never explain is that 95% of damage happens behind the artwork, not on the visible face.

    What actually needs maintenance (and what doesn’t)

    Outdoor metal wall art does not require:

    • Polishing
    • Frequent washing
    • Seasonal recoating (unless specified)
    • Cosmetic perfection

    It does require:

    • Periodic inspection of edges, fasteners, and rear surfaces
    • Early intervention when coatings are breached
    • Ensuring airflow and drainage remain unobstructed

    Neglecting inspection is what shortens lifespan, not exposure alone.

    The invisible enemy: trapped moisture

    Moisture trapped between metal and wall is more destructive than rain exposure. Dust, pollen, and organic debris act like sponges, holding water against the metal for extended periods.

    This is why stand-off mounting and rear ventilation are not optional extras. They are lifespan multipliers.

    How long does outdoor metal wall art last?

    Lifespan should be understood in phases, not years.

    Phase 1: Visual integrity

    This is when the art looks exactly as intended. For aluminum, this phase can last decades. For powder-coated steel, it may last 5–10 years depending on exposure.

    Phase 2: Controlled aging

    Minor fading, patina development, or surface texture changes appear. At this stage, the artwork is still structurally sound. Corten steel spends most of its life in this phase by design.

    Phase 3: Structural risk

    This phase begins when corrosion spreads beneath coatings or fasteners loosen due to vibration. Without intervention, damage accelerates exponentially.

    Maintenance determines whether Phase 2 lasts five years or twenty.


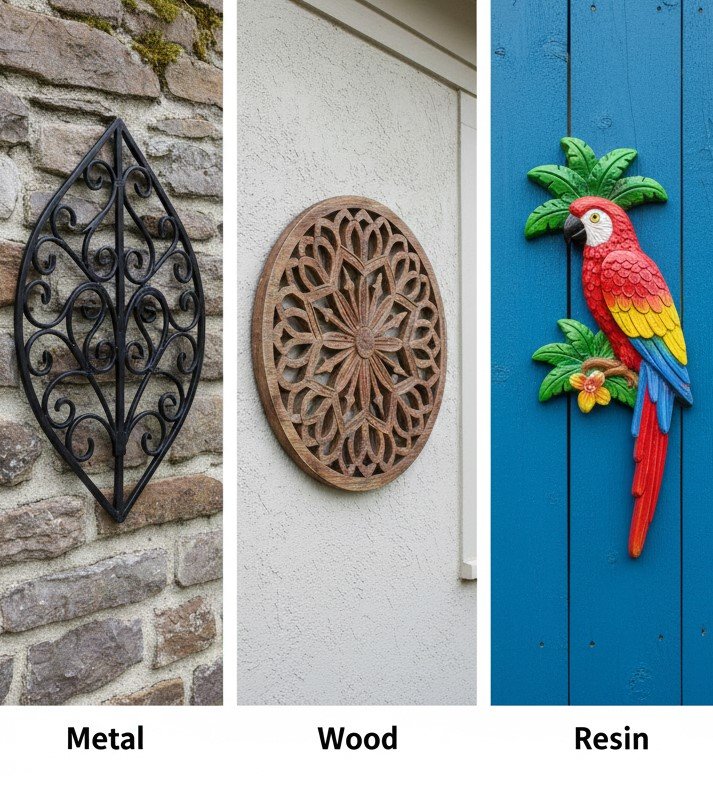
    Outdoor metal wall art vs stone, wood, and resin

    Metal outperforms wood and resin in durability. Wood requires frequent sealing. Resin fades and cracks. Stone is durable but heavy and limited in design flexibility.

    Metal offers the best balance of design freedom and structural longevity.

    The true comparison is not appearance, but total ownership cost.

    Wood

    • Requires sealing every 1–3 years
    • Susceptible to rot, insects, and warping
    • Often fails structurally before it looks damaged

    Resin

    • UV degradation causes brittleness
    • Cracking is irreversible
    • Lighter weight hides structural weakness

    Stone

    • Extremely durable
    • Limited design flexibility
    • High wall load and installation cost

    Metal sits in the optimal middle. It balances durability, design freedom, and maintainability better than any alternative when chosen correctly.

    Common mistakes people make with outdoor metal wall art

    • Using indoor-rated pieces outdoors
    • Ignoring drainage and airflow
    • Mounting directly against walls
    • Choosing glossy finishes for full sun exposure
    • Assuming “rust-proof” means maintenance-free

    These mistakes explain most negative experiences.

    Most mistakes are conceptual, not practical.

    Mistake 1: Believing “rust-proof” means maintenance-free

    No metal system is maintenance-free outdoors. “Rust-resistant” means slower failure, not immunity.

    Mistake 2: Ignoring fasteners

    Fasteners often fail before the artwork. Using non-rated screws introduces galvanic corrosion, even when the artwork itself is sound.

    Mistake 3: Treating walls as neutral surfaces

    Exterior walls absorb moisture. Mounting metal directly against stucco, brick, or concrete creates a moisture reservoir that accelerates corrosion.

    Mistake 4: Choosing aesthetics over climate

    A design that works beautifully in a dry climate may fail rapidly in coastal or tropical regions.

    Most negative experiences trace back to one of these errors.

    How to choose outdoor metal wall art before buying

    Ask five questions:

    1. Is the material explicitly outdoor-rated?
    2. What coating or finish is used?
    3. How will it be mounted and ventilated?
    4. What climate will it face year-round?
    5. Am I comfortable with natural aging or patina?

    Clear answers mean fewer regrets.

    Beyond basic questions, experts ask deeper ones:

    • Are edges sealed or raw?
    • Are mounting points isolated from the main surface?
    • Is the coating thickness specified or vague?
    • Has the design accounted for thermal expansion?
    • Will runoff stain adjacent surfaces?

    High-quality outdoor metal art answers these questions implicitly through design, not marketing language.


    Outdoor Metal Wall Art

    Outdoor metal wall art placement by location type

    Exterior house walls

    These walls often trap heat and moisture. North-facing walls retain moisture longer. South-facing walls receive maximum UV. Placement should consider orientation, not just aesthetics.

    Garden walls and fences

    Ground proximity increases splashback contamination. Elevating the artwork even slightly above ground level reduces exposure significantly.

    Courtyards

    Courtyards create microclimates. Limited airflow can trap humidity. Designs with more negative space perform better here.

    Balconies

    Wind shear and vibration matter more than rain. Secure mounting and vibration-resistant fasteners are critical.

    Wind load and vibration considerations

    Wind does not need to be extreme to cause damage.

    Repeated micro-movements loosen fasteners, enlarge mounting holes, and fracture coatings around stress points. Over time, this creates entry points for moisture.

    Designs with:

    • Multiple mounting points
    • Distributed weight
    • Slight flexibility

    perform better than rigid, single-point mounts.

    This is rarely discussed but crucial for longevity.

    Drainage, airflow, and wall protection

    Airflow is corrosion control.

    Even a 5–10 mm gap behind the artwork allows evaporation to occur. Without this gap, moisture cycles accelerate corrosion dramatically.

    Drainage matters because water will always find the lowest point. Designs that trap water at horizontal edges fail faster than those with downward-facing geometry.

    Wall protection matters because staining and wall degradation often occur before metal failure, creating secondary damage.


    The psychology of outdoor metal wall art aging

    Outdoor Metal Wall Art

    Unlike indoor décor, outdoor metal art is expected to age. The key is predictable aging.

    Corten steel ages visibly but honestly. Aluminum changes subtly. Powder-coated steel should age slowly and evenly.

    Problems arise when aging is patchy, unexpected, or uncontrolled. Understanding and accepting the intended aging path is part of a good purchase decision.

    When outdoor metal wall art is the wrong choice

    Outdoor metal wall art is durable, but it is not universal. Knowing when not to use it prevents wasted money and premature failure.

    1. Constant water exposure zones

    If the wall is regularly soaked by sprinklers, roof runoff, or ground splashback, metal wall art is a poor choice unless fully marine-rated aluminum is used.

    Continuous wetting defeats most coatings faster than weather exposure alone.

    2. Walls with no mounting flexibility

    Outdoor metal wall art should not be installed where:

    • Standoff mounting is impossible
    • Airflow behind the piece is blocked
    • Fasteners cannot be properly anchored

    Flush mounting against damp masonry dramatically shortens lifespan.

    3. Extremely high-traffic or impact-prone areas

    In narrow walkways, public-facing walls, or areas where objects regularly hit the surface, metal art suffers coating damage that quickly becomes corrosion entry points.

    In these locations, stone or recessed wall treatments perform better.

    4. Environments where visual aging is unacceptable

    Metal ages honestly.

    If the space requires a permanently pristine appearance with zero tolerance for fading, patina, or texture change, outdoor metal wall art may not align with expectations.

    Corten steel, in particular, should be avoided in such cases.

    5. Highly corrosive industrial zones

    Areas with heavy chemical pollution, industrial exhaust, or acidic airborne particles accelerate coating breakdown beyond normal climate models.

    In these environments, even aluminum may require frequent inspection.

    6. When maintenance access is impossible

    Outdoor metal wall art assumes periodic inspection.

    If the installation location makes access unsafe or impractical, selecting materials that require no inspection at all (such as stone) may be the better long-term decision.


    Why Homeaholic treats outdoor metal wall art differently

    Outdoor Metal Wall Art

    At Homeaholic, outdoor metal wall art is evaluated the same way exterior architectural elements are evaluated: by exposure tolerance, material truth, and lifecycle behavior.

    This approach rejects trend-driven selection in favor of environmental realism. Outdoor décor must coexist with weather, not fight it.

    That philosophy is what separates decorative failure from lasting installation.

    Frequently Asked Questions

    Can outdoor metal wall art be used in coastal areas?

    Yes, but aluminum or corten steel is strongly recommended.

    Will outdoor metal wall art stain walls?

    Corten steel may stain during early weathering. Proper spacing prevents this.

    Can outdoor metal wall art be repainted?

    Yes, but surface preparation is critical for adhesion.

    Does outdoor metal wall art attract heat?

    Dark finishes absorb heat but do not damage exterior walls when mounted with airflow.

    Is outdoor metal wall art safe in high winds?

    Yes, when mounted securely with appropriate fasteners.Can outdoor metal wall art be used indoors later?
    Yes, once cleaned and stabilized.


  • Metal Wall Art: The Complete Indoor Guide for Modern Homes

    Metal wall art is a durable, sculptural form of indoor wall décor made from steel, iron, or aluminum. It adds depth, texture, and long-term visual impact compared to canvas or prints, making it ideal for modern living rooms, bedrooms, offices, and feature walls.

    What is metal wall art, exactly?

    Metal wall art is decorative artwork crafted from metal sheets or rods and designed to be mounted on interior walls. Unlike printed art, it creates physical depth through cutouts, layering, and shadows. Most indoor pieces are laser-cut or welded, then finished with paint or powder coating for protection and color stability.

    Metal art is a form of interior wall décor created from solid or layered metal components that are cut, shaped, and finished for visual display. Unlike flat artwork such as canvas prints or posters, metal wall art introduces physical depth, meaning the artwork interacts with light and shadow throughout the day.

    Most indoor metal wall art is produced using laser cutting or CNC cutting, allowing precise patterns, clean edges, and consistent thickness. Designs range from abstract silhouettes to detailed geometric or botanical forms. Because the artwork is structural rather than printed, it becomes part of the room’s architecture rather than a surface decoration.

    A key distinction is that metal wall art is not defined by color alone. Its visual impact comes from negative space, layering, and the way it stands slightly away from the wall. This is why metal art often looks different depending on lighting conditions and viewing angle, something flat artwork cannot achieve.


    What materials are used in indoor metal wall art?

    Metal Wall Art indoor

    Short answer: steel, iron, and aluminum dominate indoor use.

    Steel is the most common because it balances strength and cost. Iron feels heavier and more industrial, often used in bold statement pieces. Aluminum is lightweight and corrosion-resistant, making it easier to mount on drywall. For indoor settings, corrosion resistance matters less than finish quality and edge treatment.

    Indoor metal wall art commonly uses three primary materials, each with practical implications.

    Steel is the most widely used material. It offers strength, rigidity, and affordability. Steel allows thin profiles without bending and works well for medium to large pieces. For indoor use, steel is almost always coated, so corrosion is not a concern in normal living conditions.

    Iron is heavier and often used in more traditional or industrial-style designs. It gives a sense of solidity but requires more careful mounting due to weight. Iron is less common in minimalist interiors but remains popular for bold statement pieces.

    Aluminum is significantly lighter than steel or iron. It’s ideal for large wall art where weight is a concern or for rental properties where mounting flexibility matters. Aluminum does not rust, which adds a margin of safety even in humid indoor environments.

    For indoor décor, material choice is less about weather resistance and more about weight, finish quality, and edge precision.

    Which finishes work best for indoor spaces?

    Short answer: powder-coated and matte finishes perform best indoors.

    Powder coating seals the surface evenly, resists chipping, and keeps colors stable over time. Matte black remains the most popular because it reduces glare and fits modern interiors. Hand-painted finishes add character but need more careful cleaning. Glossy finishes reflect light and should be used sparingly in bright rooms.

    Finish quality determines how metal wall art ages over time.

    Powder-coated finishes are the most reliable for indoor use. The coating is baked onto the metal, forming a uniform protective layer that resists chipping and fading. Matte powder coats are especially popular because they reduce glare and hide fingerprints.

    Painted finishes offer more artistic variation but are more sensitive to scratches. Hand-painted metal art often has unique texture but should be placed in low-contact areas.

    Raw or distressed finishes are sometimes used intentionally for industrial interiors. These should always be sealed for indoor use to prevent residue or staining on walls.

    Finish choice affects not only appearance but also cleaning frequency, durability, and how forgiving the surface is to daily life.


    Is metal wall art heavy and safe to hang indoors?

    Metal Wall Art indoor

    Short answer: most indoor metal wall art is safe on drywall when mounted correctly.

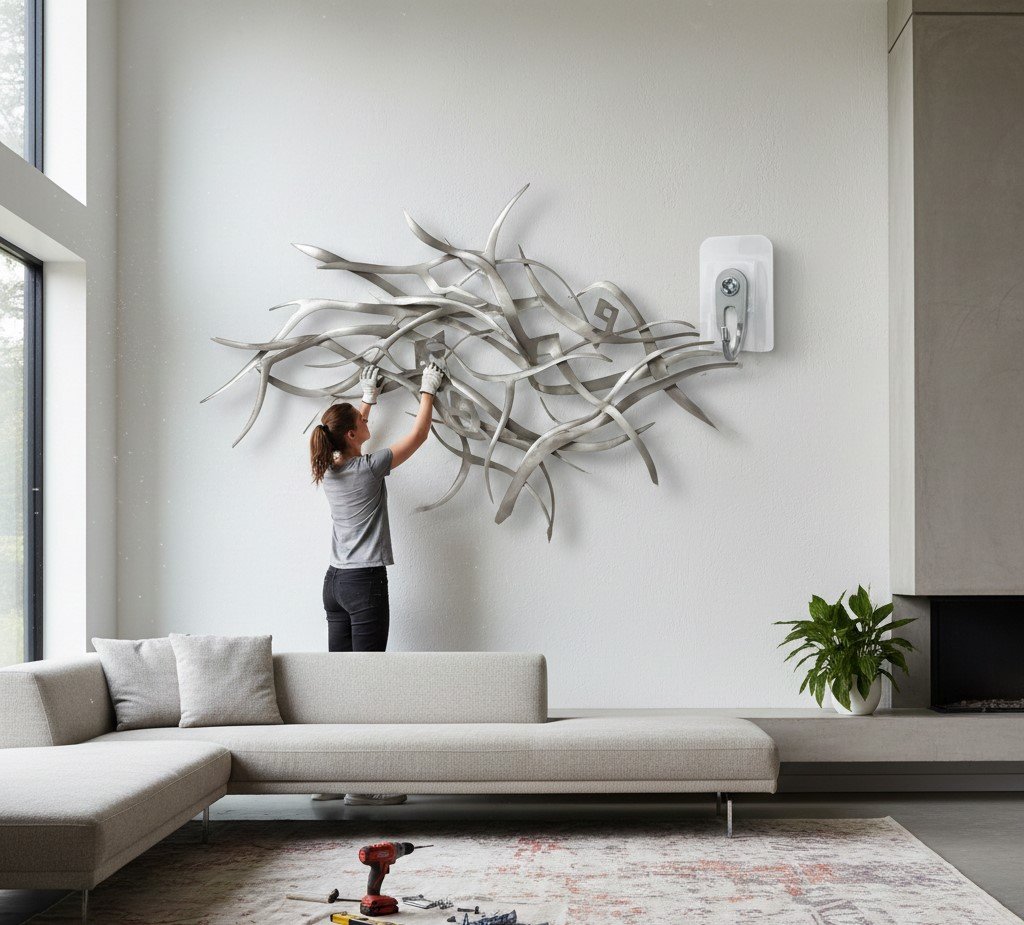
    Small to medium pieces usually weigh between 2 and 8 kg. Proper mounting matters more than weight. Keyhole slots, wall anchors, or standoff mounts distribute load safely. For large pieces placed above sofas or beds, stud mounting is recommended for peace of mind.

    Weight alone does not determine safety. Mounting design does.

    Most indoor metal wall art weighs between 2 kg and 12 kg, depending on size and thickness. Well-designed pieces distribute this weight evenly using rear mounting points, keyhole slots, or standoff systems.

    For drywall installation:

    • Lightweight to mid-weight pieces can use quality wall anchors
    • Larger pieces should be mounted into studs or masonry
    • Standoff mounts reduce pressure on paint and drywall

    Safety concerns usually arise from improper installation, not the artwork itself. A correctly mounted metal wall piece is as safe as a mirror or shelving unit.

    How do you choose the right size for your wall?

    Short answer: fill 60–75% of the available wall width.

    Above a sofa, metal wall art should be roughly two-thirds the sofa width. In dining areas, horizontal pieces work better than tall vertical designs. Oversized art works best on uncluttered walls where shadows can breathe. Triptychs suit long corridors or wide feature walls.

    Scale is one of the most misunderstood aspects of wall décor.

    A reliable guideline is the 60–75% rule. The artwork should occupy roughly two-thirds of the width of the furniture below it. Smaller pieces tend to look lost, while oversized pieces overwhelm confined spaces.

    Vertical designs work best on tall walls or staircases. Horizontal pieces suit sofas, beds, and dining tables. Multi-panel designs allow flexibility and visual rhythm across wide surfaces.

    Spacing matters as much as size. Metal wall art benefits from visual breathing room, allowing shadows to form naturally.


    Does metal wall art work with all interior styles?

    Metal Wall Art indoor

    Short answer: yes, if the design matches the space.

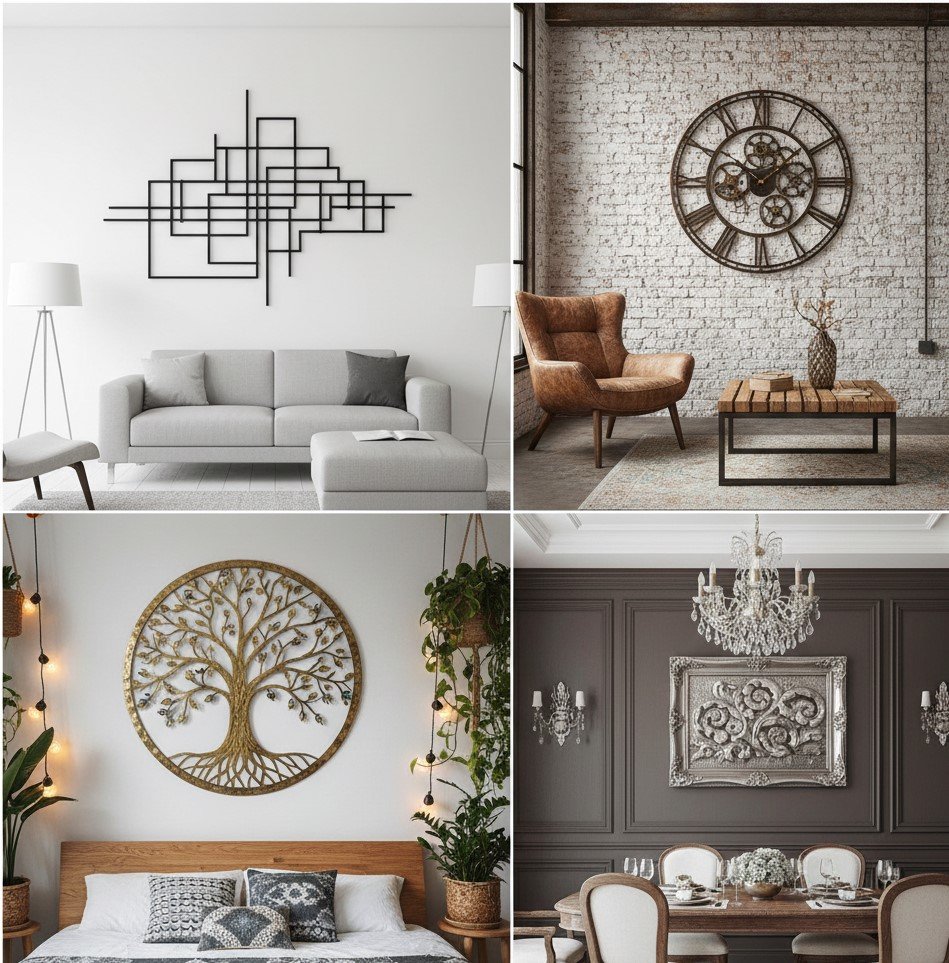
    Modern and minimalist rooms pair well with geometric or abstract metal designs. Industrial interiors favor raw or dark finishes. Floral or organic metal art softens contemporary spaces. In neutral rooms, metal art often becomes the focal point without overpowering furniture.

    Metal wall art adapts to most interiors because design, not material, defines compatibility.

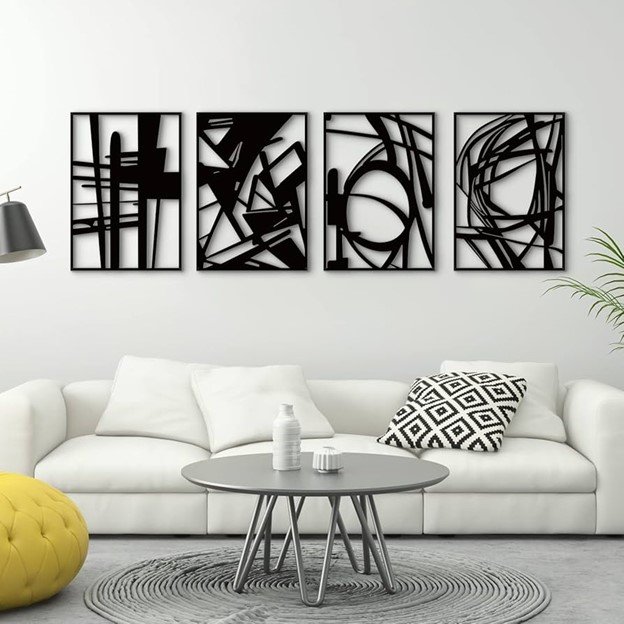
    • Modern interiors favor geometric, linear, or abstract designs
    • Minimalist spaces benefit from single-piece silhouettes
    • Industrial rooms pair well with darker finishes and layered metal
    • Transitional interiors often use organic or nature-inspired patterns

    The neutrality of metal allows it to act as a visual anchor without clashing with textiles, wood, or stone.

    Metal wall art is style-agnostic only when design, finish, and scale are chosen intentionally. The mistake many guides make is claiming universal compatibility without explaining why or how. In reality, metal wall art adapts because it functions as a structural visual element, not a decorative surface.

    What matters is not the metal itself, but how its form language aligns with the room.

    Modern and contemporary interiors

    Modern interiors favor clarity and restraint. Metal wall art works exceptionally well here because it introduces contrast without visual noise. Clean lines, geometric forms, and negative space reinforce the architectural feel of modern rooms.

    Matte black, charcoal, or monochrome finishes integrate seamlessly. Designs with sharp edges or continuous outlines echo modern furniture and lighting profiles. In these spaces, metal wall art often replaces traditional paintings entirely.

    Minimalist interiors

    Minimalism demands discipline. One strong piece is better than several smaller ones.

    Metal wall art suits minimalist spaces when it acts as a singular focal anchor. Thin-profile designs, single-color finishes, and simple silhouettes prevent clutter. The shadows created by metal add depth without adding objects.

    The key mistake to avoid in minimalist rooms is over-detail. Intricate or busy designs break the visual calm.

    Industrial and loft-style interiors

    Industrial interiors almost seem designed for metal art, but they still require control.

    Raw textures, exposed brick, concrete walls, and visible ductwork pair naturally with metal. Darker finishes, layered metal designs, or heavier visual weight feel appropriate here. Industrial spaces can support larger and bolder pieces without overwhelming the room.

    However, untreated raw metal should still be sealed indoors to prevent dust residue and wall staining.

    Scandinavian and neutral interiors

    Scandinavian interiors rely on light, balance, and warmth. Metal wall art works here when it is visually light, not physically heavy.

    White, soft gray, or muted metallic finishes blend well with pale walls and natural wood. Organic shapes or nature-inspired designs prevent the metal from feeling cold or harsh.

    In these spaces, metal wall art should complement the room, not dominate it.

    Traditional and transitional interiors

    Metal wall art can work in traditional spaces, but only with the right design language.

    Curved forms, floral motifs, symmetrical patterns, and warmer finishes integrate better than abstract geometry. Thin black metal often feels too modern here, while bronze or dark neutral tones feel more at home.

    In transitional interiors, metal wall art acts as a bridge between classic furniture and modern accents.


    How metal wall art influences visual balance in a room

    Metal Wall Art indoor

    Metal wall art affects how a room feels proportionally.

    Because it has physical depth, it carries more visual weight than flat artwork. This means placement matters. Centering a heavy metal piece on a narrow wall can make the room feel compressed. On a wide wall, the same piece can ground the space.

    Vertical designs visually raise ceiling height. Horizontal designs widen the room. This makes metal wall art a subtle architectural tool, not just decoration.

    How texture and negative space change room perception

    Metal wall art introduces negative space, areas where the wall shows through the design.

    Negative space reduces visual density and prevents the artwork from feeling bulky. This is why large metal wall art often feels lighter than large canvas pieces of the same size.

    Texture also plays a role. Smooth surfaces feel modern and controlled. Cut or layered textures add depth and interest, especially on plain walls.

    When metal wall art does NOT work well indoors?

    There are situations where metal wall art is a poor choice.

    • Extremely small rooms with busy walls
    • Spaces already overloaded with décor
    • Rooms with fragile wall surfaces and no mounting flexibility
    • Interiors where softness and fabric dominate every surface

    In these cases, metal can feel intrusive rather than complementary. Knowing when not to use metal wall art is a sign of good design judgment.


    How metal wall art interacts with furniture and layout

    Metal wall art should relate to furniture, not float independently.

    Above sofas, beds, or consoles, the artwork should visually anchor the furniture. A common mistake is hanging metal wall art too high, which disconnects it from the room’s layout.

    The bottom edge should typically sit 20–30 cm above furniture. This keeps the visual flow grounded and intentional.

    Color psychology and metal wall art finishes

    Color matters even when the art is metal.

    Black communicates strength and structure. White feels airy and calm. Metallic tones introduce sophistication but can reflect light unpredictably.

    In neutral interiors, metal wall art often replaces color with form-based contrast, which feels more timeless than trend-based palettes.

    Why metal wall art feels “timeless” compared to other décor

    Metal wall art ages differently.

    It does not rely on printed imagery, pop culture, or seasonal color trends. Its appeal comes from form, proportion, and material presence. This is why metal wall art often stays relevant even as furniture, textiles, or paint colors change.

    This longevity is one of the strongest reasons people choose metal wall art for primary living spaces.


    Metal wall art vs canvas or framed prints

    Short answer: metal lasts longer and adds depth.

    Canvas and prints rely on color and imagery. Metal wall art adds texture, shadow, and structure. It does not sag, fade easily, or warp with humidity. For long-term interior décor, metal holds visual authority better, especially in high-traffic rooms.

    Canvas and framed prints rely on imagery. Metal wall art relies on form.

    Canvas can fade, stretch, or warp over time. Frames collect dust and require alignment. Metal wall art maintains its structure indefinitely under indoor conditions.

    Another key difference is permanence. Metal wall art is chosen less frequently but kept longer, making it better suited for feature walls and long-term interior planning.


    Metal wall art by room type: what actually works in real homes

    Art performs differently depending on how a room is used, how long people stay in it, and how visual weight is distributed. Treating all rooms the same is a common design error. Below is room-specific logic that helps users choose correctly and helps search systems understand applied intent.

    Metal wall art for living rooms

    The living room is where metal wall art performs best and is most commonly used.

    Living rooms can support larger scale pieces because walls are usually wider and furniture layouts are more stable. Metal wall art works especially well above sofas, sectionals, or console tables where it visually anchors the seating area.

    Best practices:

    • Choose a width that fills 60–75% of the sofa width
    • Horizontal or multi-panel designs work better than tall vertical pieces
    • Matte or textured finishes reduce glare from windows and TVs
    • Avoid overly intricate designs if the room already has strong patterns

    In living rooms, metal wall art often replaces traditional framed artwork because it feels more architectural and permanent.

    Metal wall art for bedrooms

    Bedrooms require restraint.

    Metal wall art works best when it supports calm and balance rather than visual dominance. Above the bed, safety and weight distribution become more important than scale.

    Best practices:

    • Choose lightweight designs or aluminum when mounting above beds
    • Prefer organic, flowing shapes over sharp geometry
    • Keep finishes matte to avoid reflective distraction
    • Maintain adequate clearance above headboards

    In bedrooms, metal wall art should feel intentional but quiet, adding texture without disrupting rest.

    Metal wall art for dining rooms

    Dining rooms benefit from metal wall art because walls are often uninterrupted and visible for long periods.

    Metal designs with symmetry or rhythm work well here. Horizontal pieces above sideboards or centered feature walls help define the dining zone.

    Best practices:

    • Align artwork with the center of the dining table, not the wall
    • Avoid high-gloss finishes that reflect overhead lighting
    • Use designs that complement table shape and lighting fixtures

    In dining spaces, metal wall art often reinforces a sense of formality and structure.

    Metal wall art for home offices

    Home offices demand clarity, not distraction.

    Metal wall art works when it reinforces focus and professionalism. Abstract or geometric designs outperform decorative or narrative art in workspaces.

    Best practices:

    • Place art within peripheral vision, not directly behind screens
    • Use minimal designs with clean lines
    • Keep size moderate to avoid visual dominance
    • Neutral finishes reduce mental fatigue

    In professional environments, metal wall art often communicates intentional design and stability, which subtly affects how the space feels during long work sessions.

    Metal wall art for hallways and corridors

    Hallways are transition spaces, which makes them ideal for metal wall art.

    Long, narrow walls benefit from linear or multi-panel metal designs that guide the eye forward. Because people move through hallways quickly, bold shapes work better than fine detail.

    Best practices:

    • Use slimmer profiles to avoid physical intrusion
    • Maintain consistent spacing if using multiple pieces
    • Vertical designs help visually stretch short corridors

    Metal wall art in hallways adds identity to otherwise overlooked spaces.

    Metal wall art for staircases

    Staircases are visually complex areas, but metal wall art can enhance them when planned correctly.

    Vertical compositions work well alongside stairs because they mirror upward movement. The key is alignment, not symmetry.

    Best practices:

    • Follow the slope of the staircase visually
    • Use lighter designs to avoid visual heaviness
    • Avoid sharp protrusions near handrails

    Metal wall art in staircases often becomes a signature feature of the home.

    Metal wall art for entryways and foyers

    Entryways form first impressions.

    Metal wall art works here when it is clear, confident, and uncluttered. Oversized pieces can work surprisingly well if the wall is open and unobstructed.

    Best practices:

    • Choose a single statement piece
    • Keep mounting height aligned with eye level
    • Avoid overly detailed designs that require close inspection

    In entry spaces, metal wall art sets the tone for the rest of the interior.


    Small rooms vs large rooms: scaling rules that matter

    Metal wall art does not scale linearly.

    Small rooms need visual lightness, not small art. Thin designs with open negative space work better than compact, dense pieces. Large rooms can support both scale and complexity.

    A common mistake is shrinking artwork too much in small spaces, which makes walls feel unfinished rather than balanced.

    Ceiling height considerations

    Ceiling height influences orientation.

    • Low ceilings benefit from vertical designs
    • High ceilings allow stacked or layered compositions
    • Avoid placing heavy horizontal art too high on tall walls

    Metal wall art can subtly correct proportions when orientation is chosen deliberately.

    Room-by-room metal wall art comparison table

    Room TypeRecommended Size RangeBest MaterialFinish PreferenceMounting MethodKey Design Rule
    Living Room90–180 cm width (or triptych)Steel or AluminumMatte black, texturedWall anchors or studsFill 60–75% of sofa width
    Bedroom60–120 cm widthAluminum or thin steelMatte, low-glareStuds or heavy anchorsPrioritize safety and calm
    Dining Room80–150 cm widthSteelMatte or satinAnchors or studsAlign with table center
    Home Office50–100 cm widthAluminumNeutral matteAnchorsAvoid visual distraction
    HallwayLinear or multi-panelAluminumMatteAnchorsGuide eye through space
    StaircaseVertical compositionsAluminum or steelMatteStudsFollow stair direction
    Entryway70–140 cm widthSteelMatte or subtle metallicAnchors or studsSingle statement piece

    How to read this table correctly

    Many readers misinterpret size recommendations.

    The size range refers to visual width, not wall width. A 150 cm metal wall art piece does not need a 150 cm wall. It needs enough negative space around it to allow shadows and form to breathe.

    Material choice is driven by weight tolerance and mounting flexibility, not durability for indoor use.

    Common mis-matches this table helps avoid

    • Heavy steel art above beds without stud support
    • Oversized art in narrow hallways
    • Glossy finishes in rooms with strong natural light
    • Dense designs in already busy interiors

    Avoiding these mismatches prevents regret and reinstallation.

    How to test placement before installing

    Before installation:

    • Measure the artwork and mark dimensions with painter’s tape
    • Step back and view from typical seating positions
    • Observe lighting changes throughout the day
    • Confirm anchor points and wall structure

    This planning step prevents most placement regrets and reinstallation damage.


    Will metal wall art damage walls or paint?

    Short answer: not when mounted correctly.

    Most quality pieces include spacers or rear mounts that prevent direct wall contact. Felt pads or standoff mounts eliminate friction marks. Damage usually comes from poor installation, not the material itself.

    Quality indoor metal wall art is designed to minimize wall contact.

    Rear spacers, felt pads, or standoff mounts prevent abrasion. Damage typically occurs when artwork is mounted flush without protection or shifted repeatedly. Once installed correctly, metal wall art remains stable and does not rub against the wall surface.

    Does indoor metal wall art rust?

    Short answer: no, if it’s made for indoor use.

    Indoor metal wall art is sealed with paint or powder coating. Rust only becomes a concern in bathrooms or kitchens with constant moisture. Even there, coated steel performs well with basic ventilation.

    Rust is not a concern for indoor metal wall art when it’s properly finished.

    Powder-coated or sealed metal resists oxidation. Even in kitchens or bathrooms, normal ventilation is sufficient to prevent moisture buildup. Rust issues usually indicate poor coating quality or misuse of outdoor-unrated pieces indoors.


    How do lighting and shadows affect metal wall art?

    Lighting is part of the design.

    Metal wall art interacts with light differently than flat décor. Directional lighting creates shadows that enhance depth. Soft ambient lighting produces subtle contrast. Glossy finishes reflect light, while matte finishes absorb it.

    This dynamic quality is one reason metal wall art remains visually engaging over time.

    How do you clean and maintain metal wall art?

    Short answer: dry dusting is usually enough.

    Use a soft microfiber cloth. Avoid abrasive sponges or chemical cleaners. For fingerprints, a lightly damp cloth works. Indoor metal wall art typically needs attention only a few times a year.

    Maintenance is minimal.

    A microfiber cloth removes dust. For smudges, a lightly damp cloth is enough. Avoid abrasive cleaners or chemical sprays. Indoor metal wall art does not require polishing, sealing, or special treatments.

    How long does indoor metal wall art last?

    Short answer: 10–25 years with minimal care.

    Quality indoor pieces outlast most wall décor. Powder-coated finishes retain color and structure for decades. Unlike wood or canvas, metal does not warp, stretch, or sag.

    Well-made indoor metal wall art can last 10 to 25 years or longer.

    The metal itself does not degrade under indoor conditions. Lifespan depends almost entirely on finish quality and mounting stability. Compared to most décor materials, metal has one of the longest functional lifespans.


    Is metal wall art suitable for rental homes?

    Short answer: yes, with removable anchors.

    Lightweight aluminum pieces and smaller steel designs can be mounted using removable drywall anchors. This allows clean removal without major wall repair.

    Yes, especially when weight is considered.

    Aluminum or thin steel pieces can be mounted with removable anchors. Many designs allow clean removal with minimal wall repair, making them suitable for temporary living spaces.

    What separates quality metal wall art from cheap pieces?

    Short answer: finish, edges, and mounting design.

    Quality pieces have smooth, deburred edges, consistent coating, and secure mounting points. Cheap art often has sharp edges, uneven paint, and weak hangers. The back of the piece usually reveals the truth.

    Several indicators reveal quality immediately:

    • Smooth, deburred edges
    • Even coating without bubbles or thin spots
    • Balanced mounting points
    • Rigid structure without flexing

    The back of the artwork often reveals whether it was designed thoughtfully or mass-produced cheaply.

    Common mistakes people make when buying metal wall art

    • Choosing size too small for the wall
    • Ignoring mounting requirements
    • Using glossy finishes in bright rooms
    • Buying outdoor-style art for indoor walls unnecessarily
    • Prioritizing price over finish quality

    Avoiding these mistakes prevents disappointment and reinstallation costs.

    How to plan metal wall art placement before buying

    Measure the wall. Mark approximate dimensions with tape. Observe lighting during the day. Check wall structure for studs or anchors. Planning reduces guesswork and ensures the artwork fits both visually and structurally.

    Metal wall art pre-purchase checklist (read this before buying)

    This checklist is designed to be scanned in under 30 seconds. If every box is mentally checked, the purchase decision is almost always correct.

    1. Wall type confirmed

    Know what you’re mounting into.

    • Drywall only
    • Drywall with studs
    • Concrete, brick, or tile

    Mounting failure is the #1 regret with metal wall art, not design choice.

    2. Correct size relative to furniture

    Ask one question only:
    Does the artwork visually anchor the furniture below it?

    If it fills less than half the furniture width, it’s too small.
    If it touches nearby elements, it’s too large.

    3. Weight matches mounting reality

    Heavier is not better.

    • Aluminum is ideal when flexibility matters
    • Steel is fine when studs or anchors are available
    • Oversized steel without stud access is a red flag

    Always match material to wall structure.

    4. Finish matches lighting conditions

    Observe the room during daylight and evening.

    • Bright rooms need matte or textured finishes
    • Directional lighting exaggerates gloss
    • Neutral finishes age better than trendy colors

    Light reflection mistakes are permanent annoyances.

    5. Design complexity matches room density

    Busy rooms need simple art.
    Minimal rooms can support complexity.

    If the wall already has shelves, lighting, or patterns, choose open designs with negative space.

    6. Mounting system is visible and logical

    Flip the piece mentally.

    Quality metal wall art has:

    • Clean rear mounting points
    • Balanced weight distribution
    • Spacers or standoffs to protect walls

    If mounting feels improvised, the product likely is.

    7. Clearance and safety checked

    Especially important above beds, sofas, and dining tables.

    • Bottom edge should not sit directly above head level
    • No sharp protrusions near walkways
    • Stud mounting preferred for heavy pieces

    Safety confidence matters more than visual drama.

    8. Longevity expectation aligned

    Ask yourself this honestly:
    Would I still like this design in five years?

    Metal wall art is not seasonal décor. The best pieces survive furniture changes, repainting, and layout shifts.


    Why Homeaholic treats metal wall art as a long-term décor choice

    At Homeaholic, metal wall art is positioned as a structural décor investment, not a seasonal accessory. The focus is on indoor-safe materials, balanced weight, refined finishes, and mounting designs that work in real homes, not showrooms.

    Frequently Asked Questions

    Is metal wall art outdated or still trendy?

    Metal wall art remains popular because it adapts to modern and minimalist interiors without relying on trends.

    Can metal wall art be hung on tile or concrete walls?

    Yes. Masonry anchors or concrete screws work well with heavier pieces.

    Does metal wall art reflect too much light?

    Matte and textured finishes minimize glare. Glossy finishes should be used carefully.

    Is metal wall art safe above a bed?

    Yes, when stud-mounted or installed with heavy-duty anchors.

    Can metal wall art be customized in size or shape?

    Many designs allow custom scaling, but weight and mounting must be adjusted accordingly.

    Does metal wall art fade over time?

    Indoor pieces with quality coatings resist fading far better than prints or canvas.


  • Mini Pendant Lights: The Complete Practical Guide for Kitchens and Beyond

    Short answer: Mini pendant lights are compact hanging fixtures designed to deliver focused, controlled lighting without visually overwhelming a space. When selected, spaced, and installed correctly, they outperform larger pendants and many ceiling fixtures in kitchens, dining areas, and task-focused zones by combining function, balance, and long-term flexibility.

    Mini pendant lights are not a trend item. They are a response to how modern homes are used. Kitchens have become workspaces, social zones, and visual focal points. Lighting in these areas must work harder, not louder. This guide explains how mini pendant lights actually work, when they succeed, when they fail, and how to use them without regret.

    What Are Mini Pendant Lights and How Do They Differ From Standard Pendants?

    Mini pendant lights are scaled-down pendant fixtures, typically featuring smaller shades, narrower profiles, and lighter visual weight than standard or oversized pendants. Their purpose is not decoration first. Their purpose is precision lighting.

    Standard pendants are often chosen as statement pieces. They draw attention and visually anchor a room. Mini pendant lights behave differently. They are designed to be used in multiples, spaced deliberately, and aligned with work surfaces rather than dominating them.

    The most important differences are scale and intent. A standard pendant might be 12 to 20 inches wide and intended to stand alone. A mini pendant is usually under 10 inches wide and intended to work as part of a system. Because of this, mini pendants offer more control over spacing, brightness distribution, and visual balance.

    Another key difference is adaptability. Mini pendant lights can be rearranged, replaced, or updated without redesigning an entire room. That makes them safer long-term choices in kitchens and multi-use spaces where layouts evolve.


    Why Mini Pendant Lights for Kitchen Are Best?

    Mini Pendant Lights

    Mini pendant lights are best for kitchens because kitchens demand task accuracy, visual clarity, and balance, not just brightness.

    Kitchens are where chopping, reading, pouring, and serving happen. Overhead lighting alone often creates shadows on countertops because the light source is behind the person working. Mini pendant lights solve this by positioning light directly above the work surface, reducing shadowing and improving visibility exactly where it is needed.

    Scale is another reason mini pendants work better than large fixtures in kitchens. Kitchen islands are long and horizontal. A single large pendant often looks heavy and creates uneven lighting. Multiple mini pendant lights distribute light evenly across the island while maintaining visual openness. Sightlines remain clear, which is especially important in open-plan kitchens.

    Mini pendants also allow layout flexibility. They can be spaced to match island length, cabinet alignment, or seating placement. This control is not possible with one oversized fixture.

    Equally important, mini pendant lights layer well with other kitchen lighting. They complement recessed lights, under-cabinet lighting, and ambient ceiling fixtures rather than competing with them. This layered approach is what creates kitchens that feel bright without being harsh.

    Finally, mini pendants add style without locking the kitchen into a single aesthetic. Because they are smaller and easier to replace, they allow future updates without major renovation.

    How Many Mini Pendant Lights Should You Use Over a Kitchen Island?

    The correct number of mini pendant lights depends on island length, pendant width, and the visual balance you want to achieve.

    As a practical rule, most kitchen islands work best with two to four mini pendant lights. Short islands often look best with two. Longer islands typically require three. Very long islands may support four, but only if spacing and scale are handled carefully.

    The mistake most people make is assuming more pendants equal better lighting. Overcrowding pendants creates visual clutter and can actually reduce usable light by overlapping light pools.

    Island length should guide the decision. A 5- to 6-foot island usually supports two mini pendants. A 7- to 8-foot island often needs three. Islands longer than 9 feet may support four, but only if the pendants are very slim.

    Visual balance matters as much as math. Sometimes fewer pendants look better and function just as well when paired with strong recessed or under-cabinet lighting. The goal is even illumination without visual noise.


    How Far Apart Should Mini Pendant Lights Be Spaced?

    Mini Pendant Lights

    Spacing determines whether mini pendant lights look intentional or awkward.

    Spacing is measured center to center, not edge to edge. In most kitchens, mini pendants are spaced 24 to 30 inches apart. However, this is not a fixed rule. Shade width, island length, and ceiling height all affect ideal spacing.

    Wider shades need more space to breathe. Narrow, cylindrical pendants can be spaced closer together. The key is visual rhythm. The gaps between pendants should feel equal and proportional to the island below.

    Another common mistake is centering pendants strictly on the island length without considering seating or cabinet alignment. In many kitchens, aligning pendants with bar stools or cabinet panels creates a more cohesive look.

    Spacing should also prevent light overlap. When pendants are too close, light pools merge and create glare rather than clarity.

    How High Should Mini Pendant Lights Hang Above Counters and Tables?

    Height errors are one of the most common reasons pendant lighting fails.

    Over kitchen counters and islands, mini pendant lights usually hang 30 to 36 inches above the countertop. This height provides sufficient task lighting while keeping sightlines open.

    Over dining tables, pendants typically hang slightly lower, around 28 to 34 inches above the table surface, because diners are seated and glare risk is lower.

    Ceiling height matters. In rooms with higher ceilings, pendants may hang slightly higher to maintain proportion. In lower ceilings, adjustable cords or shorter drops are essential to avoid head clearance issues. The purpose of correct height is comfort. Pendants that hang too low block views and cause glare. Pendants that hang too high lose their task-lighting advantage and behave like weak ceiling lights.


    Are Mini Pendant Lights Bright Enough for Kitchens?

    Mini Pendant Lights

    Mini pendant lights can be bright enough, but they are rarely sufficient on their own.

    Each mini pendant typically produces localized brightness. This is excellent for task zones but does not always fill the entire room evenly. For this reason, mini pendants work best as part of a layered lighting system.

    In kitchens, mini pendants are usually paired with recessed ceiling lights and under-cabinet lighting. Together, these layers provide both general illumination and focused task lighting.

    Trying to compensate by using extremely bright bulbs in mini pendants often creates glare and discomfort. It is better to use moderate brightness and rely on supporting lights for overall coverage.

    What Bulbs and Color Temperature Work Best in Mini Pendant Lights?

    Bulb choice dramatically affects comfort and appearance.

    For kitchens, bulbs between 2700K and 3000K provide warm but clear light. Cooler temperatures can feel harsh and uninviting, especially in the evening.

    Brightness should usually fall between 400 and 800 lumens per pendant, depending on shade opacity and number of pendants used.

    Dimmable bulbs are strongly recommended. They allow the same fixture to serve both task and ambient roles at different times of day.


    What Dimming Options Work Best for Mini Pendant Lights?

    Mini Pendant Lights

    Short answer: Dimmable mini pendants are worth it because kitchens shift from task lighting to ambient lighting throughout the day.

    A kitchen is not one lighting scenario. Cooking needs clarity, but evenings often need softer light. Dimming is what makes mini pendant lights feel premium and adaptable.

    There are three common dimming approaches:

    • Wall dimmers (most common)
    • Smart dimming via smart bulbs or smart switches
    • Integrated dimming controls built into the fixture

    Compatibility matters. Not all LED bulbs dim smoothly, and not all dimmers work well with modern LED drivers. Poor dimming creates flicker or buzzing, which instantly lowers perceived quality.

    The safest approach for most households is:

    • A quality wall dimmer rated for LED
    • Dimmable LED bulbs
    • Warm to neutral color temperature

    This also improves energy efficiency without sacrificing function.

    How Do You Choose the Right Size Mini Pendant Lights?

    Short answer: Choose mini pendants based on shade diameter, ceiling height, and the surface size below, not just style.

    Mini pendant size is usually defined by shade diameter and visual bulk. In most homes, “mini” pendants fall in the 4–8 inch diameter range, but the right size depends on what they hang over.

    Over a kitchen island, size must match the island’s length and depth. A shade that is too wide makes the island feel crowded. A shade that is too small looks underpowered and may not distribute light well.

    A practical way to avoid proportion mistakes is to balance three factors:

    • Surface size (island or table width and length)
    • Fixture count (two, three, or four pendants)
    • Visual openness (open-plan kitchens need lighter visual weight)

    If the kitchen already has strong visual elements such as bold cabinetry or thick range hoods, smaller and simpler mini pendants tend to look more intentional. If the kitchen is minimalist, slightly larger mini pendants can add needed presence without becoming heavy.


    Mini Pendant Lights

    What Mini Pendant Light Styles and Materials Work Best?

    Short answer: The best style is the one that matches your kitchen’s finishes and controls glare through shade material.

    Materials affect both appearance and performance.

    • Clear glass looks airy but can cause glare unless paired with frosted bulbs or filament-style bulbs that are not harsh.
    • Frosted or opal glass diffuses light and is usually the safest choice for comfort.
    • Metal shades direct light downward and are excellent for task lighting, but they can create strong shadows if used alone.
    • Fabric shades soften light but are less common in kitchens due to grease and dust maintenance.
    • Mixed materials (metal plus glass, wood accents) work well in transitional kitchens.

    Style alignment should be intentional. Matte black, brushed nickel, and warm brass are common finishes because they integrate easily with faucets and cabinet hardware. The goal is not matching every element perfectly. The goal is coherent repetition of finishes.

    This is also where long-term flexibility matters. Choosing a neutral finish with a classic shape helps the fixture survive future kitchen updates.

    Should You Use Clear Glass Mini Pendant Lights or Frosted Glass?

    Short answer: Frosted glass is usually better for comfort, while clear glass is better for visual lightness but needs glare control.

    Clear glass mini pendants are popular because they feel lightweight and don’t visually block space. The tradeoff is glare. If the bulb is exposed, you’ll see bright points of light at eye level, especially when seated at an island.

    Frosted or opal glass diffuses the bulb and spreads light more evenly. This typically creates a calmer kitchen atmosphere and reduces eye strain.

    If you prefer clear glass, you can reduce glare by:

    • Using lower-lumen bulbs and adding support lighting
    • Choosing bulbs with a frosted finish
    • Using dimmers to control brightness at night
    • Avoiding ultra-cool color temperatures

    This section matters because clear-glass glare is one of the biggest hidden sources of buyer regret.


    Where Else Can Mini Pendant Lights Be Used Besides Kitchens?

    Mini pendant lights are often associated with kitchen islands, but limiting them to kitchens leaves significant functional and design potential unused. Their compact scale and directional light make them suitable for several other areas where traditional fixtures underperform.

    In dining areas, mini pendant lights work especially well over rectangular or narrow tables. Instead of a single chandelier that can feel oversized or cast uneven light, two or three mini pendants provide balanced illumination while keeping the visual focus on the table. This approach also makes dining spaces feel more intimate without sacrificing brightness.

    In bedrooms, mini pendant lights are increasingly used as bedside lighting. Hanging pendants on either side of the bed frees up nightstand space and provides focused reading light without glare. This is particularly effective in smaller bedrooms where table lamps consume valuable surface area.

    Bathrooms are another strong use case. Mini pendants installed over vanity areas can replace or supplement wall sconces, especially in modern or minimalist bathrooms. When placed correctly, they provide direct task lighting for grooming while adding vertical interest to the space.

    Mini pendant lights also work well in hallways and entryways, where they offer visual guidance and soft illumination without overwhelming narrow spaces. In these areas, scale matters more than brightness, and mini pendants strike the right balance.

    Finally, home bars, breakfast nooks, and stair landings benefit from mini pendant lighting because these areas often need accent lighting rather than full-room illumination. Mini pendants help define these zones without introducing bulky fixtures.

    Are Mini Pendant Lights Good for Dining Tables?

    Short answer: Yes, mini pendants work very well over dining tables, especially in sets of two or three for longer tables.

    For dining tables, the goal is even table illumination without harsh downward glare. Mini pendants excel when:

    • The table is long or rectangular
    • You want a lighter visual look than a chandelier
    • You want adjustable brightness for mood settings

    Mini pendants can also be used to create symmetry in dining areas, especially when the table is centered under a ceiling junction box that would otherwise force a single large fixture.

    The key difference versus kitchens is comfort. Dining light should feel warm and flattering. Warmer bulbs and diffused shades usually perform better here than metal shades designed for task light.


    Mini Pendant Lights vs One Large Pendant: Which Is Better?

    Choosing between multiple mini pendant lights and a single large pendant is less about style preference and more about function, proportion, and flexibility.

    A single large pendant acts as a focal point. This works well in spaces where the fixture itself is meant to draw attention, such as a formal dining room or a high-ceiling entryway. However, in most functional areas, large pendants create uneven lighting. Brightness concentrates in one spot, leaving surrounding areas dim.

    Mini pendant lights distribute light more evenly across a surface. This makes them better suited for islands, long tables, and work zones where consistent illumination matters. They also allow better alignment with furniture, seating, or architectural elements.

    Another advantage of mini pendants is adaptability. If one pendant fails or needs replacement, it can be addressed individually. With a large pendant, any change affects the entire lighting scheme. From a visual standpoint, mini pendants maintain openness. Large pendants can block sightlines, especially in open-plan homes. Mini pendants preserve flow and make spaces feel less crowded.


    Do Mini Pendant Lights Work With Low or Sloped Ceilings?

    Mini pendant lights can work in low or sloped ceilings, but only when selected with precision.

    For low ceilings, the key is minimizing drop length and shade size. Short-stem or cord-adjustable mini pendants prevent head clearance issues and reduce visual clutter. Flush or semi-flush alternatives should be considered if ceiling height is extremely limited.

    In sloped ceilings, compatibility depends on the mounting system. Some mini pendants are designed with swivel canopies that allow vertical hanging even when the ceiling is angled. Without this feature, pendants may hang awkwardly or direct light incorrectly.

    Shade design also matters. Narrow or cylindrical shades perform better in constrained spaces because they focus light downward without expanding visually outward. Wide shades can exaggerate ceiling limitations.

    When low or sloped ceilings are ignored during selection, mini pendants become liabilities rather than assets. When accounted for correctly, they remain highly effective.

    Do Mini Pendant Lights Need Support Lighting or Can They Stand Alone?

    Mini pendant lights rarely function well as the sole light source in a room. Their strength lies in focused illumination, not broad coverage.

    In kitchens, they pair best with recessed ceiling lights and under-cabinet lighting for balanced illumination. For dining areas, ambient wall or ceiling lighting helps prevent harsh contrast between lit and unlit spaces. When used in bedrooms, mini pendants work best alongside ceiling fixtures or wall sconces.

    The mistake many people make is assuming brightness equals coverage. A mini pendant can feel bright directly beneath it while leaving surrounding areas dim. This creates visual imbalance and eye strain. Layered lighting solves this problem. Mini pendants handle task and accent lighting, while other fixtures provide ambient coverage. Together, they create comfort and flexibility.

    Can You Install Mini Pendant Lights Yourself or Should You Hire a Professional?

    Short answer: If you’re replacing an existing fixture with the same wiring, DIY may be possible, but multiple pendants, new wiring, and sloped ceilings usually require a professional.

    Mini pendant installations vary in complexity.

    DIY is often reasonable when:

    • There is already a ceiling junction box
    • You are replacing one fixture with one fixture
    • No new electrical work is needed

    Professional installation is strongly recommended when:

    • Installing multiple pendants across an island
    • Moving junction boxes or adding new ones
    • Working with sloped ceilings or complex canopies
    • Kitchens require precise alignment and spacing

    This is not just about safety. It’s also about visual precision. Poor alignment makes even expensive mini pendants look cheap.

    How Much Do Mini Pendant Lights Cost and What Affects the Price?

    Short answer: Cost depends on materials, finish quality, brand, and whether the pendant uses integrated LED or standard bulbs.

    Mini pendant lights range widely in price. The most important price drivers are:

    • Glass quality and thickness
    • Finish durability (cheap finishes scratch and fade)
    • Canopy and wiring quality
    • Bulb type and dimming compatibility
    • Integrated LED design and warranty support

    Instead of shopping by price alone, evaluate value through:

    • Comfort (glare control)
    • Durability (finish and build)
    • Flexibility (bulb replacement, dimming, adjustability)

    A mid-range pendant with good diffusion and reliable dimming often outperforms a cheaper pendant that looks good in photos but fails in daily use.


    How Do You Plan Mini Pendant Lighting With Other Kitchen Lights?

    Short answer: Plan mini pendants as task and visual anchors, then use recessed and under-cabinet lighting for coverage.

    Mini pendant lights should not be treated as the only lighting layer in a kitchen. A complete plan typically looks like this:

    • Mini pendants over islands for focused task light
    • Under-cabinet lighting for countertops
    • Recessed lights for general coverage and navigation
    • Optional accent lighting for depth

    This prevents the “spotlight island” problem where the island is bright but the rest of the kitchen feels dim.

    The simplest rule is distribution. Many small, controlled light sources create a better kitchen than one overly bright source.

    How Mini Pendant Lights Affect Visual Balance and Room Proportion

    Lighting is not just about illumination. It affects how a room feels and how its proportions are perceived.

    Mini pendant lights emphasize vertical lines. This can make ceilings feel taller when used correctly. In contrast, oversized fixtures can compress vertical space, especially in rooms with standard ceiling heights.

    Using multiple small pendants instead of one large fixture helps distribute visual weight evenly. This is especially important in open spaces where lighting is visible from multiple angles.

    In minimalist or modern interiors, mini pendants reinforce clean lines and intentional spacing. In traditional interiors, they can provide contrast without overpowering decorative elements.

    Maintenance, Cleaning, and Long-Term Care of Mini Pendant Lights

    Mini pendant lights are generally low-maintenance, but neglecting upkeep affects both appearance and performance.

    Dust accumulation on shades reduces light output and dulls finishes. Regular light cleaning with a microfiber cloth keeps fixtures performing as intended. In kitchens, grease buildup may require gentle cleaning solutions.

    Bulb accessibility should also be considered. Fixtures that make bulb changes difficult become frustrating over time. Choosing pendants with easy access reduces maintenance friction.

    Finish durability matters long-term. Painted finishes may chip in high-use areas, while metal and glass finishes typically age better.


    Safety and Installation Considerations You Should Not Ignore

    Installation quality directly affects safety and performance.

    Mini pendant lights must be securely mounted and properly wired. Loose fixtures create vibration, noise, and potential hazards. In kitchens and bathrooms, moisture-rated fixtures are essential.

    Weight limits matter, especially when installing multiple pendants on shared mounting systems. Exceeding these limits risks ceiling damage.

    Professional installation is often recommended when adjusting ceiling wiring, installing multiple pendants, or working with sloped ceilings.

    Are Mini Pendant Lights a Good Long-Term Investment?

    Mini pendant lights are a strong long-term choice because they balance durability, adaptability, and timeless design.

    Unlike trend-driven fixtures, their simple forms age well. They can be updated with new bulbs or shades without replacing the entire fixture. This makes them cost-effective over time.

    Their ability to adapt to layout changes also adds value. When kitchens or dining areas are remodeled, mini pendants often remain usable with minor adjustments.

    When Mini Pendant Lights Are the Wrong Choice

    Despite their versatility, mini pendant lights are not always appropriate.

    They are poor choices in rooms requiring uniform overhead illumination without layering. They may also feel unnecessary in spaces where wall or recessed lighting already performs well.

    Recognizing when not to use mini pendants is part of making smart lighting decisions.


    Final Guidance Before You Choose Mini Pendant Lights

    Mini pendant lights succeed when function leads design. They fail when selected purely for appearance.

    If you define the task, respect proportions, layer lighting properly, and account for ceiling conditions, mini pendants deliver clarity, balance, and longevity.

    Used thoughtfully, they are not just fixtures. They are tools.

    FAQs

    1) What are mini pendant lights?

    Mini pendant lights are small hanging ceiling fixtures, usually under 10 inches wide, designed to provide focused light over a specific area like a kitchen island, bar, or table.

    2) How many mini pendant lights should you use over a kitchen island?

    Most kitchen islands look best with 2–3 mini pendant lights. Use 2 for shorter islands, 3 for longer islands, and only use 4 when the island is very long and the pendants are slim.

    3) How far apart should mini pendant lights be spaced?

    A common spacing range is 24–30 inches center-to-center. Wider shades need more spacing, while narrow cylinder pendants can be spaced slightly closer.

    4) How high should mini pendant lights hang above a countertop?

    Mini pendant lights typically hang 30–36 inches above the countertop. This keeps sightlines open and delivers usable task light without glare.

    5) Are mini pendant lights bright enough for a kitchen?

    Mini pendants provide strong task lighting over the island but usually do not replace full kitchen lighting. They work best with recessed lights and under-cabinet lights for complete coverage.

    6) What size mini pendant light should you choose?

    Choose size based on the surface below and visual balance. In most kitchens, mini pendants with a 4–8 inch diameter work well, especially when used in pairs or sets of three.

    7) Is clear glass or frosted glass better for mini pendant lights?

    Frosted glass is better for comfort because it diffuses light and reduces glare. Clear glass looks lighter but often needs careful bulb selection and dimming to avoid harsh brightness.

    8) What bulbs and color temperature are best for mini pendant lights?

    For kitchens, use LED bulbs around 2700K–3000K for warm-clean light. Aim for a high CRI (90+) to keep food and finishes looking natural.

    9) Do mini pendant lights work with low ceilings or sloped ceilings?

    Yes, but you need the right hardware. For low ceilings, choose short drops or compact shades. For sloped ceilings, use pendants with a sloped-ceiling canopy or adjustable hanging system.

    10) Can you install mini pendant lights yourself?

    DIY is possible when replacing an existing fixture with the same wiring. If you’re installing multiple pendants, moving junction boxes, or working with sloped ceilings, hiring a professional is safer and usually looks cleaner.

  • Floor Lamps Explained: Types, Placement, Brightness, and How to Choose the Right One

    Floor lamps are one of the most flexible and underrated lighting solutions in a home. They add light exactly where it’s needed, shape the mood of a room, and often eliminate the need for harsh overhead lighting. The right floor lamp depends on its purpose, brightness in lumens, height, shade design, and placement. When chosen correctly, a floor lamp improves comfort, visibility, and visual balance without permanent installation.

    This guide breaks down everything you need to know about floor lamps, from types and measurements to glare control, safety, and smart features, so you can choose with confidence rather than guesswork.

    What Are Floor Lamps and How Do They Work?

    Short answer: Floor lamps are free-standing light fixtures designed to provide ambient, task, or accent lighting without ceiling installation.

    A floor lamp works by positioning a light source at standing height, allowing it to distribute light horizontally or upward instead of straight down like ceiling fixtures. This changes how light interacts with walls, furniture, and people in the room.

    Unlike table lamps, floor lamps can:

    • Light larger areas
    • Reach above furniture lines
    • Be moved easily as layouts change

    Most floor lamps consist of four core parts: a base for stability, a vertical pole or arm, a light source, and a shade or diffuser. How these elements are combined determines the lamp’s function, brightness spread, and visual style.

    Floor lamps are often used as part of layered lighting, where ambient, task, and accent lighting work together to create comfort and depth.


    What Are the Main Types of Floor Lamps?

    Floor Lamps

    Short answer: Different floor lamp types are designed for different lighting purposes and room layouts.

    Understanding floor lamp types prevents buying a lamp that looks good but performs poorly. Below are the most common types and what they are best used for.

    Arc Floor Lamps

    Arc lamps feature a curved arm that extends outward, allowing the light to hover over seating areas or tables. They are ideal when you want overhead-style lighting without ceiling fixtures. Arc lamps work best in living rooms beside sofas or sectionals.

    Tripod Floor Lamps

    Tripod lamps use three legs for support and often feature decorative shades. They balance style and function and work well as ambient lighting in living rooms and bedrooms.

    Torchiere (Uplighter) Lamps

    Torchiere lamps direct light upward toward the ceiling. This creates soft, indirect ambient light. They are excellent for rooms that feel dark or cramped but are not ideal for reading tasks on their own.

    Task or Reading Floor Lamps

    These lamps provide focused, directional light and are designed for reading or close work. They usually have adjustable arms or heads and higher brightness.

    Column and Shelf Floor Lamps

    Column lamps distribute light evenly along a vertical structure, while shelf lamps combine lighting with storage. These are best for ambient lighting and decorative purposes.

    Each type solves a different problem. Choosing based on use is more important than choosing based on appearance alone.


    How Do You Choose the Right Floor Lamp for Your Room?

    Floor Lamps

    Short answer: Choose based on purpose first, then size, brightness, and style.

    Before looking at styles or finishes, answer one question: What do you want the lamp to do?

    • If the goal is reading, you need focused light with sufficient lumens.
    • If the goal is mood or ambiance, indirect or shaded lamps work better.
    • If the goal is filling a dark corner, height and light spread matter most.

    Next, consider room size and furniture scale. A tall lamp with a wide shade can overwhelm a small room, while a short lamp may disappear next to a large sectional.

    Finally, style should support the room rather than compete with it. Floor lamps act as visual anchors, so they should echo materials, finishes, or shapes already present.

    How Many Lumens Should a Floor Lamp Have?

    Short answer: Most floor lamps need between 800 and 1,600 lumens, depending on use.

    Lumens measure brightness, not wattage. Choosing the wrong lumen level is one of the most common floor lamp mistakes.

    Floor Lamp Brightness Guide

    Use CaseRecommended Lumens
    Soft ambient lighting400–800 lm
    General room lighting800–1,200 lm
    Reading or task lighting1,000–1,600 lm
    Dark corners or large rooms1,600+ lm

    Reading lamps should deliver enough light directly onto the task area without lighting the entire room. Ambient lamps should spread light gently without harsh shadows.

    Always consider whether the lamp is dimmable. Dimming allows flexibility and prevents over-lighting.


    What Height Should a Floor Lamp Be Next to a Sofa or Chair?

    Floor Lamps

    Short answer: The bottom of the shade should sit at or slightly below eye level when seated.

    Height determines comfort. A lamp that is too tall causes glare, while one that is too short creates shadows.

    General height guidelines:

    • Overall lamp height: 58–64 inches for seating areas
    • Shade bottom: at seated eye level or lower
    • Adjustable lamps: allow fine-tuning for reading

    Arc lamps often need extra height to clear furniture, while reading lamps benefit from lower, adjustable heads.

    Measuring before buying avoids awkward proportions.

    Where Should You Place a Floor Lamp in a Room?

    Short answer: Place floor lamps where they support seating, corners, or pathways without blocking movement.

    Common placements include:

    • Beside sofas or armchairs
    • In dark corners to visually expand space
    • Near walls to bounce light indirectly
    • Behind or beside sectionals

    Avoid placing lamps where cords cross walkways or where the base can be easily knocked over. Good placement improves both safety and lighting effectiveness.


    Floor Lamps

    Warm vs Cool Light: Which Color Temperature Is Best for Floor Lamps?

    Short answer: Warm light works best for living spaces, neutral light for tasks.

    Color temperature is measured in Kelvin (K). It affects how comfortable or energizing a room feels.

    • 2700–3000K: Warm, cozy, ideal for living rooms and bedrooms
    • 3500–4000K: Neutral, suitable for reading and work
    • 5000K+: Cool, rarely suitable for homes

    For most homes, warm or neutral light creates the best balance. Cooler light can feel harsh when used at eye level.

    What Is CRI and Why Does It Matter for Floor Lamps?

    Short answer: CRI measures how accurately light shows colors.

    CRI (Color Rendering Index) ranges from 0 to 100. Higher CRI means colors appear more natural.

    • CRI 80: Acceptable for general use
    • CRI 90+: Ideal for living spaces and reading

    A high CRI floor lamp makes rooms feel warmer and more comfortable, especially in the evening.


    How Do You Avoid Glare and Harsh Light From Floor Lamps?

    Floor Lamps

    Short answer: Control shade height, bulb type, and light direction.

    Glare occurs when light hits your eyes directly. To avoid it:

    • Choose opaque or fabric shades
    • Keep bulbs hidden below eye level
    • Use diffused or frosted bulbs
    • Avoid clear bulbs in open shades

    Indirect lighting, such as torchiere lamps or wall-bouncing light, reduces glare and eye strain.

    Are Smart Floor Lamps and Integrated LED Lamps Worth It?

    Short answer: They’re worth it for convenience, but not always flexibility.

    Smart floor lamps allow app control, scheduling, and voice commands. They are useful in modern smart homes but often cost more.

    Integrated LED lamps offer efficiency and slim designs but limit bulb replacement. If the LED fails, the entire lamp may need replacing. A flexible alternative is a standard floor lamp paired with a smart bulb. This approach offers control without long-term risk.
    Are Floor Lamps Safe Around Kids and Pets?

    Short answer: Yes, when stability and cord management are considered.

    Safety tips:

    • Choose lamps with heavy, wide bases
    • Avoid thin, top-heavy designs
    • Secure or hide cords
    • Avoid glass shades in active areas

    In homes with pets or children, stability matters as much as brightness.


    Floor Lamp vs Table Lamp: Which One Should You Choose?

    Short answer: Floor lamps light larger areas, table lamps offer localized light.

    Floor lamps:

    • Cover more space
    • Work well in corners and beside seating
    • Don’t require furniture surfaces

    Table lamps:

    • Offer focused light
    • Require tables or shelves
    • Are better for bedside use

    Many rooms benefit from using both together.

    What Are the Most Common Floor Lamp Buying Mistakes?

    Short answer: Choosing style over function.

    Common mistakes include:

    • Ignoring lumen output
    • Buying lamps that are too tall or short
    • Choosing clear shades that cause glare
    • Forgetting dimming options
    • Overlooking base stability

    A good-looking lamp that performs poorly quickly becomes frustrating.


    How to Match a Floor Lamp With Your Interior Style

    Short answer: Match materials and proportions, not trends.

    • Modern interiors suit clean lines and metal finishes
    • Scandinavian styles pair well with light wood and fabric shades
    • Industrial spaces favor metal and exposed elements
    • Traditional rooms benefit from warm finishes and classic shades

    The lamp should support the room’s style, not dominate it.

    When Can a Floor Lamp Replace Overhead Lighting?

    Short answer: When used in pairs or combined with wall lighting.

    In smaller rooms or apartments, multiple floor lamps can replace ceiling lights entirely. Using two or three lamps creates layered light without harsh shadows.

    This approach works especially well in living rooms and bedrooms.

    Floor Lamp Types vs Best Use Cases (Comparison Table)

    TypeBest ForLight DirectionTypical HeightKey Advantage
    ArcSofas, sectionalsDownwardTallOverhead reach
    TripodAmbient lightDiffusedMediumDecorative balance
    TorchiereRoom lightingUpwardTallSoft ambiance
    ReadingTask lightingAdjustableMediumFocused light
    ColumnMood lightingDiffusedTallEven glow

    Mini Case: Fixing a Dark Living Room With One Floor Lamp

    A small living room relied on a single ceiling light, creating harsh shadows. By adding a 1,200-lumen arc floor lamp beside the sofa and using a 3000K bulb, the space felt brighter and calmer. The ceiling light was rarely used afterward, reducing glare and improving comfort.

    Floor Lamp Buying Checklist

    • Define purpose (ambient, task, accent)
    • Choose correct lumen range
    • Check height relative to seating
    • Select proper shade type
    • Ensure base stability
    • Decide on dimming or smart features
    • Match materials to room style

    How Do Floor Lamps Fit Into a Layered Lighting Plan?

    Short answer: Floor lamps work best when combined with other light sources instead of acting alone.

    Professional lighting design relies on layered lighting, which combines three elements:

    • Ambient lighting for general brightness
    • Task lighting for focused activities
    • Accent lighting for depth and mood

    Floor lamps often sit between ambient and task lighting. A torchiere floor lamp supports ambient lighting by bouncing light off ceilings and walls. A reading floor lamp provides targeted task lighting without lighting the whole room.

    When floor lamps are layered correctly:

    • Overhead lights are used less often
    • Shadows are reduced
    • Rooms feel larger and calmer

    A common mistake is expecting one floor lamp to replace all lighting. Instead, floor lamps should support other light sources, such as table lamps or wall sconces. This creates balance rather than glare.


    Can Floor Lamps Improve Small Rooms and Apartments?

    Short answer: Yes, floor lamps often perform better than ceiling lights in small spaces.

    In small rooms, ceiling lights can feel harsh because light is concentrated in one spot. Floor lamps distribute light horizontally, which makes walls feel farther apart.

    Best floor lamp strategies for small rooms:

    • Use uplighters or shaded lamps instead of exposed bulbs
    • Place lamps in corners to visually expand space
    • Choose slim bases and vertical designs
    • Avoid wide shades that crowd furniture

    A tall floor lamp with upward light can visually raise the ceiling. This is especially useful in apartments with low ceilings or limited natural light. In studio apartments, floor lamps also help define zones, such as separating living and sleeping areas without physical dividers.

    How Do Floor Lamps Affect Mood and Eye Comfort?

    Short answer: Floor lamps create softer light that reduces eye strain and mental fatigue.

    Eye comfort is affected by:

    • Brightness level
    • Direction of light
    • Contrast between light and dark areas

    Ceiling lights often create high contrast, which forces the eyes to constantly adjust. Floor lamps reduce this by spreading light at eye level and across walls.

    Benefits of floor lamps for comfort:

    • Softer transitions between light and shadow
    • Reduced glare on screens and books
    • Less visual fatigue in the evening

    Warm color temperatures paired with diffused shades signal the body to relax. This is why floor lamps are commonly used in living rooms and bedrooms rather than kitchens or workspaces.

    What Bulb Type Is Best for Floor Lamps?

    Short answer: LED bulbs are the best choice for most floor lamps.

    Modern LED bulbs outperform older bulb types in almost every way:

    • Lower energy use
    • Less heat
    • Longer lifespan
    • Better dimming options

    When choosing an LED bulb for a floor lamp, focus on:

    • Lumens, not watts
    • Color temperature (2700–3000K for living spaces)
    • CRI rating (90+ preferred)

    Avoid ultra-cheap LEDs. Poor-quality bulbs flicker, hum, or fail early, especially in dimmable lamps.

    If your floor lamp uses an integrated LED module, check:

    • Expected lifespan in hours
    • Whether the LED is replaceable
    • Warranty coverage

    Integrated LEDs look sleek but reduce long-term flexibility.

    What Base Weight and Stability Should a Floor Lamp Have?

    Short answer: Heavier bases equal safer lamps.

    Stability is one of the most overlooked buying factors. A tall lamp with a narrow base is a tipping hazard, especially in homes with pets or children.

    General stability guidelines:

    • Base diameter should increase with lamp height
    • Marble or metal bases offer better weight distribution
    • Tripod lamps offer natural stability
    • Thin pole lamps need extra base weight

    Before buying, consider foot traffic and cord placement. A stable lamp not only prevents accidents but also feels more premium and intentional.


    How Do You Choose a Floor Lamp for Reading Without Eye Strain?

    Short answer: Choose focused light with correct height and angle.

    Reading floor lamps should:

    • Deliver 1,000–1,600 lumens
    • Have adjustable heads or arms
    • Aim light downward onto the page
    • Sit slightly behind or beside the reader

    Avoid lamps that shine directly into the eyes or reflect off glossy pages. A warm-neutral color temperature around 3000–3500K provides clarity without harshness.

    Adjustability matters more than brightness. The ability to fine-tune direction prevents shadows and glare.

    Are Floor Lamps Energy Efficient?

    Short answer: Yes, when paired with LED technology.

    A modern LED floor lamp typically uses 8–15 watts, compared to older incandescent lamps that used 60 watts or more.

    Energy efficiency benefits:

    • Lower electricity bills
    • Less heat output
    • Longer bulb life

    Dimmable lamps further reduce energy use by allowing lower brightness during evenings. Over time, LED floor lamps pay for themselves through reduced power consumption.

    How Do You Maintain and Clean Floor Lamps Properly?

    Short answer: Regular dusting and shade care preserve performance and appearance.

    Dust reduces brightness and dulls finishes. Maintenance tips:

    • Dust shades and bulbs monthly
    • Wipe metal or wood bases with a dry cloth
    • Avoid spraying cleaners directly onto electrical parts
    • Replace bulbs before they dim significantly

    Fabric shades trap dust and odors. Vacuum gently using a brush attachment or spot clean when needed.

    Clean lamps perform better and last longer.


    How Do Floor Lamps Compare Across Different Rooms?

    Short answer: Each room benefits from a different floor lamp role.

    Living Rooms

    • Arc lamps for seating
    • Tripod or column lamps for ambiance
    • Multiple lamps for layered lighting

    Bedrooms

    • Slim reading lamps beside chairs
    • Warm light for relaxation
    • Alternatives to bedside table lamps

    Home Offices

    • Task-focused lamps with neutral light
    • Adjustable heads to reduce screen glare

    Dining Areas

    • Accent lamps near sideboards
    • Soft light for atmosphere

    Matching the lamp’s purpose to the room prevents over- or under-lighting.

    How Many Floor Lamps Does a Room Actually Need?

    Short answer: Most rooms benefit from one to three floor lamps.

    Guidelines:

    • Small rooms: one well-placed lamp
    • Medium living rooms: two lamps for balance
    • Large rooms: two to three lamps with different roles

    Using multiple lamps at lower brightness often feels better than one very bright lamp. This reduces glare and improves visual comfort.

    Why Floor Lamps Often Look “Wrong” Even When They’re Expensive

    Short answer: Proportion, placement, or brightness is usually off.

    A floor lamp can look wrong when:

    • It’s too tall or too short for furniture
    • The shade exposes the bulb
    • The brightness overwhelms the room
    • The base clashes with flooring or furniture

    Lighting mistakes are rarely about price. They’re about ignoring measurements and function.

    A well-chosen modest lamp almost always looks better than a designer lamp used incorrectly.


    Extended Mini Case: Improving a Living Room With Two Floor Lamps Instead of One

    A rectangular living room relied on one bright torchiere lamp, which created uneven lighting and dark corners. The solution was not increasing brightness but adding a second floor lamp.

    Changes made:

    • Replaced the torchiere with a shaded tripod lamp (900 lumens)
    • Added a reading lamp near the sofa (1,200 lumens)
    • Reduced overhead lighting usage

    The result was even illumination, reduced glare, and improved comfort. Total energy use decreased despite using two lamps.

    This demonstrates how distribution beats brightness.

    Expanded Floor Lamp Buying Checklist (Detailed Version)

    Before purchasing, confirm:

    • Primary purpose (reading, ambient, accent)
    • Required lumens for the task
    • Correct lamp height relative to seating
    • Shade design that hides the bulb
    • Stable, weighted base
    • LED compatibility
    • Dimming or smart control needs
    • Cord length and routing
    • Room size and furniture scale

    If any of these feel unclear, the lamp is likely a poor match.

    Why Floor Lamps Are a Long-Term Design Investment

    Floor lamps are reusable across rooms and layouts. Unlike ceiling fixtures, they move with you and adapt to new spaces.

    A good floor lamp:

    • Works in multiple rooms
    • Survives furniture changes
    • Supports evolving lighting needs
    • Reduces reliance on renovations

    This flexibility makes floor lamps one of the most cost-effective lighting upgrades in any home.


    How Do You Choose the Right Floor Lamp? (Step-by-Step Decision Flow)

    This step-by-step flow mirrors how lighting professionals make decisions. It replaces guesswork with logic.

    Step 1: Define the primary purpose

    Ask what the lamp must do most of the time:

    • Reading or focused tasks
    • General room lighting
    • Mood or accent lighting

    If the purpose is unclear, the lamp will underperform.

    Step 2: Choose the correct brightness range

    Match lumens to the task:

    • 400–800 lumens for soft ambient light
    • 800–1,200 lumens for general lighting
    • 1,000–1,600 lumens for reading or task use

    Brightness should support the task without overwhelming the room.

    Step 3: Match lamp height to seating or space

    • Next to sofas or chairs: shade bottom at seated eye level
    • Corner lighting: taller lamps spread light more evenly
    • Adjustable arms add flexibility for task lighting

    Incorrect height is the most common cause of glare.

    Step 4: Select light direction and shade type

    • Opaque or fabric shades for comfort
    • Upward light for ambient glow
    • Adjustable heads for reading

    Avoid exposed bulbs in eye-level lamps.

    Step 5: Confirm placement and stability

    • Place beside seating, not directly in front
    • Avoid blocking walkways
    • Choose a weighted base for safety

    Step 6: Decide on control type

    • Standard switch for simplicity
    • Dimmer for flexibility
    • Smart control for automation and convenience

    If a lamp passes all six steps, it will perform well in almost any home.

    Why this matters:

    This flow reduces buying mistakes by aligning purpose → performance → comfort, which is exactly how AI Overviews and expert guides evaluate lighting decisions.


    Smart Floor Lamps vs Standard Floor Lamps: Which Is Better?

    FeatureSmart Floor LampsStandard Floor Lamps
    Control MethodApp, voice assistant, automationSwitch, foot pedal, or dimmer
    Brightness ControlPrecise digital dimmingManual dimming or fixed output
    Color TemperatureTunable white and RGB optionsFixed by bulb choice
    Ease of SetupRequires app and Wi-FiPlug-and-play
    Long-Term FlexibilityLimited by software supportVery flexible with bulb swaps
    Failure RiskDependent on electronicsMinimal, simpler design
    UpgradabilitySoftware updates requiredUpgrade by changing bulbs
    Best ForSmart homes, automation usersMost households
    Cost Over TimeHigher upfront costLower long-term cost
    ReliabilityHigh but tech-dependentVery high

    Homeaholic Guidance on Choosing

    Smart floor lamps make sense when:

    • The home already uses smart lighting systems
    • Automated schedules matter
    • Color tuning is a priority

    Standard floor lamps are usually better when:

    • You want long-term reliability
    • You prefer easy bulb replacement
    • You don’t want app or network dependence

    A hybrid approach often works best:
    Use a standard floor lamp with a smart bulb. This offers flexibility without locking the lamp into one system.

    Final Word: Why Floor Lamps Matter More Than People Think

    Floor lamps are not decorative extras. They influence comfort, mood, safety, and how a space is experienced day to night.

    When chosen with:

    • Correct lumens
    • Proper height
    • Thoughtful placement
    • Appropriate color temperature

    They transform rooms quietly and consistently.

    That’s why at Homeaholic, floor lamps are treated as functional design tools, not accessories


    Why Homeaholic Treats Floor Lamps as Functional Design

    At Homeaholic, floor lamps are viewed as tools that combine design and comfort. The goal is not just visual appeal but better living through thoughtful lighting choices. When lighting works well, everything else in the room feels easier.


    Frequently Asked Questions About Floor Lamps

    How many lumens does a good floor lamp need?

    Most floor lamps need 800–1,600 lumens depending on use.

    Are floor lamps better than ceiling lights?

    They offer softer, more flexible lighting but work best when layered.

    Can floor lamps be used in bedrooms?

    Yes, especially as alternatives to bedside table lamps.

    Do floor lamps consume a lot of power?

    LED floor lamps are energy-efficient and cost little to run.

    Are arc floor lamps practical?

    Yes, when space allows and placement is planned.

    What color temperature is best for living rooms?

    Warm white, around 2700–3000K, is ideal.


  • House Cleaning Made Simple: Routines, Methods, and Checklists That Actually Work

    House cleaning is not about perfection. It is about control, hygiene, and mental clarity. When cleaning is approached as a system instead of a long list of random chores, it becomes predictable, faster, and far less exhausting. The most effective house cleaning routines focus on order, frequency, and the right tools rather than constant effort.

    This guide explains how to clean a house properly, why professionals follow specific systems, and how you can build a routine that fits real life instead of fighting it.

    What Is the Correct Order to Clean a House?

    Short answer: Clean top to bottom and dry to wet.

    The correct order of house cleaning is what separates efficient routines from endless rework. When surfaces are cleaned in the wrong sequence, dust and dirt fall onto areas that were already cleaned, doubling the effort.

    Professional cleaners follow a top-to-bottom, dry-to-wet system. This means starting with high surfaces like shelves, ceiling fans, and light fixtures, then moving down to furniture, countertops, and finally floors. Dry tasks such as dusting and sweeping come before wet tasks like mopping and wiping.

    This order works because gravity is predictable. Dust falls. Liquids spread. Cleaning against those forces wastes time.

    A full-house cleaning order looks like this:

    1. Declutter visible surfaces
    2. Dust high areas and furniture
    3. Clean mirrors and glass
    4. Wipe surfaces and countertops
    5. Clean bathrooms and kitchens
    6. Vacuum and mop floors last

    Following this sequence prevents re-cleaning and keeps results consistent.

    A practical way to make the cleaning order stick is to divide the house into two lanes.

    Lane 1 is Dry Cleaning

    Dusting, vacuuming, sweeping, and removing crumbs. This removes loose particles so you don’t smear dirt into damp surfaces later.

    Lane 2 is Wet Cleaning

    Wiping, scrubbing, mopping, and disinfecting. Wet cleaning becomes faster because the dust layer is already gone.

    A second rule that professionals use is cleaning by “zones,” not rooms. For example, handle all glass in the house at once, then all dusting, then all bathrooms. This prevents constantly changing tools and products, which saves time and reduces mistakes.

    If you feel overwhelmed, use a “minimum viable flow” on busy weeks. Do only the tasks that prevent the home from sliding backward:

    • Kitchen surfaces and sink
    • Toilet and bathroom sink
    • Floors in the main pathway
    • Trash out

    How Often Should You Clean Different Areas of Your House?

    House Cleaning

    Short answer: Cleaning frequency should match use, not appearance.

    Not every part of a house needs the same level of attention. Overcleaning low-use areas wastes energy, while undercleaning high-use zones creates hygiene problems.

    High-touch and high-moisture areas need frequent cleaning. These include kitchens, bathrooms, entryways, and floors. Bedrooms and storage areas can be cleaned less often without negative effects.

    A realistic frequency breakdown looks like this:

    • Daily: Kitchen counters, sink, high-touch surfaces
    • Weekly: Bathrooms, floors, trash areas
    • Bi-weekly: Dusting furniture, mirrors, baseboards
    • Monthly: Windows, appliances, vents
    • Seasonal: Deep cleaning, decluttering, storage areas

    Households with pets, children, or allergies often need higher frequency in floors and fabrics. The goal is prevention, not reaction.

    Frequency should also reflect risk level, not just usage.

    High-risk zones are places where moisture, food residue, or body contact occurs. They need routine attention because bacteria and odors build up faster:

    • Kitchen sink and drain area
    • Bathroom toilet zones
    • Trash cans
    • Pet feeding areas

    Medium-risk zones include:

    • Floors
    • Couch arms
    • Remote controls
    • Entryways

    Low-risk zones include:

    • Guest rooms
    • Decorative shelves
    • Storage closets

    If you want a simple approach, follow the 3-layer routine:

    • Daily reset (5–10 minutes): clear counters, wipe sink, quick trash check
    • Weekly clean (60–180 minutes): bathrooms, floors, dust, linens
    • Monthly maintenance (30–90 minutes): appliances, baseboards, vents, deep clutter zones

    What Is the Difference Between Regular Cleaning and Deep Cleaning?

    House Cleaning

    Short answer: Regular cleaning maintains, deep cleaning resets.

    Regular cleaning focuses on visible dirt and daily hygiene. It keeps surfaces usable and the home comfortable. Deep cleaning targets buildup that regular routines miss, such as grime behind appliances, soap residue, and dust in hidden areas.

    Regular cleaning includes:

    • Wiping counters
    • Vacuuming floors
    • Cleaning toilets and sinks
    • Light dusting

    Deep cleaning includes:

    • Scrubbing grout and tile
    • Cleaning inside appliances
    • Washing baseboards and doors
    • Removing buildup from fixtures
    • Deep fabric and upholstery cleaning

    Deep cleaning is not meant to be constant. Most homes need it two to four times a year. Without regular cleaning, deep cleaning becomes harder and more frequent.

    Understanding this distinction prevents burnout and unrealistic expectations.

    A useful way to define deep cleaning is: deep cleaning targets buildup, edges, and hidden contact points.

    Regular cleaning keeps things usable. Deep cleaning prevents long-term damage and recurring issues like:

    • Bathroom soap scum that becomes permanent
    • Kitchen grease film that attracts dust
    • Mold growth in corners
    • Odors trapped in fabric and drains

    Deep cleaning also includes inspection, not just scrubbing. While cleaning, you spot problems early:

    • Slow drains
    • Loose caulk
    • Water leaks under sinks
    • Swelling cabinet panels
    • Cracked grout

    That inspection layer is why deep cleaning saves money long term. You catch small problems before they become repair jobs.


    Which House Cleaning Tasks Matter Most for Health and Hygiene?

    House Cleaning

    Short answer: High-touch surfaces and moisture zones matter most.

    Not all cleaning tasks impact health equally. Some tasks improve appearance, while others reduce bacteria, allergens, and mold. Health-focused cleaning prioritizes areas where germs and moisture accumulate.

    Key health-critical zones include:

    • Kitchen sinks and cutting surfaces
    • Bathroom toilets, showers, and drains
    • Door handles, switches, and remotes
    • Floors in entryways and kitchens

    Dust buildup affects indoor air quality, especially for people with allergies or asthma. Fabric surfaces like carpets, sofas, and curtains trap allergens and should be cleaned regularly.

    Disinfection should be targeted, not constant. Overuse of disinfectants creates unnecessary chemical exposure without added benefit in low-risk areas.

    Health-first cleaning improves when you separate cleaning vs disinfecting.

    Cleaning removes dirt, grease, and debris.
    Disinfecting kills germs on surfaces after they’re cleaned.

    Disinfecting a dirty surface is low value because grime blocks the disinfectant from doing its job. That’s why the correct sequence is:

    1. Remove visible dirt and residue
    2. Apply disinfectant to high-touch surfaces
    3. Allow the proper contact time
    4. Air out the room

    Focus disinfection on:

    • Door handles
    • Light switches
    • Bathroom faucet handles
    • Toilet flush handles
    • Phone screens and remotes

    For allergy-sensitive homes, the priorities shift. Your biggest wins come from:

    • Vacuuming with proper filtration
    • Washing bedding consistently
    • Cleaning soft furniture zones
    • Managing dust traps like curtains and rugs

    What Tools and Supplies Make House Cleaning Faster and Easier?

    House Cleaning

    Short answer: The right tools reduce effort more than extra time.

    Cleaning efficiency depends heavily on tools. Poor tools turn simple tasks into exhausting work. Good tools reduce physical strain and improve results.

    Essential tools for most homes include:

    • A quality vacuum with attachments
    • Microfiber cloths for dust and wiping
    • A mop suitable for your floor type
    • Scrub brushes in multiple sizes
    • Spray bottles for controlled product use

    Microfiber is particularly effective because it traps dust instead of spreading it. Using one cloth per task prevents cross-contamination.

    Avoid buying dozens of specialized products. A small, well-chosen set of tools outperforms cluttered supplies.

    The fastest setups are built around tool standardization.

    Instead of carrying random sprays, build a simple “cleaning kit”:

    • Microfiber cloths (at least 8–12 so you can rotate)
    • One all-purpose cleaner
    • One degreaser for kitchen buildup
    • One bathroom cleaner
    • One glass cleaner
    • One disinfectant used only when needed
    • Scrub brush and an old toothbrush for edges
    • Gloves

    The key is not mixing products. Mixing chemicals is a common safety risk, especially bleach with ammonia-based products. Keep it simple and label spray bottles.

    Also, pick the mop that matches your floors. A bad mop wastes more time than you think because it pushes dirty water around. For many homes, a flat microfiber mop is the best balance of speed and control.

    Are Natural and Eco-Friendly Cleaners Effective?

    Short answer: Yes, for most everyday cleaning.

    Natural cleaners such as vinegar, baking soda, and mild soap are effective for removing dirt, grease, and odors. They are safer for frequent use and reduce chemical buildup in indoor air.

    However, natural cleaners are not disinfectants. They clean but do not kill all bacteria. In kitchens and bathrooms, occasional use of disinfectants is appropriate, especially after illness.

    Eco-friendly commercial cleaners bridge the gap by offering effective cleaning with lower toxicity. The best approach is mixed use: natural products for daily cleaning and targeted disinfectants when necessary.

    Safety improves when products are used intentionally rather than excessively.

    How Long Should House Cleaning Take?

    Short answer: A full weekly clean should take 1.5 to 3 hours.

    Time expectations are often unrealistic. Social media cleaning videos show extreme results without showing the hours behind them. In reality, cleaning time depends on house size, clutter level, and routine consistency.

    A well-maintained home takes less time to clean than a neglected one. Consistency reduces buildup, which reduces effort.

    Approximate time ranges:

    • Small apartment: 60–90 minutes
    • Medium house: 2–3 hours
    • Large home: 3–4 hours

    Breaking cleaning into short daily sessions is often more sustainable than marathon cleaning days.

    Most people underestimate how much time is lost to setup and switching. If you reduce switching between rooms, tools, and sprays, the total time drops fast.

    Use time blocks:

    • 15-minute reset: surfaces, trash, quick wipe
    • 30-minute zone clean: bathroom or kitchen
    • 60-minute weekly sweep: floors + dust + bathroom

    A realistic weekly plan for a busy household could look like:

    • Day 1: Bathroom (30–40 minutes)
    • Day 2: Floors (30–45 minutes)
    • Day 3: Kitchen reset and appliances (30 minutes)
    • Day 4: Dust and bedding (30 minutes)

    Mini Case: How a System-Based Cleaning Routine Cut Weekly Cleaning Time by 45%

    A four-person household in a medium-sized home was spending nearly 4 hours every weekend on house cleaning. Tasks were done randomly, often starting with floors and ending with surfaces, which led to repeated work and frustration.

    After switching to a top-to-bottom, zone-based cleaning system, the routine changed:

    • Daily 10-minute resets replaced long weekday neglect
    • Bathrooms and kitchens were cleaned in focused 30-minute sessions
    • Floors were cleaned last, once per week instead of multiple times

    Within three weeks, total weekly cleaning time dropped to just over 2 hours, without any visible decline in cleanliness. More importantly, cleaning felt predictable instead of overwhelming, making it easier to stay consistent.

    This example shows that cleaning systems reduce effort more than speed, and that structure matters more than motivation.


    What Are the Most Common House Cleaning Mistakes to Avoid?

    Short answer: Cleaning without a system.

    The most common mistake is cleaning randomly. This leads to repeated work and frustration. Another mistake is using the wrong product on the wrong surface, which causes damage over time.

    Other frequent errors include:

    • Cleaning floors before dusting
    • Mixing chemicals unsafely
    • Using dirty cloths across rooms
    • Overcleaning low-impact areas
    • Ignoring ventilation

    Cleaning should simplify life, not dominate it. Systems prevent mistakes before they happen.

    One major mistake is using too much product. More soap does not mean more clean. It often leaves residue, which attracts dust and makes surfaces feel dirty again sooner.

    Another mistake is treating every surface the same. Different materials react differently:

    • Marble and stone can be damaged by acidic cleaners
    • Wood hates excess water
    • Stainless steel streaks when wiped incorrectly

    A third mistake is skipping “drying.” Bathrooms in particular stay dirty longer when they stay damp. A quick squeegee or towel dry reduces water spots and slows mold growth.

    Finally, many people clean while stressed and rush the wrong tasks. If you only have limited time, prioritize the tasks that prevent hygiene decline:

    • Kitchen surfaces and sink
    • Toilet zone
    • Floors in high traffic areas
    • Trash and odor sources

    When Is It Worth Hiring Professional House Cleaning Services?

    Short answer: When time, health, or consistency becomes a problem.

    Professional cleaning is not a failure. It is a tool. Many households use professional services for deep cleaning, seasonal resets, or during busy life stages.

    Professional cleaning is worth considering when:

    • Time is limited
    • Physical ability is reduced
    • Allergies require deeper cleaning
    • Moving in or out
    • Routine cleaning is falling behind

    The goal is support, not replacement of personal responsibility. Even with professionals, maintaining daily habits keeps homes comfortable.

    Hiring professionals makes the most sense when you need a reset, not minor touch-ups. The strongest use cases are:

    • Move-in and move-out cleaning
    • Post-renovation dust control
    • Allergy seasons when deeper cleaning helps
    • A quarterly deep clean to protect surfaces

    To avoid disappointment, define the scope. Many people book cleaning without agreeing on priorities like:

    • Inside appliances
    • Baseboards
    • Windows
    • Shower grout
    • Cabinet interiors

    Even if you are hiring help, the best outcomes happen when the home is lightly decluttered first. It allows cleaners to spend time cleaning instead of moving objects.

    DIY House Cleaning vs Professional Cleaning Services

    FactorDIY House CleaningProfessional Cleaning Services
    Time Investment1.5–4 hours per week, depending on house size and routine consistency2–5 hours per visit, but your personal time is near zero
    ConsistencyVaries with schedule, energy, and motivationHigh consistency due to fixed schedules
    Cleaning DepthGood for daily and weekly maintenanceStrong for deep cleaning, buildup removal, and resets
    CostLow direct cost (supplies only)Higher recurring cost (weekly, bi-weekly, or monthly fees)
    Health & Hygiene ControlHigh control over products usedDepends on service policies and product choices
    Equipment QualityLimited to household toolsAccess to commercial-grade tools and methods
    Surface ProtectionDepends on user knowledgeGenerally safer when handled by trained cleaners
    FlexibilityVery flexible, can clean anytimeFixed appointment windows
    Best Use CaseRoutine upkeep, budget-conscious householdsDeep cleaning, busy schedules, health limitations
    Stress ReductionCan feel burdensome over timeSignificantly reduces mental and physical load

    How to Choose Between DIY and

    Professional Cleaning

    DIY house cleaning works best when:

    • You follow a system-based routine
    • Time is available weekly
    • You want full control over products
    • The home is already maintained

    Professional cleaning is usually worth it when:

    • Cleaning has fallen behind
    • Deep cleaning is overdue
    • Allergies or health concerns exist
    • Time or physical energy is limited
    • You need a reset after renovation or moving

    Many households find the best balance by combining both:

    • DIY for weekly maintenance
    • Professional cleaning once per quarter for deep resets

    House Cleaning Tasks by Frequency and Health Impact

    TaskFrequencyHealth Impact
    Kitchen countersDailyHigh
    Bathroom cleaningWeeklyHigh
    FloorsWeeklyMedium
    DustingBi-weeklyMedium
    AppliancesMonthlyMedium
    UpholsteryQuarterlyMedium
    WindowsSeasonalLow

    This table helps prioritize effort where it matters most.

    Step-by-Step House Cleaning Flow (Top-to-Bottom System)

    1. Declutter visible items
    2. Dust ceilings, shelves, and furniture
    3. Clean glass and mirrors
    4. Wipe surfaces and fixtures
    5. Clean bathrooms and kitchen
    6. Vacuum and mop floors

    This flow minimizes wasted effort and improves results.

    Weekly House Cleaning Checklist (Realistic Version)

    • Clear surfaces
    • Wipe kitchen counters and sink
    • Clean bathroom surfaces
    • Vacuum main areas
    • Mop kitchen and bathroom floors
    • Take out trash

    How Do You Build a House Cleaning Routine You Can Actually Stick To?

    The best routine is the one you can repeat without mental resistance. The secret is to reduce decision-making.

    Start by defining a “daily reset” that takes under 10 minutes:

    • Clear kitchen counters
    • Wipe sink area
    • Quick trash check
    • Put items back in their zones

    Then build a weekly routine around one idea: one focus per day, not “everything Saturday.” For example:

    • Monday: bathroom surfaces
    • Tuesday: floors
    • Wednesday: dust and glass
    • Thursday: kitchen deeper wipe
    • Friday: laundry and bedding

    This spreads the workload and prevents burnout. Cleaning becomes maintenance, not punishment.

    What Is the Best Room-by-Room House Cleaning Method?

    Room-by-room works best when you follow the same internal sequence:

    1. Declutter
    2. Dust high to low
    3. Wipe surfaces
    4. Clean touch points
    5. Floors last

    Kitchen: focus on grease and food contact zones

    • Degrease stove area
    • Clean sink and drain edge
    • Wipe counters and handles
    • Finish with floor sweep and mop

    Bathroom: focus on moisture and buildup

    • Spray shower and toilet first, let it sit
    • Wipe mirror and surfaces
    • Scrub toilet and shower
    • Rinse and dry high-moisture zones

    This method works because it uses dwell time. Sprays work while you do other tasks.

    How Do You Clean Faster Without Cutting Corners?

    Speed comes from removing friction:

    • Keep supplies in a portable caddy
    • Use fewer products consistently
    • Do one category at a time (all glass, then all dust)
    • Use timers to prevent over-cleaning

    Try a simple rule: clean until the room feels clean, not until it is perfect. Most people waste time chasing tiny details while ignoring bigger wins like floors, sinks, and trash.

    A strong fast-clean strategy is the “visibility sweep”:

    • Clear the surfaces people see first
    • Fix odors and trash second
    • Floors last

    How Do You Clean Safely Around Kids, Pets, and Sensitive Skin?

    If your home includes kids or pets, cleaning should avoid unnecessary chemical exposure.

    Safer practices include:

    • Ventilate rooms when using sprays
    • Avoid mixing cleaners
    • Store products locked away
    • Use fragrance-free products if skin sensitivity exists
    • Rinse surfaces that contact food, hands, or pet areas

    For pet homes, prioritize:

    • Regular vacuuming in fur zones
    • Washing pet bedding
    • Cleaning feeding areas
    • Odor control at trash bins and litter zones

    This keeps hygiene high while keeping the home safer.

    What Are the Best House Cleaning Checklists for Daily, Weekly, and Monthly Cleaning?

    Checklists reduce decision fatigue.

    Daily (5–10 minutes)

    • Counter reset
    • Sink wipe
    • Trash check
    • Quick sweep of high-traffic crumbs

    Weekly (60–180 minutes total)

    • Bathroom clean
    • Floors vacuum and mop
    • Dust main surfaces
    • Bedding wash

    Monthly (30–90 minutes)

    • Appliance wipe down
    • Baseboards in main zones
    • Vent and fan dusting
    • Cabinet handle and door wipe

    Why Homeaholic Treats House Cleaning as Home Maintenance, Not Chores but as a System

    Home cleaning works best when it is tied to comfort and protection. The goal is not to “look perfect.” It is to protect surfaces, improve air quality, prevent odors, and keep daily life smooth.

    At Homeaholic, we treat cleaning as a system with:

    • Clear frequency rules
    • Correct cleaning order
    • Minimal product confusion
    • High-impact hygiene priorities
    • Sustainable routines that reduce burnout

    When cleaning is structured like maintenance, it stops feeling endless.

    At Homeaholic, house cleaning is approached as part of home management, not punishment. Systems reduce decision fatigue and help people maintain clean homes without stress.

    When cleaning follows logic instead of emotion, it becomes predictable. Predictability is what turns cleaning into a habit instead of a burden.

    Frequently Asked Questions About House Cleaning

    How often should a house be cleaned?

    Most homes benefit from weekly cleaning with daily maintenance.

    What is the correct order to clean a house?

    Top to bottom, dry to wet.

    Is deep cleaning necessary?

    Yes, a few times a year to remove buildup.

    Are natural cleaners effective?

    Yes, for daily cleaning, with disinfectants used selectively.

    How long should cleaning take?

    Between 1.5 and 3 hours weekly for most homes.

    Is professional cleaning worth it?

    Yes, when time or health limits consistency.


  • Colorful Throw Pillows That Add Personality Without Overwhelming Your Space

    Colorful throw pillows are one of the easiest ways to refresh a room, but they’re also one of the fastest ways to create visual chaos if used without rules. The right mix of color, quantity, size, and pattern can energize a space while keeping it balanced. Successful styling relies on contrast, repetition, and proportion rather than random mixing.

    How Do You Style Colorful Throw Pillows Without Making a Room Look Busy?

    Short answer: Limit color dominance and repeat shades intentionally.

    Beyond limiting color dominance, visual calm comes from clear hierarchy. One color should clearly lead, one should support, and any additional color should appear only as a small accent. When all colors shout equally, the eye has nowhere to rest.

    Texture also plays a role. A solid velvet pillow reads differently from a flat cotton one, even in the same color. Mixing textures allows you to keep colors bold without increasing visual noise. This is especially effective in modern and minimalist interiors where texture replaces ornament.

    If a setup feels off, remove one pillow and reassess. Overstyling is far more common than understyling, and restraint almost always improves balance.


    How Many Colorful Throw Pillows Should You Use on a Sofa or Bed?

    Short answer: Fewer pillows create more impact.

    Another important factor is visual weight, not just quantity. Darker or more saturated colors visually weigh more than light ones. A sofa with three deep jewel-toned pillows can feel fuller than one with five light pastel pillows. This means color intensity should always be considered alongside count.

    Furniture style also matters. Structured, modern sofas benefit from fewer, cleaner arrangements. Softer, casual sofas can handle an extra pillow without looking overstyled. On beds, pillow count should never interfere with daily use. If pillows are constantly removed and stacked elsewhere, the arrangement is impractical.

    The most reliable test is distance. Step back to the doorway. If pillows dominate your first impression, reduce the count by one.


    Which Colors Work Best With Neutral Furniture?

    Short answer: High-contrast colors create energy, muted tones create calm.

    Beyond matching undertones, consider color role assignment. Every color should have a job. One color anchors the arrangement, one adds contrast, and any additional shade should be minimal. When colors lack roles, they compete.

    Another overlooked aspect is surface finish. Matte fabrics soften bold colors, while shiny fabrics intensify them. A bright color in velvet feels richer and calmer than the same color in a flat weave. This allows bolder choices without overwhelming the room. If neutral furniture already has texture, like boucle or tweed, keep pillow colors simpler. Texture plus color can quickly feel busy if both are pushed too far at once.


    How Do You Mix Patterns and Colors in Throw Pillows?

    Colorful throw pillows

    Short answer: Vary scale, not chaos.

    Pattern success depends on negative space. Patterns need visual breaks to breathe. Solid-colored pillows act as resting points between patterned ones, preventing overload.

    Direction also matters. Mixing horizontal, vertical, and organic patterns adds interest without clutter, as long as color overlap exists. When all patterns run in the same direction, the arrangement can feel flat or rigid.

    Avoid novelty patterns unless the room already leans playful. Novelty designs age quickly and are harder to integrate with future updates. If used, limit them to one pillow and support them with simple solids so they don’t dominate the arrangement.


    Are Colorful Throw Pillows Suitable for Small Rooms?

    Short answer: Yes, when used strategically.

    Small rooms benefit from controlled focal points. Colorful pillows should guide attention toward seating, not scatter it across the room. This is why placing all pillows on one primary seating piece often works better than spreading them around.

    Wall color also influences suitability. White or light walls amplify color contrast, making bold pillows feel stronger. Dark walls absorb color, allowing brighter pillows without visual overload. Adjust intensity accordingly.

    In compact spaces, pillows should also stay visually light. Overly thick or bulky pillows reduce perceived space. Slimmer profiles maintain openness while still adding color.


    What Throw Pillow Sizes and Shapes Look Best Together?

    Colorful throw pillows

    Short answer: Layer large to small.

    Another key factor is seat depth. Deep seats require thicker or larger pillows to provide back support. Shallow seats look better with slimmer pillows that don’t push users forward.

    Shape repetition creates order. If you use rectangular lumbar pillows, repeating that shape once more creates rhythm. Random single shapes often look accidental rather than styled.

    Round pillows should be used sparingly. They work best as a contrast piece rather than a core component. Too many unconventional shapes disrupt structure and make arrangements harder to refresh later.


    Which Fabrics Hold Color Best Over Time?

    Short answer: Tightly woven fabrics last longer.

    Color longevity also depends on dye quality, not just fabric type. Solution-dyed fabrics retain color better than surface-dyed ones, especially in bright hues. While not always visible at purchase, higher-quality brands often disclose this.

    Maintenance habits play a role. Frequent washing accelerates fading, especially in hot water. Spot cleaning and gentle cycles preserve color longer. Using pillow covers that can be removed independently protects inner inserts from wear.

    If pillows sit near windows, rotating them every few weeks prevents uneven fading. This simple habit significantly extends visual lifespan.


    Are Colorful Throw Pillows Seasonal or Timeless?

    Short answer: Both, depending on color choice.

    Seasonality is often driven by emotional response, not rules. Bright colors feel energizing in warmer months, while deeper tones feel grounding in cooler seasons. Understanding this helps with intentional rotation.

    Timelessness comes from adaptability. Pillows that work with multiple throws, rugs, or wall colors stay relevant longer. Highly specific colors tied to a single palette limit flexibility.

    If budget or storage is limited, prioritize versatile colors and update seasonality through texture rather than hue. Fabric swaps can change mood without replacing color entirely.


    What Are the Most Common Colorful Throw Pillow Mistakes to Avoid?

    Colorful throw pillows

    Short answer: Overuse and randomness.

    Another frequent mistake is ignoring context. Pillows don’t exist in isolation. Nearby artwork, rugs, and lighting all affect how colors are perceived. A pillow that looks perfect online may clash in your actual space.

    People also underestimate lighting temperature. Warm lighting softens colors, while cool lighting sharpens them. This can drastically change how pillows read at night versus day.

    Finally, many people stop adjusting too soon. Styling is iterative. Small tweaks over time usually lead to better results than one-time decisions.


    Colorful Throw Pillow Styling Rules by Sofa Size and Room Type

    Sofa or Space TypeIdeal Pillow CountBest Color StrategyPattern Advice
    Small sofa or loveseat2–3One dominant colorMostly solid
    Standard 3-seater sofa3Two related colorsOne subtle pattern
    Sectional sofa4–5Repeated accent colorsOne bold pattern
    Bed (queen/king)2–4Calm, coordinated tonesMinimal patterns
    Accent chair1Strong single colorSolid or textured

    This table simplifies decisions and prevents overstyling. Use this table as a starting framework, not a final answer. Real rooms have quirks that charts can’t fully capture. Arm width, back height, and cushion firmness all influence how pillows sit.

    After applying the guidelines, sit in the space. Comfort is a critical validation step often skipped. If pillows shift constantly or feel intrusive, adjust size or number.

    The best styling rules are flexible. They guide decisions but always yield to real-life usability.


    Colorful Throw Pillow Balance Checklist

    Before finalizing your setup, check the following:

    Color palette is limited and intentional
    Pillow count suits furniture size
    Patterns vary in scale
    Colors repeat elsewhere in the room
    Fabric suits light exposure and use
    Arrangement feels comfortable, not staged

    If all boxes are checked, the pillows will enhance the room rather than overwhelm it.

    This checklist also helps when editing existing setups. Remove one pillow at a time and reassess rather than replacing everything. Subtraction often reveals what truly matters.

    Balance should be felt intuitively. If the arrangement feels calming and easy to live with, it’s working. If it feels fragile or overly precious, it’s too complex. The goal isn’t perfection. It’s visual ease that holds up over time.


    Real-World Styling Example: When Less Color Creates More Impact

    In a 12×14 living room with a medium-gray sofa and white walls, using five brightly colored throw pillows initially made the space feel visually crowded, especially in evening lighting. Reducing the setup to three pillows—two in a muted rust tone and one patterned pillow repeating both rust and gray—immediately restored balance. The room felt calmer, seating felt more usable, and the colors appeared richer rather than overwhelming.

    This outcome highlights a common pattern. Visual comfort improves when color intensity is paired with restraint. Fewer, well-chosen colorful throw pillows often deliver stronger results than larger, mixed collections.


    Why Homeaholic Approaches Colorful Throw Pillows With Balance

    Design choices should support daily life. Colorful throw pillows are meant to enhance comfort and expression, not create maintenance or decision fatigue.

    By focusing on proportion, comfort, and long-term satisfaction, styling remains flexible as tastes evolve. This approach avoids constant replacement cycles and keeps spaces feeling intentional.

    When balance leads the process, color becomes a lasting asset rather than a short-lived statement.


    Frequently Asked Questions About Colorful Throw Pillows

    Can colorful throw pillows make a room look messy?

    Yes, if too many colors or patterns are used without repetition.

    How many throw pillows are too many?

    More than five on a standard sofa usually feels excessive.

    Do colorful pillows fade quickly?

    They can, especially in direct sunlight. Fabric choice and rotation help.

    Are colorful pillows good for minimalist homes?

    Yes, when used sparingly as controlled accents.

    Should throw pillows match curtains or rugs?

    They don’t need to match exactly, but repeating tones creates harmony.

    Are bold pillows still in style?

    Yes. Balance and restraint matter more than trends.

  • Bathroom Sink Cabinet Ideas That Balance Storage, Durability, and Style

    Bathroom sink cabinets do far more than hide plumbing. They determine how well a bathroom handles moisture, how easy it is to stay organized, and whether the space feels calm or constantly cluttered. The best bathroom sink cabinet ideas prioritize material durability, smart storage, and sink compatibility before appearance.

    When those fundamentals are right, style becomes effortless. This guide is a cornerstone foundation when it comes to discussing different bathroom sink cabinet ideas, stamping several deciding factors to help you decide the right bathroom sink cabinet for you.

    How Do You Choose the Right Bathroom Sink Cabinet?

    The right bathroom sink cabinet is chosen by solving practical problems first. Moisture exposure, plumbing layout, storage needs, and sink type all shape what will work long term.

    Start with the environment. Bathrooms experience humidity, splashes, and temperature changes daily. A cabinet that performs well in a bedroom or hallway can fail quickly in a bathroom. Material choice and construction quality matter more here than almost anywhere else in the home.

    Next, consider storage behavior. Ask what needs to live inside the cabinet. Towels, cleaning supplies, toiletries, and spare rolls all require different access patterns. A cabinet that looks sleek but forces items to pile up on the countertop quickly becomes frustrating.

    Finally, confirm sink compatibility. Not every cabinet supports every sink type. Choosing these elements together avoids expensive rework later.


    What Types of Bathroom Sink Cabinets Are Available?

    Bathroom Sink Cabinet Ideas

    Bathroom sink cabinets fall into a few main structural categories, each suited to different layouts and preferences.

    Freestanding cabinets sit directly on the floor and offer strong structural support. They hide plumbing easily and tend to be forgiving during installation. Floating cabinets mount to the wall, creating a lighter visual look and making floor cleaning easier, but they require solid wall support.

    Corner cabinets make use of tight layouts where standard cabinets would block movement. Compact vanities are designed for powder rooms and small bathrooms where space is limited. Full-width cabinets work best in master bathrooms where storage demand is higher.

    Understanding these categories helps narrow choices quickly.


    Which Materials Work Best for Bathroom Sink Cabinets?

    Material choice determines how well a cabinet survives moisture over time.

    Solid wood offers strength and natural beauty but must be sealed properly to resist humidity. Plywood performs well in bathrooms because it resists swelling better than many alternatives. MDF is common in mid-range cabinets but is vulnerable to water damage if coatings fail.

    In real-world bathroom conditions, MDF cabinets exposed to frequent humidity or minor leaks often show edge swelling or surface bubbling within 3–5 years if protective coatings are compromised. This is why sealed edges and proper ventilation matter as much as the material itself.

    Particle board is the least durable option in wet environments. It may look fine initially but can swell and crumble when exposed to leaks or repeated humidity. Metal and PVC cabinets resist moisture well but have a more limited aesthetic range.

    As a general rule, moisture resistance and edge sealing matter more than surface finish alone.


    Are Floating Bathroom Sink Cabinets Better Than Freestanding Ones?

    Bathroom Sink Cabinet Ideas

    Floating cabinets are popular because they make bathrooms feel larger and more modern. They expose more floor space and create a clean visual break between wall and floor.

    However, durability depends on installation quality. Floating cabinets must be anchored into studs or reinforced walls to support the weight of the cabinet, sink, and contents. Poor installation leads to sagging or wall damage over time.

    Freestanding cabinets distribute weight to the floor and tolerate heavier sinks more easily. They are often better for traditional bathrooms or where wall reinforcement is limited.

    Neither option is universally better. The right choice depends on structure, sink weight, and long-term expectations.


    Which Sink Types Work With Different Cabinet Designs?

    Sink type and cabinet design are tightly linked.

    Vessel sinks sit on top of the cabinet and require lower cabinet heights to remain comfortable. They reduce internal storage because plumbing must rise higher inside the cabinet. Undermount sinks integrate smoothly with countertops and preserve interior space, making them practical for storage-focused designs.

    Integrated sinks are molded into the countertop and simplify cleaning while reducing joint failures. Drop-in sinks are flexible and budget-friendly but create visible edges that collect moisture if not sealed carefully.

    Matching sink type to cabinet structure avoids awkward ergonomics and wasted space.


    Are Drawers Better Than Doors in Bathroom Sink Cabinets?

    Bathroom Sink Cabinet Ideas

    In most cases, drawers outperform doors for daily storage.

    Drawers allow full visibility and prevent items from disappearing into the back of the cabinet. Deep drawers can increase usable storage by 25 to 40 percent compared with standard shelves. They also make it easier to organize smaller items.

    The challenge is plumbing. Sink traps and supply lines can block drawer space if not planned correctly. Many modern cabinets use U-shaped drawers or split configurations to work around pipes.

    Doors still make sense for large items or where plumbing layouts are unpredictable. The best cabinets often combine both.


    Bathroom Sink Cabinet Ideas

    What Bathroom Sink Cabinet Ideas’ Sizes

    Work Best for Small Bathrooms?

    Small bathrooms demand careful proportioning.

    Cabinets between 24 and 36 inches wide suit most compact layouts. Floating cabinets visually expand the room by exposing floor space. Shallow-depth cabinets reduce crowding without sacrificing basic storage.

    Tall storage should be placed elsewhere rather than forcing oversized cabinets under the sink. In tight spaces, fewer but better-designed storage zones outperform bulky furniture.

    Choosing the smallest cabinet that meets real storage needs keeps the room functional and comfortable.


    How Long Do Bathroom Sink Cabinets Last and What Affects Longevity?

    A quality bathroom sink cabinet typically lasts 10 to 20 years, depending on materials, installation, and maintenance.

    Moisture exposure is the biggest factor in failure. Cabinets fail when water penetrates seams, edges, or unsealed cutouts. Poor ventilation accelerates this process.

    Hardware quality also matters. Soft-close hinges and runners reduce stress and extend lifespan. Cheap hardware often fails long before the cabinet body does.

    Regular wiping of spills and occasional inspection of seals significantly extends cabinet life.


    What Are the Most Common Bathroom Sink Cabinet Mistakes to Avoid?

    Many cabinet problems come from decisions made too early or too quickly.

    One common mistake is choosing materials based on appearance alone. Cabinets that look premium can still fail if their cores are not moisture resistant. Another issue is ignoring plumbing clearance, which leads to unusable drawers or awkward storage.

    Overcrowding is another frequent error. Installing the largest possible cabinet often restricts movement and makes the bathroom feel cramped. Finally, inadequate ventilation allows humidity to linger and damage cabinetry over time. Avoiding these mistakes requires thinking beyond the showroom display.


    Bathroom Sink Cabinet Ideas’ Materials Compared

    MaterialMoisture ResistanceDurabilityCost RangeBest Use Case
    Solid WoodModerateHighHighWell-ventilated bathrooms
    PlywoodGoodHighMidLong-term durability
    MDFModerateMediumMidBudget-conscious designs
    Particle BoardLowLowLowShort-term or low-use spaces
    PVC / MetalExcellentHighMid to HighHigh-humidity environments

    This comparison helps align expectations with reality.


    Bathroom Sink Cabinet Selection Checklist

    Before finalizing a cabinet, confirm the following.

    Material resists bathroom moisture
    Sink type matches cabinet height and structure
    Drawer layout accommodates plumbing
    Cabinet size fits the room comfortably
    Installation method supports long-term load
    Ventilation reduces humidity buildup

    If all boxes are checked, the cabinet is likely to perform well for years.

    In small apartment bathrooms, one of the most common renovation regrets is choosing a deep cabinet that blocks movement and traps moisture behind the sink. Switching to a shallower floating cabinet with proper wall clearance often solves both issues without reducing usable storage, proving that proportion matters more than size.


    What Bathroom Sink Cabinet Sizes Work Best for Small Bathrooms?

    At Homeaholic, bathroom sink cabinets are treated as functional systems, not just furniture. Material behavior, plumbing clearance, moisture exposure, and daily use patterns are considered before visual style is finalized.

    This approach prevents common failures like swelling, sagging drawers, and wasted storage. When cabinets are designed around real conditions, they stay reliable and visually calm long after trends fade.


    Frequently Asked Questions About Bathroom Sink Cabinets

    What material is best for bathroom sink cabinets?

    Plywood and properly sealed solid wood perform best in most bathrooms.

    Are floating bathroom cabinets durable?

    Yes, when installed correctly into reinforced walls.

    Do drawers work under bathroom sinks?

    They do if designed to accommodate plumbing.

    How long should a bathroom sink cabinet last?

    Quality cabinets often last 10 to 20 years with proper care.

    Are cheap bathroom cabinets worth it?

    They can work short term but often fail faster in humid environments.

    Do bathroom cabinets need ventilation?

    Yes. Ventilation reduces moisture buildup and extends lifespan.


  • Bedroom Blind Ideas That Improve Sleep, Privacy, and Comfort

    Bedroom blinds are not just decorative window coverings. They directly affect sleep quality, privacy, temperature control, and how calm or cluttered a bedroom feels. The best bedroom blind ideas balance light control, insulation, safety, and visual harmony instead of focusing on style alone.

    Choosing the wrong blinds often leads to early regret. Choosing the right ones improves daily comfort for years.

    How Do You Choose the Right Blinds for a Bedroom?

    The right bedroom blinds are chosen by starting with function, not appearance. Bedrooms have different requirements than living rooms or kitchens. Sleep, privacy, and comfort come first.

    Begin by asking four questions. How much light needs to be blocked? Is the bedroom street-facing or overlooked? Does temperature fluctuate significantly? Are children or pets using the room?

    Once these needs are clear, style becomes easier. A blind that performs well but looks average will always outperform a stylish blind that disrupts sleep or privacy. Good bedroom blinds quietly do their job without drawing attention to themselves.


    Which Types of Bedroom Blinds Are Available?

    Bedroom Blind Ideas

    Bedroom blinds come in several functional categories, each with strengths and limitations.

    Roller blinds are simple, compact, and effective for light control. Roman blinds add softness and work well in classic or layered bedrooms. Venetian blinds offer adjustable light but are less effective for full darkness. Cellular or honeycomb blinds provide insulation benefits in addition to light filtering.

    Zebra blinds combine sheer and solid bands for adjustable privacy but rarely achieve full blackout. Vertical blinds are less common in bedrooms and suit large glass areas rather than standard windows.

    Understanding these differences prevents disappointment later.


    What Are the Best Bedroom Blind Ideas for Sleep and Light Control?

    Bedroom Blind Ideas

    For sleep quality, blackout performance matters more than brand or fabric type.

    Blackout blinds are designed to block nearly all incoming light. They work best for light sleepers, shift workers, and bedrooms facing streetlights or early sunrise. Dim-out blinds reduce brightness but still allow some glow, which may be fine for afternoon naps but not deep sleep.

    Light-filtering blinds soften daylight and protect privacy during the day but should not be relied on for night-time darkness.

    For maximum effectiveness, blackout blinds should be paired with proper fitting. Outside mounts reduce light leakage better than inside mounts. Even the best blackout fabric fails if gaps are left at the edges.


    Are Bedroom Blinds Better Than Curtains?

    Blinds and curtains serve different roles, and neither is universally better.

    Blinds offer cleaner lines, precise light control, and easier maintenance. Curtains provide softness, sound absorption, and stronger edge coverage. In many bedrooms, the best solution is layering.

    Using blackout blinds for function and light control, combined with curtains for softness and insulation, creates the most adaptable setup. This approach handles both daytime aesthetics and night-time performance without compromise.

    If space is limited or a minimalist look is desired, blinds alone can work well when chosen carefully.


    Which Bedroom Blinds Offer the Most Privacy?

    Privacy depends on both material and positioning.

    For night-time privacy, opaque blinds or blackout blinds are essential. Light-filtering blinds may look private during the day but become transparent at night when interior lights are on.

    Street-facing and ground-floor bedrooms benefit from blinds that sit close to the window frame with minimal gaps. Top-down bottom-up blinds are useful where daylight is needed without exposing the entire room.

    Bedrooms in apartments or dense neighborhoods should avoid sheer-only solutions unless combined with secondary coverings.


    Do Bedroom Blinds Help With Insulation and Noise Reduction?

    Bedroom Blind Ideas

    Some blinds contribute significantly to thermal comfort.

    Cellular blinds trap air within their honeycomb structure, creating a thermal barrier. This can reduce heat loss in winter and limit heat gain in summer. In climates with temperature swings, these blinds improve comfort and reduce reliance on heating or cooling.

    Fabric thickness also matters. Heavier fabrics provide mild sound dampening, although blinds alone will not fully soundproof a room. Layering blinds with curtains improves both insulation and noise control.

    In practical use, insulated cellular blinds can reduce heat transfer through bedroom windows by up to 20–30%, depending on window size and climate. This makes a noticeable difference in bedrooms exposed to direct sunlight in summer or cold drafts in winter, especially when combined with proper window sealing.


    What Are the Safest Bedroom Blinds for Children and Pets?

    Safety should never be an afterthought in bedrooms used by children.

    Cordless blinds are the safest option. They remove strangulation risks associated with looped cords. Motorized blinds also improve safety by eliminating manual operation entirely.

    Look for blinds that comply with modern child-safety standards and use tension-based or wand-controlled systems. Bedrooms used by pets benefit from durable materials that resist bending, scratching, or chewing.

    Safe blinds protect occupants without sacrificing design.


    Are Motorized and Smart Blinds Worth It for Bedrooms?

    Bedroom Blind Ideas

    Motorized blinds offer convenience, not necessity.

    They are most useful in bedrooms with tall windows, hard-to-reach placements, or for users who value automation. Timed opening and closing can support consistent sleep routines, especially when paired with blackout blinds.

    Smart features should be chosen selectively. Reliable motors and quiet operation matter more than complex app controls. In many cases, motorization is about comfort rather than performance improvement.


    How Much Do Bedroom Blinds Cost and How Long Do They Last?

    Bedroom blind costs vary based on material, size, and mechanism.

    Basic roller blinds sit at the lower end. Cellular and Roman blinds cost more due to construction complexity. Motorized systems add a premium.

    Lifespan depends on quality and use. Well-made blinds typically last 8 to 15 years. Cellular blinds and quality roller systems often last longer due to fewer moving parts. Cheap blinds may need replacement within a few years, making them a false economy.

    Investing in durability usually reduces long-term costs.


    What Bedroom Blind Styles Work Best for Different Interiors?

    Bedroom Blind Ideas

    Style should support the room’s atmosphere, not dominate it.

    Modern bedrooms benefit from clean roller or cellular blinds in neutral tones. Classic interiors pair well with Roman blinds and textured fabrics. Small bedrooms feel larger with blinds that sit close to the window and avoid bulky folds.

    Color choice matters. Light colors reflect daylight and keep rooms airy. Dark colors enhance blackout performance but should be balanced with lighting and wall tones.

    The best bedroom blind style is the one that disappears when not in use.


    What Are the Most Common Bedroom Blind Mistakes to Avoid?

    Many bedroom blind problems stem from poor planning.

    Choosing blinds based only on daytime appearance often leads to night-time privacy issues. Ignoring light leakage creates frustration for light sleepers. Underestimating maintenance results in dusty or warped blinds over time.

    Another common mistake is mismatching blind type to window size. Heavy Roman blinds on wide windows can sag. Narrow windows fitted with bulky blinds look cramped.

    Avoiding these mistakes requires thinking beyond aesthetics.


    Bedroom Blind Types Compared by Performance

    Blind TypeLight ControlPrivacyInsulationBest Use Case
    Blackout Roller BlindsExcellentExcellentModerateLight-sensitive sleepers
    Cellular BlindsGood to excellentGoodHighTemperature control
    Roman BlindsModerateGoodModerateLayered, classic bedrooms
    Venetian BlindsAdjustableModerateLowDaytime control
    Zebra BlindsAdjustableLow at nightLowStyle-focused rooms

    This comparison helps narrow choices quickly without guesswork.


    A Practical Bedroom Blind Ideas’ Selection Checklist

    Before buying, confirm the following.

    • Light control matches sleep needs
    • Night-time privacy is guaranteed
    • Blind fit minimizes gaps
    • Safety is appropriate for children or pets
    • Maintenance requirements are realistic
    • Style complements room size and decor

    If all boxes are checked, the blinds will perform well long-term.


    Why Homeaholic Designs Bedroom Blind Ideas’ Solutions That Last

    At Homeaholic, bedroom blind selection is approached as part of a sleep-focused design system. Light control, privacy, insulation, and ease of use are prioritized before style decisions are finalized.

    This approach ensures bedroom blinds support rest, comfort, and visual calm rather than becoming another source of daily friction. When blinds are chosen correctly, they fade into the background and let the bedroom do what it’s meant to do. Help you rest.

    In street-facing apartments, one of the most common regrets is choosing light-filtering blinds that feel private during the day but become transparent at night. Switching to blackout or opaque blinds consistently solves this issue without changing the room’s overall design, which is why night-time testing matters as much as showroom appearance.


    Frequently Asked Questions About Bedroom Blind Ideas

    Are blackout blinds good for bedrooms?

    Yes. They are ideal for light-sensitive sleepers and rooms exposed to street lighting or early sunrise.

    Do blinds block heat and cold?

    Some do. Cellular blinds provide measurable insulation benefits.

    Are blinds better than curtains for bedrooms?

    Neither is always better. Layering both often delivers the best results.

    Are cordless blinds safer?

    Yes. Cordless and motorized blinds reduce safety risks significantly.

    How long do bedroom blinds last?

    Quality blinds typically last 8 to 15 years with normal use.

    Can blinds reduce noise?

    They help slightly, but layered treatments work better for sound reduction.


  • Modern Kitchen Design Ideas That Balance Style, Function, and Longevity

    Modern kitchen design ideas is not about chasing trends or copying showroom photos. It’s about creating a kitchen that works better every day, looks calm instead of cluttered, and ages well over time. A truly modern kitchen prioritizes function first, removes visual noise, and uses materials and layouts that support real cooking habits.

    In Homeaholic’s planning work, the biggest difference between a kitchen people love and a kitchen people tolerate shows up after week two. The winners usually have two things nailed down early. Enough storage to keep counters clear, and lighting that makes prep easy at night. When either is missing, even expensive kitchens start feeling messy and inconvenient.

    This guide breaks modern kitchen design ideas into practical ideas you can actually apply. Each section explains what works, when to use it, and what to avoid, based on layout logic, material behavior, and everyday use.


    What Defines a Modern Kitchen Design Idea?

    A modern kitchen is defined by simplicity with purpose. Every element earns its place. Clean lines replace ornamentation. Storage is hidden. Appliances are integrated. Visual balance matters more than decoration.

    Modern does not mean cold or empty. When done right, modern kitchens feel warm, efficient, and calm. Key characteristics include flat or handleless cabinetry, neutral or muted color palettes, seamless surfaces, and layouts designed around workflow rather than appearance. The goal is to reduce friction in daily use while maintaining a refined look.


    How to Choose the Right Modern Kitchen Design Layout

    Layout decisions shape how the kitchen feels and functions. Modern kitchens favor layouts that reduce movement, improve visibility, and integrate with surrounding spaces.

    L-Shaped Layout

    Best for small to mid-sized homes. It keeps the work triangle compact and allows space for dining or an island. This layout works well in apartments and open-plan spaces.

    U-Shaped Layout

    Ideal for storage-heavy kitchens. It provides maximum counter space and clear zoning for prep, cooking, and cleaning. Best for enclosed kitchens with enough width.

    Galley Kitchen

    Efficient and underrated. Two parallel counters reduce movement and are excellent for serious cooking. Modern galley kitchens rely on light colors and reflective surfaces to avoid feeling tight.

    Island-Based Layout

    A modern favorite for open-plan homes. Islands add prep space, seating, and storage, but only work if clearance around them is adequate. A cramped island breaks workflow and safety.


    Modern Kitchen Design Ideas for Small Spaces

    Small kitchens benefit the most from modern kitchen design principles because clutter shows instantly.

    Flat-panel cabinets make walls feel cleaner. Tall cabinetry pushes storage vertically, freeing counter space. Handleless designs remove visual breaks, making the room feel larger.

    Light colors, reflective backsplashes, and under-cabinet lighting prevent shadow buildup. Built-in appliances save inches that matter. Pull-out pantry systems replace bulky cabinets.

    The key rule is restraint. Every visible item should be intentional.


    Cabinetry Choices That Define a Modern Kitchen

    Cabinetry is the dominant visual element in any kitchen.

    Modern kitchen design favor slab-front cabinets with minimal seams. Handleless systems use push-to-open mechanisms or recessed channels. These look clean but should be chosen carefully for durability and ease of use.

    Materials matter. MDF with high-quality laminate works well for budget-conscious builds. Plywood offers better moisture resistance. Solid wood adds warmth but must be sealed properly to avoid warping.

    Matte finishes hide fingerprints better than gloss. Gloss reflects light but shows wear faster.


    Countertop Materials That Actually Perform

    Countertops take daily abuse. Modern design doesn’t ignore practicality.

    Quartz

    Engineered, consistent, low maintenance. Quartz resists stains and scratches and works well in modern kitchens where clean visuals matter.

    Granite

    Natural and durable. Requires sealing but handles heat well. Best for kitchens with heavy cooking.

    Marble

    Visually striking but high maintenance. Scratches and stains easily. Better suited for low-use kitchens or islands rather than main prep areas. Quartz dominates modern kitchens because it balances appearance with reliability.

    Color Palettes That Don’t Age Poorly

    Modern kitchens rely on controlled color use.

    White remains popular but is rarely used alone. It’s paired with wood tones, soft greys, or muted greens. Black kitchens look dramatic but require excellent lighting to avoid feeling heavy.

    Two-tone cabinets help define zones. Neutral bases with subtle contrast age better than bold colors. Trends fade. Balanced palettes last.

    Avoid excessive contrast. Modern kitchens aim for visual flow, not sharp breaks.


    Lighting Ideas That Improve Function and Mood

    Lighting is where many kitchens fail.

    Modern kitchen designs use layered lighting. Task lighting under cabinets ensures safe food prep. Ambient ceiling lights provide overall brightness. Accent lighting highlights textures or architectural features.

    Warm-neutral light temperatures prevent sterile feelings. Dimmers allow control throughout the day. Poor lighting can ruin even the best design.


    Storage Solutions That Keep Modern Kitchens Clean and Functional

    Storage is the real secret behind a modern kitchen that stays modern. When storage is weak, countertops become permanent parking lots. When storage is planned well, the kitchen looks clean even on busy weekdays.

    A practical target is to keep 70 to 90 percent of daily-use items inside closed storage, leaving only a few essentials visible. Deep drawers typically hold 25 to 40 percent more usable space than standard base cabinets because you can stack, categorize, and access items without crouching and digging.

    Use these modern storage moves that actually change daily life. Full-extension drawers for plates, pans, and dry goods. Pull-out pantry units for narrow spaces. A tall pantry cabinet that reaches the ceiling to reduce dust-catching gaps and add meaningful capacity. Corner solutions such as swing-out trays that recover space most kitchens lose.

    Appliance garages are worth it when you want a clean look without sacrificing convenience. They keep coffee machines, blenders, and toasters accessible while removing visual clutter. Add internal power outlets inside the garage so appliances can stay plugged in.

    The modern rule that prevents clutter is simple. If it’s used every day, give it a home within one step of where it’s used. If it’s not used daily, store it higher or deeper. This single decision improves cleanliness, speed, and visual calm.


    Integrated and Smart Appliances in Modern Kitchen Design

    Integrated and Smart Appliances in Modern Kitchen Design Ideas

    Integrated appliances are a defining modern kitchen feature because they remove visual interruptions. A panel-ready dishwasher disappears into the cabinetry. Built-in refrigerators maintain clean lines. Wall ovens align with cabinet fronts for a seamless look.

    Smart features are valuable when they reduce risk or improve precision. The most useful smart functions tend to be safety shut-off, temperature accuracy, maintenance alerts, and energy monitoring. Features that mainly add notifications rarely improve daily outcomes.

    Ergonomics matter more than brand hype. Wall ovens reduce bending and are safer for families. A common comfort range places the oven so the rack aligns around mid-torso height. Dishwashers close to the sink reduce drips and slipping risk. If you use the microwave daily, build it into a safe height zone rather than placing it on the counter.
    Ventilation is a modern kitchen dealbreaker. In open-plan spaces, weak extraction causes smells to spread and surfaces to feel greasy over time. Choose ventilation based on cooking habits, not aesthetics. Frequent frying or strong spices require stronger extraction than light reheating and baking. A modern kitchen should feel effortless. Integrated appliances deliver the visual calm. Smart features should deliver measurable usefulness.


    Open-Plan Modern Kitchens and Flow Control

    Modern Kitchen Design Ideas - Open-Plan and Flow Control

    Open-plan kitchens look amazing when they stay visually quiet and functionally controlled. The problem is that open kitchens expose everything. Mess, noise, and odors travel farther, and the kitchen becomes part of the living room experience.

    Flow control starts with zoning. The island or peninsula becomes a soft boundary that separates cooking from social space while keeping sightlines open. Keep prep tasks on the kitchen side, and seating on the outer side so guests don’t collide with the cooking workflow.

    Ventilation becomes non-negotiable. Open layouts amplify odors. Strong extraction and proper placement prevent smell spread and long-term surface buildup. Good lighting is also essential because open-plan rooms often have mixed light levels. Layered lighting prevents the kitchen from looking dim while the living area looks bright.

    Visual continuity is the modern trick that makes open spaces feel intentional. Match cabinet tones with nearby furniture wood tones, keep hardware minimal, and repeat one or two finishes across the space. When the kitchen shares materials with the room, the whole area feels designed rather than accidental.


    Common Mistakes That Ruin Modern Kitchen Design

    The most common modern kitchen design failure is not style. It’s friction. A kitchen can look perfect and still feel annoying every day.

    Common Mistakes that ruin Modern Kitchen Design Ideas

    One mistake is copying showroom layouts without measuring real clearances. Islands are the most common culprit. When walkways are tight, movement becomes awkward and unsafe. Another mistake is underestimating storage. Modern kitchens need strong storage because modern design removes open shelves and visual clutter tolerance. If storage is weak, counters fill up fast.

    Lighting mistakes are a quiet disaster. A kitchen with bright ceiling lights but no under-cabinet lighting creates shadow zones right where people chop and cook. It feels unsafe and frustrating. Gloss surfaces can also backfire. They reflect light, show fingerprints, and reveal wear quickly in high-touch areas.
    Ventilation is a major regret trigger, especially in open-plan kitchens. Weak extraction leads to lingering odors, greasy surfaces, and discomfort for everyone in the living space.

    Modern kitchens succeed when they’re planned for real life. Workflow, storage, lighting, and ventilation come before aesthetics.


    Budgeting for Modern Kitchen Design Ideas

    Modern Kitchen Design Ideas

    Modern kitchen design ideas do not have to be expensive, but they do require smart budget priorities. Most kitchens feel “high-end” because of three things. Cabinet quality, countertop performance, and lighting.

    Cabinetry typically consumes the largest share of the budget. The smartest spending here is not fancy doors. It’s durable boxes, strong hinges, and soft-close runners that can handle daily use for years. Countertops are the next high-impact choice. Quartz often becomes the modern default because it’s low maintenance and tends to stay looking new for a long time.

    Appliances should match cooking intensity. Heavy cooking households benefit from better ventilation and durable cooktops more than they benefit from premium smart displays. Lighting is the most underfunded category and one of the most regretted. Under-cabinet lighting and dimmers change daily comfort more than decorative fixtures do.

    A useful budgeting logic is to invest more where touch frequency is highest. Cabinets, drawers, sink zone, lighting, ventilation. Spend less on trend finishes that can be swapped later.


    Modern Kitchen Design Ideas – Decisions Compared (What Actually Works Long-Term)

    Design Decision AreaPopular ChoiceWhy People Choose ItReal-World PerformanceBest Use Case
    Cabinet StyleHandleless slab cabinetsClean look, uninterrupted linesWorks best with quality hardware; cheap systems lose alignment over timeModern kitchens prioritizing minimal visuals
    Cabinet FinishHigh-gloss laminateReflects light, looks premium initiallyShows fingerprints and scratches quickly in high-touch zonesLow-traffic or display-heavy kitchens
    Cabinet FinishMatte laminate or satinSofter look, hides wear betterAges more gracefully with daily useFamily kitchens and heavy-use homes
    CountertopQuartzLow maintenance, uniform lookTypically lasts 15–25 years with minimal careMost modern kitchens
    CountertopMarbleLuxury appearanceScratches and stains easily; high upkeepLight-use islands or statement zones
    LayoutIsland kitchenSocial, flexible workspaceNeeds proper clearance or becomes a traffic blockerOpen-plan homes with enough space
    LayoutGalley kitchenHighly efficient workflowOften outperforms islands in small homesApartments and compact layouts
    StorageDeep drawersEasy access, better organizationImproves usable storage by 25–40%Daily cookware and utensils
    StorageStandard shelvesLower upfront costItems get lost; inefficient vertical useLow-budget or secondary kitchens
    LightingCeiling lights onlySimple installationCreates shadow zones on prep surfacesRarely sufficient alone
    LightingLayered lightingTask + ambient controlImproves safety, comfort, and usability immediatelyAll modern kitchens
    AppliancesIntegrated appliancesSeamless appearanceLong-term visual calm, higher resale appealDesign-focused modern kitchens
    AppliancesFreestanding appliancesLower upfront costBreaks visual flow, more visual clutterBudget-first builds

    Quick Reality Benchmarks That Help Decisions

    Quartz tends to stay visually consistent with minimal maintenance for 15 to 25 years in typical home use. Deep drawer systems often improve usable storage by 25 to 40 percent compared with standard cabinet shelving. Under-cabinet task lighting is one of the highest-impact upgrades because it eliminates shadow zones on prep surfaces, which improves comfort and safety immediately.


    Sustainability in Modern Kitchen Design Ideas

    Sustainability in Modern Kitchen Design Ideas

    Sustainability in modern kitchens is mainly about longevity and efficiency. The most sustainable kitchen is the one you don’t have to renovate again in a few years.

    Start with energy-efficient appliances and LED lighting because they reduce long-term power use. Choose low-VOC finishes to improve indoor air quality. If you’re using wood, choose certified sources where possible and prioritize durable construction that resists moisture and heat.

    Material durability is a sustainability choice. Countertops that resist staining and chipping reduce replacement cycles. Cabinets with stable core materials and strong hardware last longer and reduce waste.

    Sustainable modern design is not about trendy eco labels. It’s about building a kitchen that stays functional, safe, and visually stable for the long haul.


    A Practical Modern Kitchen Design Ideas Checklist

    Use this checklist before finalizing plans. It prevents the most common modern-kitchen regrets.

    Practical Checklist for Modern Kitchen Design Ideas

    Layout and workflow:

    The cooking path feels natural and doesn’t cross the main walking route. Prep, cook, and clean zones are clearly placed.

    Storage capacity:

    Storage is strong enough that counters stay mostly clear. Deep drawers exist for daily items. Pantry space is planned for real grocery volume.

    Lighting layers:

    Task lighting covers prep surfaces. Ambient lighting fills the room evenly. Accent lighting adds depth without glare.

    Ventilation strength:

    Extraction matches cooking habits, especially in open-plan layouts.

    Material reality:

    Countertops match maintenance tolerance. Cabinet finishes fit daily use and fingerprint expectations.

    Appliance ergonomics:

    Ovens and microwaves are placed for safe use. The sink and dishwasher are positioned to reduce dripping and back-and-forth steps.

    If all boxes are checked, the design will feel modern for the right reason. Because it works.


    Why Homeaholic Designs Modern Kitchens That Last

    Homeaholic Authority on Modern Kitchen Design Ideas

    Homeaholic approaches modern kitchen design as a connected system. Layout decisions are made with workflow in mind. Storage is designed to keep counters clear. Materials are selected based on durability and maintenance reality. Lighting is planned as a functional layer, not decoration.

    The goal is a kitchen that stays visually calm during real life, not only in staged photos. That means planning for high-touch zones, cleaning habits, cooking intensity, and open-plan airflow. When those factors are handled early, the kitchen stays modern because it stays usable.

    This is why Homeaholic focuses on clean-line cabinetry, integrated appliances, smart storage solutions, and lighting that supports daily prep. Modern kitchens last when the design solves friction, not when it copies trends.


    Frequently Asked Questions About Modern Kitchen Design Ideas

    What makes a kitchen truly modern?

    A modern kitchen uses clean lines, integrated storage, functional layouts, and minimal ornamentation to prioritize efficiency and visual balance.

    Are modern kitchens suitable for small homes?

    Yes. Modern design principles reduce clutter and maximize storage, making them ideal for compact spaces.

    Are handleless cabinets practical?

    They look clean but require quality hardware. Soft-close mechanisms and proper spacing are essential for long-term use.

    Which countertop is best for modern kitchens?

    Quartz offers the best balance of durability, appearance, and low maintenance for most homes.

    Do modern kitchens feel cold?

    Only if poorly designed. Warm materials, proper lighting, and wood accents prevent sterility.

    Is a modern kitchen more expensive?

    Not necessarily. Smart planning and material selection can make modern kitchens cost-effective.