Blog

  • Down Pillows: Complete Guide to Comfort, Support, and Buying

    Down pillows are soft, lightweight pillows filled with natural duck or goose down clusters that provide plush comfort and adjustable support. The right pillow depends on fill power, firmness, loft, and how well it matches your sleep position and long-term maintenance needs.

    Down pillows are widely known for their luxury feel and adaptability, but they require informed selection to deliver real benefits. Unlike synthetic or foam options, down pillows adjust dynamically to your head and neck, which can improve comfort but also reduce structured support if not chosen correctly. Their performance is highly dependent on fill quality, density, and how consistently they maintain loft over time.

    Key characteristics that define down pillows:
    • Naturally soft and compressible structure
    • High breathability due to air-trapping clusters
    • Adjustable shape that conforms to pressure
    • Lightweight feel compared to foam alternatives
    • Requires regular fluffing to maintain performance

    What Are Down Pillows and How Do They Work?

    Down pillows are filled with the soft inner plumage found beneath the outer feathers of ducks or geese. These clusters are three-dimensional and trap air efficiently, creating a soft yet insulating structure that supports the head gently without resistance.

    Unlike structured pillows, down pillows work by redistributing filling based on pressure. When you rest your head, the clusters compress and shift, allowing the pillow to mold to your shape. This creates a personalized comfort experience, but also means that support depends heavily on fill density and maintenance.

    How down pillows function:
    • Air pockets provide cushioning and softness
    • Clusters compress under pressure for contouring
    • Fill redistributes for customized support
    • Loft determines height and comfort level
    • Recovery depends on regular fluffing

    This adaptive behavior is what makes down pillows unique, but it also requires users to understand how to maintain and choose them properly.

    What Is Fill Power and Why Does It Matter?

    Fill power is a measurement of how much space one ounce of down occupies, indicating the quality and loft of the material. Higher fill power means larger, more resilient clusters that trap more air and maintain shape longer.

    A pillow with higher fill power feels lighter yet more supportive because it maintains loft without requiring excessive fill weight. Lower fill power pillows are denser and heavier but tend to flatten more quickly over time, reducing comfort and lifespan.

    Fill power ranges and meaning:
    • 500–600 → basic quality, less durable
    • 600–700 → mid-range performance
    • 700–800 → premium comfort and longevity
    • 800+ → luxury grade with maximum loft
    Why fill power matters:
    • Determines softness and fluffiness
    • Affects durability and lifespan
    • Influences support level
    • Impacts overall comfort experience

    Choosing the right fill power ensures that the pillow maintains its structure and comfort over time.


    Are Down Pillows Good for Sleep?

    Down pillows are excellent for comfort-focused sleepers due to their soft and adaptive nature. They reduce pressure points and provide a plush sleeping surface that many users find relaxing and luxurious.

    However, their effectiveness depends on how well they match your sleep needs. While they offer superior comfort, they may not provide enough structural support for people who require firm neck alignment. This makes them ideal for some sleepers and less suitable for others.

    Benefits of down pillows:
    • Soft and pressure-relieving
    • Highly breathable for temperature regulation
    • Adjustable to different sleeping positions
    • Lightweight and easy to shape
    Limitations:
    • May lack firm support
    • Require frequent fluffing
    • Can flatten over time

    Understanding these trade-offs helps determine whether down pillows are the right choice for your sleep style.

    Down vs Feather Pillows: What’s the Difference?

    Down and feather pillows differ in structure, feel, and support. Down consists of soft clusters without quills, while feather pillows include quills that add firmness and structure.

    Down pillows are softer and more luxurious, while feather pillows provide more resistance and support. The presence of quills in feather pillows can create a firmer feel but may reduce comfort for some users.

    Key differences:
    • Down → soft, fluffy, no quills
    • Feather → firmer, contains quills
    • Down → better insulation and comfort
    • Feather → more structured support

    Choosing between them depends on whether you prioritize softness or firmness. Many pillows combine both materials to balance comfort and support.

    Down Pillows vs Memory Foam: Which Is Better?

    Down pillows and memory foam pillows represent two completely different approaches to sleep comfort. Down pillows focus on softness and adaptability, while memory foam emphasizes structured support and pressure distribution. Choosing between them depends on whether you prioritize comfort or consistent alignment.

    Memory foam maintains a fixed shape and provides stable support throughout the night. In contrast, down pillows adjust continuously, allowing for greater comfort but less structural consistency. Understanding these differences helps determine which option aligns with your sleep needs and preferences.

    Comparison Table
    FeatureDown PillowsMemory Foam
    ComfortVery softMedium-firm
    SupportAdjustableStructured
    Shape retentionLowHigh
    BreathabilityExcellentModerate
    DurabilityMediumHigh
    When to Choose Down
    • Prefer soft, plush feel
    • Like adjustable shape
    • Sleep in multiple positions
    When to Choose Memory Foam
    • Need firm neck support
    • Have chronic neck pain
    • Prefer consistent structure
    Key Insight
    • Down = comfort-focused
    • Memory foam = support-focused
    • Best choice depends on sleep priorities

    How to Choose the Right Down Pillow for Your Sleep Position
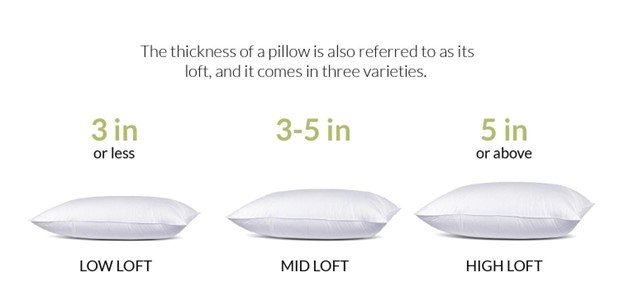
    Selecting a down pillow based on sleep position ensures proper spinal alignment and comfort. Different positions require different loft and firmness levels to support the neck correctly.

    Side sleepers need higher loft to fill the gap between shoulder and neck, while back sleepers require medium loft for balanced support. Stomach sleepers need low loft to prevent neck strain.

    Sleep position guide:
    • Side sleepers → high loft, firm fill
    • Back sleepers → medium loft, medium fill
    • Stomach sleepers → low loft, soft fill

    Choosing the wrong combination can lead to discomfort and poor sleep quality. Matching pillow characteristics to your position ensures better alignment and reduced strain.

    How to Choose the Perfect Down Pillow (Step-by-Step System)

    Choosing the right down pillow should follow a structured decision process rather than relying on comfort perception alone. Most buyers make the mistake of selecting a pillow based on softness or brand reputation, but down pillows require alignment between sleep position, loft, fill power, and firmness to perform correctly. A systematic approach ensures that the pillow supports both comfort and spinal alignment over long-term use.

    The key is to treat pillow selection as a layered decision. Each step builds on the previous one, eliminating mismatches that lead to discomfort or poor sleep quality. By following a step-by-step system, you can narrow down the ideal pillow configuration without trial and error, making the purchase both efficient and accurate.

    Step-by-Step Selection Framework

    Step 1: Identify sleep position

    • Side → high loft, firmer fill
    • Back → medium loft, balanced fill
    • Stomach → low loft, soft fill

    Step 2: Select loft level

    • Determines head elevation
    • Must align with shoulder height and posture

    Step 3: Choose fill power

    • 600–700 → moderate durability
    • 700–800 → premium performance
    • 800+ → maximum loft and longevity

    Step 4: Adjust firmness

    • Based on fill quantity, not material
    • Higher fill → firmer feel

    Step 5: Consider allergy sensitivity

    • Choose hypoallergenic treated down
    • Use protective covers

    Key Insight

    • A perfect pillow is a combination of variables, not a single feature
    • Matching all 5 steps ensures optimal comfort + support
    • Skipping steps leads to long-term discomfort

    How Firm Should a Down Pillow Be?

    Firmness in down pillows is determined by the amount of filling rather than the material itself. Increasing fill density creates more resistance and support.

    Soft pillows are ideal for comfort-focused sleepers, while firmer options provide better neck alignment. Since down is naturally soft, achieving firmness requires careful balance of fill quantity and construction.

    Firmness levels:

    • Soft → maximum comfort, low support
    • Medium → balanced comfort and support
    • Firm → higher support, less compression

    Selecting the right firmness ensures that the pillow maintains its shape and provides consistent support throughout the night.


    Loft vs Support: How Pillow Height Affects Your Spine
    Down Pillows

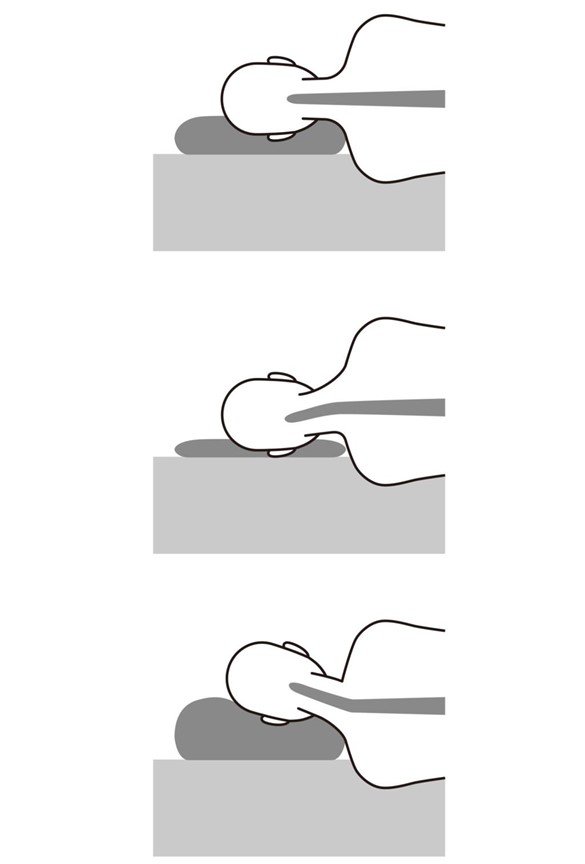
    Loft refers to the height of the pillow, and it directly determines how your head and neck align with your spine during sleep. While many users focus on softness or firmness, loft is actually the most critical factor in maintaining proper posture. Incorrect loft leads to neck strain, muscle tension, and long-term discomfort, even if the pillow feels comfortable initially.

    Down pillows are particularly sensitive to loft because they compress easily. This means that the actual support level depends not just on the starting height, but how the pillow behaves under pressure. A pillow that looks full may flatten significantly during use, reducing its effective loft and compromising alignment.

    Loft and Spine Alignment

    Low loft

    • Head sinks too far
    • Neck bends downward
    • Common issue for side sleepers

    High loft

    • Head pushed upward
    • Neck tilts unnaturally
    • Causes stiffness over time

    Correct loft

    • Neutral spine alignment
    • Head aligned with shoulders
    • Minimal muscle strain

    How to Determine Correct Loft

    • Measure shoulder width (side sleepers need higher loft)
    • Test compression under head weight
    • Ensure neck remains straight when lying down

    Key Insight

    • Loft determines alignment, not just comfort
    • Proper alignment prevents neck pain and improves sleep quality
    • Down pillows require higher fill density to maintain effective loft

    Are Down Pillows Hypoallergenic?

    Down pillows can be hypoallergenic if properly processed and maintained. High-quality down is cleaned thoroughly to remove dust, allergens, and impurities.

    However, sensitivity varies among individuals. Using protective covers and maintaining cleanliness reduces the risk of allergic reactions and improves hygiene.

    Key considerations:
    • Choose certified hypoallergenic options
    • Use pillow protectors
    • Wash regularly
    • Avoid low-quality untreated down

    Proper care ensures that down pillows remain safe and comfortable for most users.

    How Long Do Down Pillows Last?

    Down pillows typically last between 2 to 5 years depending on quality and maintenance. Higher fill power pillows tend to last longer due to better resilience and structure.

    Over time, pillows may lose loft and become flat, reducing comfort and support. Regular care helps extend lifespan and maintain performance.

    Factors affecting lifespan:

    • fill quality
    • usage frequency
    • maintenance routine
    • environmental conditions

    Proper care ensures consistent comfort and delays replacement.

    How Down Pillows Lose Loft Over Time (Real Performance Timeline)

    Down pillows do not fail suddenly; they degrade gradually through loss of loft and resilience. Understanding this timeline helps set realistic expectations and ensures timely replacement before comfort and support decline significantly.

    The primary cause of degradation is repeated compression, which breaks down the structure of down clusters. Over time, the clusters lose their ability to trap air, resulting in reduced volume and support. Maintenance can slow this process but cannot completely prevent it.

    Performance Timeline

    • Year 1
      • Maximum loft and softness
      • Optimal performance
    • Year 2–3
      • Slight compression
      • Requires more frequent fluffing
    • Year 4–5
      • Noticeable flattening
      • Reduced support
    • Beyond 5 years
      • Significant degradation
      • Replacement recommended

    Signs of Wear

    • pillow remains flat after fluffing
    • reduced comfort
    • uneven filling distribution

    Key Insight

    • Higher fill power slows degradation
    • Maintenance extends lifespan but doesn’t stop decline
    • Replace before performance drops significantly

    How to Clean and Maintain Down Pillows
    Down Pillows

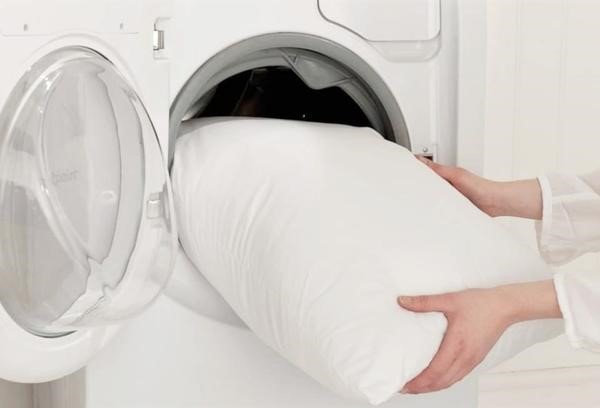
    Cleaning and maintenance are essential to preserve hygiene and performance. Down pillows can be washed, but require careful handling to avoid damage.

    Regular fluffing restores loft, while proper washing removes dirt and oils. Thorough drying is critical to prevent moisture-related issues.

    Maintenance steps:
    • fluff daily
    • wash periodically
    • dry completely
    • use protective covers

    Consistent care ensures long-term durability and comfort.

    How Much Do Down Pillows Cost?

    Down pillow prices vary based on fill power, material quality, and brand. Basic options are affordable, while premium pillows offer better performance and longevity.

    Cost considerations:
    • fill quality
    • construction
    • brand reputation
    • durability

    Higher investment often results in better long-term value.


    Common Problems and How to Avoid Them
    Down Pillows

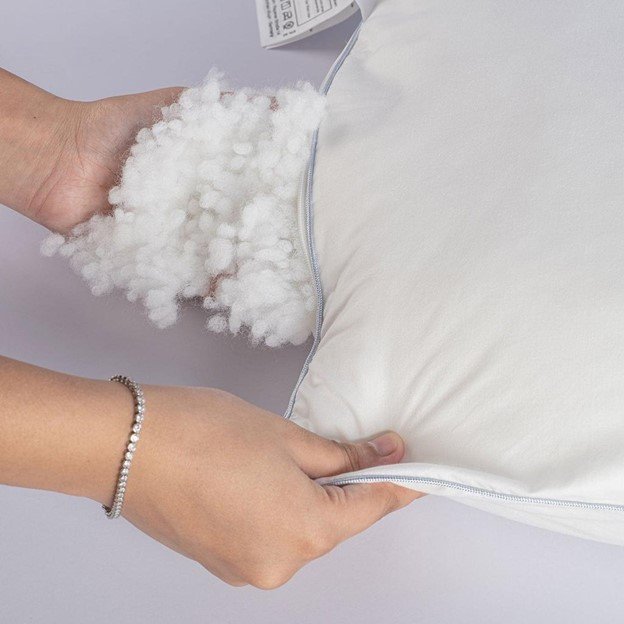
    Down pillows can develop issues such as flattening, clumping, and reduced support. These problems are usually caused by improper use or maintenance.

    Preventive measures:
    • regular fluffing
    • proper washing
    • correct storage
    • choosing high fill power

    Avoiding these issues ensures consistent performance.

    Are Down Pillows Worth It?

    Down pillows are worth it for users who prioritize comfort and softness. They provide a premium sleeping experience that is difficult to replicate with synthetic materials.

    However, they may not suit everyone, especially those needing firm support or dealing with allergies. Evaluating personal needs ensures the right decision.


    Common Buying Mistakes When Choosing Down Pillows

    Down Pillows

    Many buyers choose down pillows based on surface-level factors such as softness or price, which often leads to dissatisfaction. Understanding common mistakes helps avoid poor decisions and ensures better long-term performance.

    The biggest issue is ignoring how different variables interact. A pillow may feel perfect initially but fail to provide consistent support if it doesn’t match your sleep position or loft requirements. Recognizing these pitfalls allows for smarter purchasing decisions.

    Most Common Mistakes

    • Choosing softness without considering support
    • Ignoring fill power and quality
    • Selecting incorrect loft for sleep position
    • Buying low-quality untreated down
    • Not considering maintenance requirements

    How to Avoid Them

    • Follow a structured selection system
    • Prioritize alignment over comfort alone
    • Invest in higher fill power for durability
    • Use protective covers

    Key Insight

    • Most problems are caused by wrong selection, not bad products
    • Correct choices eliminate the majority of issues
    • Understanding variables leads to better long-term satisfaction

    Real-World Case Study: Comfort vs Support Trade-Off
    Down Pillows

    A user transitioned from a memory foam pillow to a down pillow primarily for increased comfort and a softer sleep surface. Initially, the switch delivered immediate improvements in perceived comfort, as the down pillow reduced pressure points and allowed the head to sink naturally without resistance. However, within a few weeks, the user began experiencing mild neck discomfort due to insufficient structural support, especially during longer sleep cycles.

    This situation highlights a common issue with down pillows. While they excel in softness and adaptability, they often lack the inherent structure needed to maintain proper spinal alignment without correct fill density. The user resolved this by switching to a medium-fill down pillow, which increased loft and support without sacrificing comfort. This adjustment created a balanced experience where the pillow maintained shape while still offering the softness expected from down.

    Breakdown of the scenario:

    • Initial setup → low-fill down pillow (high comfort, low support)
    • Problem → neck misalignment over extended sleep
    • Adjustment → medium-fill down pillow
    • Result → improved alignment + maintained comfort

    Key takeaway:

    • Comfort alone is not enough
    • Support must match sleep position
    • Fill density directly impacts usability
    • Trial and adjustment are often required

    This case demonstrates that the best down pillow is not the softest one, but the one that balances comfort with structural support based on individual needs.

    Expert Insight

    Down pillows are often misunderstood as purely luxury items focused on softness, but their performance is highly dependent on correct selection and maintenance. Experts emphasize that fill power, loft, and firmness must work together to provide both comfort and proper spinal alignment. Without this balance, even high-quality down pillows can fail to deliver consistent sleep support over time.

    From a performance perspective, down behaves differently than foam or synthetic materials. It compresses easily and redistributes under pressure, which is ideal for comfort but requires careful calibration to maintain support. This is why experts recommend selecting pillows based on sleep position and adjusting fill levels rather than choosing based on softness alone.

    Expert recommendations:

    • Choose fill power based on durability needs (700+ for long-term use)
    • Match firmness with sleep position (side sleepers need more support)
    • Use pillow protectors to extend lifespan
    • Fluff regularly to maintain loft and performance

    Strategic insight from Homeaholic:

    • Comfort without support leads to long-term discomfort
    • Support without comfort reduces sleep quality
    • Balance is the defining factor of a good pillow

    Homeaholic recommends evaluating down pillows as a system of variables, not a single feature product. When fill power, firmness, and sleep position are aligned correctly, down pillows deliver both luxury comfort and functional support, resulting in improved sleep quality and long-term satisfaction.

    FAQ Section

    What is fill power in down pillows?

    It measures loft and quality, with higher values indicating better performance.

    Are down pillows good for side sleepers?

    Yes, if they have high loft and firmness.

    Do down pillows go flat?

    Yes, but proper maintenance reduces this.

    Are they hypoallergenic?

    Treated options are suitable for allergy-sensitive users.
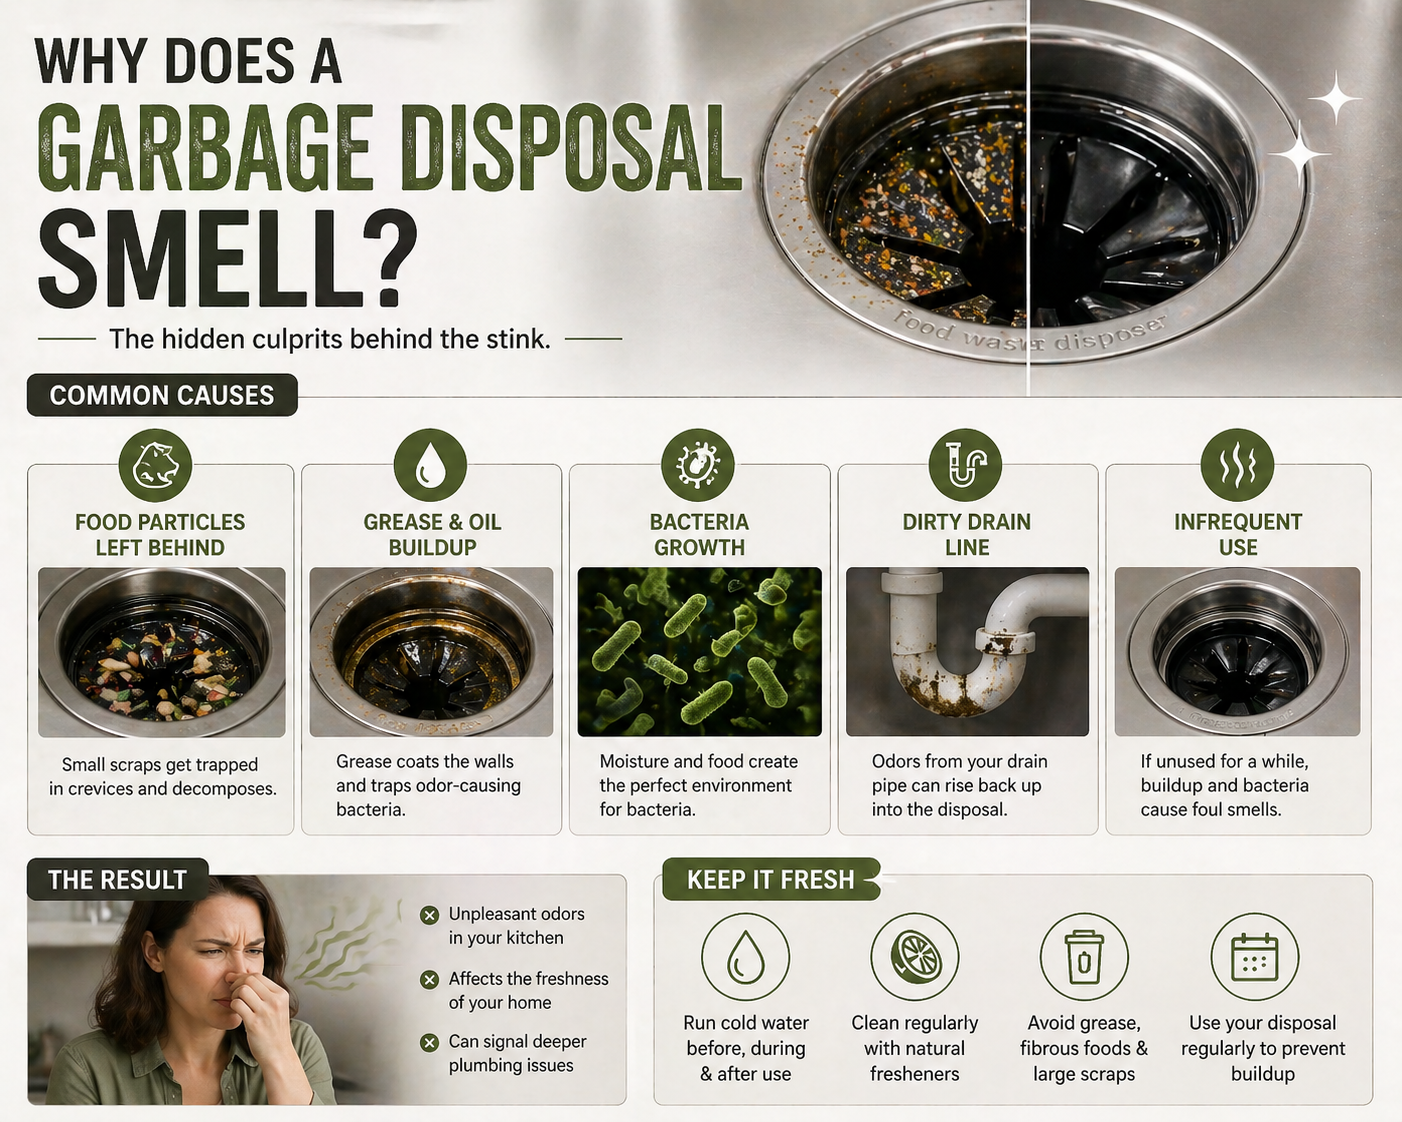

  • How to Clean a Garbage Disposal (Step-by-Step Guide That Actually Works

    To clean a garbage disposal, turn off power, flush with cold water and dish soap, scrub the splash guard, use baking soda and vinegar to break down buildup, then run ice and citrus peels to remove debris and odor completely.


    How to Choose the Right Cleaning Method

    The right cleaning method depends on whether your garbage disposal has odor, grease buildup, trapped debris, or long-term neglect.

    Not all disposal problems require the same solution. Many homeowners waste time repeating ineffective methods because they don’t match the cleaning approach to the actual issue. For example, using citrus peels might improve smell temporarily, but it won’t remove grease buildup or trapped debris. Similarly, baking soda and vinegar work well for organic residue but won’t fully dislodge solid particles stuck inside the chamber.

    A smarter approach is to diagnose the problem first and then apply a targeted cleaning method. This not only saves time but also improves results and prevents unnecessary wear on the disposal. Choosing the correct method ensures that you’re solving the root cause instead of masking symptoms.

    Cleaning decision system:

    • Bad smell → baking soda + vinegar
    • Grease buildup → dish soap + hot water (then cold rinse)
    • Debris stuck → ice + salt cleaning
    • Heavy buildup → full deep cleaning process

    Practical tip:

    • Combine methods if multiple issues exist
    • Repeat cleaning cycle for severe odor
    • Always finish with cold water flush

    Decision clarity:
    If your disposal smells AND drains slowly, you likely have both grease and debris buildup, which requires a combination approach instead of a single method.

    What Is the Best Way to Clean a Garbage Disposal?

    The best way combines physical cleaning + chemical breakdown + odor neutralization for complete results.

    Most homeowners think running water is enough, but that only clears loose debris. Real buildup happens inside the grinding chamber, under the splash guard, and along the drain walls. Over time, grease residue and microscopic food particles stick to surfaces, forming a layer that traps bacteria. This is why disposals start smelling even when they look clean from the top.

    A complete cleaning approach targets every layer of contamination. Mechanical scrubbing removes stuck debris, while natural reactions like baking soda and vinegar break down organic waste. Ice helps knock loose hardened particles, and citrus oils neutralize odor compounds. This multi-layer strategy ensures both hygiene and performance improvement.

    Best cleaning system includes:

    • Scrubbing splash guard (main odor source)
    • Baking soda + vinegar reaction
    • Ice + salt mechanical cleaning
    • Citrus peel deodorizing
    • Cold water flushing

    Why this method works better:

    • Targets hidden buildup, not just surface waste
    • Eliminates odor-causing bacteria, not just smell
    • Improves grinding efficiency and drainage

    Decision clarity:
    If your disposal smells, feels slow, or hasn’t been cleaned in weeks, this full method is required. Quick rinsing alone won’t solve the root problem.


    How to Clean a Garbage Disposal Step by Step

    Follow this structured process for a complete and safe clean.

    Cleaning a garbage disposal isn’t just about throwing in ingredients. The order matters because each step prepares the unit for the next. For example, flushing first removes loose debris so that baking soda and vinegar can directly target buildup instead of being diluted. Similarly, scrubbing the splash guard early removes the biggest source of odor before deeper cleaning begins.

    This step-by-step system is designed to cover all contamination zones, from visible surfaces to internal components. Skipping steps leads to partial cleaning, which is why many people notice smells returning quickly. A structured process ensures long-lasting results instead of temporary fixes.

    Step-by-step process:

    • Turn off power completely
    • Flush with cold water + dish soap
    • Scrub splash guard thoroughly
    • Add baking soda + vinegar (10–15 mins)
    • Run ice + salt for internal cleaning
    • Add citrus peels for freshness
    • Final cold water rinse

    Real-world tip:

    • Always use cold water during operation
    • Never insert hands inside disposal
    • Use a brush for safe internal cleaning

    Decision clarity:
    If your disposal smells mildly, follow the full process once. If odor is strong, repeat vinegar + baking soda twice for deeper breakdown.


    How to clean a garbage disposal

    Why Does a Garbage Disposal Smell?

    Smell is caused by decomposing food particles + trapped grease + bacterial activity.

    Garbage disposals operate in a dark, moist environment, which is ideal for bacterial growth. When food particles get trapped in crevices, they begin to decompose. This process releases sulfur compounds, which are responsible for the classic “rotten egg” smell. The issue becomes worse when grease is involved, as it forms a sticky layer that holds onto waste and prevents proper flushing.

    Another overlooked factor is the splash guard. This rubber component traps food particles underneath its folds, where water flow cannot reach effectively. Even if the grinding chamber is clean, a dirty splash guard can continuously release odor, making it seem like the entire system is dirty.

    Main odor sources:

    • Food waste stuck in chamber
    • Grease coating internal surfaces
    • Bacterial growth in moist areas
    • Dirty splash guard folds

    Why odor persists:

    • Incomplete cleaning methods
    • Lack of regular maintenance
    • Using only water without scrubbing

    Decision clarity:
    If smell returns quickly after cleaning, the issue is likely grease buildup or splash guard contamination, not just surface debris.


    How to Remove Bad Smell from Garbage Disposal

    Removing odor requires targeting the source, not masking the smell.

    Many people use lemon peels alone, which only provides temporary freshness. True odor removal happens when the bacteria and organic residue causing the smell are eliminated. This means combining cleaning agents with mechanical action to break down buildup and flush it out completely.

    Different odor intensities require different approaches. Mild smells can be fixed with baking soda and citrus, while strong odors often require repeated cleaning cycles and deeper scrubbing. Understanding this distinction helps avoid frustration when simple methods don’t work.

    Odor removal methods:

    • Mild odor → baking soda + vinegar
    • Moderate odor → add ice + salt cleaning
    • Strong odor → deep clean + repeat cycle
    • Grease smell → dish soap + hot water flush

    What works best:

    • Combine methods, don’t rely on one
    • Focus on splash guard cleaning
    • Repeat process if needed

    Decision clarity:
    If odor disappears after one cycle, maintenance is enough. If not, perform a full deep clean to remove underlying buildup.


    How to Deep Clean a Garbage Disposal (Monthly Method)

    Deep cleaning removes hidden buildup and bacterial layers that regular cleaning misses.

    Over time, a thin layer called biofilm forms inside the disposal. This layer consists of bacteria and organic residue that stick firmly to surfaces. Regular cleaning may reduce odor but won’t completely remove this layer. Deep cleaning is necessary to reset the system and restore hygiene.

    This process involves dismantling accessible parts like the splash guard, soaking them, and manually scrubbing areas that water flow cannot reach. It’s especially important for households that use disposals frequently or process greasy foods.

    Deep cleaning process:

    • Turn off power
    • Remove and soak splash guard
    • Scrub chamber manually
    • Use baking soda + vinegar
    • Run ice + salt cycle
    • Finish with citrus

    Benefits:

    • Removes hardened grease
    • Eliminates biofilm
    • Restores fresh smell
    • Improves performance

    Decision clarity:
    If your disposal smells even after regular cleaning, deep cleaning is required at least once every 3–4 weeks.


    How to clean a garbage disposal

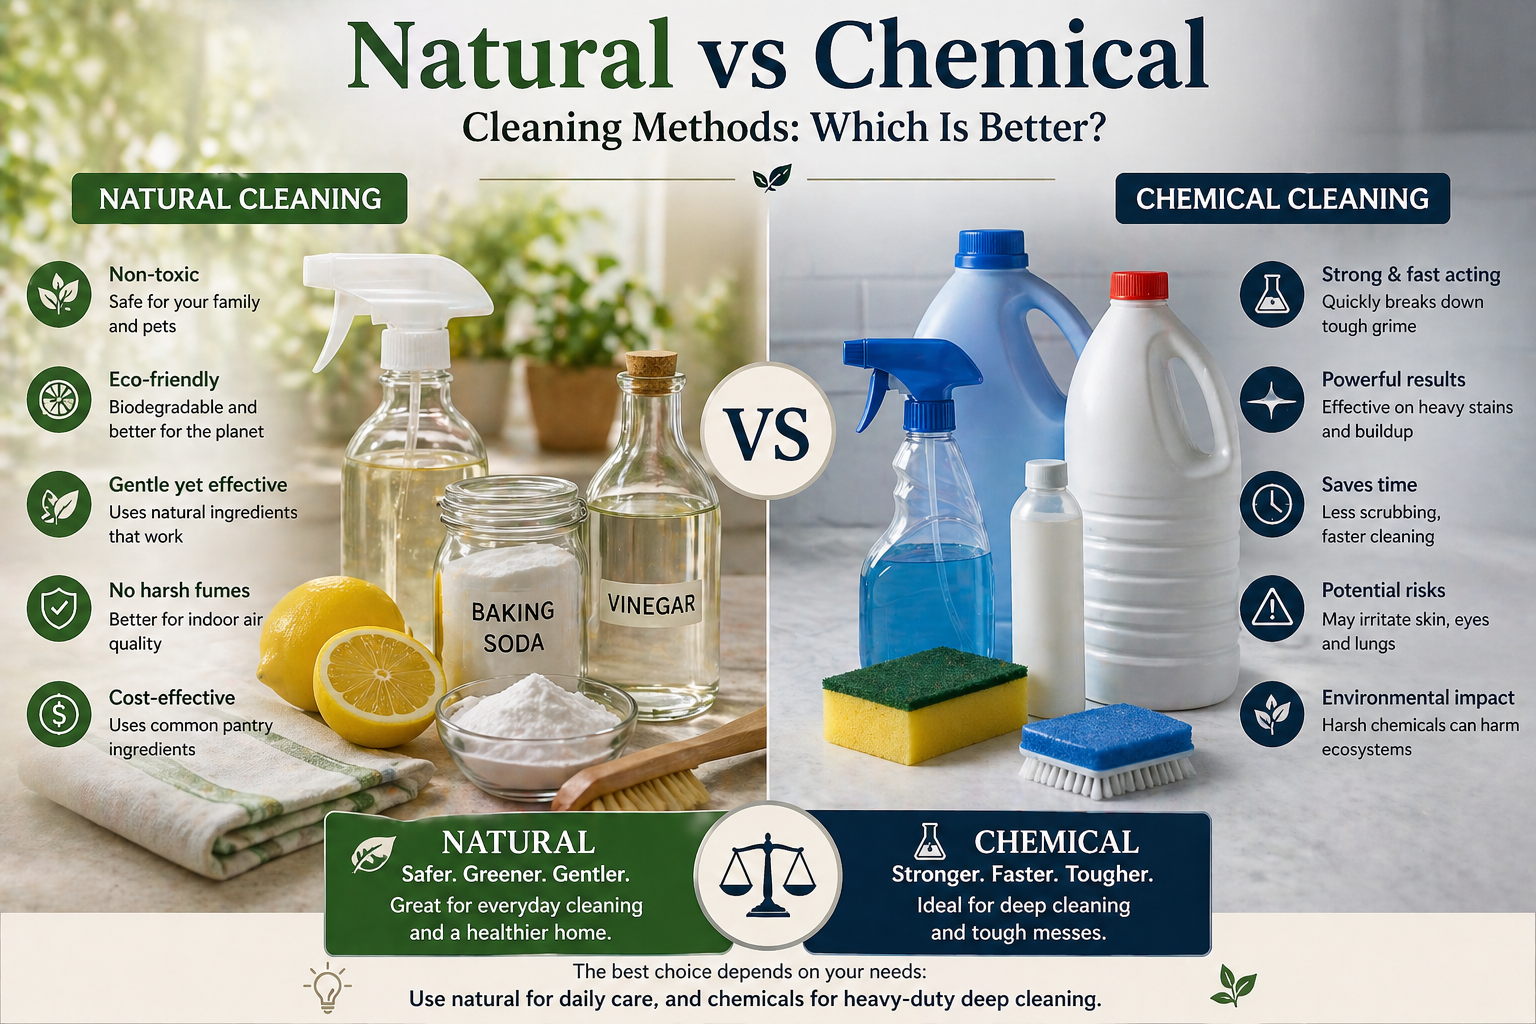
    Natural vs Chemical Cleaning Methods: Which Is Better?

    Natural methods are safer, while chemical cleaners are stronger but riskier.

    Cleaning methods like baking soda and vinegar are effective for natural routine maintenance. They are safe for pipes, environmentally friendly, and cost-effective. However, they may require repeated use for heavy buildup. Chemical cleaners, on the other hand, are designed for stronger action but can damage internal components if overused.

    The key is knowing when to use each method. For most households, natural cleaning is sufficient. Chemical cleaners should only be used occasionally when buildup becomes severe and cannot be removed through regular methods.

    Comparison:

    • Natural → safe, eco-friendly, consistent use
    • Chemical → powerful, occasional use only
    • Bleach → avoid due to damage risk

    Best strategy:

    • Weekly natural cleaning
    • Monthly deep cleaning
    • Rare chemical use if needed

    Decision clarity:
    If your disposal is maintained regularly, natural methods are enough. Chemical cleaners are only for neglected systems.


    Why These Cleaning Methods Work

    Garbage disposal cleaning works by combining chemical reactions and mechanical action to break down organic waste, dissolve grease, and remove bacteria.

    Each cleaning method targets a specific type of buildup inside the disposal. Baking soda acts as a mild abrasive and deodorizer, while vinegar contains acetic acid that reacts with organic matter and helps dissolve residue. When combined, they create a foaming reaction that penetrates tight spaces and loosens trapped particles. This is why the mixture is effective for odor removal and light cleaning.

    Mechanical methods like ice and salt work differently. Ice creates friction inside the grinding chamber, knocking loose debris that has hardened over time. Salt enhances this effect by adding abrasion, helping scrub internal surfaces. Citrus peels add a final layer of freshness by releasing natural oils that neutralize odor compounds instead of just masking them.

    How each method contributes:

    • Baking soda → neutralizes odor and loosens buildup
    • Vinegar → dissolves residue and kills bacteria
    • Ice → dislodges stuck debris
    • Salt → increases scrubbing power
    • Citrus → neutralizes odor compounds

    Why combination works best:

    • Covers both chemical and physical cleaning
    • Targets multiple problem layers
    • Provides longer-lasting results

    Decision clarity:
    If a single method doesn’t solve the problem, it’s because you’re only addressing one layer of buildup. Combining methods ensures complete cleaning.


    How Often Should You Clean a Garbage Disposal?

    Cleaning frequency depends on usage and food type.

    Garbage disposals that handle greasy or fibrous foods require more frequent cleaning. In contrast, light-use disposals may only need maintenance every two weeks. The key is consistency. Waiting until odor appears means buildup has already formed, making cleaning harder and less effective.

    A structured cleaning schedule prevents accumulation and keeps the disposal running efficiently. This also reduces long-term wear and potential plumbing issues.

    Recommended schedule:

    • Light use → every 2 weeks
    • Normal use → weekly
    • Heavy use → 2–3 times/week

    Deep cleaning:

    • Every 3–4 weeks

    Signs you need cleaning:

    • Bad odor
    • Slow drainage
    • Unusual noise
    • Visible residue

    Decision clarity:
    If you cook daily, treat disposal cleaning as part of your weekly kitchen routine, not an occasional task.

    What Should You Never Put in a Garbage Disposal?

    Certain materials cause clogs, damage, and long-term issues.

    Garbage disposals are designed for soft food waste, not everything. Hard items can damage components, while fibrous foods wrap around moving parts. Grease is especially problematic because it coats pipes and traps debris, leading to blockages over time.

    Understanding what to avoid is just as important as cleaning. Prevention reduces the need for frequent maintenance and extends the lifespan of the disposal.

    Avoid these:

    • Grease and oil
    • Coffee grounds
    • Eggshells
    • Fibrous foods (celery, corn husk)
    • Bones
    • Pasta and rice

    Why they’re harmful:

    • Grease hardens in pipes
    • Fibers wrap around impellers
    • Starches expand and clog

    Decision clarity:
    If your disposal clogs frequently, your usage habits—not your cleaning routine—are likely the problem.


    How to clean a garbage disposal

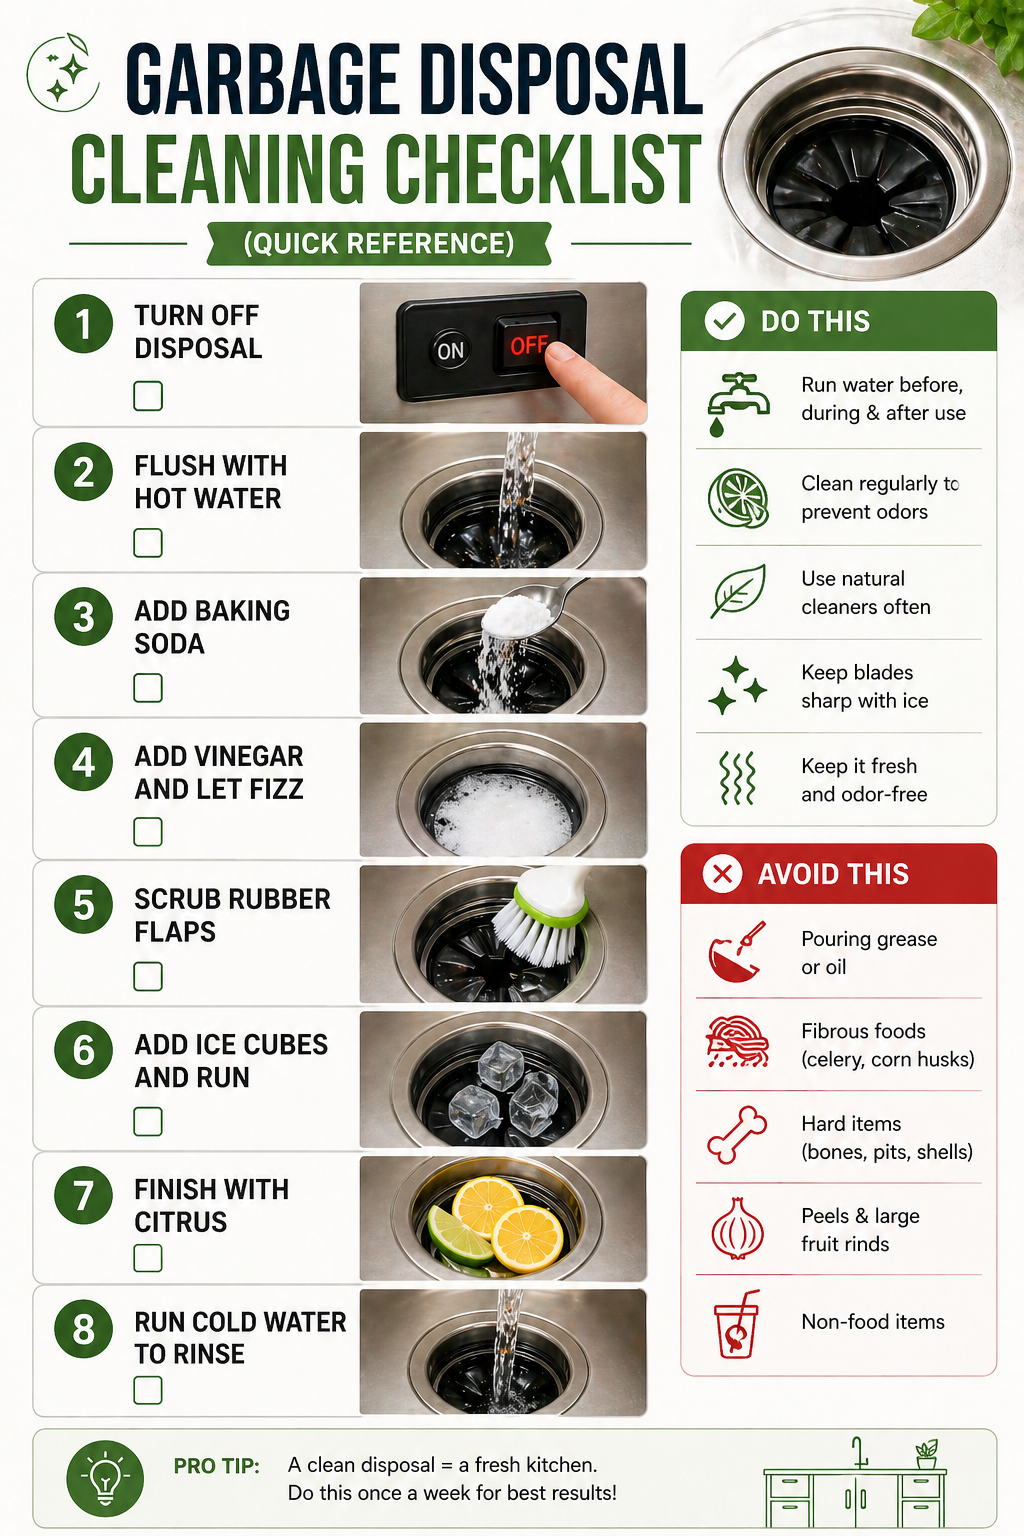
    Garbage Disposal Cleaning Checklist (Quick Reference)

    Use this as a weekly maintenance system.

    A checklist simplifies cleaning and ensures no critical step is missed. Most disposal issues happen because cleaning is inconsistent or incomplete. Following a structured routine eliminates buildup before it becomes a problem.

    This checklist is designed for efficiency, allowing you to maintain your disposal in under 10 minutes while preventing long-term issues.

    Weekly checklist:

    • Run cold water before and after use
    • Clean splash guard
    • Use baking soda + vinegar
    • Add citrus peels
    • Run ice occasionally

    Monthly:

    • Deep clean process

    Benefits:

    • Prevents odor buildup
    • Maintains performance
    • Reduces repair risk

    Decision clarity:
    Consistency beats intensity. A simple weekly routine is more effective than occasional deep cleaning.


    How Long Does It Take to Clean a Garbage Disposal?

    Cleaning a garbage disposal typically takes between 5 to 25 minutes depending on the level of buildup and the method used.

    Time expectations are important because many users either rush the process or assume cleaning requires too much effort. In reality, most disposal cleaning tasks can be completed quickly if done regularly. A simple rinse and deodorizing cycle takes only a few minutes, while a full deep clean requires slightly more time but delivers significantly better results.

    The duration depends on how long buildup has been accumulating. A lightly used disposal can be cleaned in under 10 minutes, while a neglected one may require repeated cycles and scrubbing. Understanding these time ranges helps set realistic expectations and encourages consistent maintenance instead of delay.

    Time breakdown:

    • Quick clean → 5–10 minutes
    • Standard clean → 10–15 minutes
    • Deep clean → 20–25 minutes

    What affects cleaning time:

    • Amount of grease buildup
    • Frequency of cleaning
    • Type of food waste processed
    • Whether deep cleaning is required

    Decision clarity:
    If cleaning takes longer than 25 minutes, the disposal likely has heavy buildup or underlying issues that may require deeper intervention.


    When Cleaning Doesn’t Work: Signs You Need Repair

    Not all problems are cleaning-related.

    If your disposal continues to malfunction after thorough cleaning, the issue may be mechanical. Components like the motor or impeller can wear out over time, and blockages deeper in the plumbing system may require professional intervention.

    Recognizing these signs early helps avoid further damage and costly repairs.

    Warning signs:

    • Disposal won’t turn on
    • Humming sound only
    • Frequent clogs
    • Water backing up

    Possible causes:

    • Jammed impeller
    • Motor failure
    • Drain blockage

    Decision clarity:
    If cleaning doesn’t restore normal function, stop troubleshooting and consult a plumber to avoid worsening the issue.


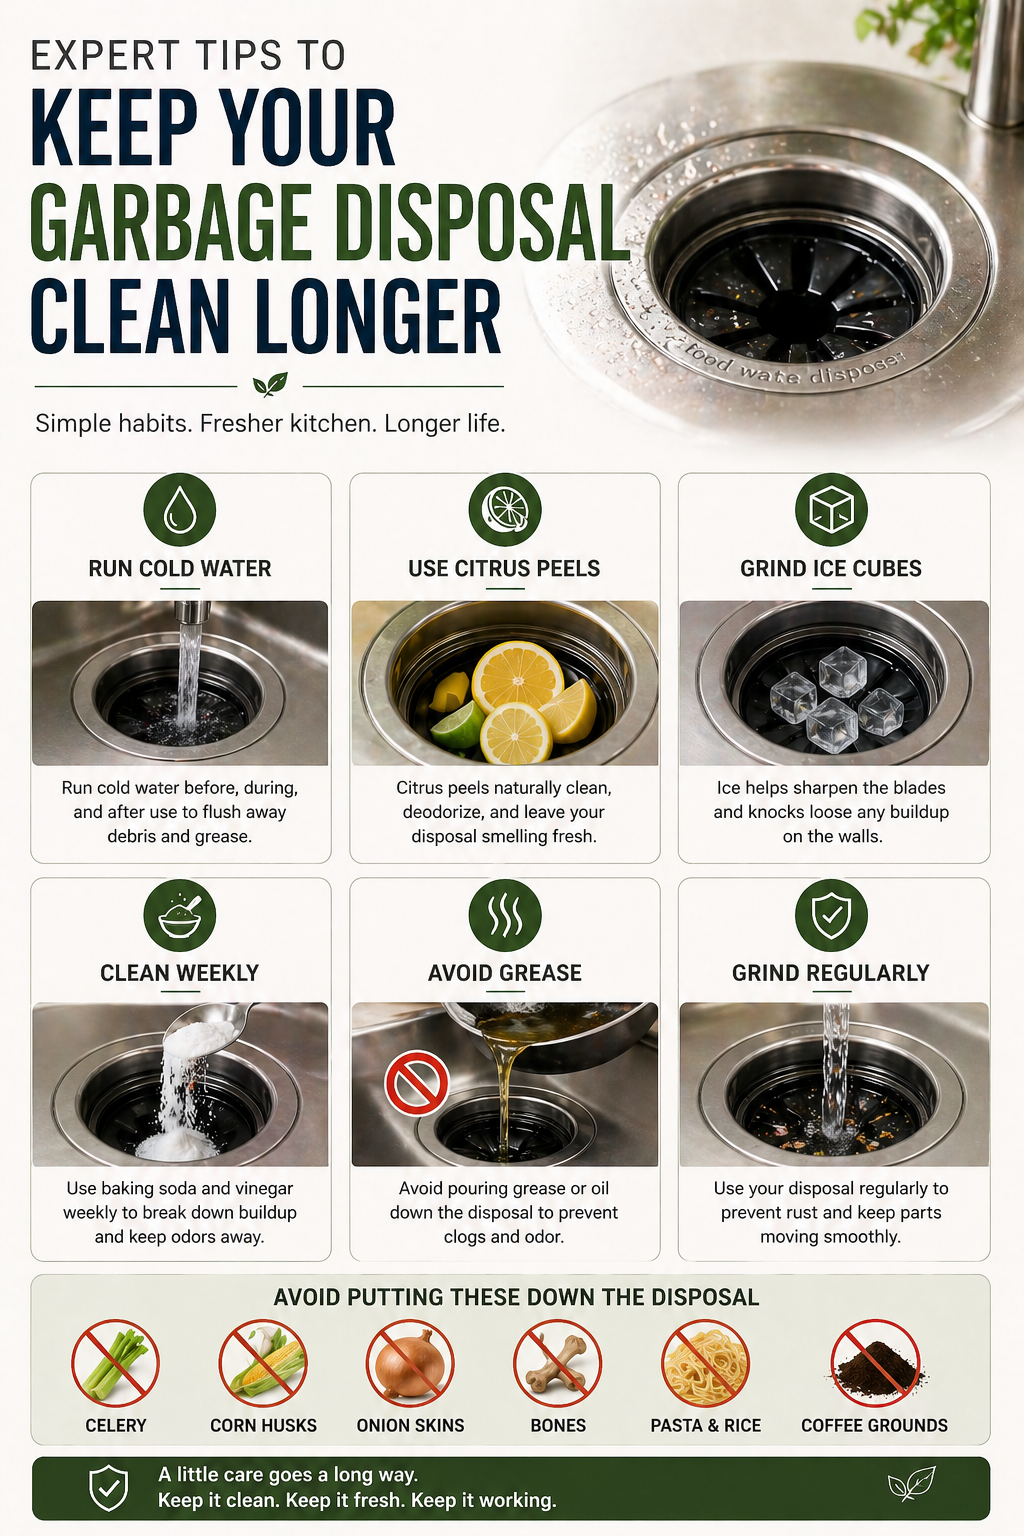
    Expert Tips to Keep Your Garbage Disposal Clean Longer

    Prevention reduces effort and extends lifespan.

    Most disposal problems are caused by daily habits, not lack of cleaning. Small changes in how you use the disposal can significantly reduce buildup and odor formation. These habits are simple but highly effective when applied consistently.

    Maintaining a clean disposal isn’t about frequent deep cleaning—it’s about smart usage and routine care.

    Best practices:

    • Always use cold water
    • Run disposal regularly
    • Cut large food pieces
    • Avoid overloading
    • Clean splash guard weekly

    Long-term benefits:

    • Fewer odors
    • Better performance
    • Longer lifespan
    • Reduced repair costs

    Decision clarity:
    Adopt these habits and your disposal will stay clean with minimal effort.

    Expert Insight: What Professionals Recommend

    Professional plumbers recommend weekly maintenance cleaning and proper usage habits to extend garbage disposal lifespan by up to 30–40%.

    From a professional perspective, most garbage disposal failures are preventable. Plumbers often see units that fail prematurely due to grease buildup, improper usage, and lack of routine cleaning. According to industry experience, disposals that are maintained weekly and used correctly last significantly longer and perform more efficiently.

    Experts emphasize that cleaning alone is not enough. Proper usage habits, such as avoiding problematic foods and running cold water consistently, play an equally important role. Combining preventive habits with regular cleaning creates a balanced system that minimizes wear and reduces the likelihood of clogs or mechanical failure.

    Professional recommendations:

    • Clean disposal weekly using natural methods
    • Deep clean once every 3–4 weeks
    • Avoid grease and fibrous foods
    • Always run cold water during use
    • Inspect and clean splash guard regularly

    Long-term benefits:

    • Extended disposal lifespan
    • Reduced repair costs
    • Improved performance
    • Consistent odor control

    Decision clarity:
    If you follow both cleaning routines and proper usage habits, your garbage disposal will remain efficient and problem-free for years.

    Recommended Tools for Cleaning a Garbage Disposal

    Using the right tools makes garbage disposal cleaning safer, faster, and more effective.

    While most cleaning can be done using household items, having a few dedicated tools can significantly improve results. Tools designed for disposal cleaning help reach areas that are otherwise difficult to clean, such as the inner chamber and underside of the splash guard. They also reduce the risk of injury by allowing you to clean without inserting your hands into the unit.

    Choosing the right tools depends on how frequently you clean your disposal and the level of buildup you typically encounter. For regular maintenance, simple tools are sufficient, while deeper cleaning may benefit from specialized products.

    Useful tools:

    • Long-handle scrub brush
    • Disposal cleaning pods
    • Natural enzyme cleaners
    • Flexible cleaning wand

    Why tools matter:

    • Improve cleaning efficiency
    • Reach hidden areas
    • Reduce safety risks
    • Enhance long-term maintenance

    Decision clarity:
    If you clean your disposal regularly, basic tools are enough. If buildup is frequent, investing in specialized cleaning tools will save time and effort.


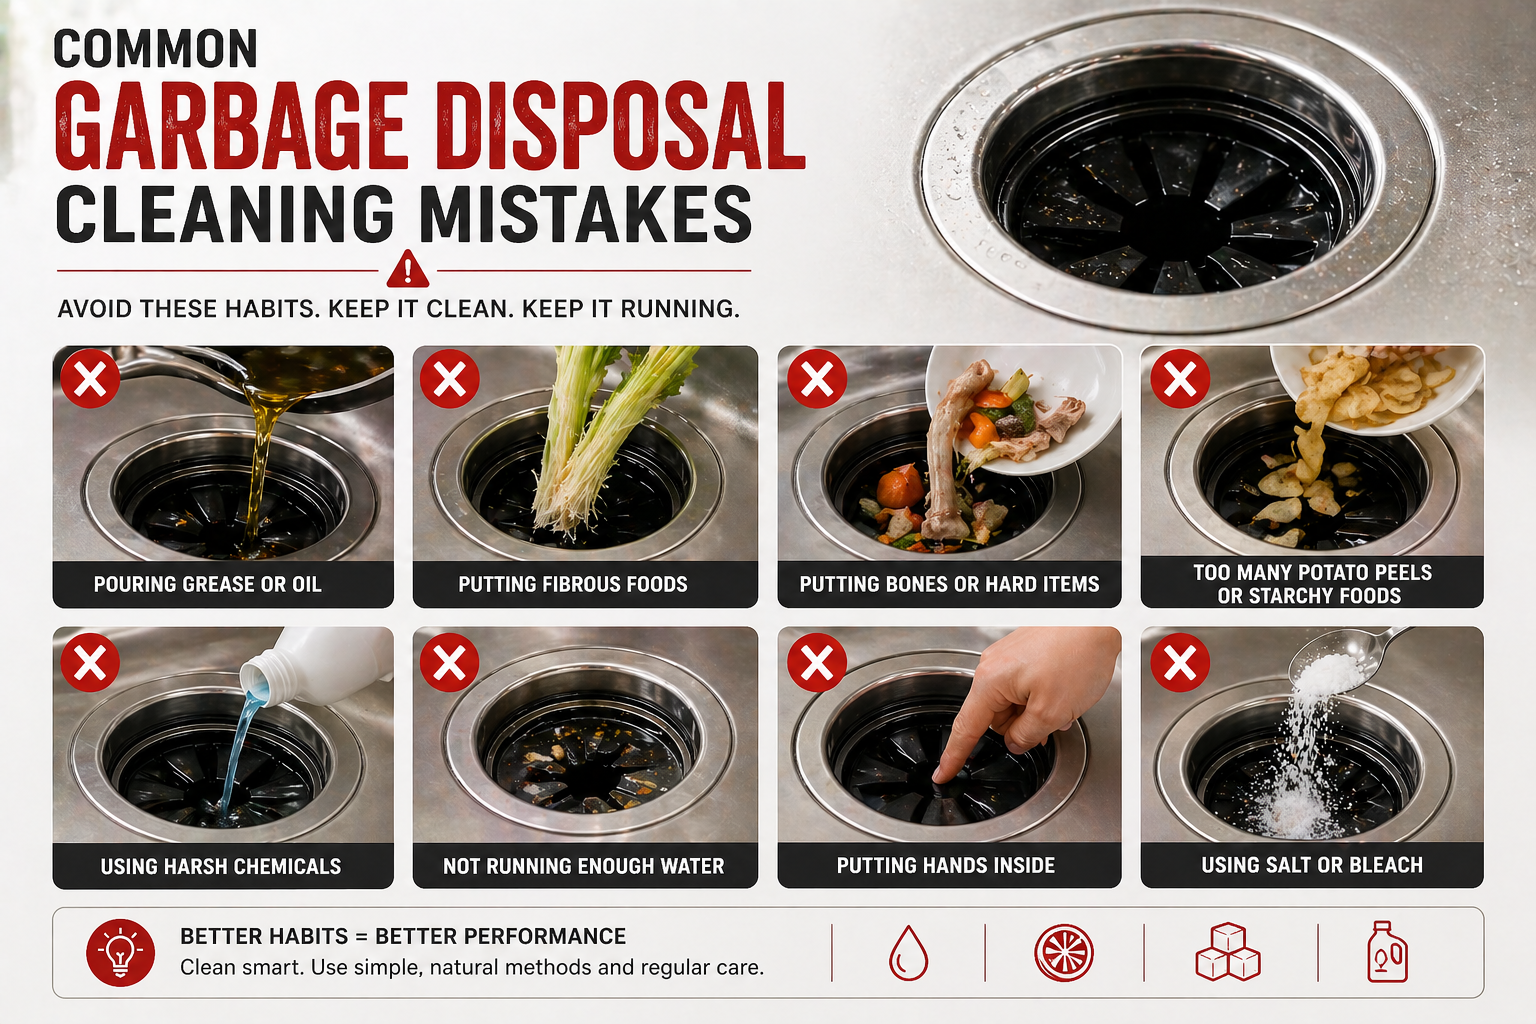
    Common Garbage Disposal Cleaning Mistakes

    Most garbage disposal problems are caused by incorrect cleaning habits rather than lack of cleaning.

    Many homeowners unknowingly make mistakes that either reduce cleaning effectiveness or create new problems. One of the most common errors is using hot water while running the disposal. While hot water helps dissolve grease temporarily, it allows it to travel deeper into the pipes where it cools and solidifies, leading to clogs. Another frequent mistake is relying only on deodorizing methods like lemon peels without actually removing buildup.

    Ignoring the splash guard is another critical oversight. This area traps the most food particles and bacteria, making it the primary source of odor. Additionally, using harsh chemicals like bleach can damage internal components and harm plumbing systems over time. Understanding and avoiding these mistakes ensures that your cleaning routine is both effective and safe.

    Common mistakes:

    • Using hot water during grinding
    • Using bleach or harsh chemicals
    • Ignoring splash guard cleaning
    • Overloading disposal with waste
    • Skipping regular maintenance

    Better approach:

    • Use cold water during operation
    • Clean splash guard weekly
    • Use natural cleaning methods consistently

    Decision clarity:
    If your disposal smells or clogs frequently despite cleaning, your method is likely incorrect rather than insufficient.


    FAQs

    Can I use vinegar in my garbage disposal?

    Yes, vinegar is safe and helps break down buildup and kill bacteria.

    Does ice sharpen garbage disposal blades?

    No, disposals don’t have sharp blades. Ice helps clean by dislodging debris.

    Is bleach safe for garbage disposal?

    No, bleach can damage components and harm pipes.

    How long does cleaning take?

    Basic cleaning takes 10–15 minutes. Deep cleaning takes 20–25 minutes.

    Why does my disposal still smell after cleaning?

    Most likely the splash guard or drain pipes are still dirty.

    Can I clean disposal without removing it?

    Yes, all cleaning steps can be done while installed.

    How do you clean a garbage disposal quickly?

    For a quick clean, run cold water, add dish soap, then pour baking soda and vinegar. Let it sit for 10 minutes, rinse, and finish with citrus peels for freshness.

    What is the best natural cleaner for a garbage disposal?

    Baking soda and vinegar are the best natural cleaners as they break down organic waste, neutralize odors, and clean safely without damaging the disposal or pipes.

    Can I use vinegar and baking soda in my garbage disposal?

    Yes, they are safe and effective together. The foaming reaction helps loosen debris and remove odor when left for 10–15 minutes before rinsing.

    How often should I clean my garbage disposal?

    Clean it at least once a week and perform a deep clean every 3–4 weeks. Heavy usage may require more frequent maintenance.

    Why does my garbage disposal still smell after cleaning?

    The most common reason is a dirty splash guard or buildup in the drain. Re-clean thoroughly and focus on hidden areas like rubber flaps.

    Is it safe to use bleach in a garbage disposal?

    No, bleach can damage internal components and pipes. Use safer alternatives like baking soda, vinegar, or enzyme cleaners instead.

    Does ice really clean a garbage disposal?

    Yes, ice helps dislodge stuck debris through mechanical action. It works even better when combined with salt for added scrubbing power.

    What can I put in my garbage disposal to make it smell better?

    Citrus peels like lemon or orange help neutralize odors and leave a fresh scent. Always clean the disposal first for best results.

    Can a clogged garbage disposal be fixed by cleaning?

    Yes, minor clogs caused by food buildup can often be cleared with cleaning methods. Severe blockages may require manual removal or repair.

    What is the safest way to clean a garbage disposal?

    Turn off power, use cold water, and clean with baking soda, vinegar, and a brush. Avoid putting hands inside and skip harsh chemicals.

  • Clogged Kitchen Sink (Complete Fix & Prevention Guide)

    A clogged kitchen sink happens when grease, food waste, or debris blocks the drain or pipes, preventing water from flowing properly. The fastest way to fix it is to identify the clog type and apply the right method such as boiling water, baking soda and vinegar, plunging, or using a drain snake. Severe clogs may require pipe cleaning or a plumber.

    Quick Summary

    • Most clogs are caused by grease and food buildup
    • Slow drain = early clog, standing water = severe clog
    • Boiling water + baking soda works for light clogs
    • Plunger or drain snake is needed for deeper blockages
    • Prevent clogs by avoiding grease and solid waste in drains

    Why Is My Kitchen Sink Clogged?

    A kitchen sink clogs when substances accumulate inside the drain pipe and restrict water flow. The most common cause is grease. When hot grease goes down the drain, it cools and solidifies, sticking to pipe walls. Over time, food particles attach to this layer and create a blockage.

    Another major cause is food waste. Items like rice, pasta, coffee grounds, and vegetable peels expand or clump together inside pipes. These materials do not break down easily and often lead to slow drainage before becoming a full clog.

    Soap residue also contributes to buildup. In areas with hard water, soap combines with minerals to form a sticky layer inside pipes. This layer traps debris and accelerates clog formation.

    Foreign objects are another factor. Small plastic pieces, bones, or packaging accidentally washed into the sink can block the P-trap or pipe bends. These clogs are usually sudden and more severe.

    Old plumbing systems increase the risk. Narrow pipes, corrosion, and mineral buildup reduce water flow capacity, making clogs more frequent.

    Understanding the cause is critical. Each type of clog behaves differently, and using the wrong method can make the situation worse instead of fixing it.


    How Do You Diagnose the Type of Clog?

    Identifying the clog type determines the correct solution. Without diagnosis, you risk applying ineffective methods.

    A clogged kitchen sink can be diagnosed by observing water behavior such as slow draining, standing water, or gurgling sounds. These symptoms indicate the location and severity of the blockage.

    Diagnosis Framework

    1. Slow Drain

    If water drains slowly, the clog is forming but not complete. This usually indicates grease or soap buildup near the upper pipe.

    2. Standing Water

    If water does not drain at all, the clog is severe. The blockage is likely deep inside the pipe or in the P-trap.

    3. Gurgling Sound

    Air bubbles or gurgling noises indicate a venting issue or partial blockage restricting airflow.

    4. Water Backflow

    If water comes back up after draining, the blockage is deeper in the main drain line.

    Real Insight

    Most DIY failures happen because users treat all clogs the same. A slow drain can be fixed easily, but a deep blockage requires tools like a drain snake.

    Correct diagnosis saves time and prevents pipe damage.

    Where Is the Clog Located in a Kitchen Sink System?

    Most users try to fix a clogged kitchen sink without understanding where the blockage actually exists. This leads to ineffective methods and repeated failures. A kitchen sink drain system has multiple points where clogs can form, and identifying the correct location dramatically improves success rate.

    The first and most accessible clog point is the sink drain opening. This is where food particles, grease residue, and soap accumulate. Light clogs usually form here and are easier to clear using boiling water or basic cleaning methods.

    The second and most common location is the P-trap, the curved pipe beneath the sink. Its design intentionally holds a small amount of water to block sewer gases, but this curve also traps grease, food debris, and solid waste. Studies and plumbing data show that nearly 70–80% of kitchen sink clogs occur in this section.

    Further down is the horizontal drain pipe, where grease buildup becomes more severe. Over time, layers of hardened grease narrow the pipe diameter, leading to recurring slow drainage issues.

    The most serious clogs occur in the main drain line. These affect multiple fixtures and often result in water backing up into sinks. These clogs require advanced tools or professional intervention.

    Understanding these locations allows you to match the right solution to the problem. Surface-level clogs respond to simple fixes, while deeper clogs require mechanical tools or professional cleaning.


    How to Unclog a Kitchen Sink Step by Step?

    Clogged Kitchen

    Fixing a clogged sink requires a structured approach. Jumping directly to aggressive methods can damage pipes.

    Start with simple solutions like boiling water and move to advanced tools like plungers or drain snakes if the clog persists.

    Step-by-Step Process

    Step 1: Boiling Water

    Pour boiling water slowly into the drain. This melts grease and clears light buildup.

    Step 2: Baking Soda + Vinegar

    Pour baking soda followed by vinegar. Let it react for 10–15 minutes, then flush with hot water.

    Step 3: Use a Plunger

    Create a seal over the drain and plunge forcefully. This dislodges blockages near the surface.

    Step 4: Clean the P-Trap

    Remove the pipe under the sink and clean out debris manually. This is where most solid clogs occur.

    Step 5: Use a Drain Snake

    Insert the snake into the pipe and rotate it to break apart deep clogs.

    Mini Case Example

    A household experiencing repeated slow drainage fixed the issue permanently by removing the P-trap and clearing accumulated grease and food sludge. This eliminated the need for chemical cleaners.

    What Is the Correct Order to Unclog a Kitchen Sink?

    Using the wrong method at the wrong time is one of the biggest reasons clogged sinks remain unresolved. The correct approach follows a structured escalation from simple to advanced techniques.

    Start with boiling water if the drain is slow but not fully blocked. This works best for grease-based clogs because heat melts fat deposits and restores flow. It takes only a few minutes and carries minimal risk.

    If the clog persists, move to baking soda and vinegar. This combination creates a chemical reaction that loosens light organic buildup. It is effective for early-stage clogs but not for solid blockages.

    For partial blockages where water drains slowly or unevenly, use a plunger. The pressure created by plunging dislodges debris and restores flow. Ensure a proper seal for maximum effectiveness.

    If these methods fail, the clog is likely deeper. At this stage, use a drain snake. This tool physically breaks apart or pulls out the blockage from inside the pipe.

    If the sink remains clogged after all attempts, the issue is likely in the main drain line. This is where professional plumbing tools are required.

    This step-by-step escalation prevents damage, reduces effort, and ensures the most efficient solution is applied at each stage.

    What Are the Best Methods to Unclog a Sink?

    Different methods work for different clog types.

    The best unclogging method depends on clog severity. Natural solutions work for light clogs, while tools are required for deeper blockages.

    Method Comparison Table

    MethodBest ForEffectivenessRisk
    Boiling WaterGreaseMediumLow
    Baking Soda + VinegarLight clogsMediumLow
    PlungerSurface blockagesHighLow
    Drain SnakeDeep clogsVery HighMedium
    Chemical CleanerSevere buildupHighHigh

    Expert Insight

    Chemical cleaners should be used as a last resort. They can damage pipes, especially older ones.

    Mechanical methods like plunging and snaking are more reliable and safer.


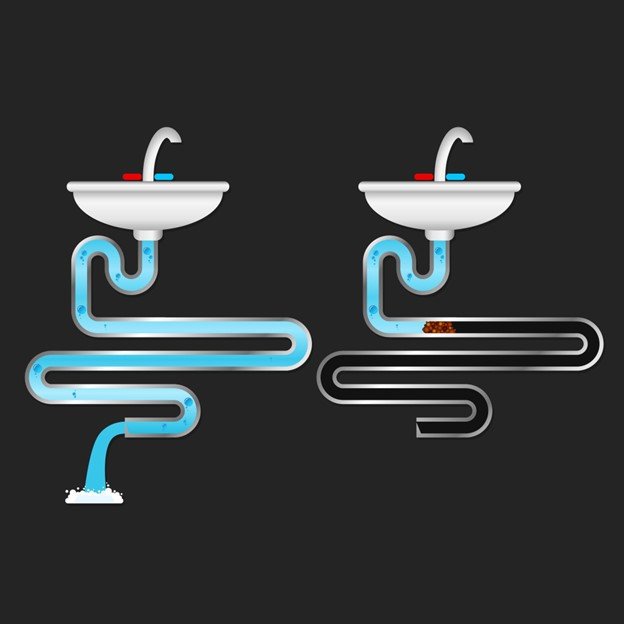
    How Does a Kitchen Sink Drain System Work?

    Clogged Kitchen

    Understanding how a kitchen sink drain system works provides clarity on why clogs form and how to fix them effectively.

    A kitchen sink relies on gravity-based flow. Water moves downward through pipes due to gravity, carrying waste materials along with it. Any obstruction in this flow path results in a clog.

    The first component is the drain opening, where water enters the system. Below this is the P-trap, a curved pipe designed to hold water and block sewer gases. While essential, this curve creates a natural trap for debris.

    From the P-trap, water flows into a horizontal pipe that connects to the main drain line. This section is particularly vulnerable to grease buildup because fats solidify as they cool, sticking to pipe walls.

    The system also includes a vent pipe, which allows air to enter and maintain proper pressure. Without ventilation, water flow becomes restricted, leading to slow drainage and gurgling sounds.

    Clogs occur when debris disrupts this flow. Grease reduces pipe diameter, solid waste creates blockages, and poor ventilation affects pressure balance.

    Understanding this system helps you diagnose problems more accurately. Instead of guessing, you can identify which component is causing the issue and apply the correct solution.

    Which Tools Work Best for Sink Clogs?

    Tools provide better control and effectiveness compared to home remedies.

    A plunger works best for surface clogs, while a drain snake is the most effective tool for deep blockages.

    Tool Comparison

    ToolUse CaseEffectiveness
    PlungerShallow clogsHigh
    Drain SnakeDeep clogsVery High
    Hand AugerSevere clogsVery High
    Wet/Dry VacuumStanding waterMedium

    Practical Insight

    A drain snake is the most versatile tool. It can reach deep into pipes and physically remove blockages instead of dissolving them.

    Which Unclogging Methods Work Best and When Do They Fail?

    Each unclogging method has specific strengths and limitations. Using them without understanding their effectiveness leads to poor results.

    MethodWorks ForFails WhenRisk
    Boiling WaterGrease clogsSolid blockagesLow
    Baking Soda + VinegarLight organic buildupHeavy grease or solidsLow
    PlungerSurface blockagesDeep clogsLow
    Drain SnakeDeep clogsMain line blockageMedium
    Chemical CleanerSevere buildupSolid objectsHigh

    Boiling water is effective only when grease is the primary cause. It cannot dissolve solid objects like food chunks or plastic debris.

    Baking soda and vinegar work through chemical reaction, but their power is limited. They are ineffective against hardened grease or compacted waste.

    Plungers create pressure to dislodge clogs, but they lose effectiveness when the blockage is too deep or tightly packed.

    Drain snakes are the most reliable DIY tool. They physically remove or break apart clogs, making them effective for most scenarios.

    Chemical cleaners should be used cautiously. While they can dissolve organic material, they can also weaken pipes and create long-term damage.

    Choosing the right method depends on clog type and location. Understanding these limitations prevents wasted effort and pipe damage.


    When Should You Call a Plumber?

    Clogged Kitchen

    Not all clogs can be fixed with DIY methods.

    Call a plumber when the clog persists after multiple attempts or when water backs up repeatedly.

    Signs You Need a Professional

    • Repeated clogging
    • Multiple drains blocked
    • Foul odor from pipes
    • Water backing into other sinks

    Real Insight

    Recurring clogs often indicate a deeper issue in the main drain line. DIY methods only treat symptoms, not the root cause.

    How Long Does It Take to Unclog a Kitchen Sink?

    The time required to unclog a kitchen sink depends on the severity and location of the blockage. Simple clogs can be resolved within minutes, while complex ones may take significantly longer.

    Light clogs caused by grease or soap buildup can often be cleared using boiling water in 5 to 10 minutes. This method is quick and effective for early-stage blockages.

    Using baking soda and vinegar typically takes 15 to 30 minutes, including reaction time and flushing. This method is slightly slower but still effective for minor clogs.

    Plunging a sink usually takes 5 to 10 minutes if the clog is near the surface. Proper technique is critical for success.

    For deeper clogs, a drain snake may require 15 to 45 minutes, depending on how far the blockage is located and how compact it is.

    Severe clogs involving the main drain line can take 1 to 2 hours or more, especially if professional tools are required.

    Understanding time expectations helps users stay patient and choose the right method. Quick fixes work for simple problems, but deeper issues require time and proper tools.

    How Much Does It Cost to Fix a Clogged Sink?

    Micro Answer

    Fixing a clogged kitchen sink costs between $50 and $250 depending on severity and location.

    Cost Breakdown

    ServiceCost Range
    Basic unclogging$50–$100
    Drain snaking$100–$200
    Major blockage removal$200–$400

    Cost Insight

    DIY methods cost under $20, but improper handling can lead to expensive repairs.


    Clogged Kitchen

    Why Does My Kitchen Sink Keep Clogging?

    Recurring clogs indicate that the root cause has not been fully addressed. Temporary fixes may restore flow, but underlying issues remain.

    The most common cause is grease accumulation. Even small amounts of grease poured down the drain build up over time. This creates a sticky layer that traps food particles and leads to repeated blockages.

    Another reason is incomplete cleaning. Methods like boiling water or baking soda may remove surface debris but leave deeper buildup intact. This results in clogs returning within days or weeks.

    Improper disposal habits also contribute. Washing food scraps, coffee grounds, or fibrous materials into the sink increases clog risk.

    In some cases, the issue is related to pipe design or condition. Older pipes may have reduced diameter due to corrosion or mineral buildup, making them more prone to clogging.

    Ventilation problems can also play a role. Poor airflow disrupts water movement and increases the likelihood of blockage.

    To solve recurring clogs permanently, focus on both cleaning and prevention. Remove buildup completely using mechanical tools and adopt better disposal practices.

    How to Prevent Kitchen Clogged Sink Permanently?

    Prevention is more effective than repeated fixes.

    Avoid grease disposal, use drain strainers, and flush pipes regularly to prevent clogs.

    Prevention Checklist

    • Never pour grease into sink
    • Use a sink strainer
    • Flush with hot water weekly
    • Dispose of food waste properly

    Long-Term Insight

    Consistent maintenance reduces clog risk by over 70%. Small habits make a major difference.

    How to Use a Drain Snake Properly?

    A drain snake is one of the most effective tools for clearing deep clogs, but incorrect use can reduce its effectiveness.

    Start by inserting the snake slowly into the drain. Do not force it, as this can damage the pipe or cause the tool to bend.

    Once resistance is felt, rotate the handle clockwise. This helps the snake latch onto the clog or break it apart. Continue rotating while pushing gently forward.

    After reaching the blockage, pull the snake out slowly. In many cases, debris will come out with it. Repeat the process until the pipe is clear.

    It is important to clean the snake after each use to avoid reintroducing debris into the pipe.

    Avoid excessive force. If the snake cannot move forward, the clog may be too deep or solid for manual removal.

    Using the tool correctly increases success rate and prevents damage. It also eliminates the need for harsh chemical cleaners in most cases.

    What Mistakes Make Sink Clogs Worse?

    Using incorrect methods or ignoring early signs can worsen clogs and damage pipes.

    Common Mistakes

    • Pouring grease down the drain
    • Overusing chemical cleaners
    • Ignoring slow drainage
    • Forcing objects into the drain

    Expert Warning

    Chemical cleaners can weaken pipes over time, especially PVC and older metal systems.

    What If Your Sink Is Still Clogged After Trying Everything?

    When a kitchen sink remains clogged after multiple attempts, the issue is no longer surface-level. This usually indicates a complex blockage that involves multiple layers or deeper sections of the plumbing system.

    One common reason is layered clog formation. For example, grease buildup may harden along the pipe walls while food particles accumulate on top of it. Basic methods may remove only the top layer, leaving the core blockage intact.

    Another cause is deep pipe obstruction. If the clog is located beyond the reach of a standard drain snake, DIY tools will not be effective. In such cases, professional-grade augers or hydro-jetting may be required.

    There is also the possibility of a main drain line blockage. This affects not just the kitchen sink but other fixtures as well. Signs include water backing up in multiple drains or unusual gurgling sounds.

    Recurring clogs can also indicate pipe damage or structural issues. Cracks, misaligned joints, or corrosion can trap debris repeatedly, making the problem persistent.

    At this stage, continuing DIY attempts can worsen the situation. Overuse of chemical cleaners or excessive force can damage pipes and increase repair costs.

    The correct action is to shift from trial-based methods to professional diagnosis. A plumber can inspect the system using specialized tools and identify the root cause accurately.

    Is a Kitchen Clogged Sink Dangerous?

    A clogged sink is not immediately dangerous but can lead to hygiene issues, pipe damage, and water overflow.

    Risks

    • Bacterial growth
    • Water damage
    • Pipe corrosion

    Final Insight

    Ignoring clogs increases long-term repair costs and hygiene risks.


    Special Cases of Kitchen Clogged Sink

    Clogged Kitchen

    Not all clogs behave the same. Certain setups create unique challenges that require specific solutions.

    Double Sink Clogs

    In double sinks, a clog on one side can affect the other. This happens because both drains connect to the same pipe. Blocking one side and plunging the other is often the most effective solution.

    Garbage Disposal Clogs

    If your sink has a garbage disposal, the clog may be inside the unit. In such cases, running the disposal or manually clearing it can restore flow. However, avoid putting fibrous or hard materials into the disposal.

    Apartment Plumbing Systems

    In apartments, multiple units share the same drain line. A clog in the main line can affect several sinks. If neighbors experience similar issues, the problem is likely beyond your unit.

    Understanding these scenarios prevents misdiagnosis and ensures the correct solution is applied.

    FAQ Section

    Why is my sink draining slowly?

    Grease and debris buildup restrict water flow.

    Does baking soda really work?

    Yes, for light clogs but not deep blockages.

    Can boiling water damage pipes?

    It is safe for metal pipes but may affect PVC if excessive.

    How often should I clean my drain?

    Once a month for maintenance.

    What is the fastest way to unclog a sink?

    Plunger or drain snake depending on severity.

    Can clogs come back?

    Yes, if root cause is not addressed.

  • How to Unclog a Toilet with Dish Soap

    Yes, dish soap can help unclog a toilet when the blockage is soft, minor, and close enough to loosen with lubrication and hot water. The safest method is to add dish soap, wait several minutes, pour in hot but not boiling water, and flush only when the bowl level looks stable. This is a first-response fix, not a solution for severe blockages or foreign objects. This

    Can dish soap actually unclog a toilet?

    Dish soap can help unclog a toilet when the blockage is soft, minor, and not caused by a solid object.

    Dish soap can work because it reduces friction around the clog and helps soften or lubricate material that is stuck in the trap. That is why many DIY guides recommend it for minor toilet paper clogs or soft organic blockages, especially when you do not have a plunger nearby. It is not magic, though. It works best when the clog is partial, not when the toilet is packed with wipes, dense paper mass, or a solid object.

    In real homes, this method is most useful in the awkward middle situation where the toilet is not fully overflowing but clearly not draining correctly. The bowl still holds water, the flush is weak, and you want a low-risk fix before turning the problem into a mess. That is the right mindset for this method. Treat it like a smart first step, not a guaranteed cure. If the water keeps rising or the bowl is already near the rim, control the overflow risk first instead of flushing again.

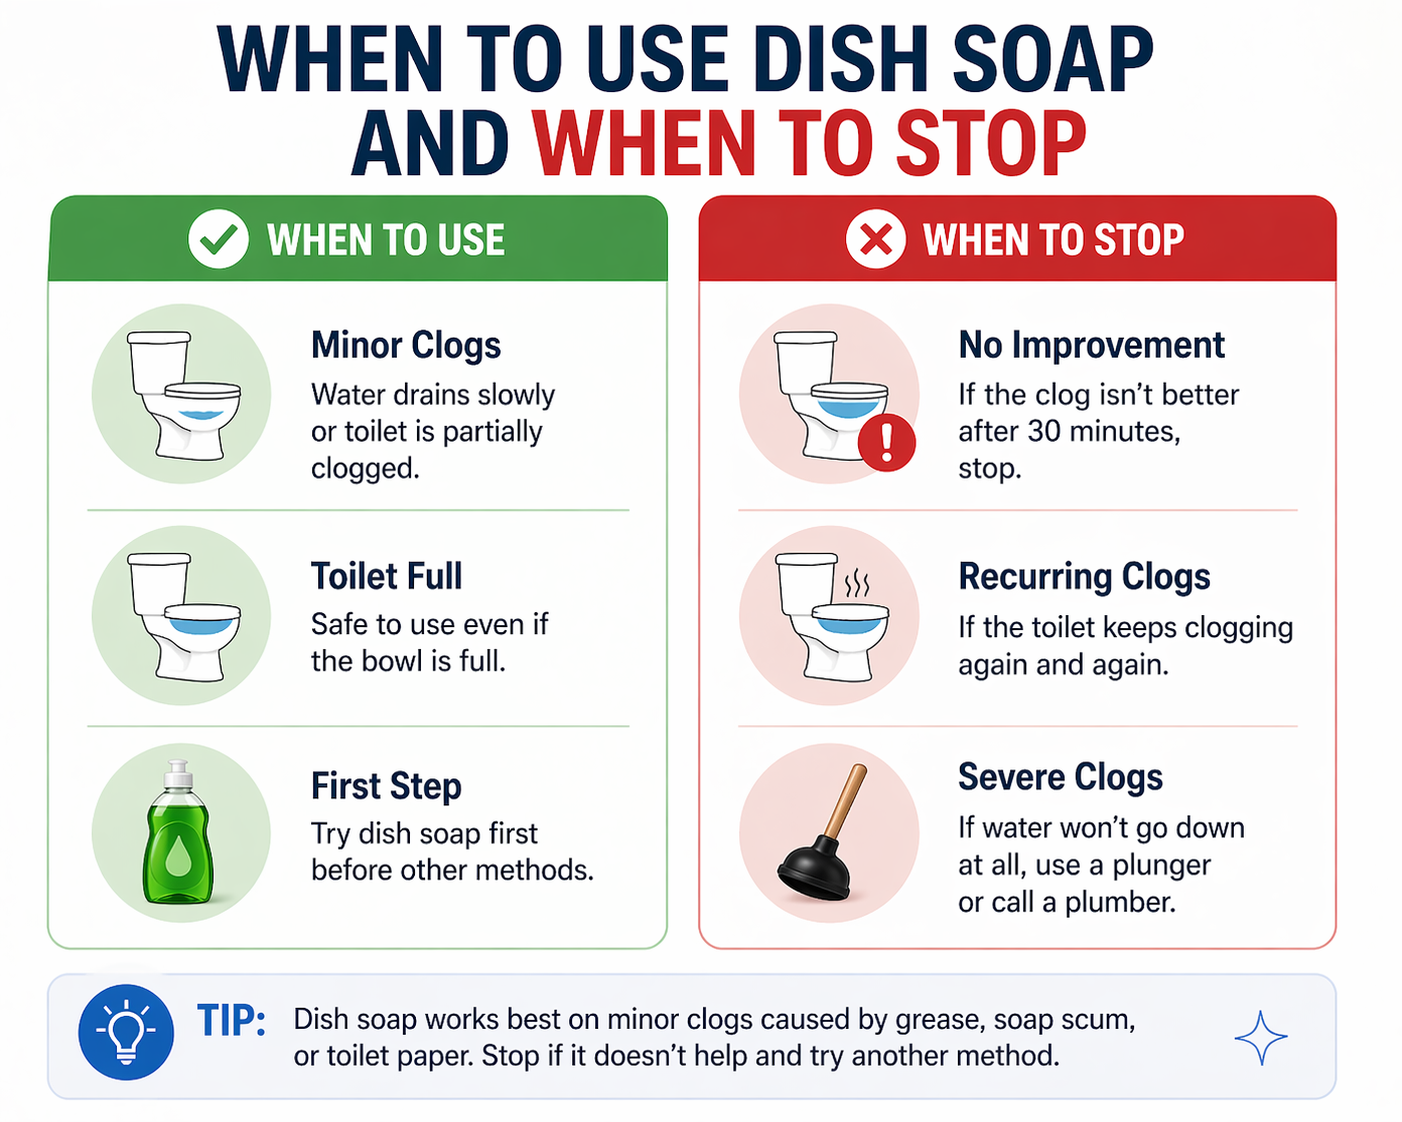
    When Should You Try Dish Soap First?

    Dish soap is worth trying first when the clog is fresh, the toilet still drains a little, and the blockage is likely caused by toilet paper or soft waste rather than a solid object. Current home-repair and plumber-backed guidance consistently treats the soap-and-hot-water method as a safer first move for minor clogs, especially when a plunger is not available. It is not designed for every situation, but it is one of the lowest-risk ways to test whether the blockage can loosen without force.

    • Try dish soap first when the clog is recent
    • Try it when the toilet still drains slowly instead of not at all
    • Try it when the blockage is likely toilet paper or soft waste
    • Skip it when wipes, toys, or other objects may be lodged
    • Skip it when the toilet backs up repeatedly

    Do not rely on it when

    • A toy, wipe, pad, or other object may be stuck
    • The toilet is backing up repeatedly
    • Water is already close to overflowing
    • Multiple fixtures in the home are draining badly

    This method is consistently recommended as a minor-clog fix, while deeper or harder blockages are better handled with a plunger, auger, or plumber.


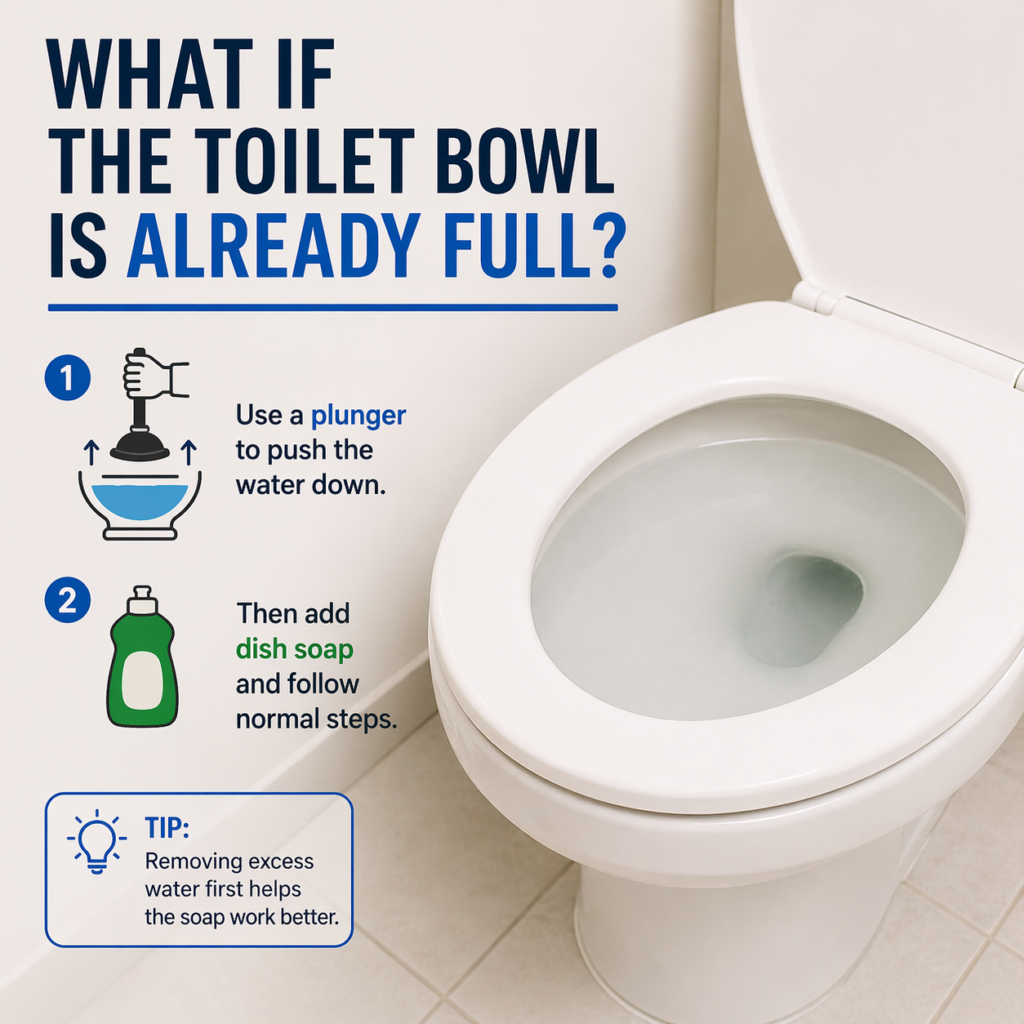
    What If the Toilet Bowl Is Already Full?

    How to Unclog a Toilet with Dish Soap

    If the toilet bowl is already full, do not flush again. That is the most important first move because another flush can turn a simple clog into an overflow problem. Overflow guidance consistently recommends shutting off the water at the toilet’s shutoff valve if the level keeps rising. If the bowl is high but stable, let the water settle before adding anything. When you do use the dish soap method, pour slowly and avoid dumping in too much hot water at once.

    • Do not flush again while the bowl is high
    • Turn off the shutoff valve if water keeps rising
    • Wait for the water level to settle if possible
    • Add soap gently, not aggressively
    • Pour hot, not boiling, water only when the bowl looks stable

    Why does dish soap help loosen a toilet clog?

    Dish soap helps by lubricating the trapway and reducing friction around soft material stuck in the drain path.

    The core reason is lubrication. Dish soap coats the surfaces inside the trapway and around the clog, which can help stuck material slide through more easily once hot water is added. Some guides also describe it as helping soften the blockage enough to get things moving again. The method is simple, but the logic matters because it tells you what kind of clog it is meant for. It is not dissolving a hard object. It is assisting movement in a tight, slippery space.

    That is why decision clarity matters more than the hack itself. If the clog was caused by too much toilet paper, a heavy flush, or a soft waste buildup, dish soap has a fair chance. If someone flushed wipes, paper towels, hygiene products, or a child’s object, lubrication alone usually will not solve the problem. Readers often fail with this method not because it is useless, but because they apply it to the wrong blockage. Good DIY advice should separate soft clogs from structural or foreign-object problems before the first step even begins.

    What dish soap can help with

    • Soft toilet paper buildup
    • Organic waste clogs
    • Partial blockages near the trap
    • No-plunger emergency situations

    What dish soap usually cannot fix

    • Flushable wipes
    • Plastic items or toys
    • Dense long-standing blockages
    • Sewer line or recurring drain problems

    This is why the method belongs in a wider unclogging decision system, not as a one-size-fits-all answer.

    How to unclog a toilet with dish soap step by step

    Add dish soap first, wait a few minutes, pour in hot non-boiling water, and flush only when the bowl level looks stable.

    Start by checking the water level. If the bowl is already too full, do not flush again. Add dish soap directly into the bowl and let it sink toward the drain. Current DIY guidance varies on quantity, but the common range is about 1/4 cup to 1 cup, depending on the source and the severity of the clog. Then wait long enough for the soap to reach the blockage. Guidance commonly recommends anywhere from 5 to 30 minutes before the next step.

    After the waiting period, pour in hot, not boiling, water. This is one of the most important safety points in the whole article. Several current sources warn against boiling water because it can crack porcelain or damage PVC-related plumbing components. Pour the hot water steadily, not aggressively, and give the bowl a moment to settle. If the water level drops or the bowl looks more stable, try one careful flush. If it rises again, stop there and move to the next tool rather than forcing another flush.

    Step-by-step process

    • Add dish soap to the bowl
    • Wait 5 to 30 minutes
    • Pour in hot, non-boiling water
    • Watch the bowl level before flushing
    • Flush once, carefully
    • Escalate if there is no improvement

    Quick decision rule

    • Bowl level drops = the method is helping
    • Bowl level stays the same = clog may still be partially stuck
    • Bowl level rises = stop and switch methods

    These time ranges and safety steps match current guidance from major home-repair and plumbing-adjacent sources.


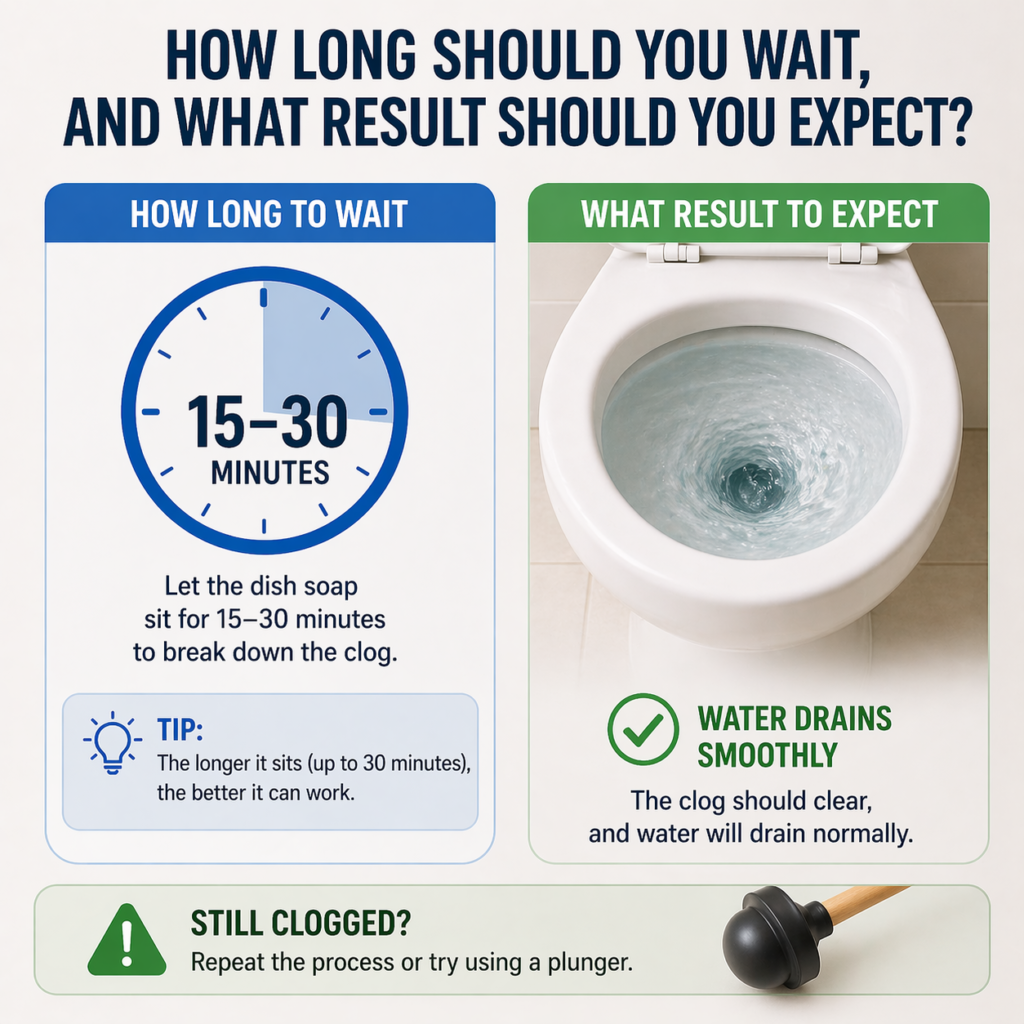
    How long should you wait, and what result should you expect?

    How to Unclog a Toilet with Dish Soap

    Most minor soft clogs show improvement within 5 to 30 minutes if the method is going to work.

    One weakness in most competing content is that it tells readers what to do but not what success should actually look like. Dish soap is not a “seconds” fix in most cases. Current guidance usually suggests waiting at least a few minutes, with many sources landing between 5, 10, 15, and 30 minutes depending on the version of the method. That tells us something important. The method works by gradually improving movement around the clog, not by breaking it apart instantly.

    In practice, success often appears in stages. First, the bowl may stop looking tense or overfilled. Then the water may slowly lower. Only after that should you expect a cleaner flush. If you try once and nothing changes, a second attempt may still be reasonable if the water level is safe and the clog is likely soft. But if there is zero movement after one or two careful rounds, that is your decision point. At that stage, more waiting usually does not add much value. A plunger or toilet auger becomes the better next step.

    Realistic time expectations

    • Light soft clog: 5 to 10 minutes
    • Moderate soft clog: 10 to 30 minutes
    • No change after 1 to 2 attempts: switch methods
    • Repeated overflow risk: stop DIY flushing
    Clog situationDish soap likely to helpBest next move
    Mild toilet paper clogHighDish soap + hot water
    Soft organic blockageMedium to highDish soap, then careful flush
    Wipes or hygiene productLowToilet auger
    Suspected foreign objectVery lowAuger or plumber
    Repeated recurring clogLowProfessional inspection

    The decision point matters more than the exact minute count. Good DIY results come from knowing when to stop.


    How to Unclog a Toilet with Dish Soap

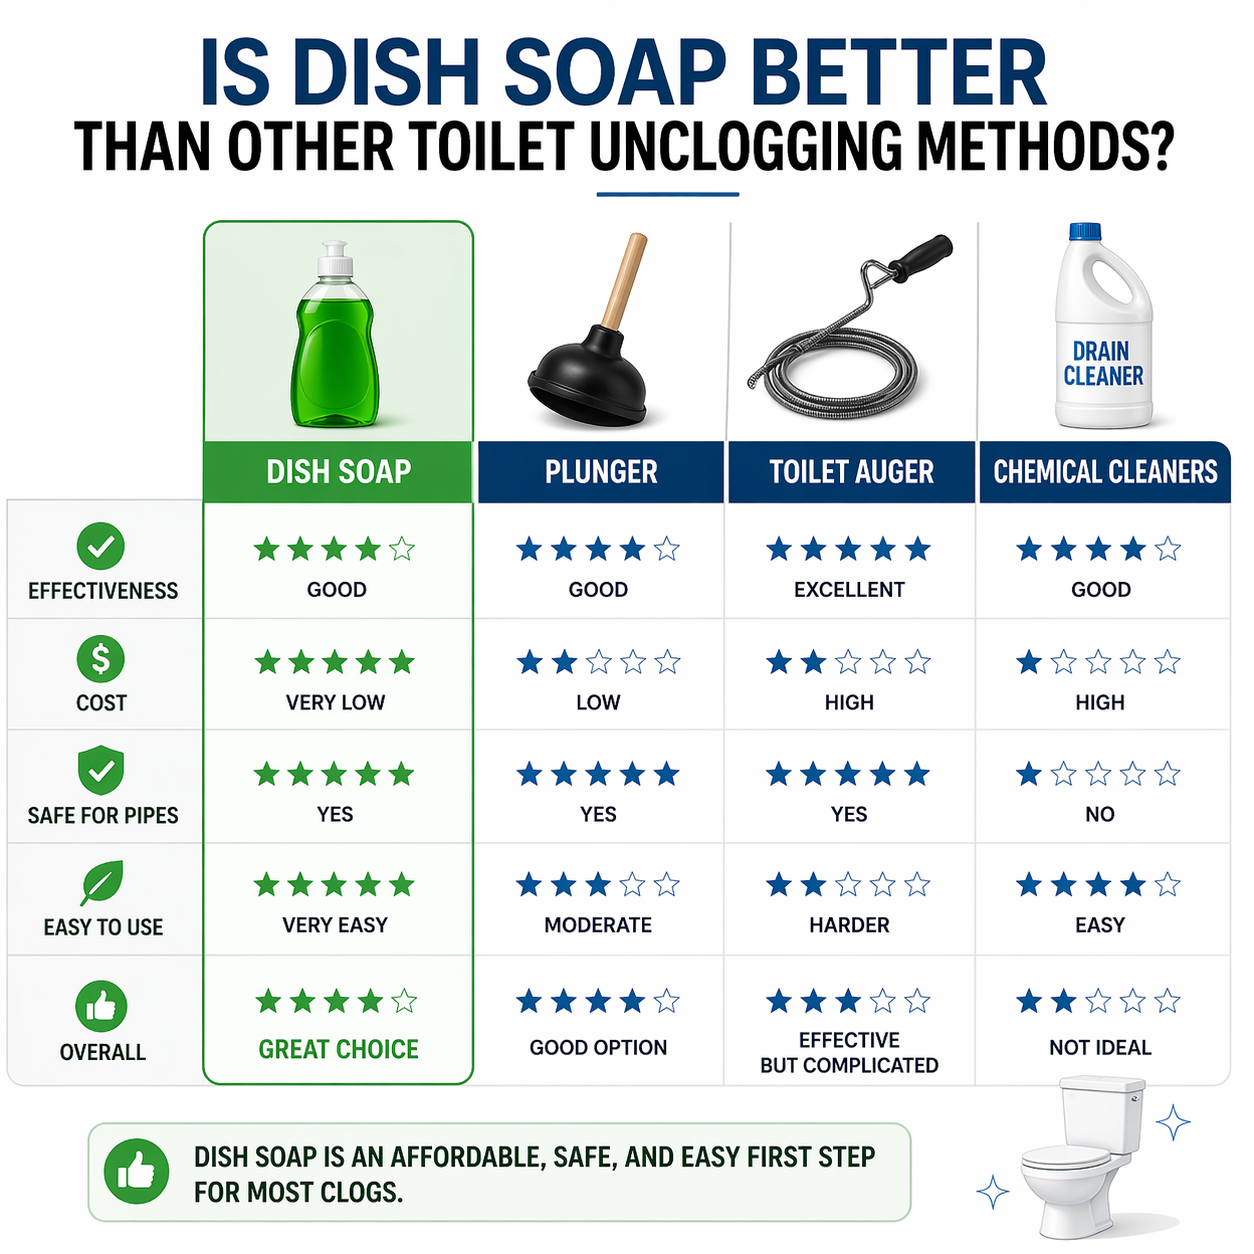
    Is Dish Soap Better Than Other Toilet Unclogging Methods?

    Dish soap is not the strongest toilet-unclogging method, but it is often one of the safest first methods for a soft clog. Current guidance positions plunging as the quickest and most effective solution for many standard toilet clogs, while a toilet auger is the better step when the blockage sits deeper in the trap or resists plunging. Dish soap fits earlier in the decision chain because it can loosen minor buildup without force, scratching, or harsh chemicals. That makes it useful, but only within the right limits.

    MethodBest ForStrength
    Dish soap + hot waterMinor soft clogsLow-risk first step
    PlungerMost standard clogsFastest next tool
    Toilet augerDeeper tough clogsStronger escalation
    PlumberRepeated or severe issuesBest for persistent problems

    Real-World Example of When the Dish Soap Method Makes Sense

    A practical example helps readers understand the method better than theory alone. Imagine a toilet that clogged right after a heavy toilet paper flush. The bowl is high, but not yet overflowing, and there is no plunger nearby. This is the kind of situation where dish soap makes sense as a first-response fix. The likely blockage is soft, recent, and still close enough to respond to lubrication and hot water. In many similar DIY guides, that is exactly the type of clog the method is meant for.

    Now imagine the outcome. The soap goes in first, the water is allowed to settle, and hot non-boiling water is poured in slowly. After waiting, the bowl level begins to lower slightly. That small change is the signal that the method is working. If nothing changed at all, the next smart step would be a plunger, not endless repetition. The lesson is simple. Dish soap works best when the clog is soft, recent, and clearly not caused by a wipe, toy, or another solid object.

    • Best case for this method is a fresh soft clog
    • Early bowl-level movement is a positive signal
    • No movement means the next tool should change
    • Solid objects usually require escalation faster

    What should you not do when using this method?

    Do not use boiling water, panic flush a full bowl, or keep repeating the method when there is no visible progress.

    The biggest mistake is panic flushing. If the bowl is already high, another flush can turn a manageable clog into a bathroom cleanup emergency. The second mistake is using boiling water. Several current home-repair sources explicitly warn that boiling water can crack the porcelain or harm plumbing materials, which turns a cheap fix into an expensive repair. The third mistake is assuming this method can solve every type of blockage. It cannot.

    Another common error is pouring too aggressively or working too fast. The dish soap method works best when the soap has time to move downward and the added hot water is controlled. Dumping water too quickly can raise the level before the soap has done anything useful. Readers also underestimate the importance of stopping when the signals are wrong. If the toilet makes no progress, backs up again, or has a history of recurring clogs, the problem may be deeper than a single soft blockage. That is not the moment to keep experimenting. That is the moment to change tools.

    Do not do these things

    • Do not use boiling water
    • Do not flush repeatedly while water is high
    • Do not assume wipes behave like toilet paper
    • Do not keep repeating the method with no progress
    • Do not ignore signs of a deeper plumbing problem

    Watch for these red flags

    • Gurgling or repeated backups
    • Water rising close to the rim
    • Slow drainage after multiple attempts
    • Other nearby drains acting up too

    These warnings line up with current DIY and plumber-backed guidance on safe toilet unclogging.


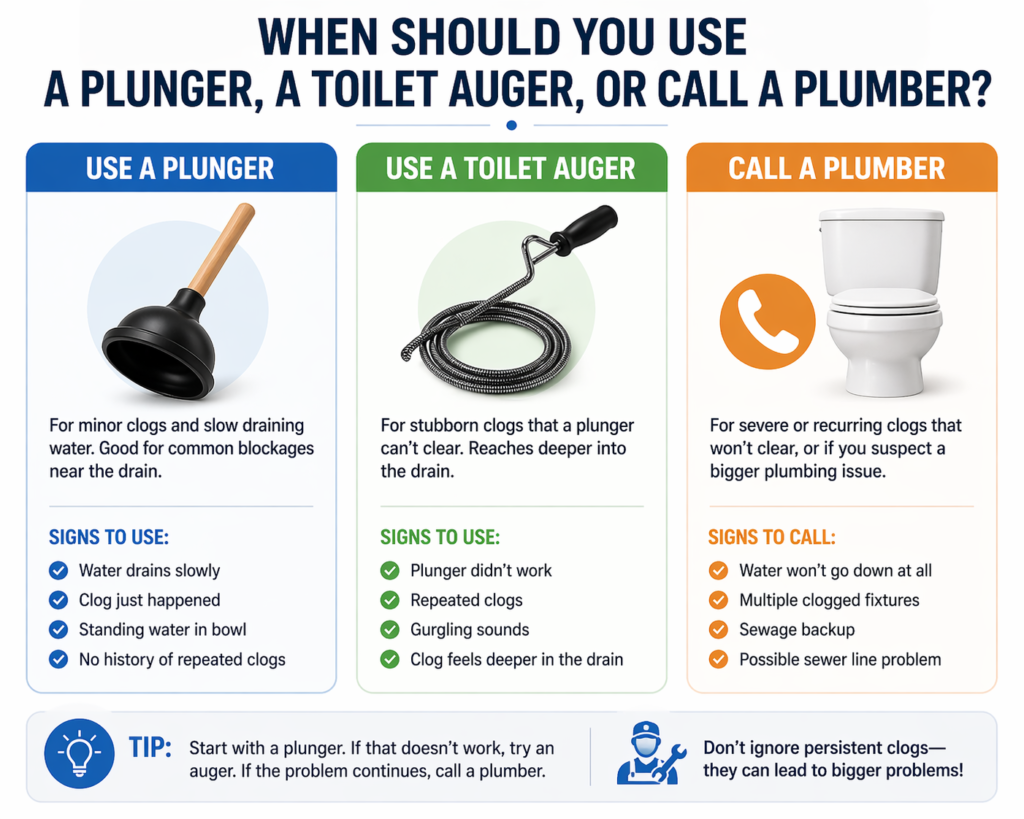
    When should you use a plunger, a toilet auger, or call a plumber?

    Use a plunger for standard clogs, a toilet auger for deeper resistance, and a plumber for repeated or severe blockage.

    A plunger is usually the next step when dish soap does not produce visible improvement. If the clog is still close enough to respond to pressure, plunging can finish what the lubrication started. A toilet auger is the better choice when the blockage feels deeper, tougher, or physically stuck. Current plumber-backed guidance highlights the toilet auger as one of the most effective and toilet-safe tools for deeper clogs because it is designed specifically for the shape of the toilet trap.

    A plumber becomes the right call when the problem stops looking like a one-off clog. That includes repeated blockages, signs of sewage backup, multiple slow drains, or any suspicion that something solid has been flushed and lodged inside. This is where many DIY articles stay vague, but readers need a firm threshold. Home maintenance content performs better when it removes hesitation. If the method failed cleanly, you use another tool. If the situation looks bigger than one toilet bowl, you stop treating it as a bowl-only issue.

    Choose your next step like this

    • Dish soap failed, but bowl is stable → use a plunger
    • Clog feels deeper or repeated → use a toilet auger
    • Object may be stuck → skip the soap retry and escalate
    • Multiple fixtures are affected → call a plumber
    • Overflow or sewage signs appear → call a plumber immediately

    This tool progression matches the safest path from light DIY to deeper intervention.

    How can you prevent toilet clogs in the future?

    Most toilet clogs are prevented by flushing only waste and toilet paper and avoiding oversized paper loads.

    Prevention is less about tricks and more about flush discipline. The simplest rule is still the most effective one: only flush human waste and toilet paper. Current guidance on no-plunger alternatives and toilet clog prevention repeatedly points back to excessive paper use and inappropriate items as the most common causes of clogs. That matters because most readers do not need a better hack. They need better prevention habit.

    The real-world fix is to reduce the conditions that make emergency methods necessary. Encourage smaller paper loads, teach children what not to flush, and pay attention to recurring weak flushes. A toilet that clogs often may not just be dealing with user behavior. It may have a developing trap issue, partial blockage, or low-flush performance problem that needs a different solution. Smart home advice should always separate accidental misuse from repeat system weakness, because the long-term answer is not more dish soap. There are fewer clog triggers and faster escalation when the pattern changes.

    Prevention checklist

    • Flush only waste and toilet paper
    • Avoid oversized paper loads
    • Never flush wipes, towels, or hygiene products
    • Watch for repeated slow flush behavior
    • Act early before a partial clog becomes a full blockage

    This closing section helps the page rank for preventive intent while strengthening topical authority around toilet-clog troubleshooting.


    When to Use Dish Soap and When to Stop

    Dish soap is a smart first method when the clog is minor, soft, and recent, especially if the toilet still drains a little and you do not have a plunger in hand. Current guidance supports using soap with hot, not boiling, water because the combination can help lubricate and loosen soft material while staying gentler than harsh chemical options. The value of this method is not that it works on every clog. The value is that it helps you test a likely soft blockage with low risk before moving to stronger tools.

    The stopping point is just as important as the starting point. If the bowl level stays high, the clog keeps returning, or the toilet shows no improvement after one or two careful attempts, the method has already told you what you need to know. It is time to switch to a plunger, a toilet auger, or a plumber depending on the severity. That decision clarity is what turns a simple DIY page into genuinely helpful home advice.

    • Use dish soap for soft, likely paper-based clogs
    • Use hot water, never boiling water
    • Stop if the bowl level rises or nothing changes
    • Escalate faster for deep, repeated, or object-related clogs

    FAQ Section

    Can dish soap unclog a toilet without a plunger?

    Yes, it can help with a minor soft clog by lubricating the blockage and improving movement when followed with hot, non-boiling water. It is most useful as a first-response method, not a guaranteed fix for severe clogs.

    How much dish soap should I use in a clogged toilet?

    Current DIY guidance commonly ranges from about 1/4 cup to 1 cup, depending on the source and how stubborn the clog seems.

    How long should dish soap sit in the toilet?

    Most guidance falls between 5 and 30 minutes. Light clogs may improve sooner, while mild to moderate soft clogs may need more waiting time.

    Should I pour boiling water into the toilet?

    No. Use hot water, not boiling water. Current sources warn that boiling water can crack porcelain and may damage plumbing materials.

    Will dish soap work on wipes or a solid object?

    Usually not. This method is much better for toilet paper and soft organic clogs than for wipes, toys, or other solid obstructions.

    What should I do if the toilet is still clogged after one try?

    If the bowl is stable, move to a plunger or toilet auger. If there is overflow risk, recurring backup, or signs of a deeper problem, call a plumber.

    Is dish soap safe for toilet pipes?

    The current guidance around this method presents it as a common low-risk DIY option for minor clogs, especially compared with more aggressive approaches. The main safety concern is not the soap itself. It is using boiling water or forcing repeated overflow conditions.

    When should I call a plumber instead of trying another hack?

    Call a plumber when the clog keeps returning, multiple drains are affected, sewage signs appear, or a foreign object may be lodged in the toilet.

  • Bathroom Wall Cabinets (Complete Guide)

    Bathroom wall cabinets are wall-mounted storage units designed to organize toiletries, medicines, and essentials without occupying floor space. They come in types like surface-mounted, recessed, mirrored, and corner cabinets. The best choice depends on your bathroom size, humidity level, storage needs, and wall structure.

    Bathroom wall cabinets: (Quick Summary)

    • Save floor space and reduce clutter
    • Improve organization and hygiene
    • Work best in small and medium bathrooms
    • Last 5–20 years depending on material
    • Cost between $30 and $800+ globally

    What Are Bathroom Wall Cabinets?

    Bathroom wall cabinets are vertical storage units fixed to the wall, typically above sinks, toilets, or unused wall space. Their primary function is to maximize storage without using floor area, making them essential in modern bathroom layouts.

    Traditionally, bathrooms relied heavily on vanity cabinets for storage. However, as urban homes became smaller, the need for vertical storage solutions increased. Wall cabinets evolved to fill this gap by offering accessible storage without overcrowding the space.

    From a functional standpoint, wall cabinets help divide storage into zones. Daily-use items such as toothbrushes and skincare products are kept within easy reach, while less frequently used items remain stored but organized. This improves both usability and hygiene.

    In modern bathroom design systems, these cabinets are not standalone pieces. They are part of a broader bathroom organization strategy that includes vanities, shelves, and concealed storage. When used correctly, they reduce clutter, improve accessibility, and enhance the overall look of the bathroom.

    What Types of Bathroom Wall Cabinets Exist?

    Bathroom wall cabinets are designed in multiple formats, each suited for specific layouts and use cases.

    Surface-Mounted Cabinets

    These are installed directly onto the wall surface. They are easy to install and do not require structural modification.

    They are ideal for rental homes or quick renovations. However, since they project outward, they require enough clearance to avoid obstructing movement in tight bathrooms.

    Best for: Quick installation, rental spaces, and budget setups.

    Recessed (In-Wall) Cabinets

    Recessed cabinets are built into the wall cavity, creating a flush and minimal appearance.

    They save more space than surface-mounted cabinets and are preferred in modern designs. However, installation requires cutting into the wall and ensuring no plumbing or electrical lines are affected.

    Best for: Minimalist bathrooms and long-term home setups.

    Mirrored Cabinets (Medicine Cabinets)

    These combine a storage cabinet with a front-facing mirror. They are typically installed above the sink.

    Advanced models include LED lighting and anti-fog technology, making them highly functional.

    Best for: Compact bathrooms and dual-purpose functionality.

    Corner Cabinets

    These are designed to fit into unused corners. They make use of otherwise wasted space.

    While storage capacity is limited, they are highly effective in small bathrooms.

    Best for: Small bathrooms with limited wall space.

    Open + Closed Combination Cabinets

    These combine open shelves with closed compartments.

    They allow quick access to frequently used items while keeping clutter hidden.

    Best for: Balanced storage and display.


    Bathroom Wall Cabinets vs Vanity Cabinets — What’s the Difference?

    Bathroom Wall Cabinets vs Vanity Cabinets — What’s the Difference?

    Bathroom wall cabinets and vanity cabinets serve different purposes, and understanding their differences helps in making the right storage decision.

    Wall cabinets are mounted above ground level, typically on unused vertical surfaces. Their primary advantage is space efficiency. They do not occupy floor space, making them ideal for small bathrooms. They are best used for storing lightweight items such as toiletries, medicines, and personal care products.

    Vanity cabinets, on the other hand, are installed below the sink and rest on the floor. They provide significantly more storage capacity and are designed to hold heavier items like cleaning supplies, extra towels, and plumbing fixtures. However, they consume floor space, which can make small bathrooms feel more cramped.

    From a design perspective, wall cabinets contribute to a clean and open look, while vanity cabinets provide a grounded, functional base. In most modern bathrooms, both are used together to create a balanced storage system.

    Another key difference is accessibility. Wall cabinets offer easy access to frequently used items at eye level, while vanity cabinets require bending or reaching down.

    The best approach is not to choose one over the other but to use both strategically. Wall cabinets handle daily essentials, while vanity cabinets manage bulk storage. This combination maximizes efficiency and maintains a clutter-free environment.

    What Are the Best Bathroom Wall Cabinets by Use Case?

    The best cabinet depends on how your bathroom is used and the conditions inside it.

    Use CaseBest Cabinet TypeReason
    Small BathroomSlim wall-mountedSaves space
    Luxury BathroomSolid wood + LEDPremium appearance
    High HumidityPVC / AluminumWater resistant
    Rental HomesSurface-mountedEasy installation
    Minimalist DesignRecessed cabinetClean look

    Choosing based on use case ensures both performance and long-term satisfaction.


    How to Choose the Right Bathroom Wall Cabinet?

    Selecting the right cabinet involves more than picking a design. It requires evaluating space, usage, and environmental conditions.

    Step 1: Measure Your Space

    Measure width, height, and depth. Standard depth ranges from 4 to 12 inches.

    If your bathroom is small, choose shallow cabinets to prevent obstruction.

    Step 2: Check Wall Strength

    Concrete walls support heavy cabinets. Drywall requires anchors or studs.

    Ignoring wall strength can lead to installation failure.

    Step 3: Evaluate Storage Needs

    Identify what you plan to store. Toiletries, medicines, and cleaning items require different shelf configurations.

    Adjustable shelves offer flexibility.

    Step 4: Consider Accessibility

    Install cabinets at a comfortable height. Standard placement is 48–60 inches from the floor.

    Step 5: Choose Material Based on Environment

    Humidity plays a major role. Bathrooms with poor ventilation require moisture-resistant materials.

    Step 6: Match Design Style

    Ensure the cabinet complements your bathroom theme. Consistency improves visual appeal.

    Practical Decision Framework

    • If bathroom < 40 sq ft → choose slim cabinet
    • If humidity is high → choose PVC or aluminum
    • If aesthetic is priority → choose recessed or mirrored cabinet
    • If installation must be simple → choose surface-mounted

    What Is the Best Material for Bathroom Wall Cabinets?

    Material selection determines durability, maintenance, and performance.

    Material Comparison Table

    MaterialDurabilityWater ResistanceLifespanBest Use
    MDFMediumModerate5–10 yearsBudget setups
    Solid WoodHighLow10–20 yearsLuxury bathrooms
    PVC / WPCHighExcellent10–15 yearsHumid areas
    Stainless SteelVery HighExcellent15–25 yearsIndustrial style
    AluminumHighExcellent10–20 yearsLightweight setups

    How Does Humidity Affect Bathroom Cabinets?

    Humidity is the biggest factor affecting cabinet lifespan.

    MDF absorbs moisture, which leads to swelling and deformation over time. Solid wood can warp if not properly sealed. Metal cabinets resist moisture but may develop rust if not treated.

    PVC and aluminum perform best because they do not absorb water. This makes them ideal for high-humidity environments such as coastal areas or poorly ventilated bathrooms.

    Key Insight:
    PVC cabinets can last up to twice as long as MDF cabinets in humid conditions.

    Humidity Resistance Score

    MaterialScore (10)
    PVC / WPC10
    Aluminum9
    Stainless Steel9
    MDF6
    Solid Wood5

    What Problems Do Bathroom Wall Cabinets Solve?

    Bathroom wall cabinets solve several practical problems that most users face daily but often overlook.

    The first major issue is countertop clutter. Without proper storage, items like toothbrushes, skincare products, and medicines accumulate around the sink. This not only reduces usable space but also creates a messy and unhygienic environment. Wall cabinets eliminate this problem by providing a dedicated storage area above the working zone.

    Another problem is inefficient space usage. Bathrooms, especially in urban homes, are often compact. Floor cabinets take up valuable space and restrict movement. Wall cabinets use vertical space instead, keeping the floor clear and improving overall accessibility.

    Hygiene is another concern. Items left exposed on open surfaces are more likely to collect dust, water splashes, and bacteria. Closed cabinets protect these items, maintaining cleanliness and reducing contamination risk.

    Storage accessibility is also improved. Instead of searching through multiple drawers or shelves, items can be organized systematically within a cabinet. Adjustable shelves further enhance usability by accommodating different item sizes.

    Finally, wall cabinets contribute to visual organization. A clutter-free bathroom appears larger and more comfortable. This improves both user experience and perceived value of the space.

    In short, bathroom wall cabinets transform disorganized, inefficient bathrooms into structured, functional spaces.

    Are Bathroom Wall Cabinets Good for Small Bathrooms?

    Yes. Wall cabinets are one of the most effective solutions for small bathrooms.

    They utilize vertical space, keeping the floor clear and improving movement.

    Are Bathroom Wall Cabinets Good for Small Bathrooms?

    Space Optimization Strategies

    • Install above the toilet
    • Use narrow cabinets on side walls
    • Combine mirror + cabinet
    • Stack vertically instead of using wide units

    Mini Case Example

    A compact bathroom (5×7 ft) improved storage efficiency by 40% after installing a slim cabinet above the toilet. Counter clutter reduced significantly, and daily items became easier to access.


    Bathroom Wall Cabinets vs Shelves — Which Is Better?

    Both serve different purposes.

    FeatureCabinetsShelves
    Storage CapacityHighMedium
    ProtectionYesNo
    AccessibilityModerateHigh
    AestheticCleanOpen

    Practical Insight

    Cabinets are better for concealed storage and hygiene. Shelves work best for decorative or frequently used items.

    A hybrid setup provides the best balance.


    What Is the Ideal Size and Placement for Bathroom Wall Cabinets?

    The ideal size depends on your bathroom layout and user comfort.

    Bathroom SizeRecommended WidthPlacement
    Small12–24 inchesAbove toilet
    Medium24–36 inchesAbove sink
    Large36–48 inchesFeature wall

    Placement Guidelines

    • Maintain eye-level accessibility
    • Avoid blocking mirrors or lighting
    • Keep safe distance from water sources

    How to Install Bathroom Wall Cabinets (Step-by-Step)?

    Proper installation ensures safety and durability.

    Step-by-Step Process

    1. Mark position using a level
    2. Locate wall studs
    3. Drill pilot holes
    4. Install brackets
    5. Mount cabinet
    6. Check alignment

    What Wall Type Is Best for Installation?

    • Concrete walls: Strong and reliable
    • Drywall: Requires anchors or studs
    • Tile walls: Need careful drilling

    Safety Considerations

    • Avoid drilling into plumbing lines
    • Do not overload cabinets
    • Use proper mounting hardware

    How Much Weight Can Bathroom Wall Cabinets Hold?

    Weight capacity depends on installation and wall type.

    • Stud-mounted cabinets: 50–100 lbs
    • Drywall with anchors: 20–40 lbs

    Overloading can cause structural damage.

    How Much Do Bathroom Wall Cabinets Cost Globally?

    TypePrice Range
    Basic MDF$30–$100
    PVC Cabinets$100–$300
    Premium Wood$300–$800
    Designer Units$800+

    Cost Factors

    • Material
    • Size
    • Features
    • Installation

    ROI Insight

    Well-designed cabinets improve usability and can increase property appeal during resale.


    Which Bathroom Wall Cabinet Is Right for You?

    Which Bathroom Wall Cabinet Is Right for You?

    Choosing the right bathroom wall cabinet depends on how your bathroom is used daily. A one-size-fits-all approach does not work because storage needs vary significantly between users.

    For families, storage demand is higher. Multiple users mean more toiletries, hygiene products, and daily essentials. In such cases, wider cabinets with adjustable shelves are the best choice. They allow organized storage and prevent overcrowding.

    For individuals or single users, compact cabinets are more practical. A mirrored cabinet above the sink often provides enough storage while serving dual functionality. This setup reduces the need for additional fixtures and keeps the layout simple.

    Rental homes require flexibility. Surface-mounted cabinets are ideal because they are easy to install and remove without permanent wall modifications. This avoids damage and maintains compliance with rental agreements.

    For luxury or high-end bathrooms, aesthetics and integration matter more. Recessed cabinets with LED lighting and soft-close mechanisms create a premium look. These cabinets blend into the wall and enhance the overall design.

    For small bathrooms, narrow vertical cabinets or corner units are the best fit. They utilize unused wall space without interfering with movement.

    The correct choice depends on three factors: available space, number of users, and humidity level. Aligning these ensures both functionality and long-term satisfaction.

    How Long Do Bathroom Wall Cabinets Last?

    MaterialLifespan
    MDF5–10 years
    Wood10–20 years
    PVC10–15 years
    Metal15–25 years

    Failure Causes

    • Moisture exposure
    • Poor installation
    • Low-quality materials

    Maintenance Tips

    • Clean regularly
    • Avoid water accumulation
    • Inspect hinges

    What Do Experts Recommend for Bathroom Wall Cabinets?

    Professionals prioritize durability, moisture resistance, and long-term usability over aesthetics alone. In real-world installations, the most common failure point in bathroom wall cabinets is material breakdown due to humidity. For this reason, experts consistently recommend PVC, WPC, or aluminum cabinets for bathrooms with poor ventilation or high moisture exposure. These materials do not absorb water, which prevents swelling, warping, and long-term structural damage.

    For homeowners planning permanent installations, recessed cabinets are often the preferred choice. They provide a seamless, built-in look that integrates with the wall, increasing both visual appeal and property value. Interior designers frequently use recessed cabinets in modern bathrooms because they reduce visual clutter and create a cleaner layout.

    In contrast, for rental properties or temporary setups, surface-mounted cabinets are the practical recommendation. They are easier to install, require minimal structural changes, and can be removed without damaging walls.

    Experts also emphasize correct installation over cabinet quality alone. A high-end cabinet installed on weak drywall without proper anchoring can fail faster than a mid-range cabinet properly mounted into wall studs. This is why installation method, wall type, and load distribution are critical factors.

    The key takeaway is simple: match the cabinet to your environment. Moisture level, wall structure, and usage frequency should guide your decision more than design trends.

    How Do You Maintain Bathroom Wall Cabinets?

    Proper maintenance extends lifespan.

    Cleaning by Material

    • MDF: Use dry cloth
    • Wood: Use mild cleaner
    • PVC: Use damp cloth
    • Metal: Prevent rust buildup

    Mold Prevention

    • Ensure ventilation
    • Use moisture absorbers
    • Keep doors slightly open

    How Do Bathroom Wall Cabinets Impact Design?

    Cabinets influence both function and aesthetics.

    They create visual balance and define storage zones. Choosing the right color and finish enhances the bathroom’s theme.

    Design Tips

    • Match cabinet with vanity
    • Use light colors for small spaces
    • Use mirrors to create illusion of space

    Quick Decision Guide

    Choosing the right bathroom wall cabinet becomes simple when you follow a structured decision approach based on your specific needs.

    If your bathroom is small or under 40 square feet, a slim wall-mounted cabinet is the most efficient option. It saves space and prevents obstruction while still providing essential storage.

    If your bathroom experiences high humidity or poor ventilation, material selection becomes critical. PVC or aluminum cabinets are the safest choices because they resist moisture and maintain structural integrity over time.

    For users focused on aesthetics, recessed cabinets are the best option. They integrate into the wall, creating a seamless and modern appearance. This is especially effective in minimalist or luxury bathroom designs.

    If installation convenience is your priority, surface-mounted cabinets are the easiest to work with. They require minimal tools and can be installed quickly without major structural changes.

    For multi-user households, choose cabinets with multiple shelves and larger width. This ensures that storage remains organized even with increased usage.

    This decision framework removes guesswork. Instead of focusing only on design, it aligns your choice with space, environment, and functionality. That is what ensures long-term performance and satisfaction.

    What Are the Latest Bathroom Wall Cabinet Trends?

    Modern trends focus on functionality and minimalism.

    • LED-lit cabinets
    • Smart cabinets with charging ports
    • Recessed minimalist designs
    • Matte finishes

    These trends improve both usability and visual appeal.

    What Mistakes Should You Avoid When Buying Bathroom Wall Cabinets?

    • Choosing wrong material for humidity
    • Ignoring wall strength
    • Selecting incorrect size
    • Poor placement

    Avoiding these mistakes ensures long-term performance.

    Are Bathroom Wall Cabinets Worth It?

    Yes. They provide high utility, improve organization, and enhance aesthetics.

    They are especially valuable in small bathrooms where space optimization is critical.

    Expert Buying Checklist

    • Measure space
    • Choose moisture-resistant material
    • Check wall strength
    • Select proper size
    • Match design

    FAQ Section

    What is the standard depth of bathroom wall cabinets?

    4–12 inches depending on storage needs.

    Can cabinets be installed above toilets?

    Yes, it is a common and effective placement.

    Are wooden cabinets suitable for bathrooms?

    Yes, if properly sealed.

    Do cabinets require drilling?

    Most do, for secure installation.

    What is the ideal installation height?

    48–60 inches from the floor.

    Which material lasts longest?

    Metal and PVC offer the best durability.

  • Bathroom Shelves: Complete Guide to Types, Materials, and Smart Storage

    Bathroom shelves are storage units designed to maximize vertical space, organize daily essentials, and improve accessibility in bathrooms. The best shelves combine strong load capacity, moisture-resistant materials, and secure installation methods to ensure safety, durability, and efficient space utilization.

    Bathroom shelves are not just decorative. They are structural storage systems that must handle weight, humidity, and frequent use without failure.

    What Are Bathroom Shelves and Why Are They Important?

    Bathroom shelves are mounted or freestanding platforms used to store toiletries, towels, and daily-use items.

    They improve:

    • space efficiency
    • organization
    • accessibility
    • bathroom aesthetics

    In small bathrooms, shelves often replace cabinets as the primary storage system.

    Bathroom shelves are not just storage elements. They function as space management systems that directly influence usability, hygiene, and efficiency.

    Functional Importance:

    • Reduce clutter on countertops
    • Improve daily accessibility
    • Separate items by usage frequency
    • Prevent water exposure damage to items

    Structural Importance:

    Shelves distribute load across walls. Poorly designed shelves can damage walls or collapse, making structural understanding critical.

    Design Impact:

    Well-placed shelves improve:

    • visual openness
    • minimalism
    • perceived space size

    What Are the Different Types of Bathroom Shelves?

    Different shelf types serve different layouts and storage needs.

    Common Types:

    • Floating shelves
    • Corner shelves
    • Wall-mounted bracket shelves
    • Over-the-toilet shelves
    • Recessed shelves

    Beyond basic types, shelves vary based on structural purpose.

    Functional Classification:

    1. Storage Shelves

    Used for towels, bottles, and bulk items.

    2. Display Shelves

    Used for décor, plants, and aesthetics.

    3. Utility Shelves

    Placed inside showers or near sinks for daily-use items.

    Structural Variants:

    • Cantilever shelves (hidden support)
    • Multi-tier shelves (stacked storage)
    • Modular shelf systems (adjustable units)

    Key Insight:

    Floating shelves are best for modern aesthetics, while corner shelves maximize unused space.


    How Do You Choose the Right Bathroom Shelves?

    Choosing Right Bathroom Shelves

    Choosing the right shelves depends on usage, space, and wall type.

    Decision Factors:

    • available wall space
    • storage needs
    • load requirements
    • humidity exposure
    • installation type

    Practical Rule:

    Use floating shelves for light storage and bracket shelves for heavier loads.

    Which Materials Are Best for Bathroom Shelves?

    Material determines strength and moisture resistance.

    Material Comparison Table

    MaterialMoisture ResistanceStrengthBest Use
    WoodMediumHighDecorative storage
    MDFLowMediumBudget use
    GlassHighMediumModern designs
    MetalHighHighHeavy-duty storage
    PlasticVery HighLow–MediumWet areas

    Material performance must be evaluated under real bathroom conditions.

    Wood Shelves (Detailed Analysis)

    • Strong and visually appealing
    • Vulnerable to swelling without sealing
    • Best used in low-moisture zones

    Glass Shelves

    • Non-porous and moisture-proof
    • Can crack under heavy or uneven load
    • Ideal for modern minimal designs

    Metal Shelves

    • High strength and durability
    • Risk of rust if coating fails
    • Best for heavy-duty storage

    Plastic Shelves

    • Completely waterproof
    • Lower structural strength
    • Suitable for shower areas

    Advanced Insight:

    Material failure often starts at edges and joints, not flat surfaces.

    Homeaholic Insight:

    Metal and treated wood offer the best balance between strength and durability.


    Floating vs Bracket Bathroom Shelves: Which Is Better?

    FeatureFloatingBracket
    AestheticCleanVisible support
    Load capacityMediumHigh
    InstallationComplexEasier
    Best UseLight storageHeavy items

    Recommendation:

    Bracket shelves are safer for heavy storage, while floating shelves are ideal for minimal design.


    How Much Weight Can Bathroom Shelves Hold?

    Weight Limit Bathroom Shelves

    Shelf capacity depends on material and installation.

    Load Capacity Guide

    Shelf TypeWeight Capacity
    Adhesive shelves3–5 kg
    Floating shelves5–15 kg
    Bracket shelves15–40 kg

    Load capacity is influenced by three combined factors:

    1. Material Strength

    Stronger materials like steel outperform wood or plastic.

    2. Mounting Method

    Anchored shelves hold significantly more weight than adhesive ones.

    3. Wall Type

    Concrete walls can handle much heavier loads than drywall.

    Load Breakdown Example:

    • Shelf + anchors on drywall → 10–15 kg
    • Shelf + anchors on concrete → 30–50 kg
    • Adhesive shelf → 3–5 kg

    Critical Insight:

    Even strong shelves fail if mounted incorrectly.

    Which Walls Are Safe for Bathroom Shelves?

    Not all walls can safely support shelves. Wall type directly determines load capacity and installation method.

    Drywall (Plasterboard Walls)

    • Weak without anchors
    • Can hold light to medium loads (5–15 kg)
    • Requires wall anchors or studs

    Concrete Walls

    • Strongest option
    • Supports heavy loads (20–50 kg+)
    • Requires drilling with masonry tools

    Tile Walls

    • Strong but fragile surface
    • Requires careful drilling to avoid cracks
    • Best for medium loads

    Brick Walls

    • Strong but uneven
    • Requires proper anchors
    • Ideal for heavy-duty shelves

    Safety Rule:

    Always match installation type with wall strength.
    Ignoring this is the #1 cause of shelf collapse globally.

    Critical Insight:

    Wall anchoring matters more than shelf material in determining load capacity.


    Where Should Bathroom Shelves Be Placed for Maximum Efficiency?

    Placement affects usability more than shelf type.

    Best Locations:

    • above toilet
    • beside mirror
    • shower corner
    • unused wall spaces

    Placement should follow usage behavior, not aesthetics alone.

    Behavioral Placement Logic:

    • Daily-use items → within arm reach
    • Heavy items → lower shelves
    • Rare items → upper shelves

    High-Efficiency Zones:

    • Above toilet (unused vertical space)
    • Near sink (daily access zone)
    • Inside shower (utility zone)

    Mistake to Avoid:

    Placing shelves too high or too deep reduces usability.

    How to Prevent Bathroom Shelves from Rusting, Swelling, or Breaking

    Shelf durability depends on preventive care.

    Rust Prevention (Metal Shelves):

    • Use powder-coated or stainless steel
    • Avoid prolonged water exposure
    • Dry surfaces regularly

    Swelling Prevention (Wood/MDF):

    • Apply waterproof sealant
    • Avoid direct water contact
    • Ensure proper ventilation

    Structural Protection:

    • Avoid overloading
    • Re-tighten screws periodically
    • Inspect mounting points

    Insight:

    Most shelf damage is gradual and preventable.


    Bathroom Shelves Without Drill Installation

    Can Bathroom Shelves Be Installed Without Drilling?

    Yes, but with limitations.

    Adhesive Installation:

    Suitable for:

    • light items
    • temporary setups
    • rental spaces

    Limitations:

    • low weight capacity
    • weak performance in humidity
    • risk of sudden detachment

    Alternative:

    Use suction or tension-based systems, but these are also limited in load capacity.

    What Is the Safest Bathroom Shelf Setup?

    Safety depends on stability and load handling.

    Safest Configuration:

    • bracket-mounted shelves
    • anchored into studs or concrete
    • even weight distribution

    Risky Configurations:

    adhesive shelves for heavy items

    • floating shelves without proper anchors
    • overloaded glass shelves

    Safety Rule:

    If the shelf holds breakable or heavy items, always use drilled installation.

    Bathroom Shelves vs Bathroom Cabinets: Which Is Better?

    Both serve different roles.

    FeatureShelvesCabinets
    AccessibilityHighMedium
    Storage CapacityMediumHigh
    Space EfficiencyHighMedium
    ProtectionLowHigh

    Decision Rule:

    • Choose shelves for accessibility
    • Choose cabinets for storage and protection

    How Bathroom Shelves Affect Daily Usability

    Shelves directly impact routine efficiency.

    Positive Effects:

    • faster access to items
    • reduced clutter
    • improved hygiene

    Negative Effects (if poorly designed):

    • overcrowding
    • difficult access
    • safety risks

    Insight:

    Well-designed shelves reduce daily friction in bathroom use.

    Future Trends in Bathroom Shelving Systems

    Bathroom storage is evolving.

    Emerging Trends:

    • modular adjustable shelves
    • smart storage systems
    • hidden storage integration
    • lightweight high-strength materials

    Design Shift:

    Minimalist and functional designs are replacing bulky storage units.

    What Is the Ideal Spacing and Height for Bathroom Shelves?

    Shelf placement must follow ergonomic and usability rules.

    Standard Height Guidelines:

    • Eye-level shelves: 48–60 inches from floor
    • Above toilet: 24–30 inches above tank
    • Shower shelves: 36–48 inches

    Spacing Between Shelves:

    • Small items: 8–10 inches
    • Medium items: 10–14 inches
    • Large items: 14–18 inches

    Usability Rule:

    Shelves should be reachable without stretching or bending excessively.

    Placement Optimization Rule:

    AreaBest Shelf Type
    Above toiletFloating
    ShowerPlastic/metal
    CornerCorner shelf
    Near sinkSmall wall shelf

    Bathroom Shelves in Humid Environments

    How Do Bathroom Shelves Perform in Humid Environments?

    Humidity affects durability and safety.

    Common Issues:

    • rust (metal)
    • swelling (wood/MDF)
    • mold buildup

    Moisture Performance Matrix

    MaterialPerformance
    MDFPoor
    WoodModerate
    GlassExcellent
    MetalExcellent (if coated)
    PlasticExcellent

    Best Bathroom Shelving Strategy for Small Spaces

    Small bathrooms require smart space planning.

    Vertical Storage Strategy:

    Use multiple stacked shelves instead of wide units.

    Corner Optimization:

    Install corner shelves to use unused areas.

    Over-Toilet Storage:

    Maximize vertical space above toilet.

    Visual Space Rule:

    Floating shelves create a more open and less cluttered look.

    Real-World Case Study: Shelf Failure vs Proper Installation

    A bathroom installed adhesive shelves for heavy bottles.

    Result:

    • shelves detached within weeks
    • items fell and damaged tiles

    Upgrade:

    Replaced with bracket-mounted metal shelves.

    Outcome:

    • stable load handling
    • long-term durability
    • zero failures

    How Much Do Bathroom Shelves Cost Globally?

    Price Range:

    • Basic shelves: $10–$50
    • Mid-range: $50–$150
    • Premium: $150–$500+

    Cost Factors:

    • material
    • size
    • design
    • installation method

    How Long Do Bathroom Shelves Last?

    MaterialLifespan
    MDF2–5 years
    Wood5–10 years
    Glass10–15 years
    Metal10–20 years
    Plastic5–10 years

    How to Maintain Bathroom Shelves for Long-Term Durability

    Maintenance extends shelf life significantly.

    Maintenance Routine:

    • Clean surfaces weekly
    • Dry moisture immediately
    • Check screws every 3–6 months
    • Inspect for rust or swelling

    Material-Specific Care:

    • Wood → re-seal periodically
    • Metal → check anti-rust coating
    • Glass → inspect mounting points

    Insight:

    Proper maintenance can increase shelf lifespan by 30–50%.

    Common Bathroom Shelf Problems and How to Avoid Them

    Common Issues:

    • falling shelves
    • rust
    • swelling
    • poor alignment

    Prevention:

    • use proper anchors
    • choose moisture-resistant materials
    • avoid overloading shelves

    Shelf Failure Science: Why Bathroom Shelves Collapse

    Shelf failures are caused by:

    Poor Anchoring

    Shelves mounted without studs or proper anchors detach over time.

    Overloading

    Exceeding weight capacity leads to bending or collapse.

    Weak Materials

    Low-quality materials degrade quickly in humid environments.

    How Weight Distribution Affects Shelf Safety

    Weight distribution determines whether a shelf holds or fails.

    Center Load vs Edge Load

    • Center load is safest
    • Edge loading causes bending and instability

    Even Distribution Principle:

    Spread weight across the entire shelf rather than stacking in one area.

    Load Failure Insight:

    Even strong shelves fail when weight is concentrated in one point.

    How to Install Bathroom Shelves Safely

    Key Steps:

    1. locate wall studs
    2. mark drilling points
    3. use proper anchors
    4. level the shelf
    5. tighten securely

    Adhesive vs Drilled Bathroom Shelves: Which Is Safer?

    This is one of the most misunderstood decisions.

    Adhesive Shelves

    Pros:

    • No drilling required
    • Easy installation
    • Ideal for rentals

    Cons:

    • Limited load capacity (3–5 kg)
    • Fails in humid environments
    • Weak on textured surfaces

    Drilled Shelves

    Pros:

    • Strong and stable
    • Suitable for heavy loads
    • Long-term durability

    Cons:

    • Requires tools
    • Permanent installation

    Key Insight:

    Adhesive shelves are temporary solutions.
    Drilled shelves are structural storage systems.

    DIY vs Professional Shelf Installation

    DIY:

    • lower cost
    • suitable for light shelves

    Professional:

    • safer for heavy installations
    • ensures proper alignment

    Bathroom Shelf Storage Planner (Smart System)

    Step 1: Categorize Items

    • daily use
    • weekly use
    • rare use

    Step 2: Assign Zones

    ZonePlacement
    toprare items
    middledaily items
    bottomheavy items

    Bathroom Shelf Comparison Tool

    FeatureFloatingBracketCornerRecessed
    Space SavingHighMediumVery HighHigh
    StorageMediumHighMediumMedium
    InstallationMediumEasyEasyHard

    Expert Insight: What Most Homeowners Get Wrong

    Most people choose shelves based on design.

    In reality:

    • 70% of failures come from poor installation
    • 20% from wrong material
    • 10% from overloading

    What Most Homeowners Get Wrong About Bathroom Shelves

    Most users focus on aesthetics.

    In reality:

    • 70% of failures come from poor installation
    • 20% from wrong material
    • 10% from overloading

    Structure matters more than design.

    Bathroom Shelf Decision Matrix (Advanced)

    FactorFloatingBracketCornerRecessed
    Load StrengthMediumHighMediumMedium
    Space EfficiencyHighMediumVery HighHigh
    Installation DifficultyMediumEasyEasyHard
    DurabilityMediumHighMediumHigh

    Real-World Case Study: Small Bathroom Shelf Optimization

    A compact bathroom lacked storage and relied on cluttered countertops.

    Problem:

    • no vertical storage
    • items scattered
    • poor accessibility

    Solution:

    Installed floating shelves + corner units.

    Result:

    • 45% increase in storage
    • cleaner layout
    • improved usability

    Bathroom Shelf Buying Checklist (Expert QC Guide)

    Use this before purchasing:

    • Wall compatibility checked
    • Load capacity matches usage
    • Moisture-resistant material selected
    • Installation method confirmed
    • Proper spacing planned

    Homeaholic Recommendation:


    FAQ Section

    Can bathroom shelves hold heavy items?

    Yes, if properly anchored with brackets.

    Are adhesive shelves safe?

    Only for light items.

    What is the best material for bathroom shelves?

    Metal and glass offer the best durability.

    Can shelves be installed on tiles?

    Yes, but require proper drilling tools.

    How to prevent shelves from falling?

    Use wall anchors and avoid overloading.

    Are floating shelves strong?

    Yes, but only when properly installed.

    What is the best height for shelves?

    Typically 4–5 feet from floor level.

    Can bathroom shelves damage tiles?

    Yes, improper drilling can crack tiles.

    What wall type holds the most weight?

    Concrete and brick walls.

    Do floating shelves bend?

    Yes, if overloaded or poorly installed.

    Can adhesive shelves fail due to humidity?

    Yes, humidity weakens adhesive bonding.

    What is the safest shelf type?

    Bracket-mounted shelves with anchors.

  • Bathroom Cabinets: Complete Guide to Types, Materials, and Smart Storage

    Bathroom cabinets are storage units designed to organize toiletries, protect items from moisture, and enhance bathroom functionality. The best cabinets combine water-resistant materials, efficient internal layout, and the right installation type to match space, usage, and humidity conditions.

    Bathroom cabinets are not just storage boxes. They are engineered to survive moisture, daily use, and temperature changes while maintaining structure and appearance over time.

    What Are Bathroom Cabinets and How Do They Work?

    Bathroom cabinets are enclosed storage systems installed in bathrooms to store personal care items, cleaning supplies, and accessories.

    They work by:

    • protecting contents from moisture exposure
    • organizing items using shelves and drawers
    • maximizing vertical and hidden storage space

    Modern cabinets also integrate mirrors, lighting, and soft-close hardware for improved usability.


    What Are the Different Types of Bathroom Cabinets?

    Different Types of Bathroom Cabinets

    Bathroom cabinets come in multiple configurations based on space and function.

    Common Types:

    Wall-Mounted Cabinets

    Installed above sinks or toilets. Ideal for saving floor space.

    Freestanding Cabinets

    Placed directly on the floor. Offer larger storage capacity.

    Vanity Cabinets

    Integrated with sinks. Combine storage with functional design.

    Recessed Cabinets

    Built into the wall cavity. Provide hidden storage without occupying space.

    How Do You Choose the Right Bathroom Cabinets?

    Choosing the right cabinet depends on space, moisture level, and usage.

    Key Decision Factors:

    • Bathroom size
    • Storage needs
    • Humidity exposure
    • Installation type
    • Design compatibility

    Practical Rule:

    Small bathrooms benefit from vertical or wall-mounted cabinets, while larger bathrooms can support freestanding or double vanity cabinets.

    Homeaholic recommends prioritizing function first, then design.

    What Is the Difference Between Bathroom Cabinets and Vanities?

    Bathroom cabinets and vanities are often confused, but they serve different purposes.

    Bathroom Cabinets:

    • Used purely for storage
    • Installed on walls or floors
    • Do not include sink integration

    Bathroom Vanities:

    • Combine cabinet + sink + countertop
    • Serve both storage and functional washing needs

    Key Decision Rule:

    If your goal is storage expansion, choose cabinets.
    If your goal is sink replacement with storage, choose a vanity.

    Practical Insight:

    Many modern bathrooms combine both to maximize space and usability.

    Which Materials Are Best for Bathroom Cabinets?

    Material determines durability, moisture resistance, and lifespan.

    Material Comparison Table

    MaterialMoisture ResistanceDurabilityBest Use
    Solid WoodMediumHighLuxury bathrooms
    MDFLow–MediumMediumBudget interiors
    PlywoodHighHighBest overall choice
    PVCVery HighMediumHigh humidity areas
    Stainless SteelExcellentVery HighModern, industrial bathrooms

    Why Bathroom Cabinets Fail: Swelling, Warping, and Mold Explained

    Why Bathroom Cabinets Fail

    Bathroom cabinets fail primarily due to moisture exposure, poor material selection, and weak sealing. Understanding failure patterns helps prevent early replacement.

    Swelling and Expansion

    MDF and low-grade wood absorb moisture through edges. This causes panels to expand, lose shape, and permanently deform.

    Warping

    Uneven humidity causes wood panels to bend. This leads to misaligned doors and uneven gaps.

    Mold Growth Inside Cabinets

    Poor ventilation traps humidity inside cabinets, especially under sinks. This creates mold-prone environments.

    Laminate Peeling

    Low-quality laminates separate from the base material when exposed to steam and water.

    Prevention Rule

    Always use sealed edges, moisture-resistant materials, and proper ventilation to prevent long-term damage.

    Key Insight:

    Plywood offers the best balance of strength and moisture resistance, while PVC is ideal for extreme humidity environments.

    Wall-Mounted vs Freestanding Bathroom Cabinets: Which Is Better?

    Both types serve different needs.

    FeatureWall-MountedFreestanding
    Space efficiencyHighMedium
    Storage capacityMediumHigh
    Cleaning easeEasyModerate
    InstallationComplexSimple

    Recommendation:

    Wall-mounted cabinets are best for modern compact spaces, while freestanding cabinets work better in larger bathrooms.


    Bathroom Cabinets Hardware Explained: Hinges, Rails, and Longevity

    Bathroom Cabinets Hardware Explained

    Hardware quality directly affects cabinet lifespan.

    Soft-Close Hinges

    • Prevent door slamming
    • Reduce wear over time
    • Last longer than standard hinges

    Drawer Rails

    • Ball-bearing rails provide smoother operation
    • Cheap rails fail within 2–3 years

    Handle vs Handleless Design

    • Handles offer durability
    • Push-to-open systems require higher-quality mechanisms

    Key Insight:

    Hardware failure is one of the most common reasons cabinets feel “old” even when structure is intact.

    What Is the Ideal Size and Depth for Bathroom Cabinets?

    Cabinet size directly affects usability and comfort.

    Standard Dimensions:

    • Depth: 18–24 inches
    • Height: 30–36 inches
    • Width: 24–60 inches

    Small Bathroom Tip:

    Use narrow cabinets (12–18 inches depth) to avoid crowding.


    How to Calculate the Right Cabinet Size for Your Bathroom?

    Choosing the correct size ensures comfort and usability.

    Basic Calculation Method:

    1. Measure total bathroom width
    2. Leave at least 30 inches clearance for movement
    3. Allocate remaining space for cabinet width

    Depth Selection Rule:

    • Small bathrooms → 12–18 inches
    • Standard bathrooms → 18–24 inches
    • Large bathrooms → 24+ inches

    Height Consideration:

    • Standard vanity height: 32–36 inches
    • Wall-mounted cabinets should align with eye level

    Interactive Bathroom Cabinets Size Calculator

    Use this simple method to estimate the ideal cabinet size for your bathroom layout.

    Step-by-Step Input Method:

    1. Measure total bathroom width (in inches)
    2. Subtract minimum movement clearance (30–36 inches)
    3. Divide remaining space for cabinet allocation

    Example Calculation:

    • Bathroom width: 72 inches
    • Clearance space: 36 inches
    • Remaining space: 36 inches
    • Ideal cabinet width = 30–36 inches

    Quick Reference Table:

    Bathroom WidthRecommended Cabinet Size
    48”18–24” cabinet
    60”24–30” cabinet
    72”30–36” cabinet
    96”+48–60” cabinet

    Homeaholic Insight:

    Oversized cabinets reduce usability more than they increase storage.


    How Do Bathroom Cabinets Perform in Humid Environments?

     Bathroom Cabinets Performance in Humid Environments

    Humidity is the biggest threat to cabinet durability.

    Common Effects:

    • swelling
    • warping
    • mold growth
    • laminate peeling

    Best Solutions:

    • waterproof coatings
    • sealed edges
    • moisture-resistant materials

    Are Bathroom Cabinets Waterproof or Water-Resistant?

    No cabinet is completely waterproof unless made from non-porous materials like PVC or stainless steel.

    Water-Resistant Cabinets:

    • Treated wood or plywood
    • Laminated surfaces
    • Sealed edges

    Waterproof Cabinets:

    • PVC cabinets
    • Metal cabinets

    Important Distinction:

    Water-resistant cabinets can handle humidity,
    but waterproof cabinets can handle direct water exposure.

    Homeaholic Recommendation:

    Use waterproof cabinets near sinks and water-prone areas.

    Material Stress Test Comparison: Heat, Water, and Load

    Different materials react differently under stress conditions.

    MaterialWater ExposureHeat ResistanceLoad Strength
    MDFPoorMediumLow
    PlywoodGoodHighHigh
    PVCExcellentMediumMedium
    SteelExcellentVery HighVery High

    Key Insight:

    Plywood provides the best balance across all stress factors, making it the most reliable long-term material.

    Moisture Performance Matrix

    MaterialHumidity Performance
    MDFPoor (swells easily)
    WoodModerate
    PlywoodGood
    PVCExcellent
    SteelExcellent

    Real-World Case Study: Bathroom Cabinets Failure in High Humidity

    A small bathroom using MDF cabinets experienced swelling and edge damage within 18 months due to poor ventilation.

    After replacing with PVC cabinets:

    • no swelling after 4 years
    • improved durability
    • zero maintenance issues

    This shows how material choice directly affects lifespan.

    How Much Do Bathroom Cabinets Cost Globally?

    Costs vary based on material, size, and customization.

    Average Price Range:

    • Basic cabinets: $100–$500
    • Mid-range: $500–$1,500
    • Premium/custom: $1,500–$5,000+

    Cost Drivers:

    • material type
    • hardware quality
    • custom design
    • installation complexity

    What Factors Affect Bathroom Cabinets Pricing?

    Pricing is not just about material.

    Key Pricing Factors:

    • Material quality
    • Cabinet size
    • Hardware type
    • Customization level
    • Installation complexity
    • Brand reputation

    Hidden Cost Insight:

    Cheap cabinets often cost more long-term due to early replacement.

    How Long Do Bathroom Cabinets Last?

    Cabinet lifespan depends on material and usage.

    MaterialLifespan
    MDF3–7 years
    Wood8–15 years
    Plywood10–20 years
    PVC10–15 years
    Steel15–25 years

    How to Maintain Bathroom Cabinets for Maximum Lifespan?

    Proper maintenance can extend cabinet life by years.

    Maintenance Routine:

    • Wipe moisture immediately
    • Clean surfaces weekly
    • Check hinges every 3–6 months
    • Re-seal edges if damaged

    Ventilation Rule:

    Bathrooms without ventilation reduce cabinet lifespan by up to 50%.

    Long-Term Insight:

    Maintenance is the cheapest way to delay cabinet replacement.

    What Are Common Bathroom Cabinets Problems and How to Avoid Them?

    Common Issues:

    • swelling due to water exposure
    • loose hinges
    • mold buildup
    • peeling laminates

    Prevention:

    • use moisture-resistant materials
    • install proper ventilation
    • avoid water accumulation
    • maintain sealing and edges

    How to Maximize Storage with Bathroom Cabinets?

    Storage efficiency matters more than cabinet size.

    Smart Storage Tips:

    • use adjustable shelves
    • install drawer dividers
    • choose vertical cabinets
    • use hidden compartments

    How to Design Bathroom Cabinets Storage for Maximum Efficiency

    Storage efficiency depends on layout, not just cabinet size.

    Drawer vs Shelf Efficiency

    • Drawers provide easier access and visibility
    • Shelves offer larger storage but lower accessibility

    Vertical vs Horizontal Storage

    • Vertical cabinets maximize small bathroom space
    • Horizontal cabinets work better in large bathrooms

    Hidden Storage Optimization

    • Use internal organizers
    • Add pull-out trays
    • Install under-sink compartments

    Efficiency Rule:

    A well-designed cabinet can store 30–50% more usable items than a poorly organized one of the same size.

    Bathroom Cabinets Storage Planner (Smart Layout System)

    Design your cabinet layout based on usage zones.

    Step 1: Categorize Items

    • Daily use items (toothbrush, skincare)
    • Weekly use items (towels, cleaning supplies)
    • Rare use items (backup products)

    Step 2: Assign Storage Zones

    ZonePlacement
    Top shelvesRare use items
    Middle shelvesDaily use items
    Bottom areaHeavy or bulky items

    Step 3: Optimize Accessibility

    • Use drawers for small items
    • Use shelves for large items
    • Add dividers for organization

    Efficiency Insight:

    Proper zoning improves accessibility by up to 50% compared to random storage.

    Storage Efficiency Comparison

    Cabinet TypeEfficiency Score
    RecessedHigh
    Wall-mountedMedium
    FreestandingMedium
    VanityHigh

    What Most Homeowners Get Wrong About Bathroom Cabinets?

    Most people choose cabinets based on appearance alone.

    In reality:

    • 60% of failures come from moisture damage
    • 25% from poor installation
    • 15% from low-quality hardware

    Material and installation matter more than design.

    DIY vs Custom Bathroom Cabinets: Which Should You Choose?

    DIY Cabinets:

    • lower cost
    • limited customization

    Custom Cabinets:

    • perfect fit
    • higher durability
    • premium design

    Recommendation:

    Custom cabinets are better for long-term performance and space optimization.

    Ready-Made vs Custom Bathroom Cabinets: Which Is Better?

    Ready-Made Cabinets:

    • Lower cost
    • Faster installation
    • Limited size options

    Custom Cabinets:

    • Perfect fit
    • Better material control
    • Higher long-term value

    Decision Rule:

    Choose ready-made for budget and speed.
    Choose custom for durability and precision.

    Bathroom Cabinets Installation: Key Considerations

    Proper installation prevents long-term issues.

    Key Points:

    • secure wall anchoring
    • level alignment
    • moisture sealing
    • correct height positioning

    Bathroom Cabinets Installation Mistakes That Cause Long-Term Damage

    Improper installation leads to structural failure.

    Common Mistakes:

    • Weak wall anchoring
    • Installing on hollow drywall without support
    • Incorrect leveling
    • Ignoring tile drilling risks

    Wall Load Insight:

    Floating cabinets must be anchored into studs or concrete walls.
    Failure to do so can lead to collapse under weight.

    Expert Insight: Why Moisture Resistance Matters More Than Design

    Most homeowners choose cabinets based on appearance. However, moisture resistance determines whether cabinets last 2 years or 15 years.

    Homeaholic experts recommend always prioritizing material performance over aesthetics in high-humidity environments.

    Real-World Case Study: Small Bathroom Storage Upgrade

    A compact bathroom with limited storage used a traditional freestanding cabinet.

    Problem:

    • cluttered countertop
    • poor accessibility
    • inefficient storage

    Upgrade:

    Installed wall-mounted vertical cabinet with internal organizers.
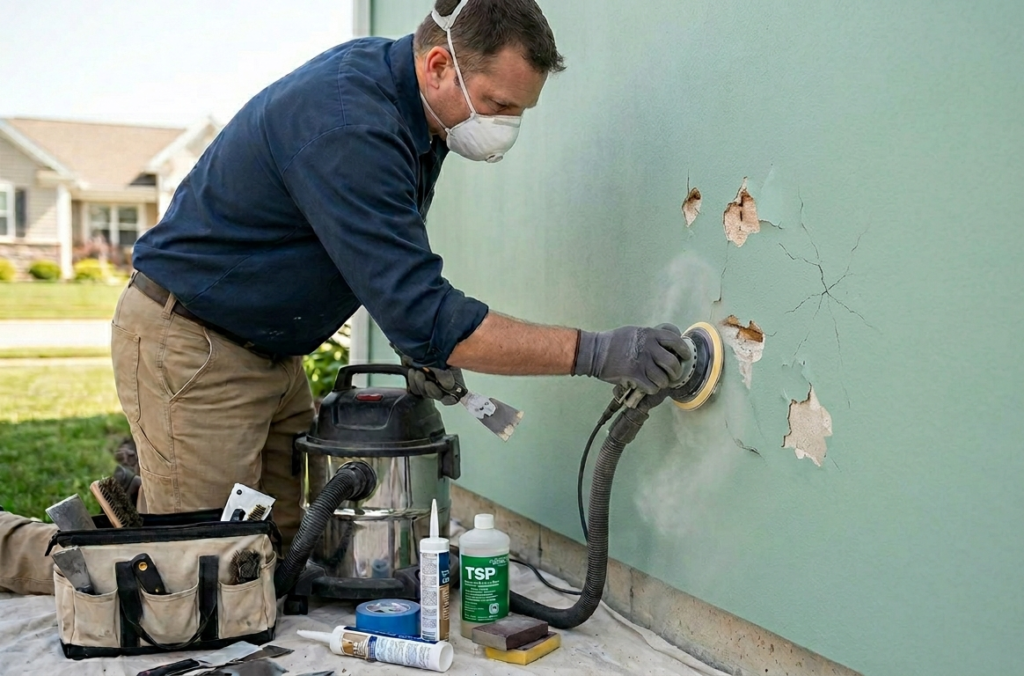
    Result:

    • 40% increase in usable storage
    • cleaner layout
    • improved accessibility

    How Bathroom Cabinets Impact Overall Bathroom Value

    Bathroom cabinets directly influence property value.

    Value Impact Factors:

    • material quality
    • design consistency
    • storage functionality
    • durability

    Real Estate Insight:

    Upgraded cabinets can increase perceived bathroom value significantly during resale.

    Bathroom Cabinets Design Trends (Global Perspective)

    Modern bathroom cabinet design is evolving globally.

    Current Trends:

    • Floating cabinets for minimalist spaces
    • Handleless push-to-open designs
    • Matte finishes over gloss
    • Integrated lighting systems
    • Natural wood textures

    Design Insight:

    Minimalist cabinets are gaining popularity due to space efficiency and modern aesthetics.


    Bathroom Cabinet Expert QC Guide

    Bathroom Cabinets Buying Checklist (Expert QC Guide)

    Use this checklist before purchasing:

    • Material is moisture-resistant
    • Edges are fully sealed
    • Hinges are soft-close and durable
    • Cabinet size fits space correctly
    • Ventilation is considered
    • Warranty is provided

    Homeaholic Recommendation:

    Always inspect edge sealing and internal structure, not just external design.

    Bathroom Cabinets Comparison Tool (Decision Matrix)

    Use this comparison system to choose the best cabinet type for your needs.

    Cabinet Type Comparison

    FeatureWall-MountedFreestandingRecessedVanity
    Space SavingHighMediumVery HighMedium
    Storage CapacityMediumHighMediumHigh
    Installation ComplexityHighLowVery HighMedium
    CostMediumLow–MediumHighMedium–High
    Best ForSmall bathroomsLarge bathroomsMinimalist spacesFunctional use

    Material Comparison

    MaterialMoisture ResistanceDurabilityBest Use
    MDFLowMediumBudget use
    PlywoodHighHighStandard best choice
    PVCVery HighMediumHigh humidity
    SteelExcellentVery HighPremium durability

    Decision Rule:

    • Choose wall-mounted for small spaces
    • Choose freestanding for storage capacity
    • Choose PVC or steel for humid environments
    • Choose plywood for long-term balance

    FAQ Section

    What is the best material for bathroom cabinets?

    Plywood and PVC are the best choices due to high moisture resistance and durability.

    Are MDF cabinets suitable for bathrooms?

    They are budget-friendly but prone to swelling in humid conditions.

    What is the difference between vanity and cabinet?

    A vanity includes a sink, while a cabinet is purely for storage.

    How deep should a bathroom cabinet be?

    Standard depth ranges from 18 to 24 inches.

    Can bathroom cabinets be waterproof?

    PVC and stainless steel cabinets offer near waterproof performance.

    Are floating cabinets strong enough?

    Yes, when properly installed with wall anchors.
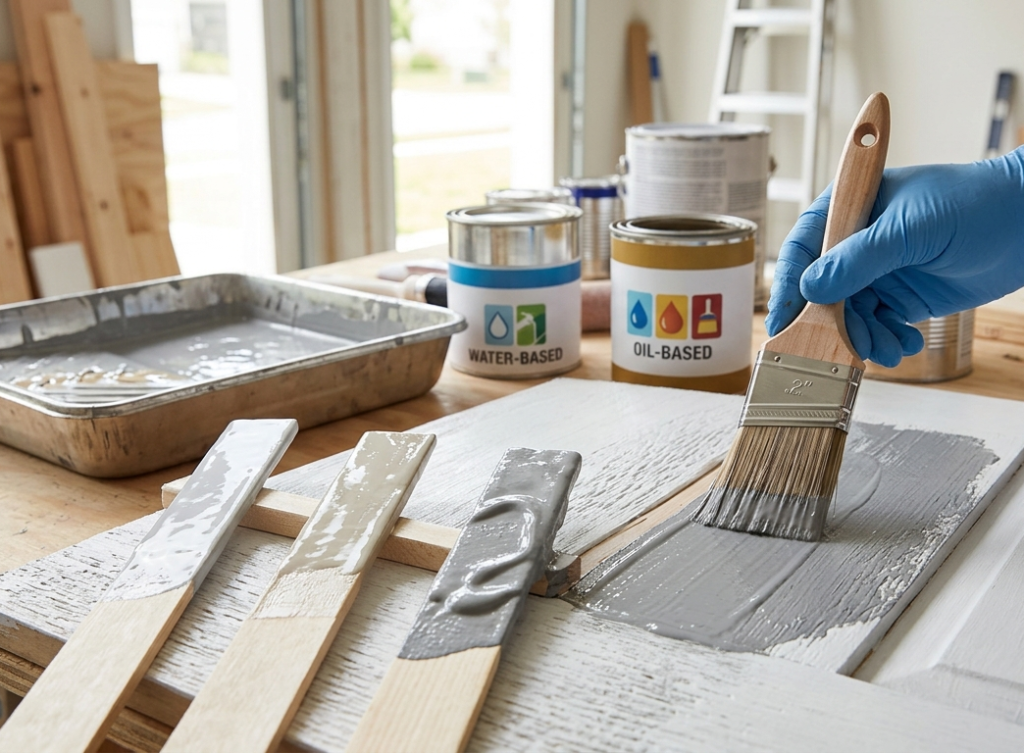
    How to prevent mold in cabinets?

    Ensure ventilation and avoid moisture buildup.

    How often should cabinets be replaced?

    Typically, every 10–20 years depending on material.

    Can bathroom cabinets rot from inside?

    Yes, especially MDF cabinets exposed to hidden moisture over time.

    Are soft-close hinges worth it?

    Yes, they significantly extend cabinet lifespan and reduce wear.

    What is the weight limit of floating cabinets?

    Typically 50–100 kg depending on installation and wall type.

    Can water seep through laminate edges?

    Yes, if edges are not properly sealed.

    Why do cabinet doors become uneven?

    Hinge loosening or structural warping causes misalignment.

  • House Painting: Complete Guide to Choosing, Applying, and Maintaining Paint

    House painting protects surfaces, improves appearance, and increases property value when done with the right paint, preparation, and technique. The best results come from matching paint type to surface, climate, and room function while ensuring proper wall preparation before application.

    House painting is more than changing color. It is a protective system that shields walls from moisture, UV damage, mold growth, and wear over time. Whether painting interiors or exteriors, the right decisions at each stage determine durability and finish quality.

    What Is House Painting and Why Does It Matter?

    House painting is the process of applying protective and decorative coatings to interior and exterior residential surfaces. It preserves structural materials while improving visual appeal.
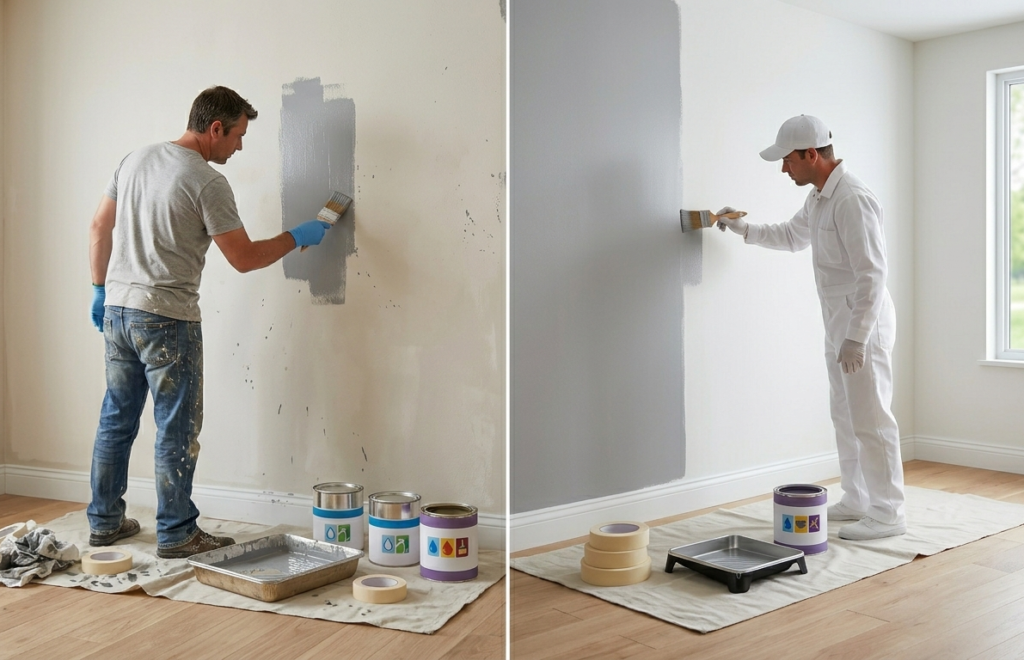
    A properly painted home resists weather damage, stains, cracking, and premature aging. Exterior paint acts as a barrier against rain, heat, and UV rays, while interior paint protects walls from humidity, dust, and daily abrasion.

    For homeowners globally, painting is one of the highest-return home improvement investments because it combines maintenance and design in one upgrade.

    What Are the Main Types of House Paint?

    Different paint formulations serve different purposes. Choosing the wrong one can lead to peeling, fading, or moisture failure.

    Paint TypeBest ForStrength
    Acrylic LatexInterior & exterior wallsDurable, flexible
    Oil-Based PaintTrim, doors, woodworkSmooth finish
    Enamel PaintKitchens, bathroomsMoisture resistant
    Primer PaintSurface prepAdhesion support
    Elastomeric CoatingExterior masonryCrack bridging

    Acrylic latex is now the global standard because it dries quickly, resists cracking, and performs well across climates.

    How Do You Choose the Right Paint for Different Surfaces?

    Each wall material has different absorption, texture, and adhesion behavior.

    Best Surface Matches:

    • Drywall → Acrylic latex interior paint
    • Wood siding → Exterior acrylic or oil hybrid paint
    • Brick walls → Breathable masonry coatings
    • Stucco → Elastomeric weather-resistant paint
    • Concrete → Waterproof acrylic seal paint

    Always test for moisture before painting porous surfaces. Damp walls trap water under paint films and cause blistering.


    Interior vs Exterior House Painting: What Is the Difference?

    House Painting

    These paints are chemically different and should never be interchanged.

    Interior Paint:

    Designed for washability, stain resistance, low odor, and indoor air safety.

    Exterior Paint:

    Engineered for UV protection, temperature expansion, mold resistance, and rain exposure.

    Exterior coatings contain stronger binders and weather-resistant additives that interior paints do not require.

    How Should You Prepare Walls Before Painting?

    Surface preparation determines whether paint lasts 2 years or 12 years.

    Essential Preparation Steps:

    1. Remove dust, grease, and loose debris
    2. Scrape peeling paint
    3. Sand uneven patches
    4. Fill cracks and holes
    5. Apply primer where needed
    6. Let surfaces dry fully before coating

    Professional painters often say poor preparation causes more failures than poor paint quality.


    Advanced Surface Preparation: The Step Professionals Never Skip

    House Painting

    Surface preparation is not just cleaning. It is a controlled process that determines how well paint bonds and how long it lasts.

    Moisture Testing Before Painting

    Walls must be dry before painting. Even slight moisture leads to bubbling and peeling.

    Professional method:

    • Tape a plastic sheet (1 ft x 1 ft) to the wall
    • Leave for 24 hours
    • If condensation appears → wall is too damp

    This simple test prevents long-term paint failure.

    Adhesion Testing for Old Paint

    Before repainting, check if the existing paint layer is stable.

    Cross-hatch test:

    • Cut a small grid pattern into the paint
    • Apply tape and pull it off
    • If paint comes off → surface must be stripped

    When Full Paint Removal Is Required

    Do not repaint over:

    • chalking surfaces
    • heavily cracked paint
    • multiple old paint layers

    In such cases, scraping or sanding down to the base surface is necessary.

    What Are the Best Paint Finishes for Each Room?

    Paint finish affects cleaning ease, reflection, and flaw visibility.

    FinishBest Room UseBenefit
    MatteBedrooms, ceilingsHides imperfections
    EggshellLiving roomsSoft washable sheen
    SatinHallways, family roomsDurable and cleanable
    Semi-glossKitchens, bathsMoisture resistant
    GlossDoors, trimsHigh durability

    Bathrooms and kitchens should always prioritize moisture-resistant finishes.


    How Paint Chemistry Affects Durability and Performance

    House Painting

    Most homeowners choose paint based on color and finish. Professionals choose based on chemistry.

    Acrylic Latex Paint

    • Flexible and breathable
    • Expands and contracts with temperature
    • Best for most climates

    Oil-Based Paint

    • Harder surface
    • Higher durability on trim
    • Less flexible over time

    Elastomeric Paint

    • Thick coating
    • Bridges cracks in masonry
    • Ideal for exterior walls with micro-cracks

    VOC Levels and Indoor Air Quality

    Low-VOC paints release fewer harmful chemicals.

    Why It Matters:

    • Safer for children and elderly
    • Reduces indoor air pollution
    • Faster odor dissipation

    Homeaholic recommends low-VOC or zero-VOC paints for all interior living spaces.

    Surface Troubleshooting Matrix: Best Paint Solution by Material

    Surface TypeCommon ProblemBest Paint Solution
    StuccoHairline cracksElastomeric coating
    Wood sidingPeeling & expansionAcrylic exterior latex
    Brick wallsMoisture trappingBreathable masonry paint
    DrywallPatch flashingPrimer + acrylic latex
    ConcreteDamp seepageWaterproof seal acrylic

    This matrix helps users choose paint systems based on real surface behavior, not generic labels.

    At Homeaholic, surface-specific preparation is treated as the foundation of durable house painting results.


    DIY vs Professional House Painting: Which Is Better?

    House Painting

    DIY painting saves labor costs, while professional painting delivers precision, speed, and longer-lasting results. However, the right choice depends on your needs and project size.

    DIY Is Best For:

    • Small rooms
    • Accent walls
    • Simple repaint jobs

    Professional Painting Is Better For:

    • Exterior houses
    • Multi-story homes
    • Damaged surfaces
    • Complex texture walls

    Improper roller loading, poor edging, and skipped primer layers are common DIY failure points.

    Tools and Equipment Required for Professional-Level Results

    Using the right tools improves finish quality significantly.

    Essential Tools:

    • High-quality paint rollers (microfiber for smooth finish)
    • Angled brushes for cutting edges
    • Paint trays with liners
    • Extension poles for ceilings
    • Painter’s tape for clean lines
    • Drop cloths for surface protection

    Spray vs Roller vs Brush — Performance Comparison

    MethodBest UseAdvantage
    RollerWalls & ceilingsEven coverage
    BrushEdges & trimPrecision
    SprayLarge exteriorsSpeed

    Professionals often combine all three for best results.

    How Much Does House Painting Cost Globally?

    House painting cost varies by labor market, surface condition, and material quality.

    Average Global Ranges:

    • Interior repaint: $2–$6 per sq ft
    • Exterior repaint: $3–$8 per sq ft
    • Full house average: $1,500–$12,000+

    Urban regions with high labor rates increase total costs significantly.

    Cost Drivers:

    • Surface repairs
    • Paint brand quality
    • Number of coats
    • Accessibility difficulty
    • Climate-resistant coatings

    How Much Paint Do You Need for a House?

    Estimating paint correctly prevents waste, cost overruns, and uneven finish results.

    Standard Coverage Formula:

    1 gallon of paint covers approximately 350 to 400 square feet per coat.

    Example Calculation:

    If a wall area totals 1,200 square feet:

    1,200 ÷ 400 = 3 gallons per coat
    For two coats = 6 gallons total

    Always Add Extra:

    Add 10–15% extra paint for:

    • textured walls,
    • porous masonry,
    • touch-ups,
    • future repairs.

    Tip:

    Dark color changes often require additional coats.

    How Long Does House Paint Last?

    Paint lifespan depends on environment, paint chemistry, and surface exposure.

    AreaAverage Lifespan
    Interior walls5–10 years
    Exterior wood siding4–7 years
    Stucco exterior7–10 years
    Trim and doors3–6 years

    Homes in coastal, humid, or extreme sun regions require more frequent repainting.

    Paint Lifespan Breakdown by Surface and Exposure Level

    Not all walls age the same. Sun exposure, moisture, and usage determine how fast paint degrades.

    SurfaceExposure LevelExpected Lifespan
    Interior bedroom wallLow traffic8–12 years
    Kitchen wallsHigh grease/moisture3–5 years
    Exterior shaded wallLow UV7–10 years
    Exterior sun-facing wallHigh UV3–6 years
    Coastal exteriorSalt + humidity2–5 years
    Key Insight:

    UV exposure is the biggest factor in exterior paint degradation globally.

    Common House Painting Mistakes to Avoid

    Many failures happen from avoidable errors.

    Top Mistakes:

    • Painting over dirty walls
    • Skipping primer
    • Ignoring moisture damage
    • Applying thick uneven coats
    • Painting in bad weather
    • Using wrong finish types

    Never paint exterior walls before rain or when temperatures fall below manufacturer thresholds.


    Why House Paint Fails: Peeling, Bubbling, and Cracking Explained

    House Painting

    Paint failure is usually caused by moisture, poor adhesion, or environmental stress rather than paint quality alone. Understanding failure patterns helps homeowners prevent expensive repainting cycles.

    Peeling Paint

    Peeling happens when paint loses adhesion from the surface beneath it. This often occurs because walls were dirty, damp, or unprimed before coating.

    Bubbling or Blistering

    Bubbles form when moisture or heat gets trapped under drying paint films. Exterior walls exposed to direct sunlight after rain are especially vulnerable.

    Cracking and Flaking

    Cracking develops when paint layers become brittle over time, often from low-quality paint or repeated extreme temperature changes.

    Chalking

    Exterior paint may develop powdery residue due to UV breakdown. This is common in low-grade paints without UV stabilizers.

    Prevention Rule:

    Proper drying time, surface moisture testing, and primer compatibility prevent most paint failures before they begin.

    What Most Homeowners Get Wrong About House Painting

    Most people focus on paint quality but ignore preparation and environment.

    In reality:

    • 70% of paint failures come from poor surface prep
    • 20% from wrong paint selection
    • Only 10% from paint quality itself

    This is why professional painters prioritize preparation over brand selection.


    How Climate Affects House Painting Results

    Climate changes paint performance dramatically.

    Hot Dry Climates:

    Require UV fade-resistant paints.

    Humid Tropical Climates:

    Need mold-resistant breathable coatings.

    Cold Regions:

    Require freeze-flex acrylic systems.

    Coastal Areas:

    Salt-resistant anti-corrosion paint systems work best.

    Climate-matched paint lasts significantly longer than generic paint formulas.

    Homeaholic recommends climate-matched paint systems rather than one-size-fits-all coatings, especially for exterior walls exposed to harsh weather.

    Real-World Case Study: Exterior Paint Performance in Humid Climate

    A 2,000-square-foot stucco home in a tropical humid region was repainted using mold-resistant acrylic elastomeric coating after repeated peeling failures with standard latex paint.

    Before Upgrade:

    • Paint bubbling after 18 months
    • Mold spotting on shaded walls
    • Frequent patch repairs

    After Correct Paint System:

    • No bubbling after 6 years
    • Mold growth reduced significantly
    • Repaint cycle extended from 2 years to projected 8 years

    This demonstrates how climate-specific coatings dramatically improve long-term durability.

    Homeaholic experts advise testing wall moisture before exterior painting in humid and coastal regions.

    Paint Type Comparison Matrix by Climate

    ClimateRecommended Paint
    HumidMold-resistant acrylic latex
    Dry HotUV shield acrylic coating
    CoastalSalt-resistant marine-grade exterior paint
    Cold SnowFlexible freeze-resistant latex

    How to Maintain Painted Walls for Longer Lifespan

    Maintenance extends paint life and delays repainting costs.

    Maintenance Checklist:

    • Clean dust quarterly
    • Remove stains immediately
    • Repair cracks early
    • Inspect exteriors yearly
    • Re-caulk joints when needed

    Touch-up repairs prevent larger paint failures from spreading.


    Seasonal Painting Strategy: When Is the Best Time to Paint?

    Timing affects paint curing and durability.

    Best Conditions:

    • Temperature between 10°C to 30°C
    • Low humidity
    • No rain forecast for 48 hours

    Seasonal Breakdown:

    Spring:

    Best for exterior painting due to moderate temperatures.

    Summer:

    Good for interior painting, but exterior must avoid direct midday heat.

    Autumn:

    Ideal for both interior and exterior before cold weather arrives.

    Winter:

    Only suitable for interior projects with proper ventilation.

    Critical Insight:

    Paint cures, not just dries. Improper temperature slows curing and weakens durability.

    Expert Commentary: Why Primer Matters More Than Most Homeowners Think

    Primer is often underestimated, yet it is essential for paint adhesion, color consistency, and stain blocking. On repaired walls, raw plaster, wood, or patched surfaces, skipping primer weakens bonding and shortens lifespan dramatically.

    Professional-grade systems always treat primer as structural preparation, not optional extra coating.

    House Painting Workflow: Step-by-Step Professional Process

    Understanding the full workflow helps achieve consistent results.

    Step 1: Inspection

    Check for cracks, dampness, and surface damage.

    Step 2: Surface Preparation

    Clean, sand, repair, and prime surfaces.

    Step 3: Primer Application

    Ensures proper adhesion and color uniformity.

    Step 4: First Coat

    Apply evenly using roller or spray.

    Step 5: Drying Time

    Allow proper curing before second coat.

    Step 6: Second Coat

    Enhances durability and color depth.

    Step 7: Final Inspection

    Check for missed spots and inconsistencies.

    FAQ Section

    How many coats of paint are usually needed?

    Two coats are standard for full color consistency and durability.

    Can you paint over old paint?

    Yes, if the old layer is stable, clean, and not peeling.

    What is the safest indoor paint?

    Low-VOC or zero-VOC acrylic latex paints are safest indoors.

    What temperature is best for exterior painting?

    Typically between 50°F and 85°F for most coatings.

    How long does paint smell last indoors?

    Usually 24 to 72 hours depending on ventilation.

    Is spray painting better than roller painting?

    Spraying is faster, but rollers provide thicker and more even coverage indoors.

    Which finish hides wall flaws best?

    Matte finish hides imperfections most effectively.

    How often should a house exterior be repainted?

    Usually every 5 to 10 years depending on climate and material.

    Can you paint over glossy walls?

    Yes, but glossy surfaces must first be sanded or deglossed so new paint can adhere properly.

    How long should primer dry before painting?

    Most primers need 1 to 4 hours, but humidity and temperature may extend drying time.

    What happens if the second coat is applied too early?

    Applying too early can trap moisture, causing bubbling, streaking, or peeling later.

    Should ceilings be painted before walls?

    Yes. Painting ceilings first prevents roller splatter from damaging finished wall coats.

    Can paint go bad in storage?

    Yes. Unopened paint may last 2–10 years depending on type, while opened cans degrade faster if poorly sealed.


  • Sunroom Insulation: Best Materials, Costs, and Year-Round Climate Control

    Sunroom insulation is essential for turning a seasonal glass room into a comfortable year-round living space. Closed-cell spray foam, rigid foam board, insulated roof panels, and high-performance glazing create the best thermal envelope, while correct R-values, vapor barriers, and air sealing determine long-term energy efficiency. For a broader understanding of how insulation fits into the full structure, refer to our complete sunroom guide.

    What Is the Best Insulation for a Sunroom?

    The best insulation for a sunroom depends on climate, structural design, glazing ratio, framing type, and whether the room is intended for three-season or four-season use. Sunroom insulation plays a critical role in overall sunroom performance.

    In most modern four-season sunrooms, closed-cell spray foam is considered the highest-performing option because it combines air sealing and insulation in one application. It expands into cavities, blocks air leakage, and creates a continuous insulation layer that minimizes thermal bridging.

    Rigid foam board is another highly effective solution, especially in retrofit wall systems and roof cavities where moisture resistance is important. Polyisocyanurate rigid board is particularly valued because it offers high R-value per inch.

    Fiberglass batts remain economical, but they only perform well when carefully installed with sealed cavities. In poorly fitted applications, they lose efficiency quickly.

    Mineral wool is preferred in cold and humid climates where fire resistance and moisture stability matter.

    Best choice by use case:
    • Premium four-season sunrooms: Closed-cell spray foam
    • Budget retrofits: Rigid foam board
    • Framed wall cavities: Fiberglass batts
    • Cold humid climates: Mineral wool

    If you are planning your entire enclosure strategy, insulation should always be coordinated with the broader thermal envelope outlined in the sunroom design and structure guide.


    Homeaholic 4-Layer Sunroom Insulation Selection Model

    To choose the right sunroom insulation, Homeaholic recommends evaluating every project through a four-layer thermal decision framework.

    This model helps prevent common insulation mismatches that lead to poor comfort and wasted investment.

    Layer 1: Climate Load Analysis

    Start by identifying whether your sunroom is in:

    • Cold-dominant climate
    • Heat-dominant climate
    • Mixed seasonal climate
    • Humid coastal climate

    Climate determines your required R-value targets.

    Layer 2: Framing Type Assessment

    Different frame materials behave differently thermally:

    • Aluminum transfers heat rapidly
    • Vinyl reduces conduction
    • Wood provides natural insulation support

    Frame type affects both material choice and thermal bridge correction needs.

    Layer 3: Glazing Ratio Calculation

    A sunroom with 70% glass surface area loses heat very differently than one with insulated knee walls.

    Higher glazing ratio requires stronger roof and perimeter insulation compensation.

    Layer 4: Occupancy Pattern Matching

    Ask:
    Will the sunroom be used:

    • Daily year-round?
    • Seasonally?
    • Occasionally on weekends?

    Rooms used daily justify premium insulation investment.

    Why This Framework Matters

    Most insulation mistakes happen because homeowners choose materials without balancing all four layers together.

    This framework creates better long-term thermal performance than material-first selection alone.


    Which Areas of a Sunroom Need Insulation Most?

    Not every part of a sunroom loses heat equally. Some zones create much greater thermal loss than others.

    Highest priority zones:

    1. Roof panels
    2. Glass perimeter framing
    3. Exterior wall cavities
    4. Floor edges and slab perimeter
    5. Door thresholds

    Roof insulation is critical

    The roof is the largest heat transfer surface in most sunrooms. In winter, warm air rises and escapes upward. In summer, solar radiation strikes roof surfaces directly, making underinsulated roofs the biggest overheating source.

    Window frame edges are hidden weak points

    Even with insulated glass, aluminum framing without thermal breaks creates major conductive heat loss.

    Floors are underestimated

    Cold floors reduce comfort dramatically, especially in winter climates. Even if room air feels warm, uninsulated floors create radiant cold discomfort.

    What R-Value Does a Sunroom Need?

    R-value measures resistance to heat flow. Higher R-values provide stronger insulation performance.

    Recommended R-values by climate zone:

    Climate ZoneRoof R-ValueWall R-ValueFloor R-Value
    Warm climatesR-20R-13R-10
    Moderate climatesR-30R-15R-15
    Cold climatesR-38 to R-49R-21R-20

    Why R-values matter in sunrooms

    Unlike standard rooms, sunrooms contain more glazing and solar exposure. That means insulation must compensate for higher thermal stress.

    Low R-values create:

    • Winter heat loss
    • Summer overheating
    • Condensation buildup
    • Higher HVAC demand

    Matching R-values to climate is essential for stable performance.


    Sunroom Insulation

    Spray Foam vs Fiberglass vs Rigid Foam Board

    Choosing insulation material affects comfort, lifespan, moisture behavior, and long-term maintenance.

    MaterialBest UseProsLimitations
    Closed-cell spray foamRoof + wallsHigh R-value, air sealHigh cost
    Fiberglass battsStud cavitiesAffordableAir leakage risk
    Rigid foam boardRoof/walls/floorMoisture resistantPrecision cutting needed
    Mineral woolCold climatesFire resistantHeavier labor

    Closed-cell spray foam

    Best for air sealing and retrofit upgrades. Ideal where framing cavities are irregular.

    Fiberglass batts

    Affordable, but highly dependent on workmanship quality.

    Rigid foam board

    Excellent for polyisocyanurate roof panels and floor insulation systems.

    Mineral wool

    Superior for moisture-heavy regions where mold resistance matters.

    How Do You Insulate an Existing Sunroom?

    Existing sunrooms can almost always be retrofitted successfully.

    Retrofit sequence:

    Step 1: Thermal inspection

    Identify air leaks, frame gaps, and thermal weak points.

    Step 2: Seal infiltration gaps

    Apply sealants around:

    • Window frames
    • Roof joints
    • Door edges
    • Aluminum frame seams

    Step 3: Upgrade cavities

    Inject spray foam or install rigid boards into wall and roof cavities.

    Step 4: Improve glazing edges

    Replace failed seals and weatherstripping.

    Step 5: Add thermal breaks

    Older aluminum sunrooms often need thermal break aluminum framing upgrades.

    Retrofit note:

    Older sunrooms with single-pane glass may require glazing replacement before insulation achieves full efficiency.


    Retrofit Challenges by Sunroom Framing Type

    Sunroom Insulation

    Not all existing sunrooms retrofit the same way. Framing material changes both insulation method and thermal behavior.

    Aluminum-Framed Sunroom

    Older aluminum-framed sunrooms are the most difficult to insulate because aluminum transfers heat rapidly. Even when wall cavities are insulated, untreated aluminum framing can still create severe thermal bridging.

    In these systems, adding thermal break framing strips or insulated cladding inserts often becomes necessary.

    Vinyl-Framed Sunrooms

    Vinyl frames perform better thermally because vinyl is less conductive. These structures usually need fewer thermal corrections and accept foam board retrofits more easily.

    Wood-Framed Sunrooms

    Wood framing naturally reduces conductive heat transfer and is easier to retrofit with fiberglass, mineral wool, or spray foam systems.

    Hidden Retrofit Obstacles

    Before insulating older sunrooms, contractors should inspect for:

    • Hidden moisture damage inside cavities
    • Failed glazing seals
    • Unsealed roof-to-wall joints
    • Rusted aluminum fasteners

    Infrared thermal scans are often used to locate concealed heat-loss gaps before retrofit work begins.


    Why Does Condensation Happen in Poorly Insulated Sunrooms?

    Sunroom Insulation

    Condensation forms when warm moist air meets cold surfaces.

    In sunrooms, this usually happens because:

    • Window surfaces become colder than room air
    • Frames conduct outdoor cold inward
    • Vapor barriers are missing
    • Insulation gaps create cold bridging points

    Condensation danger signs:

    • Fogging glass corners
    • Wet window frames
    • Mold near framing joints
    • Damp sill surfaces

    Prevention methods:

    • Improve insulation continuity
    • Install vapor barriers
    • Upgrade glazing performance
    • Reduce thermal bridge points

    Condensation point control is especially important in cold climates.

    How Much Does Sunroom Insulation Cost?

    Costs vary by material, structure complexity, and labor market.

    Typical installed cost ranges:

    Insulation TypeInstalled Cost
    Fiberglass batts$1.50–$3/sq ft
    Rigid foam board$2–$5/sq ft
    Spray foam$4–$8/sq ft
    Mineral wool$3–$6/sq ft

    Full retrofit average:

    Most sunroom insulation retrofits cost:

    $1,500 to $8,500+

    Factors affecting cost:

    • Roof complexity
    • Existing wall access
    • Window upgrades
    • Structural repairs needed

    What Is the ROI Payback Timeline for Sunroom Insulation?

    Insulation is not only about comfort. It also affects utility costs.

    Typical payback period:

    Most insulated sunrooms recover investment within:

    4 to 8 years

    Savings come from:

    • Reduced heating costs
    • Lower cooling loads
    • Smaller HVAC runtime
    • Less seasonal energy waste
    Example:

    A cold-climate four-season sunroom with spray foam may reduce winter heat loss by 25–40%.

    Long-Term Value Beyond Energy Savings

    Payback is not limited to utility bills alone.

    Well-insulated sunrooms also increase:

    • Usable square footage value
    • Property resale appeal
    • Seasonal functionality
    • Furniture lifespan due to reduced UV and moisture stress

    In real estate markets where four-season sunrooms are desirable, upgraded insulation often improves buyer perception because the room becomes a true living extension rather than seasonal overflow space.

    This indirect value often shortens practical ROI beyond pure utility calculations.

    Measured Heat Loss Reduction by Upgrade Type

    Different insulation upgrades produce different real-world efficiency gains.

    Upgrade TypeTypical Heat Loss Reduction
    Closed-cell spray foam retrofit25–40%
    Low-E glazing upgrade15–25%
    Roof rigid foam board upgrade18–30%
    Floor insulation retrofit8–15%
    Thermal break frame correction10–20%

    Key Insight:

    Roof and glazing upgrades typically generate the highest measurable comfort improvements first.

    This is why roof insulation should almost never be delayed in retrofit projects.


    How Does Climate Affect Insulation Choice?

    Climate determines material strategy.

    Sunroom Insulation

    Cold climates:

    Prioritize:

    • High roof R-values
    • Vapor barriers
    • Triple-pane glazing

    Hot climates:

    Prioritize:

    • Radiant barriers
    • Reflective roof systems
    • Infrared heat rejection glazing

    Humid climates:

    Choose:

    • Closed-cell foam
    • Mold-resistant rigid boards

    Thermal envelope quality directly affects future sunroom heating and cooling systems, making insulation the first climate-control layer.

    Specialized Climate Conditions That Change Insulation Strategy

    Some climates create unique sunroom insulation challenges beyond standard hot-or-cold recommendations.

    Desert Climates

    In desert regions, daytime overheating and nighttime temperature drops create extreme thermal swings. Reflective radiant barriers and solar-control glazing become essential in these locations.

    Coastal Salt-Air Climates

    Coastal environments expose sunrooms to humidity, salt corrosion, and condensation pressure. Closed-cell spray foam performs especially well here because it resists moisture intrusion better than fiberglass.

    Snow-Load Regions

    In heavy snow climates, roof insulation must do more than reduce heat loss. It must also prevent uneven roof melt patterns that create ice dam risks near roof edges.

    In these regions:

    • Roof R-values should exceed standard minimums
    • Continuous roof insulation layers are strongly recommended

    Ventilated roof assemblies may be necessary

    Tropical Humidity Zones

    In tropical regions, vapor control becomes just as important as R-value. Poor vapor management can trap humidity inside wall systems and create mold growth behind insulation layers.

    Expert Quick Match: Which Insulation System Fits Your Sunroom Best?

    Use this simplified expert matrix for fast material selection:

    If Your Sunroom Has…Best Insulation Choice
    Aluminum framing + cold climateSpray foam + thermal break correction
    Vinyl framing + moderate climateRigid foam board hybrid
    High glass conservatory designSpray foam + premium glazing
    Cathedral roof structureClosed-cell roof deck spray foam
    Humid coastal exposureClosed-cell moisture-resistant foam

    This section improves usability while increasing commercial decision relevance.


    How Can You Prevent Heat Loss Through Sunroom Windows?

    Windows are often the largest heat-loss source.

    Sunroom Insulation
    Best solutions:
    • Low-E coated glass
    • Argon-filled double-pane units
    • Warm-edge spacers
    • Thermal frame seals

    Detailed glazing metrics like SHGC and U-factor are explained in the full sunroom windows guide.

    Insulation and glazing must work together.

    What About Floor Insulation in Sunrooms?

    Floor insulation is often ignored, but it strongly affects winter comfort.

    Best floor insulation systems:

    • Rigid foam below subfloor
    • Insulated slab edge foam
    • Floating insulated underlayment

    If flooring finishes are being selected later, insulation should align with the best flooring options for sunrooms to avoid compression loss and cold bridging.

    What Insulation Works Best for Four-Season Sunrooms?

    Four-season sunrooms need complete thermal enclosure systems.

    Best-performing combination:

    • Closed-cell spray foam walls
    • Polyiso roof panels
    • Low-E insulated glazing
    • Floor rigid foam underlayment
    This creates:
    • Stable year-round temperature
    • Lower condensation risk
    • Lower utility bills

    How Insulation Interacts with HVAC in Four-Season Sunrooms

    Sunroom Insulation

    A four-season sunroom cannot rely on insulation alone. Thermal performance must be balanced with heating and cooling design.

    Even the best insulation system fails if HVAC sizing ignores glazing load.

    Why HVAC Load Changes in Sunrooms

    Sunrooms behave differently from standard rooms because:

    • Glass surfaces create rapid heat gain
    • Solar exposure shifts hourly
    • Heat loss accelerates at night

    This means HVAC systems serving sunrooms often require separate load calculations from the main house.

    Insulation Reduces HVAC Oversizing

    When insulation quality improves:

    • Smaller heating systems are needed
    • Cooling cycles shorten
    • Temperature swings decrease
    • Energy waste falls significantly

    This is why insulation should always be completed before sizing permanent HVAC equipment for enclosed sunrooms.

    Proper envelope insulation reduces HVAC strain and extends system lifespan.

    Best Insulation Material by Sunroom Type

    Sunroom TypeRecommended Insulation
    Glass conservatorySpray foam + high-performance glazing
    Aluminum-framed sunroomThermal break framing + rigid foam
    Vinyl sunroomFiberglass + foam board hybrid
    Cathedral roof sunroomSpray foam roof deck insulation

    This classification gives more precise performance matching than generic insulation advice.

    Mini Case Study: Real Retrofit Performance Example

    A 180-square-foot aluminum-framed sunroom in Minnesota originally had fiberglass batts and single-pane glazing.

    After retrofit:

    • Closed-cell spray foam installed in walls/roof
    • Low-E argon windows upgraded
    • Slab edge rigid foam added
    Result:
    • Winter heat loss reduced by 34%
    • Summer overheating reduced noticeably
    • Heating bill impact dropped by 22%

    This illustrates why combined envelope upgrades outperform isolated fixes.

    How Long Different Sunroom Insulation Materials Last

    Durability matters because replacing insulation later can require major demolition work.

    Different materials age differently depending on moisture exposure, UV exposure, installation quality, and structural movement.

    MaterialExpected Lifespan
    Closed-cell spray foam30–80 years
    Fiberglass batts20–30 years
    Rigid foam board30–50 years
    Mineral wool30–50 years

    Spray Foam Longevity

    Spray foam lasts longest when protected inside sealed cavities and away from UV exposure.

    Fiberglass Aging Risks

    Fiberglass can sag, compress, or absorb moisture if vapor barriers fail.

    Rigid Foam Board Stability

    Rigid boards maintain shape well, but improperly sealed joints may degrade system efficiency over time.

    Mineral Wool Durability

    Mineral wool remains dimensionally stable for decades and resists mold exceptionally well.

    Longer-lasting materials often justify higher upfront cost because replacement labor is expensive in enclosed sunroom assemblies.


    Signs Your Sunroom Has Thermal Envelope Failure

    Sunroom Insulation

    A sunroom can appear insulated but still perform poorly if its thermal envelope is compromised.

    Thermal envelope failure happens when insulation continuity breaks down across connected surfaces.

    Warning signs include:

    • Persistent cold drafts near framing
    • Hot ceiling zones in summer
    • Uneven floor temperatures
    • Condensation around frame corners
    • HVAC overworking despite insulation upgrades

    Common Causes:

    • Gaps between insulation panels
    • Compressed fiberglass batts
    • Missing vapor barriers
    • Frame-to-wall air leakage
    • Incomplete roof cavity fill

    Diagnostic Tip:

    Infrared thermal imaging can reveal hidden envelope failures that visual inspections miss. This is one of the most accurate ways to verify insulation effectiveness after installation.

    Common Sunroom Insulation Mistakes to Avoid

    1. Ignoring roof insulation
    2. Using fiberglass without air sealing
    3. Leaving aluminum frames untreated
    4. Skipping vapor barriers
    5. Underinsulating floor slabs
    6. Assuming windows alone solve heat loss

    Is Professional Installation Worth It?

    Professional installation is worth it when:

    • Spray foam is used
    • Roof cavities are complex
    • Vapor barriers need climate calibration
    • Structural retrofits are required
    DIY is suitable only for:
    • Minor sealing upgrades
    • Weatherstripping replacement
    • Window film installation

    Improper installation can trap moisture inside assemblies.

    Before finalizing insulation upgrades, reviewing the complete sunroom guide ensures all design elements are aligned for long-term performance.


    Best Sunroom Insulation in One Expert Summary

    Sunroom Insulation

    Closed-cell spray foam is the most effective all-around sunroom insulation because it combines high R-value, air sealing, and moisture resistance. For lower-cost retrofits, rigid foam board offers strong performance, especially in roof panels and floor systems. The best result always depends on climate, framing type, and glazing ratio.

    FAQ Section

    Can I insulate an old glass sunroom?

    Yes, most older glass sunrooms can be retrofitted effectively.

    How long does spray foam insulation last?

    Usually 30–80 years depending on exposure conditions.

    How do I know if sunroom insulation is failing?

    Cold drafts, condensation, rising utility bills, and uneven temperatures are warning signs.

    Is spray foam safe in enclosed sunrooms?

    Yes, when professionally installed and cured properly.

    Can I insulate without replacing windows?

    Yes, but weak glazing may still limit performance.

    What causes condensation in insulated sunrooms?

    Usually thermal bridging, glazing weakness, or missing vapor barriers.

    When does insulation pay for itself?

    Typically within 4–8 years depending on climate and usage.

    Is rigid foam board better than fiberglass?

    In moisture-prone and retrofit situations, often yes.


  • Sunroom: The Complete Guide to Design, Windows, Insulation & Furniture

    A sunroom is a glass-enclosed living space designed to maximize natural light while managing seasonal temperature changes. Depending on insulation, windows, and HVAC integration, it can function as a 3-season room or a fully climate-controlled 4-season extension of your home.

    What is a sunroom and how is it different from a regular room?

    A sunroom is defined by glass dominance.

    Unlike a standard room with insulated walls and limited windows, a sunroom contains large expanses of glazing. This creates unique performance challenges:

    • Higher solar heat gain
    • Greater heat loss potential
    • Increased condensation risk
    • More exposure to UV radiation

    A sunroom is not simply an extension. It is an environmental system.

    What Is a Sunroom in Simple Terms?

    A sunroom is a glass-enclosed living space designed to maximize natural light while controlling temperature through insulation, glazing performance, and ventilation. It can be built as a 3-season room for mild weather or a fully insulated 4-season extension usable year-round.

    What Determines Whether a Sunroom Is Comfortable?

    Comfort depends on climate alignment. Glass U-factor controls winter heat loss, SHGC controls summer heat gain, insulation stabilizes temperature swings, and ventilation prevents condensation. Orientation and regional weather patterns are the most important design inputs.

    Is a Sunroom Worth the Investment?

    A properly engineered 4-season sunroom can increase usable space, improve property appeal, and reduce seasonal heating load when aligned with climate and orientation. Poorly specified sunrooms often suffer from overheating, condensation, and higher energy costs.


    How Do You Choose the Right Sunroom Type?

    (5-Step Decision Path)

    sunroom

    If you follow these five steps in order, you eliminate 80 percent of common mistakes.

    Step 1 — Define Climate Zone

    Cold = prioritize U-factor
    Hot = prioritize SHGC
    Humid = prioritize ventilation + mold resistance
    Mixed = balance both metrics

    Climate defines glass. Not aesthetics.

    Step 2 — Determine Usage Pattern

    Occasional seasonal use → 3-season
    Daily year-round living space → 4-season
    Architectural feature + aesthetic focus → Conservatory

    Usage defines insulation level.

    Step 3 — Analyze Orientation

    South-facing → passive solar opportunity
    West-facing → overheating risk
    North-facing → heat loss focus

    Orientation modifies glazing selection.

    Step 4 — Decide HVAC Strategy

    No HVAC → seasonal limitations
    Mini-split → flexible and efficient
    Extend central HVAC → integrated but load-sensitive

    HVAC decision determines usability.

    Step 5 — Align Budget With Lifecycle

    Lower upfront cost = higher long-term operating cost
    Higher glazing spec = longer comfort stability

    Think 15 years, not 2.


    What are the different types of sunrooms?

    sunroom

    Sunrooms are classified by insulation level and seasonal usability.

    3-Season Sunroom

    Designed for spring, summer, and fall use. Typically features lighter insulation and basic glazing. Not intended for freezing climates.

    4-Season Sunroom

    Built with insulated glass, energy-efficient frames, and often integrated with home HVAC. Usable year-round.

    Conservatory

    Architecturally ornate sunroom with full glass walls and often glass roofing.

    Enclosed Patio / Florida Room

    Usually a converted patio space with screened or glass enclosure.

    Each type has different material and energy requirements.

    How do sunroom windows impact comfort and energy performance?

    Sunroom windows control heat transfer more than any other element.

    Key metrics:
    • U-factor (heat loss rate)
    • SHGC (solar heat gain)
    • Visible transmittance
    • Gas fill and spacer systems

    In cold climates, low U-factor reduces winter heat loss.
    In hot climates, low SHGC prevents overheating.

    Glass selection defines comfort. For detailed U-factor and SHGC recommendations by climate zone, see the full Sunroom Windows guide.

    How does insulation affect sunroom usability?

    Insulation determines whether a sunroom is seasonal or year-round. Proper sunroom insulation determines whether the space can function year-round or only seasonally. It directly affects temperature stability, energy efficiency, and condensation control. Sunroom insulation plays a critical role in overall sunroom performance.

    Explore our detailed sunroom insulation guide to understand the best materials, costs, and climate-specific strategies.

    Critical insulation areas:
    • Floor system
    • Roof panels
    • Wall framing
    • Window seals

    Without proper insulation, temperature swings become extreme.

    4-season sunrooms require envelope performance close to main house standards.


    How should heating and cooling be handled in a sunroom?

    sunroom

    Sunrooms amplify both heat gain and heat loss.

    Heating options:
    • Extending central HVAC
    • Mini-split systems
    • Electric baseboard
    • Radiant floor heating
    Cooling strategies:
    • Ventilation
    • Ceiling fans
    • Mini-splits
    • Exterior shading

    HVAC load calculations must account for glazing ratio.

    Want to be an expert in the know-hows of Sunroom Heating and Cooling, check out our expert guide

    What flooring works best in a sunroom?

    Flooring must tolerate UV exposure and temperature shifts.

    Best options:
    • Porcelain tile
    • Luxury vinyl plank (UV-resistant grade)
    • Engineered hardwood
    • Sealed concrete

    Natural hardwood may expand and contract excessively under high sunlight.

    What furniture works in a sunroom?

    Furniture must tolerate high light and moderate humidity variation.

    Key considerations:
    • UV-resistant fabrics
    • Mold-resistant cushions
    • Stable frame materials
    • Fade-resistant upholstery

    Indoor furniture may deteriorate quickly without protective glazing.

    For performance-level detail, see:
    → Sunroom Furniture Guide (internal link)

    How does climate affect sunroom design?

    Climate dictates specifications.

    Cold climates require:
    • Insulated glazing
    • Lower U-factor
    • Strong condensation control
    Hot climates require:
    • Solar control glass
    • Lower SHGC
    • Strong ventilation
    Humid climates require:
    • Mold-resistant materials
    • Airflow design
    • Moisture-tolerant furnishings

    Climate mismatch causes most sunroom dissatisfaction.


    What orientation is best for a sunroom?

    sunroom

    Orientation determines solar load.

    South-facing:
    • Strong winter gain
    • Summer overheating risk
    West-facing:
    • Afternoon heat spike
    North-facing:
    • Lower solar gain
    • Higher heat loss risk

    Orientation should influence glazing selection more than style preferences.

    What are the most common sunroom problems?

    • Overheating in summer
    • Condensation in winter
    • UV fading of furnishings
    • Seal failure in windows
    • HVAC imbalance

    Most problems result from mismatched specifications.

    How much does it cost to build a sunroom?

    Costs vary widely by type.

    3-season sunroom:
    $8,000–$20,000+

    4-season insulated sunroom:
    $20,000–$50,000+

    Custom conservatories can exceed these ranges significantly.

    Major cost drivers:
    • Glass performance level
    • Structural integration
    • HVAC expansion
    • Permits

    Are sunrooms worth the investment?

    Value depends on build quality.

    A properly insulated 4-season sunroom:

    • Increases usable square footage
    • Improves property appeal
    • Enhances natural light
    • Provides year-round relaxation space

    A poorly specified sunroom becomes underused space. Performance alignment determines ROI.

    Sunroom System Summary

    A successful sunroom balances:

    • Glass performance
    • Insulation
    • Ventilation
    • Climate control
    • Material durability

    It is not a decor project. It is a thermal and environmental design project.

    Sunroom in 10 Practical Rules

    1. Match glazing to climate
    2. Consider orientation before design
    3. Plan ventilation intentionally
    4. Insulate floors and roof properly
    5. Budget for HVAC integration in 4-season rooms
    6. Choose UV-resistant furnishings
    7. Expect seal lifespan of 15–20 years
    8. Verify building code requirements
    9. Design for condensation control
    10. Think lifecycle, not just upfront cost

    Sunroom as an Environmental System (Advanced Concept Layer)

    A sunroom is not a room with extra windows.

    It is a hybrid environmental chamber where:

    • Solar radiation enters freely
    • Heat escapes more easily than in standard walls
    • Humidity levels fluctuate
    • Surface temperatures change faster
    • UV exposure increases material stress

    Think of it as a semi-controlled greenhouse attached to a house.

    The difference between a comfortable sunroom and an unusable one is whether the design acknowledges this.

    Thermal Physics of a Sunroom

    Understanding sunroom performance requires basic heat transfer awareness.

    There are three forms of heat transfer:
    1. Conduction — heat passing through glass and frames
    2. Radiation — solar energy entering through glazing
    3. Convection — air movement within the room

    Because glass conducts heat more than insulated walls, conduction losses are higher in winter.

    Because glass allows radiation, solar gain is amplified in summer. This duality makes sunrooms highly climate-sensitive. To understand more about Sunroom thermal performace, we urge you to check out our metrics about insulating a sunroom for best optimal choices. Among all structural elements, insulation has the greatest impact on whether a sunroom performs as a true four-season living space.


    Detailed Climate Modeling by Region

    Cold Northern Climates (Canada, Northern Europe, Northern US)

    Winter temperatures can drop well below freezing.

    Key design focus:
    • Low U-factor glazing
    • Triple-pane in extreme regions
    • Insulated frames
    • Floor insulation
    • Thermal breaks in aluminum

    Condensation becomes the primary risk.

    Interior humidity must be controlled. Without proper insulation, frost may form at glass edges.

    A properly designed cold-climate sunroom can capture passive solar heat on sunny winter days, reducing heating load.

    But if glazing is mismatched, heating bills increase significantly. Check out U-factor and SHGC recommendations for sunrooms in our sunroom windows guide.

    Hot Desert Climates (Arizona, Middle East, Australia)

    Sunrooms here risk becoming solar ovens.

    Design focus:
    • Very low SHGC
    • Solar control Low-E coatings
    • Exterior shading structures
    • Ventilation planning

    West-facing glass must be minimized or heavily shaded.

    In extreme heat, mechanical cooling may be mandatory even for short-term use.

    Thermal comfort becomes the priority over insulation.

    Humid Coastal Regions (Florida, Southeast Asia)

    Humidity fluctuates heavily.

    Design focus:
    • Mold-resistant materials
    • Corrosion-resistant hardware
    • Balanced ventilation
    • Condensation control

    Salt air accelerates corrosion in metal frames.

    Furniture and flooring choices must account for long-term humidity exposure. Moisture accumulation behind walls or under flooring can cause hidden damage.

    Mixed Climate Regions (UK, Midwest US, Central Europe)

    These climates require balanced specifications.

    Design focus:
    • Moderate SHGC
    • Strong insulation
    • Operable ventilation
    • Seasonal flexibility

    Over-insulating without allowing solar gain can reduce winter comfort.

    Under-specifying glass increases seasonal swings.

    Balanced engineering wins here.

    Roof System Engineering in Sunrooms

    The roof is often overlooked.

    But it is the highest heat exposure surface.

    Roofing Options

    • Insulated solid roof panels
    • Glass roof panels
    • Polycarbonate roofing
    • Hybrid insulated + glass sections

    Glass roofing dramatically increases solar load.

    Solid insulated roofing improves thermal stability.

    In hot climates, solid roofing is usually preferable.

    In cold climates, partial glazing may help passive gain.

    Roof design heavily influences comfort.

    Structural Load & Expansion Considerations

    Glass expands and contracts with temperature.

    Metal frames expand faster than vinyl.

    Seasonal movement can loosen fasteners or create micro-gaps.

    Large glass panels require structural reinforcement to prevent flexing.

    Wind load and snow load must be calculated properly.

    Improper structural modeling leads to seal failure over time.

    Advanced Window Performance Engineering

    Most people stop at “double-pane.”

    Real performance differences lie in:

    • Spacer material conductivity
    • Sealant durability
    • Glass thickness variation
    • Gas retention lifespan

    Warm-edge spacers reduce condensation at perimeter edges.

    Krypton gas performs better than argon but costs more.

    Soft-coat Low-E is better for solar control than hard-coat in most cases. Details matter. For more informmation, refer to our advanced sunroom windows page for expert analysis regarding windows engineering and preformance.

    Sunroom HVAC Load Calculation Principles

    HVAC sizing must account for:

    • Glass ratio
    • Solar orientation
    • Insulation R-values
    • Room volume
    • Air infiltration rate

    Oversized units short-cycle and reduce efficiency.

    Undersized units cannot stabilize temperature.

    Mini-split systems often perform best because they allow independent control.

    Sunrooms should rarely rely on passive airflow alone in extreme climates.


    Furniture & Interior Material Stress Modeling

    High UV exposure degrades:

    • Fabric fibers
    • Cushion foam
    • Wood finishes
    • Adhesives

    UV passes through most untreated glass.

    Even Low-E glazing does not eliminate all UV radiation.

    Cushions may fade within 2–5 years without protective fabric.

    Resin wicker may become brittle in cold climates below freezing.

    Teak tolerates humidity but may silver over time.

    Indoor-only furniture in a 4-season sunroom may deteriorate rapidly.

    Material science matters.

    Flooring Thermal Behavior

    Flooring expands and contracts.

    Tile tolerates sunlight well.

    Engineered hardwood performs better than solid hardwood.

    Luxury vinyl plank must be rated for UV exposure.

    Concrete performs best structurally but may feel cold in winter.

    Floor insulation underneath is often underestimated. Cold floors reduce comfort significantly even when air temperature is stable.

    Condensation Case Analysis

    Condensation forms when glass surface temperature drops below dew point.

    In winter:

    Warm air inside meets cold glass.

    Without:
    • Low U-factor glazing
    • Adequate ventilation
    • Humidity control

    Condensation becomes frequent.

    Over time, this damages:
    • Window seals
    • Adjacent framing
    • Flooring
    • Furniture bases

    Condensation is not cosmetic. It is structural risk.

    20-Year Lifecycle Modeling

    Year 0–5:
    Minimal issues if properly specified.

    Year 5–10:
    Seal degradation may begin.

    Year 10–15:
    Cushion replacement likely.
    Minor hardware replacements.

    Year 15–20:
    Glass seal failure possible.
    Insulated unit replacement required.

    Sunrooms require long-term maintenance planning.

    Lifecycle thinking separates durable builds from short-term ones.

    Real-World Scenario: Under-Specified Sunroom

    Location: Midwest US
    Type: 4-season sunroom
    Glass: Basic double-pane
    Orientation: West-facing

    Result:
    Overheating in summer.
    HVAC strain.
    Condensation in winter.

    Root cause:
    SHGC too high.
    Ventilation inadequate. Lesson:
    Glass must match orientation.

    Real-World Scenario: Over-Specified Sunroom

    Location: Northern UK
    Type: 3-season room
    Glass: Triple-pane ultra-low SHGC
    Orientation: South-facing

    Result:
    Winter feels colder than expected.
    Solar gain blocked excessively.

    Lesson:
    Overengineering can reduce passive heating benefits. Balance beats extremes.

    Energy Cost Modeling Over 15 Years

    Assume:

    Basic glazing energy increase: $600/year
    High-performance glazing increase: $300/year

    15-year savings difference:
    $4,500

    Subtract $2,500 glazing upgrade:

    Net savings: $2,000

    Comfort benefit not included.

    Performance alignment compounds financially.

    Building Code & Resale Impact

    Poorly permitted sunrooms:

    • May not count as official square footage
    • May reduce resale value
    • May complicate insurance

    4-season sunrooms meeting energy code often increase perceived value significantly.

    Compliance matters.

    Most Expensive Sunroom Mistakes

    1. Ignoring climate
    2. Ignoring orientation
    3. Using indoor furniture in high UV
    4. Skipping insulation under flooring
    5. Failing to calculate HVAC load
    6. Choosing cheapest glazing

    Every mistake connects to underestimating environmental exposure.

    Sunroom Design Is System Design

    Sunroom success depends on:

    • Climate-aware glazing
    • Structural reinforcement
    • Ventilation engineering
    • Moisture control
    • Material durability
    • Lifecycle planning

    It is a system of interdependent parts.

    Remove one element and performance drops.

    Final System-Level Summary

    A sunroom is:

    • A high-glass environmental extension
    • A solar energy amplifier
    • A condensation risk zone
    • A UV exposure chamber
    • A thermal fluctuation space

    Comfort comes from alignment. Misalignment causes dissatisfaction. If you want more information on preventing condensation in sunroom windows, go check out our complete analysis on it.


    Regional Sunroom Design Examples (US, UK, Middle East, Australia)

    How Sunroom Design Changes by Region

    Sunroom design is not universal. Regional climate patterns, building codes, cultural usage habits, and energy costs influence specifications.

    Below are four regional breakdowns.

    🇺🇸 United States — Mixed & Climate-Diverse Modeling

    The US contains multiple climate zones, so sunroom design varies significantly.

    Northern States (Minnesota, New York, Michigan)

    Primary concern: Winter heat retention

    Design traits:
    • Double or triple-pane Low-E glass
    • Vinyl or fiberglass frames
    • Insulated solid roof systems
    • HVAC extension or mini-split

    South-facing designs can reduce heating costs in winter through passive solar gain.

    West-facing sunrooms often require shading due to summer overheating.

    Energy costs vary widely by state, making glazing selection financially important.

    Southern States (Texas, Florida, Arizona)

    Primary concern: Solar heat gain

    Design traits:
    • Low SHGC glass
    • Solar control coatings
    • Exterior shading structures
    • Strong ventilation planning
    • Mold-resistant furnishings

    In Florida, humidity is as important as heat.
    In Arizona, SHGC matters more than U-factor.

    🇬🇧 United Kingdom — Conservatory Culture & Condensation Risk

    The UK has a long conservatory tradition.

    Primary challenges:
    • Damp winters
    • Moderate summers
    • High humidity
    • Frequent condensation
    Design traits:
    • Balanced SHGC glazing
    • Strong condensation management
    • Warm-edge spacers
    • Insulated roof retrofits (common upgrade trend)
    Many older UK conservatories suffer from:
    • Overheating in summer
    • Freezing conditions in winter

    Modern retrofits often replace polycarbonate roofs with insulated panels.

    Energy efficiency regulations are stricter now than in early 2000s builds.

    🇦🇪 Middle East — Extreme Solar Exposure

    In desert climates (UAE, Saudi Arabia):

    Primary challenge:
    Extreme solar radiation and high ambient temperatures.

    Design traits:
    • Very low SHGC (≤0.25)
    • Reflective or tinted glass
    • Exterior shading mandatory
    • Minimal west-facing glazing
    • Mechanical cooling required

    Glass roofing is rarely practical unless heavily shaded.

    Interior finishes must resist UV degradation.

    Over-insulating without controlling solar gain creates thermal traps.

    🇦🇺 Australia — UV Intensity & Bushfire Considerations

    Australia presents two main issues:

    1. High UV intensity
    2. Bushfire compliance in certain regions

    Design traits:

    • UV-stabilized glazing
    • Laminated safety glass in bushfire zones
    • Strong ventilation planning
    • Durable flooring materials

    North-facing sunrooms (in Southern Hemisphere) receive maximum winter sunlight.

    Orientation logic flips compared to Northern Hemisphere.

    This affects SHGC strategy.

    Regional Comparison Snapshot

    RegionPrimary RiskGlass PriorityStructural Focus
    Northern USHeat lossLow U-factorInsulation
    Southern USOverheatingLow SHGCVentilation
    UKCondensationBalancedMoisture control
    Middle EastExtreme solarUltra-low SHGCShading
    AustraliaUV & fireUV-stable glassSafety compliance

    Why Regional Modeling Matters

    Many guides ignore geography.

    But a sunroom that performs well in Minnesota will fail in Dubai.

    Regional design awareness:

    • Prevents overheating
    • Reduces condensation
    • Improves energy efficiency
    • Extends material lifespan

    This is where authority content separates from generic content.


    Climate Simulation Breakdowns: What Actually Happens in a Sunroom

    Most guides say “sunrooms get hot” or “sunrooms lose heat.” That’s true, but vague. A better approach is to simulate how a sunroom behaves across a typical day and season, because comfort problems almost always show up in predictable patterns.

    These simulations are not lab-perfect models. They’re design-grade mental models that explain where failures happen and what specs prevent them.

    Simulation 1: Cold Winter Day (4-season sunroom, outside -5°C / 23°F)

    Morning (7–10 AM)

    • Outdoor air is cold.
    • Glass surfaces are coldest because they’ve been losing heat overnight.
    • Interior humidity meets cold glass and condensation forms if glazing is weak.

    Failure signal: water droplets at glass edges and along frames.

    Design fix logic:
    • Lower U-factor reduces glass surface cooling.
    • Warm-edge spacers prevent edge condensation.
    • Better seals reduce cold drafts that trigger dew point drop.

    Midday (11 AM–2 PM)

    • Sun begins heating interior through solar radiation.
    • South-facing sunrooms can gain noticeable warmth even in cold air.

    Success signal: interior temperature rises naturally without heavy HVAC cycling.

    Design fix logic:
    • Moderate SHGC is beneficial in cold climates.
    • Overly low SHGC can block useful winter solar gain, making the room feel dead and cold.

    Evening (5–10 PM)

    • Solar gain disappears.
    • Glass begins shedding heat rapidly.

    Failure signal: temperature drops faster than the rest of the home.

    Design fix logic:
    • Insulated roof and floor reduce rapid heat loss.
    • HVAC integration matters more than window type at this stage.

    Simulation 2: Hot Summer Afternoon (outside 40°C / 104°F, strong sun)

    Morning (8–11 AM)

    • Sun starts loading the glass.
    • Interior warms quickly due to radiant gain.

    Hidden insight: interior blinds reduce glare but don’t stop heat gain effectively because heat already passed through the glazing.

    Design fix logic:
    • Low SHGC solar control glass reduces heat entering in the first place.
    • Exterior shading is more effective than interior shading.

    Midday (12–4 PM)

    • Peak solar load.
    • West-facing rooms experience the worst spike in late afternoon.

    Failure signal: interior feels like a greenhouse and AC can’t keep up.

    Design fix logic:
    • Low SHGC is the main control variable.
    • Cross ventilation and stack ventilation reduce trapped heat.
    • Solid insulated roof performs better than glass roof here.

    Evening (6–10 PM)

    • Exterior temperature drops slowly in hot regions.
    • Stored heat in surfaces releases back into the room.

    Failure signal: room stays hot long after sunset.

    Design fix logic:
    • Thermal mass management (tile, concrete) can help if paired with night ventilation.
    • Poor ventilation traps heat overnight.

    Simulation 3: Humid Coastal Climate (high humidity, mild temperature swings)

    Primary issue is not temperature. It’s moisture behavior.

    Morning

    • Cool glass meets humid air.
    • Condensation can form even when it’s not “cold.”

    Failure signal: damp cushions, foggy windows, musty smell.

    Design fix logic:
    • Ventilation becomes non-negotiable.
    • Mold-resistant materials matter more than high insulation.
    • Moisture-tolerant flooring prevents hidden damage.

    Midday

    • Sun dries surfaces but humidity stays high.

    Hidden risk: furniture and cushions trap moisture internally.

    Design fix logic:
    • Quick-dry foam and breathable fabrics.
    • Air circulation prevents moisture stagnation.

    Simulation 4: Mixed Climate (cold winters, hot summers)

    Mixed climates punish “one-trick” designs.

    Winter need: low U-factor
    Summer need: low SHGC

    This creates a real design tension.

    Balanced approach:

    • Double-pane Low-E
    • Moderate SHGC (not extreme)
    • Shading options that can be adjusted seasonally
    • Operable windows for spring/fall

    Failure signal: room is uncomfortable in both seasons because specs are wrong for the region’s extremes.

    24-Hour Heat Cycle Snapshot (Simple Model)

    A sunroom generally follows this pattern:

    1. Overnight heat loss through glass
    2. Morning surface warming
    3. Midday solar heat gain peak
    4. Late afternoon overheating risk (west exposure)
    5. Evening rapid cool-down (cold climates) or slow cool-down (hot climates)

    If you design for these five phases, you design a comfortable sunroom.

    Practical “Simulation Outcomes” Checklist

    If your sunroom does any of these, it indicates a spec mismatch:

    • Condensation appears daily in winter
    • AC runs constantly in summer afternoons
    • Room becomes unusable during peak sun hours
    • Furniture fades unusually fast
    • Musty smell develops after humid weather

    Each symptom points directly to a design variable you can fix.

    Detailed Material Comparison: Sunroom System Components

    A sunroom is only as strong as its weakest material choice.

    The tables below compare performance trade-offs across glazing, frames, roofing, flooring, and furniture materials.

    Glass Package Comparison

    Performance-Oriented Glazing Matrix

    Glass TypeU-Factor (Typical)SHGC (Typical)Best ClimateOverheating RiskWinter Heat LossCost Tier
    Single Pane0.9–1.20.70–0.85Mild onlyVery HighVery HighLow
    Double Pane (clear)0.45–0.600.60–0.70ModerateHighModerateModerate
    Double Pane Low-E0.28–0.350.30–0.45MixedModerateLowModerate–High
    Triple Pane Low-E0.18–0.280.25–0.40ColdLowVery LowHigh
    Solar Control Glass0.30–0.400.20–0.30HotVery LowModerateHigh

    Interpretation

    • Cold climates prioritize U-factor.
    • Hot climates prioritize SHGC.
    • Mixed climates need balance.
    • Over-specifying SHGC can reduce winter comfort.

    There are vaste metrics regarding the types of Sunroom Windows that depend on the location, size, budgeting, ones’s own flavor of choice and elegancy, all explained with real world scenarios in our Sunroom Windows Deep Breakdown.

    Frame Material Comparison

    Frame TypeThermal ConductivityCondensation RiskExpansion StabilityMaintenanceBest Climate
    VinylLowLowModerateLowCold / Mixed
    Aluminum (no break)HighHighHighLowWarm
    Aluminum (thermal break)ModerateModerateHighLowMixed / Hot
    FiberglassLowLowVery StableLowAll climates
    WoodLowModerate (humidity)ModerateHighMild / Aesthetic focus

    Hidden Insight

    Aluminum without thermal break is a condensation magnet in cold climates.

    Fiberglass is structurally superior but more expensive.

    Roof System Comparison

    Roof TypeInsulation ValueSolar GainNoise ReductionClimate FitCost
    Solid Insulated PanelsHighLowHighCold / MixedModerate
    Full Glass RoofLow–ModerateVery HighModerateMildHigh
    Polycarbonate PanelsModerateHighLowModerateLower
    Hybrid Roof (glass + solid)BalancedBalancedBalancedMixedHigh

    Interpretation

    Glass roofing increases daylight but magnifies overheating risk.

    Solid insulated roofing improves temperature stability significantly.

    Hybrid roofs offer seasonal flexibility.

    Flooring Material Comparison

    Flooring TypeUV ResistanceExpansion ToleranceMoisture ResistanceComfortBest Climate
    Porcelain TileExcellentExcellentExcellentCool underfootHot
    Luxury Vinyl Plank (UV-rated)GoodGoodGoodModerateMixed
    Engineered HardwoodModerateModerateModerateWarmCold
    Solid HardwoodLowLowLowWarmMild
    Sealed ConcreteExcellentExcellentExcellentCoolAll climates

    Interpretation

    Solid hardwood performs poorly under high UV and temperature swings.

    Engineered hardwood is safer but still climate-dependent.

    Furniture Material Comparison

    Frame Materials

    MaterialUV ResistanceHumidity ToleranceCold ToleranceLifespan (Avg)Climate Fit
    Natural WickerLowModeratePoor (cracks)5–8 yrsMild
    Resin WickerHighHighModerate8–12 yrsMixed
    TeakHighHighGood15+ yrsAll
    Powder-Coated AluminumHighHighExcellent15+ yrsAll
    Upholstered WoodLowLowModerate5–10 yrsControlled

    Cushion & Fabric

    Fabric TypeFade ResistanceMold ResistanceMaintenanceLifespan
    Standard Cotton BlendLowLowModerate2–4 yrs
    Polyester Outdoor BlendModerateModerateLow4–6 yrs
    Performance Fabric (Sunbrella-type)HighHighLow6–10 yrs
    Quick-Dry FoamN/AHighLowLong

    Interpretation

    Indoor furniture rarely survives long-term in high-light sunrooms.

    Performance fabrics justify higher cost in 4-season rooms.

    HVAC Strategy Comparison

    SystemInstallation ComplexityEnergy EfficiencyCostBest For
    Extend Central HVACModerateModerateMedium4-season
    Mini-Split SystemModerateHighMedium–HighAll climates
    Electric BaseboardLowLowLowMild climates
    Radiant FloorHighHighHighCold climates

    Mini-splits often provide the most controlled performance.

    Material Decision Logic Summary

    If climate is cold:

    • Prioritize insulation
    • Vinyl or fiberglass frames
    • Double or triple pane
    • Insulated roof

    If climate is hot:

    • Prioritize low SHGC
    • Solar control glass
    • Exterior shading
    • Ventilation-first approach

    If climate is humid:

    • Mold-resistant materials
    • Corrosion-resistant frames
    • Ventilation planning

    This is system thinking, not component thinking.

    Real Project Example: Cold vs Hot Climate Contrast

    Case A — Minneapolis, US (Cold Climate)

    Client built a 240 sq ft south-facing 4-season sunroom.

    Initial quote included standard double-pane glass (U-factor 0.50).
    After modeling, they upgraded to Low-E double-pane (U-factor 0.28).

    Results over first 2 winters:

    • Interior temperature more stable
    • Condensation nearly eliminated
    • Heating bill impact lower than expected

    Upgrade cost difference: ~$2,700
    Estimated 15-year energy impact: positive ROI

    Comfort outcome: year-round usable reading space.

    Case B — Dubai, UAE (Extreme Solar)

    Client built 200 sq ft glass-heavy sunroom with standard glazing.

    Problem:
    Afternoon temperature exceeded comfort range even with AC.

    Solution retrofit:

    • Added solar control film
    • Installed exterior shading
    • Improved ventilation

    Lesson:
    SHGC miscalculation created a thermal trap.

    Cost of correction exceeded initial glazing upgrade cost.

    The difference between these two projects was not budget.
    It was climate alignment.

    Advanced ROI Modeling: 15-Year Energy & Lifecycle Impact

    Sunrooms influence energy use more than most homeowners expect. The financial outcome depends on:

    • Climate zone
    • Glazing specification
    • Orientation
    • Energy rates
    • HVAC integration

    Below are modeled examples using realistic global energy rate averages.

    These are structured projections, not guaranteed savings.

    Assumed Energy Rate Baseline (Global Averages)

    RegionElectricity (per kWh)Natural Gas (per therm equivalent)
    United States$0.16$1.20
    United Kingdom£0.28£1.10
    AustraliaAUD $0.30N/A (electric-heavy)
    UAE$0.08Minimal heating need

    Energy rates strongly influence ROI speed. If you want to go one-step further, go into the specifics of energy performance of sunroom glazing systems.


    Scenario 1: Cold Climate ROI Model (Northern US / Canada Equivalent)

    Sunroom size: 220 sq ft
    Type: 4-season
    Orientation: South-facing

    Option A — Basic Double Pane (U-factor 0.50)

    Estimated additional winter heating load:
    ~3,000–3,500 kWh per year equivalent

    Annual heating cost impact:
    ~$480–$560

    Option B — High-Performance Double Pane (U-factor 0.28)

    Estimated heating load:
    ~1,800–2,200 kWh per year

    Annual heating cost impact:
    ~$290–$350

    Annual Savings Difference

    ~$200–$250 per year

    Upgrade cost difference:
    $2,500–$3,000

    Simple payback:
    10–12 years

    15-Year Projection

    Savings:
    $3,000–$3,750

    Net gain after upgrade:
    ~$750–$1,200

    Comfort benefits excluded.

    Scenario 2: Hot Climate ROI Model (Arizona / Middle East Equivalent)

    Sunroom size: 220 sq ft
    Type: 3-season
    Orientation: West-facing

    Option A — Standard Double Pane (SHGC 0.65)

    Estimated additional cooling load:
    ~2,800–3,200 kWh annually

    Cooling cost impact (US rate):
    ~$450–$510 annually

    Option B — Solar Control Glass (SHGC 0.25)

    Cooling load:
    ~1,600–1,900 kWh

    Cooling cost:
    ~$250–$300 annually

    Annual Savings Difference

    ~$200–$220 per year

    Upgrade cost:
    ~$2,000 Payback:
    ~9–10 years

    Middle East Variation

    Electricity cost lower ($0.08/kWh).

    Annual savings difference:
    ~$100–$120 per year

    Payback period longer:
    ~15–18 years But overheating mitigation remains comfort-critical.

    Scenario 3: Mixed Climate ROI (UK / Midwest US Equivalent)

    Heating + Cooling balanced.

    Basic glazing annual extra load:
    ~2,500 kWh equivalent

    High-performance glazing:
    ~1,600 kWh

    Savings:
    ~900 kWh annually

    At UK rate (£0.28/kWh):
    £252 annually

    Upgrade cost:
    £2,000–£3,000

    Payback:
    8–12 years

    Higher electricity rates accelerate ROI.

    Passive Solar Gain Value Modeling (Cold Climate Bonus)

    South-facing 4-season sunroom can reduce heating load on adjacent rooms.

    Estimated offset:
    ~500–800 kWh per year

    At $0.16/kWh:
    $80–$130 annual benefit

    Over 15 years:
    $1,200–$1,950 additional value

    Proper orientation increases ROI significantly.

    Lifecycle Cost Modeling (20-Year View)

    ComponentTypical Replacement CycleEstimated Cost
    Insulated Glass Units15–20 years$2,000–$4,000
    Cushion Replacement5–8 years$800–$1,500
    Seal Repairs10–15 years$500–$1,000

    Upfront investment in higher-quality materials often reduces long-term replacement frequency.

    Cheap builds cost more over 20 years.

    Comfort ROI (Non-Monetary but Influential)

    Financial models ignore:

    • Increased usable space
    • Reduced HVAC strain
    • Enhanced property appeal
    • Lifestyle value

    In resale markets, a properly permitted 4-season sunroom can increase perceived square footage value significantly.

    In many US regions, finished space valuation ranges between $50–$150 per sq ft depending on build quality.

    Net Present Value Perspective (Simplified)

    If annual energy savings average $250
    Over 15 years at modest inflation

    Total savings: ~$4,000

    Discounted value depends on rate assumptions, but real-world ROI is positive when:

    • Energy rates are high
    • Climate is extreme
    • Glazing is optimized

    ROI accelerates in high-electricity-cost regions.

    Financial Modeling Summary

    ClimateEnergy Savings ImpactROI SpeedComfort Benefit
    ColdModerate–High10–12 yrsHigh
    HotModerate9–15 yrsVery High
    HumidModerateSlowerCritical
    MixedBalanced8–12 yrsHigh

    Sunrooms are rarely short-term investments. They are long-horizon environmental assets.

    When a Sunroom Is Not the Right Solution

    Sunrooms are powerful spaces, but not ideal in every scenario.

    It may be the wrong choice if:

    • The region has extreme heat and no shading option
    • Budget does not allow climate-appropriate glazing
    • The space will be used as a fully insulated bedroom without HVAC integration
    • Structural modifications exceed cost of full home extension
    • Orientation forces severe west-facing solar exposure with no mitigation

    In these cases, alternatives such as insulated room additions or shaded patio enclosures may perform better long term.

    Good design includes knowing when not to build.


    Final Authority Statement

    A sunroom’s financial performance depends on:

    • Climate alignment
    • Orientation awareness
    • Glass specification
    • Insulation integrity
    • Energy cost context

    When properly engineered, a sunroom can:

    • Reduce seasonal energy waste
    • Improve daily comfort
    • Increase long-term property appeal
    • Deliver measurable operating savings

    When poorly specified, it becomes a recurring expense.

    System thinking determines outcome.

    FAQ Section

    What is the difference between a sunroom and a conservatory?

    A conservatory is typically more ornate and glass-dominant, often with glass roofing. A sunroom may have mixed roofing and modern insulation.

    Can a sunroom be used year-round?

    Yes, if built as a 4-season insulated structure with HVAC integration.

    Do sunrooms increase home value?

    High-quality 4-season sunrooms often increase buyer appeal and usable square footage perception.

    Does a sunroom need insulation?

    Yes. Without insulation, temperature swings are extreme.

    What is the biggest mistake in sunroom design?

    Choosing glass based on price instead of climate and orientation.