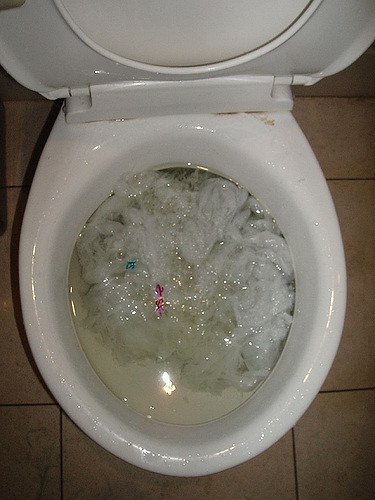
A clogged toilet can be a tough problem to deal with. An overflowing toilet is terrifying. It can ruin your floor, ruin your toilet and ruin your day. It is very inconvenient experience when our homes, offices, hospitals and other places toilets get clogged. Fortunately, we can unclog a toilet by ourselves using household items without the need to call a Professional. Here is a home remedy on how to unclog a toilet with baking soda.
Here are a few of the most common causes of a toilet that just keeps clogging and how to fix them.
Causes of Clogged Toilet
Installing Low-Quality Equipment
Most people are using low-quality toilet pipes and other equipment which is a common cause of clog of toilet pipeline. Installation of quality pipes and other equipment is a lifetime solution to avoid this hassle.
Unnecessarily Water Wastage:
Wasting unnecessarily water in the toilet is a significant cause of clog. That is why it is important to avoid using excessive water to get rid of clogs. It is also important to avoid additional flushing in the toilet.
Extra Usage of Toilet Papers:
Toilet papers are the standard item in every toilet. When you are using many toilet papers, it can become a significant cause of toilet clogs. Less toilet paper usage can save you from this unwanted hassle.
Flushing Damaging Items:
Toilets are designed to dispose of waste only. Damaging items, such as sanitary napkins, cigarettes butts, paper towels, diapers and other hard items can damage your toilet pipelines hence, can clog your toilet.
Children Fun in the Toilet:
If we leave the children in the toilet alone, in most of the cases children start playing and flush their toys in the commode which becomes the reason of clog. This is a very un-habitual cause. Keep an eye on your kids while they are using the toilet.
Congested Pipelines and Fitting:
People who are living in the colonies and apartments can face toilet clog issues due to the congested fitting of the pipes. In the colonies and apartments, flats/homes, as well as toilets sizes, are very small due to which pipe fitting arrangements are not proper.
BEST SOLUTION TO UNCLOG A TOILET
HOW TO UNCLOG A TOILET WITH BAKING SODA
“How to unclog a toilet with baking Soda?” when we think and concentrate on this, it blocks our minds and raises questions. Are there any possibilities to unclog a toilet with Baking Soda? Don’t be shocked. Yes, it is possible; we can get rid of a clog with Baking Soda.
Baking Soda:
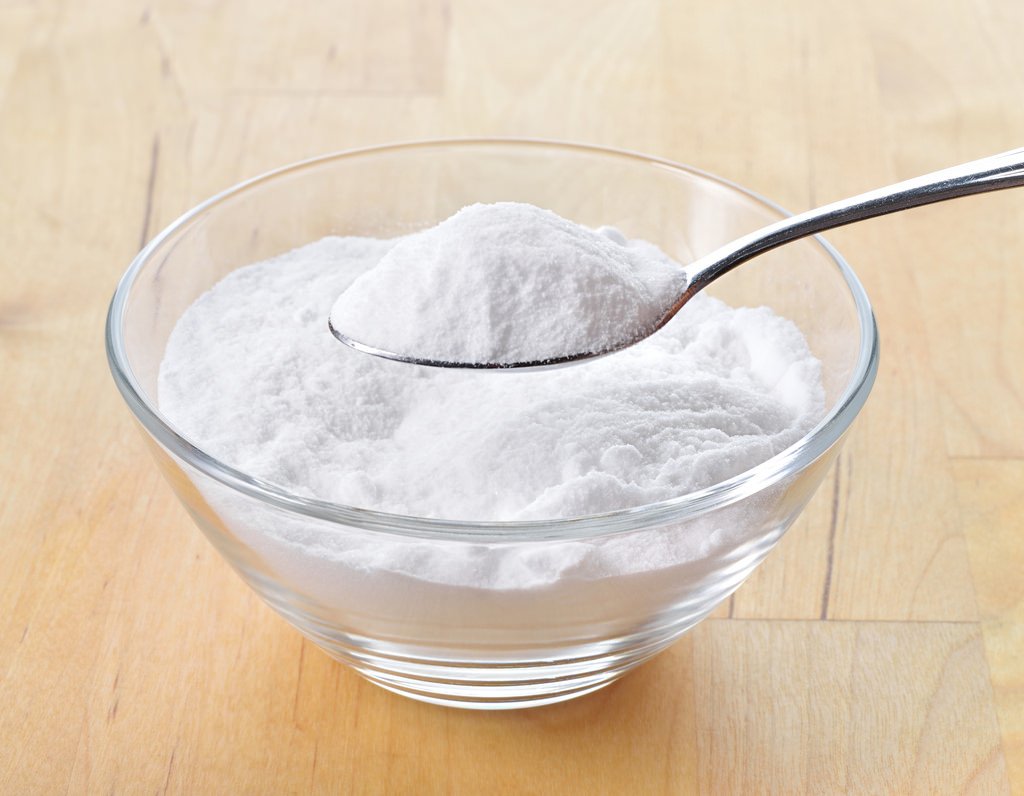
Baking soda has a cleaning power. It gently wears away strains. When mixing with vinegar, it creates a carbonic acid, a weak acid that boosts the corrosive action of vinegar.
As a weak alkali, baking soda neutralizes acids in odor molecules to eliminate strong smells. The key to this process is to measure the ingredients very carefully to keep them in the toilet bowl and avoid a children eruption on the bathroom floor.
INGREDIENTS
Following ingredients are required for this method
• Baking Soda
• White Vinegar
Steps for How to Unclog a Toilet with Baking Soda:
Step 1
Put Baking Soda in the Toilet first:
For minor clogs, you can pour the full amount of baking soda into the toilet bowl. For severe clogs, start with one-fourth cup and then increasing it to a half cup of baking soda.
Step 2
Pour the Vinegar:
Slowly pour white vinegar on top of Baking soda. It is going to fizzle so do it very carefully.
Step 3
Pour a kettle of hot water into the toilet:
Wait for almost 30 minutes, and then pour a pot of hot water into the toilet. It will help you to see if the clog has been released.
Step 4
Repeat as necessary until the clog is released
If your toilet is still clogged, repeat this exercise. The clog is cleared when the toilet makes a rapid suction sound. If the clog has been released, you need to flush the toilet at least two/three times and make sure that toilet is operating as it should.
If the toilet does not unclog after repeating the process, again and again, you may need to hire a Plumber to deal with the problem for you.
TIPS FOR PREVENTING TOILET TROUBLES
• Clean your toilet regularly with a mild cleaner. Vinegar, Baking Soda or a mild soap are all ideas for regular porcelain cleaning.
• Inspect your toilet inner workings about every six months to make sure toilet is functioning properly.
• Teach your children about the adequate way to care for a toilet.
• Don’t flush anything other than human waste and toilet papers.
• Do fix a running or leaking toilet at the right time.
• Don’t use chemical drain cleaners to unclog your toilet as they can cause many troubles.
• Don’t be afraid to a plumber when you need to.
So you have blocked drains? Try not to stress, it happens! Sinks can get stopped up for various reasons—the stream of water can be hindered by anything from food washes off of plates to grease to hold up foreign objects, hair, and even bathing soap deposits. We are going to share Seven proved home remedies for unclogging drains quickly at home.
Don’t go systematic instantly or call your plumber. There are a few systems you can attempt with a specific end goal to clear the clog before falling back on a handyman. What’s more, good for you—you most likely as of now have all that you requirement for do-it-without anyone else’s help for clog removal.
Before you begin, analyze your drain clog cause and its sensitivity. If it is a partial blockage or would you say that drain is totally blocked? If the water from you drain is passing through pipes but in slow motion, this means that you have a partial clogging. In case the drain(s) is fully clogged, it would be hard for water to flow down to the drain as normal.
Home Remedies For Unclogging Drains
Don’t crack your head or put yourself in trouble, just follow these magically approved home remedies for unclogging drains.
1. The wire coat hanger
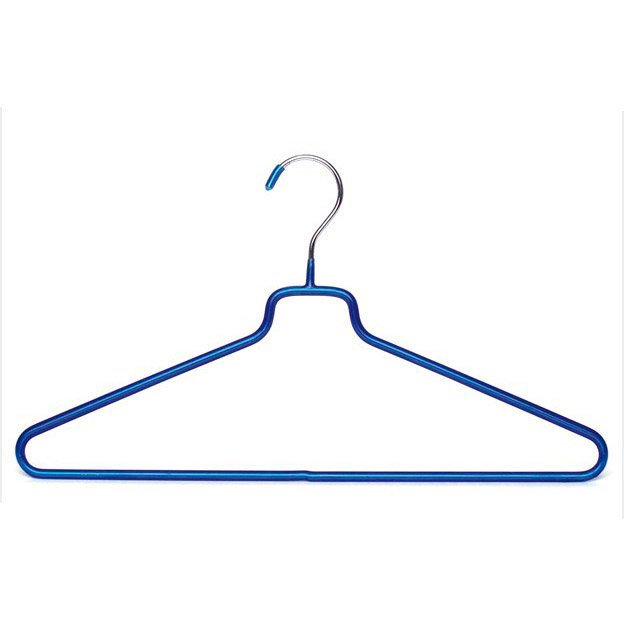
If you have a spare wire coat hanger in your home, make some use of it right away. Simple but exceptionally efficient method to unclog the drains of your kitchen, toilets, and garden. Straighten your hanger and bend it from one end to give it a shape of a hook. Push that wire into the drain and start fishing. You must be able to extract undesired substances blocked in the drain like hair and other nasty stuff.
2. Dishwashing Detergent
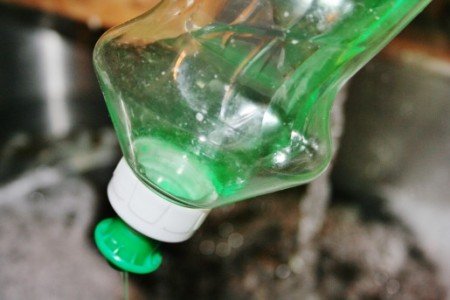
This remedy effects best when got mixed with hot water. As this solution has a tendency to wash away, any grease found the drain. It acts as a lubricant and helps break up of any greasy stuff inside. Once you pour this solution into the drain make sure that your next step would a use of a plunger.
3. Wet/Dry Vacuum
If you have a wet and dry shop vacuum, it can turn into an excellent device to unclog channels. Initially, set it to vacuum fluids. Conceal the vent to prevent a mess. At that point, make the most secure seal you can over the drain. You might need to get inventive and adjust an old plunger headset for this process. With the vacuum turned on its most elevated setting, it can be sufficiently compelling to draw the obstruct the pipe and into the vacuum pack. It does not generally work. However, it has justified shot option.
4. Plain Hot Water
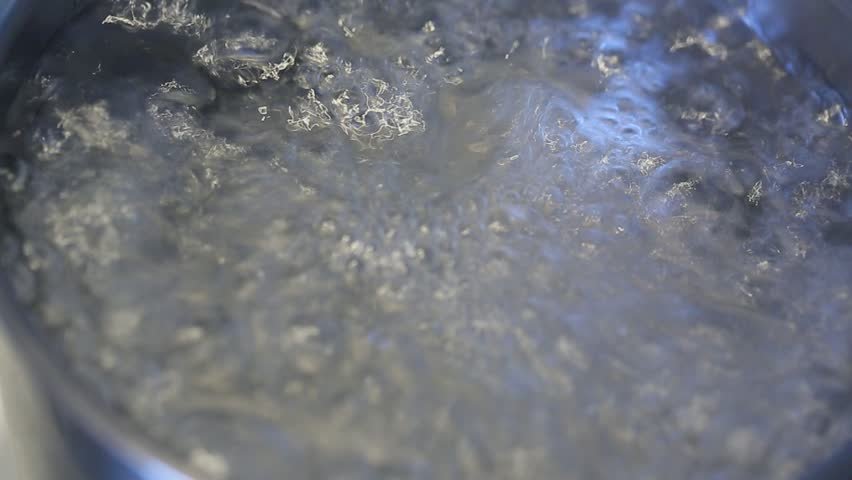
Hot water stimulates in the drain pipes and unclog undesired particles out of the pipe and straight into the gutter. A hot water remedy could be an excellent choice for those who think that their sink or toilets drains are not sufficiently clogged. Hard elements resistance will not be pulled out with just hot water. For that purpose, you need a snake wire or a plunger.
5. Baking soda and white Vinegar liquid
This chemical formula works best in the bad times of drains. These ingredients are accessible in almost every home so, it makes another perfect remedy.
A bucket of hot boiled water
Table salt
Baking soda
Vinegar
Mix all these ingredients in a hot water bucket and pour down in the clogged drains for overnight. You will see a significant water flow in the morning.
6. Sodium Hydroxide formula
For this process, you may need some rubber gloves and eye protection glasses. This method typically called as ‘caustic soda’ which can bring about frightful compound smolders. You can find this chemical at your nearby stores, however dependably use precautioning measures stated in it
Pour 3/4 gallon of frosty water into a clean container, and add an adequate amount of caustic soda in the water. Mix it well with an old wooden spoon. It will start to bubble and warmth up. Empty it into the blocked drain and leave for 20-30 minutes, then flush the drain with boiling water. Repeat this process under the supervision of any expert if it is necessary.
7. Drain opener
If you are not a well-off risk taker, you may find a real drain opener in the superstore. Bring the best quality drain opener so that you do not need to settle drain clog repeatedly.
For slow draining bathtub: it is dependably an or more when the water drains out of your sink or bath at best possible pace. That additionally makes it a tremendous frustration when it does not. There are some ways your sink or tub could have turned out to be clogged, and the main reasons could be; free hair, build up of food particles or even shower salts. Their delicate scent can inevitably transform into something far less tasteful as they get to be held up in the drain.
Things to Remember
The initial step before you begin blending chemicals is just to lift up the drain cover. Frequently build-up of hair and other upsetting things will get to be held up underneath here, halting the stream of water. Unblocking the bath drain can be as basic as cleaning up this flotsam and jetsam.
You can use plunge or plumbing snake before you sneak out for chemical drama. Chemical formulas should be done under the supervision of an expert or previously done by some person. You can fix this problem with the help of a plunger if the clogging is not that worst.
You have invested in large and beautiful wooden furniture, but consequently, that furniture set is getting dull and darken day by day due to dirt and dust. But you neither want to spoil up your whole investment nor do you want to buy new furniture and so now you are getting worried. How to make this wooden furniture set new again without investing a huge amount in that? Here are various effective methods on how to clean wood furniture with vinegar and oil.
So, here’s the easiest and economical way to solve out your query. This will not only help to make your furniture look new, but it will also extend the life of your favorite furniture set. It’s a very simple, safe and environmentally friendly approach; you can all do this only with the help of vinegar and oil. Isn’t interesting? As vinegar is also known as the cleaning agent, so before using it on the wooden part just try it on the little part which is not so visible as to know the result. If you do not notice any damage or discoloration to the furniture, then it means it is safe to use the vinegar. For valuable and antique pieces you may want to consult the Professional for proper cleaning of the part.
Below are the different ways with the appropriate description on how to clean wood furniture with vinegar and oil.
How to Clean Wood Furniture with Vinegar and Oil- METHOD 1
Cleaning of Wooden Surface with the Help of Vinegar
Vinegar is not only money saving but it is a fantastic natural way to clean the household items, and it’s an eco-friendly product. So, below are some easy steps to clean up the wooden surface with the help of vinegar and to make your old, dirty wooden surface to look new and more beautiful just like new one!
STEPS OF CLEANING THE FURNITURE WITH VINEGAR:
STEP 1
Cleaning materials
Just gather all the materials which will be useful in cleaning the wooden surface which includes small pieces of cloth, a bucket full of water, vacuum cleaner and of course vinegar.
STEP 2
Remove all the stuff
If you’ve kept the showpiece or any other stuff such as pillows, cushions, lamps on the wooden furniture, remove them all, if something is attached then unfix it so that you can easily start-up your work. Make sure before starting that you have removed everything from the piece that needs to be cleaned.
STEP 3
Clean up the dust
Clean the dust from the wooden furniture which you want to make it new with the help of vacuum cleaner and a cloth. Remove all the dust from it. If space is not easily accessible, then you can also use the piece of cloth, moisten it and use it gently and smoothly for removing dust but make sure dust is removed correctly from the furniture.
STEP 4
Start-up with the vinegar
Take half cup of white vinegar and a half bucket of warm water and mix it well. If the surface is larger than double the quantity of both vinegar and water. After mixing it well, you can use spray bottled and fill in the mixture in that bottle and use it on the small piece of cloth, or you can use a soft piece of cloth dip it in the mixture, squeeze it properly and can use on the wooden surface. Then clean it in a circular motion with the help of the wet cloth. But make sure and be careful of excess water as it can result in damage. Continue the process until the entire piece has been cleaned and if the piece of cloth becomes dirty rinse it out or take a new piece of cloth.
Caution: Don’t use the dirty cloth again and again it will ruin the whole process as well as your toil.
STEP 5
Remove moisture
Now, after the process just take a clean piece of cloth rub it gently in a circular motion to get a shiny surface. Try to remove the water from the furniture as much as possible. If you do not get the desired result i.e. the shiny surface, don’t get sad just repeat the fourth step again. However, don’t forget to clean up the moisture from the wooden furniture. Otherwise, the case will be all different.
BENEFITS OF USING VINEGAR TO CLEAN THE FURNITURE
Following are the advantages of using vinegar for cleaning the furniture:
The first and foremost advantage is that the Vinegar is cheap and it is readily available at homes. You do not have to pay real money to buy branded cleaning products if you have such handy materials already with you.
Secondly, Vinegar is, of course, safe while many cleaning products are not. They have chemicals which can cause problems when breathing in and could be harmful to eyes.
Last but not the least, this method is straightforward and efficient.
METHOD 2
Not just this, there’s another simple and easiest way through which we can clean and as well as polish the surface that is, with the help of vinegar and oil. As vinegar is just the cleaning agent but oil contributes to polish the furniture and make it look more beautiful and shiny. So, the question arises how to use it together? It is just simple!
Cleaning of Wooden Surface with the Help of Vinegar and Oil
To make wooden furniture polish at home, follow the below given steps, but make sure you first apply it on the small part which is not visible as to see the result.
Ingredients:
Olive oil
White vinegar
Preparation:
1)Take 1 cup of olive oil.
2)¼ cup of vinegar.
3)Mix it well, before using.
How to use?
1) Spray it onto the soft cloth.
2) Then, apply it onto the wooden surface with the help of small piece of cloth
3) Then wipe dry.
Caution: Don’t spray the mixture of vinegar and oil directly onto the wooden surface it will cause damage.
ADVANTAGES OF ABOVE METHOD
Following are the benefits of using vinegar and oil to enhance the beauty of your furniture:
It is cheaper than store bought cleaners and is safe to use around kids and pets.
Vinegar and oil not only help to clean and polish the wooden furniture but it also contributes to fix the scratches on the wooden surface.
Vinegar and oil results in an effective polish and can be stored for a longer time, and it is entirely harmless.
Some more information about Wooden Furniture
Furniture and wood stuff are part of our everyday lives. Some are useful, such as a chair at the dining table and others are aesthetic, such as an antique statue or models and still others may have an emotional or symbolic importance as mementos, such as a chest that has been in the family for years. Whatever their nature or purpose are, if they are important to us they deserve the best care and importance in our lives, and we should provide best to them. Always invest in
Always invest in high-quality wood furniture. Good quality wood furniture always has a long life and remain with us for years and years. If you want to keep your wood furniture long life, cares them and dust it regularly. Dust in gentle oval motions going with the grain of the wood. Always dust your wood furniture with soft and lint-free cotton cloth. Avoid rough or irritating materials of fabrics to clean your furniture.
During moving furniture at home offices, hotels and other places, do it very gently to avoid damaging. Always use lifts instead use stair to move, it will save your wood furniture to crack. Always move wood furniture when it became compulsory to move, otherwise avoid moving. Do read guidelines when you are moving your wood furniture.
If the wood furniture minor mishap occurs, most can be adjusted or minimized with the proper products. In the market water mark and tint, remover products are easily available to help reduce or remove damage when it occurs. Always give your time to clean your valuable wood furniture.
WHY WOODEN FURNITURE EXPERIENCE DUST AND DAMAGE:
Some reasons contribute to damage to your furniture. The most common are neglect in caring for the Furniture.
Wood collects dust and grease from the environment. It has a tendency to lose its shine because of wear, and if it would not be regularly cleaned and polished, then it has a tendency to absorb oil and water and thus can easily get stained.
Dusting, Cleaning, Polishing of the wooden furniture is essential to maintain its shine and to prevent it from the damage.
The furniture also needs to be adequately covered to protect it from moisture, humidity, light that could result in the destruction of wooden furniture.
TIPS FOR RESTORING THE SHINE AND BEAUTY OF YOUR WOODEN FURNITURE:
Furniture requires special care to remain intact and elegant. Here are the tips which you can follow:
Dusting the furniture daily or 2 to 3 times in a week is beneficial. It will ensure that the furniture does not accumulate dust and remains clean. Dusting will restore the furniture appearance and shine.
Protect the wood from water and other liquids such as alcohol as it can leave a stain on the furniture which spoils your furniture beauty.
Keep your furniture out of the sun or at least try to minimize exposure as UV light is very dangerous and it can destroy and shrink the wood, which will cause cracks.
So, therefore:
1.Don’t leave the furniture outside.
2.Don’t place the furniture near a window where it may be exposed to sunlight.
Polish your wooden furniture each year to maintain its luster and to protect the surface from moisture and dust.
You must not use soap and water on a regular basis as it can stain and damage the wood.
CONCLUSION
The two methods described above i.e. vinegar and vinegar with oil, are the easiest, simplest and under budget, a technique to make your wooden furniture clean and polish. It can be done easily at home and gives the same result as chemical polish. Just try this, and you will notice the great change. It will give a new look to your furniture and will increase the beauty of your home too.
Clogged toilets are a very common problem. This problem is a headache to deal with. Moreover, the smell that comes from the backed up system can potentially be harmful to your family’s health. Toilet clogs are the worst but not to worry you can solve this problem by your own and can save time and money. Let’s take a look on how to unclog a toilet with a snake easily at home.
What to do first?
If your toilet has started overflowing, first of all “Turn off the water.”
This prevents any more water from entering your toilet and making the problem worse.
Plunge the toilet in the first place
Try plunging first. If water starts to drain properly, then it means that plunging is successful. If the toilet bowl water continues to back up then go ahead for snaking a drain.
Plumber’s Snake – The best tool
To unclog the toilet, you need to have the proper equipment. A plumber’s snake is one of the necessary tools.
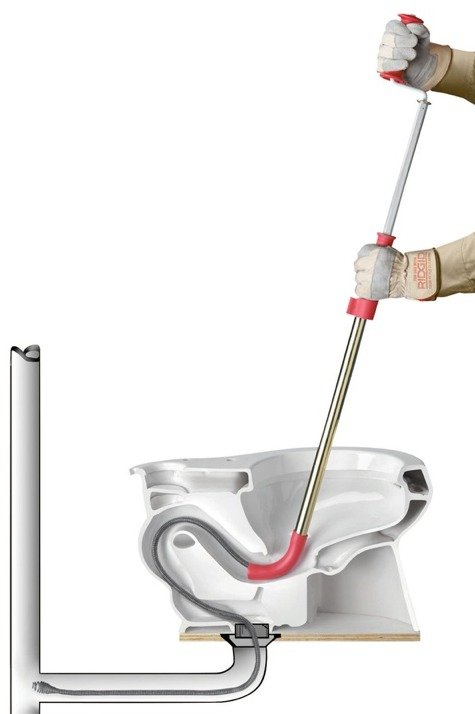
A plumber’s snake is also called as “Auger” it is flexible and used to dislodge clogs in plumbing. It is usually about 1/4 inch thick with the handle on one end. It is used to remove the deeper clogs that cannot be loosened with a plunger. Snaking itself is an easy task, but you should know how to dispose of the extracted material properly.
Selecting the best Snake
• Snake needs to be selected cautiously. Begin with a small snake head; only select the larger one if you are unable to unclog your toilet.
• Don’t push the snake too forcibly. Snake should be used carefully.
• Get the drain snake for a toilet, not for kitchen sinks.
Things You Need for How to unclog a toilet with a Snake
1. Plumber’s snake
2. Rubber Gloves
3. Wear your unused old clothes and shoes
4. Bucket
Operating a Plumber’s Snake
After the collection of the above items, following steps should be followed when you start unclogging the toilet with the Snake.
Step 1
Plumber’s Snake:
First of all, you will have to purchase a Plumber’s snake if you do not have in the home. Keep in the mind Snake quality should be strong.
Step 2
Rubber Gloves:
Then wear the rubber gloves as things can get messy and the snake can get quite slippery. If gloves are not available at home, you can purchase it from the market. It is available at very low cost in the market at pharmacy or hardware stores.
Step 3
Wear Your Unused Old Clothes and Shoes:
Always use unused old clothes and shoes as it’s a messy work so save your clean and quality dresses.
Step 4
Bucket:
After following the above three steps, arrange a bucket for wastage trashing.
Final Step
Using Snake
Hopefully, now all steps have been processed. Insert the end of Plumber’s Snake into the toilet drain. Water in the toilet bowl with the help of flush away any pieces that end up breaking loose from the clog.
Once the snake is in position, turn the snake in a clockwise motion. Turn the handle slowly. As you turn it, the snake will find its way down the drain pipe without you forcing it. You will feel resistance in turning the handle once the snakehead comes in contact with the clog. At the end of the snake, there is a curved hook which will help in breaking of clogs.
Next twist and push the snake through the obstruction to break the clog into smaller pieces that can move through the pipes. Once the clog is cleared from the pipe, remove the Plumber’s Snake and then use the toilets to see whether the drains are functioning properly.
It may be possible to rotate the handle in opposite directions. This is especially true with hard obstructions. You should contact a Plumber then if you are not comfortable in removing the obstruction.
Once the clog is cleared from the pipe, you can remove the Plumber’s Snake from the toilet bowl. You can also pour hot water after that to wash away any remaining residue.
Problems with the Snake Auger
Yes, of course, the Snake Auger is beneficial, but its dangers should also need to keep in mind. The following could be the problems of using Snake Auger.
• Improper use of Auger and exerting too much force can lead to crack or complete pipe breakage
• The metal of plumbing Snake can leave a scratch in the porcelain of your toilet bowl.
Clogging is a part of any sanitary system in one’s home. Whether it’s in your toilets, kitchen, or even in your garden drain. This mind pounding problem is messy and can be fixed by yourself or by a handyman if it is stubborn. The leakage system can be fixed if you have important required tools like ‘Plunger.’ This tool plays a great role in unclogging any blockage in the drain. Here you will find how to unclog a toilet with a plunger.
What’s the problem in the flush drain you actually found? Is it a leakage, blockage, or some other issue? If you flush your toilet drain and the water is staying in a bowl, you might face a clogging in your toilet. If you want to fix it out by your own, you are definitely a brave person to deal with that messy stuff.
So the question is how to unclog a toilet with a plunger. You must have this tool in your home not necessarily if you have clogging issues, but you can keep it as a backup. You can clear clogs yourself without having to pay a plumber.
Here we have a solution to fix this problem with the help of Plunger. Check this out step by step process to get rid of this problem.
Make Preparations before Unclogging a Toilet
Make sure you have a thicker toilet papers and extra towels in your home to place them on the floor around the flush. If you have any spare or ragged clothes in your closet, consider wearing those to avoid any stains and filthy water.
Next, put a thick or probably the rubber gloves on your hand or even covering your hand till elbow. You might need to put your whole arm inside the flush bowl to detect a clog reason. Keep children away while doing this activity.
How to unclog toilet with a plunger
This tool comes in different sizes and quality, pick the best quality so that it cooperate with your for a longer period. Plunger consists of a rubber flange at the bottom which forms a seal. Do not use the little shabby suction-glass sort of plunger. These will frequently not work.
Affirm that your plunger makes a tight seal. You have to wrap an old cloth around the finish of the plunger to stop any leakages.
Run the plunger under boiling hot water before using it. This will mollify it up, which will help with make a seal.
First Step: Insert Plunger into the Toilet Bowl
Embed the plunger into the bowl. Ensure the plunger totally covers the gap. The plunger ought to be submerged in water to be viable. It is imperative to push and to pull with water, not air. Add water from the sink to the bowl if essential.
Pump the plunger over the opening. Begin gradually at initially since the main drive will push air into the bowl. Push down, then draw up forcefully to lose the obstruct and release it. Pump it vigorously pushing and pulling until the water starts to deplete or drain. It might take 15 to 20 times before it unclogs. Be tolerant, insofar as you’re certain there’s no hard question, diving alone regularly suffices. It won’t work promptly but rather would regularly work after a couple rehashed endeavors/flushing, with every exertion constituting of many plunging.
Second Step: Check toilet drain again by pressing flush button
If the water is draining eventually and not rushing fast enough like a regular flush process, you have to keep plunger inside in the bowl, so it blocks the air, and sudden push will unclog it if there is stubborn substance. Unclogging might take enough time, and it would be a test of your patience level, so keep trying until the water rushes into the toilet without any pause.
What are the Causes of Clogging
Although there are certain reasons for the toilet clogging and we know that this mind pounding irritating issue can cause due to certain reasons. We have some most common causes listed below.
1. First generation toilets
This happens to old installed toilets in homes. However, if you keep your toilet well-flushed, then this might not happen. Make sure you constantly be checking your toilet as it got of age and its life is almost finished. Due to it’s wrecking a life, you may consider replacing it with a new one.
2. Waste obstruction
If the waste is not properly flushed off, you may suffer from clogging a toilet. If you throw toilet paper in the bowl, make sure you flush it out instead of letting is dissolve. Heavy wastes and non-flush substance can cause clogging. If you are renovating your toilet, make sure you cover the toilet with the lid so that any stubborn building particles or pieces don’t fall into it. Moreover, avoid disposal of hair in the bowl as hair are common clogging substance in the toilet.
How to Prevent Your Toilet from Clogging
Prevention is better than cure. It is important that you keep your toilets maintained and frequent examination is important. Keep an eye on children to avert them not to throw and non-flush material in the toilet.
Use cleaning agent in a toilet to keep the flow of water running instead of giving huge bucks to the plumber. The “Affability Flush” is a simple answer for forestalling regular clogging.
In the first place, flush the underlying waste. At that point, flush the bathroom tissue separately. This has a tendency to be a typical remove any obstruction bothering the toilet.
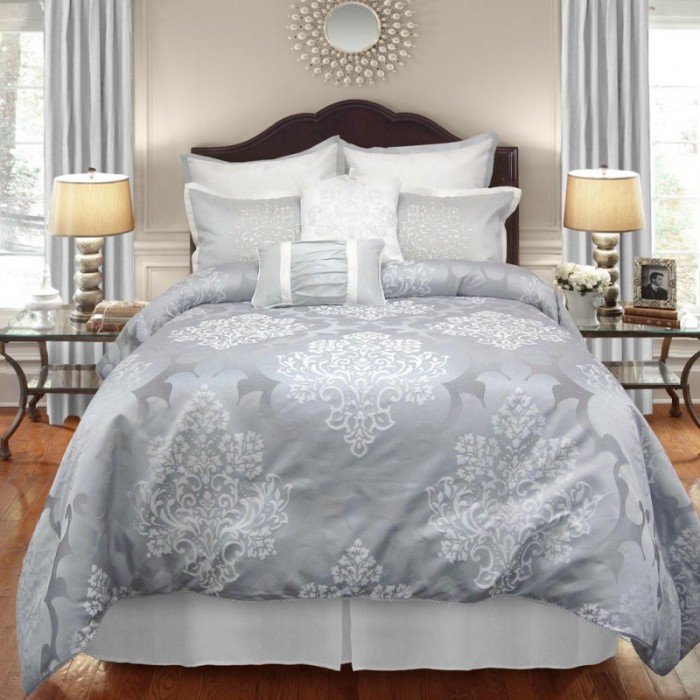
Down pillows are known for supreme comfort and adding extra style to any room at home.The pillows are of different sizes that fit for all. Each has its requirements and preferences regarding the class, support, and smoothness of a pillow. If you require a firm, extra firm, medium or a soft pillow so luxurious down pillows be best for you.
Origination of Down
Down pillows are incredibly soft, lofty and lightweight just like clouds. Down is the most deluxe, comfortable and lavish of entire filling. They are made up from fluffy and soft base coat underneath the feathers and quills of ducks and geese.
Age is likewise a feature in figuring out which kind of down is high-quality because an older duck’s down might be larger as well as healthier in spite of a younger goose. The pleasant and finest down is broadly deliberated to originate from the eider duck. Down from the above species is accrued through the birds nesting zones in Siberia, Scandinavia plus Iceland.
Down Cause Sensitivities and reactions?
Certain individuals are an allergic ad, sensitive to down as well as feathers, mostly the powdery, fine and dusty elements that certain kinds of down be able to produce. Uncleansed feathers can also be the source of different problems.
Hypoallergenic forms are accessible in the market for the sensitive individuals. Unique pillow covers are designed to avoid elements from escaping from inside the pillow. People who are sensitive and delicate, yet, might nap well on bedding occupied with synthetic filling.
How to Protect Down Pillows?
Pillows in suitable circumstance and not using a split or slums within the cloth may be effectively machine washed with the utilization of a minor washing liquid, or else one expressed in particular for down products. Scratched or tattered cushions might be spot washed with the usage of cleaner as well as water in conjunction with a soft cloth or rag. With proper cleaning and care, down pillows can be used up to 20 years. You can protect down pillows by using a pillowcase or a zipper protector.
Drying the pillows well is also very significant because dampness can propose fungus or decay and rust to cultivate very rapidly. They may be air dried out on a garment line for a whole day till completely dry.
You can also dry it in an electric dryer with a cool summersault dry setting; it also needs numerous hours for drying. Tennis balls may be positioned together with the cushions to save you clustering and bunching. It is essential to apply a low head while gadget drying, as excessive temperatures, might harm the quills and feathers.
Down Pillows Designs: Single-Shell and Dual-Shell
The most typical and frequent pillow designs are single-shell plus dual-shell, that explains and identifies the number of coatings of fabric is in the middle of the filling as well as the surface.
Single-shell cushions are not as durable as dual-shell pillows because the oil of the individual’s hair plus face may just enter into the down as well as degrade it. However, all these are also less costly than other different designs. Many pillows comprise of the inner sections of down or feathers that might offer more raise or improved support to the user’s skull.
Irrespective of what kind of filling is used, it is a great concept to incorporate a cushion case shield in addition to a cushion case. Those higher and additional coatings assists preserve the filling dry as well as clean and they can be taken off and also washed regularly.
Prevention of Neck and Back pain
Napping on the wrong cushion or pillow is frequently the reason for back pain plus neck pain . So Down pillows are breathable and give comfort to your neck and head. They also pass through a challenging and laborious purification and refining procedure to guarantee that it is completely hypoallergenic.
Diverse Shapes
Down pillows have the ability to mold into different shapes of the head, irrespective of the napping position. These natural down pillows are the great option for those who want to keep their head warm during their nap. Down pillows have the ability to fill and match the mass and density you desire.
Pros of Down Pillows
• Down pillow has a tendency to grip its shape fine, it is moldable and provides good backing to neck and head.
• Down pillows are incredibly soft, fluffy and light.
Cons of Down Pillows
• They need frequent fluffing to sustain its loft.
• It is tough to clean and dry
• There is the absence of firm choices
• Certain of them are hypersensitive
• Some of them are extremely expensive
• They are lightweight and airy
• Noise free
Examples
1. L.L. Bean 700-Fill-Power Sateen White Goose Down Pillow
2. Cuddle down 700 Fill Power European Goose Down Pillow
3. Pacific Coast Luxury Down Pillow 680 thread count Hyperclean 700 fill power white goose down
So customize your ease with the soft, medium, and firm down pillows made from premium and excellent quality material. Complete your Bed through down pillows plus give your bedroom the supreme luxury. Your loveliness nap waits for you.
We all love to decorate a balcony with ideal balcony furniture ideas. No matter whether it is an apartment balcony or a house balcony, it is something that can allow you to have some extra open space. However, it is a pity how very few of us are concerned about furnishing the balcony. Trust me it should never be like this. If you have a balcony in your house, it is vital to make it appear presentable and stylish. If not for others you should pay some attention for the decoration of your balcony for yourself. To furnish your balcony the first step you need to take is to plan. Planning is crucial because once you have a detailed layout of how you want your balcony to look, you will be able to pick balcony furniture most quickly.
Balcony Furniture Ideas
One of the main components that can help enhance the look of the balcony has to be balcony furniture. I know most of you might think of it as something which is not so important and not worthy to spend some amount of money on, but let me tell you one thing. If you want to make your balcony stand out, it can only be done with the help of decent balcony furniture. It is in no way waste of money, and you will only realize its value once you buy it and set it.
I must also tell you that not only does the balcony furniture help to create a great look for your balcony but it has practical uses as well. If you have already experienced it, you might understand that the lack of balcony furniture makes it difficult enjoy standing on the balcony for a long time, as you get tired. You obviously need some seating arrangement, and balcony furniture becomes a necessity for you.
It does not matter whether you have a really small balcony or a huge one. You can have a seat or two just in case you would want to sit down and relax while enjoying the sight. In fact, some of the most stylish balcony designs are created on smaller balconies. However, of course, with a larger balcony, you have the advantage of being open to more options. You can choose anything you want. So before heading out to buy yourself balcony furniture, you need to make sure you are well aware of the size of your balcony. It is an important part of choosing balcony furniture. You must know the exact measurements and the exact size of the balcony. That way you will pick the balcony furniture that can fit entirely on your balcony according to its shape and size.
Different Types of Balcony Furniture
Keeping in respect the popularity of the balcony furniture the manufacturers have come up with unique and innovative designs and styles. It allows you to have the liberty to choose from a wide range of models. You can find some fantastic and very practical pieces for your balcony today. Some of the most popular and highly preferable items are the multipurpose balcony furniture pieces.
This type of furniture has more than one use in most cases. For example, if you have small space then you can always use a storage bench which is readily available. Not only can these be used for seating purpose but may also be used to store some stuff. Apart from this, you can always get the sets of tables and chairs that can be folded to be kept aside if you are not using them. It is another great option which provides you with great convenience.
Wooden Balcony Furniture Ideas
However, if you gravitate more towards adding elegance and style to your balcony, then you have other options as well. Elegant wooden balcony furniture is one great option. It will help adding a rustic feel to your balcony and make it appear very classy. The best part about the wooden furniture is that not only is it very versatile but highly durable too. It is a one-time investment, and then you can enjoy the benefits from using it for years. The appearance of wooden furniture is just exquisite.
With so many items to choose from, you can do a good job. You should know that the elite look of wooden furniture cannot be found in furniture made from any other material. However, it is true that wooden furniture is a little expensive as compared to other types, but as I mentioned before, it has excellent durability and can be used for years without having to care much about maintenance. Polishing it whenever required can help make it appear brand new. Wooden furniture is further made beautiful with the addition of other items to decorate it. If you like that kind of furniture, you can find it most easily from most vendors.
Plastic and Wicker Balcony Furniture Ideas
If you want to go with something that is lighter and can be easily moved, then you must consider plastic or wicker balcony furniture. The best thing is that these materials are used especially to for making outdoor furniture. That is why they are perfect for your balcony. Wicker and plastic balcony furniture are available in stylish as well as antique styles so you should know that you have various options here. Also, it is good for those of you who want to create a great look for their balcony without having to spend much. Wicker and plastic furniture are mostly reasonably priced. However, this in no way means that you may have to compromise with quality. The items are weather resistant and can perfectly withstand any weather condition. They will also create a very comfortable and fresh ambiance on your balcony.
Also, it is good for those of you who want to create a great look for their balcony without having to spend much. Wicker and plastic furniture are mostly reasonably priced. However, this in no way means that you may have to compromise with quality. The items are weather resistant and can perfectly withstand any weather condition. They will also create a very comfortable and fresh ambiance on your balcony.
Final Words
Purchasing balcony furniture requires much concentration. You need to aware of your needs, and only then you can pick something that is suitable for your balcony. You can even add some natural decorations like plants to add to the beauty of the balcony. If you can afford to buy a set of furniture the best option is to get single pieces of different types and combine them to make a perfect combination. Experiment, explore and then experience with these balcony furniture ideas.
Selecting proper kitchen island lights for the most important place of the house can be a very irritating task as tons of options are available everywhere. Here are some Kitchen Island Pendant Lighting Ideas to enlighten and decorate your kitchen. The kitchen island is the toughest working plus best versatile spot in any home, engaged in food preparation and family time. The most crucial thing is to pick the right illumination for the kitchen arena plus in what way and where to swing them.
Cutting-edge pendant lighting is rapidly becoming captivated and attractive work of art. Aside from presenting adequate illumination and lighting, they appear to deliver in conjunction with them lovely stability and modern style. Through a fantastic collection of pendant illumination designs in the market, your kitchen island will now not look dull, cloudy and unexciting any longer.
Your lighting plans for the kitchen island should match the series of tasks performed there right from reading, cooking instructions, cutting vegetables to family time. The best illumination idea delivers the capacity to control brightness for the numerous tasks. Likewise, ensure that you have regulators or dimmers that may regulate and alter the mood.
Gloss many lights to the kitchen through a top notch music light or pendant lighting fittings to liven up and enhance the cooking space. Discover a fabulous, remarkable pendant or multi-light layout from modern to conventional plus make sure that the kitchen island is a warmth, attractive and appealing workplace for friends plus family to accumulate round.
Any of the attractive and serviceable kitchen islands is not perfect and intact deprived of the same light fitting. When completed correctly, kitchen island illumination and lights complement the atmosphere while imparting sufficient mission lighting at the similar time. Your first attention while selecting island illumination and lighting must be style, shade, and color. You need to search for a chandelier, a pendant or additional form of illumination and lighting that matches the design and scheme of the kitchen.
Kitchen island lighting not only provides you with the right lighting that permits to get the paintings executed on the kitchenette countertop, however, act as important design additions even at some point of sunlight hours. While conventional ventilation and airing take over the pendant illuminations still appear to keep their mysterious charm and charisma. Glossy and trendy pendant illuminations complement the kitchenette’s Cabinets which vanish into the walls. Following are some unique and traditional kitchen island pendant lighting ideas.
Kitchen Island Pendant Lighting Ideas
Splash of Shades through a Sensational Twist
Pendant illuminations are a fascinating plus exciting mode to enhance beautiful shades in the kitchen. A splash of bright shade in the form of unique and excellent pendant illuminations that spot a unique scheme that might halt the dullness and boredom. Likewise, there are certain graceful and elegant curves and bends in a kitchen which places merely bright, well-defined and shiny lines.
The Canon of Threes
For those people who comply with interior or indoors layout thoroughly, the ‘Canon of Threes’ is somewhat quite acquainted plus basis. Canon of Threes virtually means that any design detail and component have to recur three instances to tug off each visual effect and stability.
Well-designed plus Ornate Lighting
In contrast to bedroom plus living zone, the kitchen is an area in which you need to do adequate work. This factor creates lights and illuminations a real extra giant component in this particular a portion of the house. Lights and illuminations in the kitchen area are going manner away from being clearly an artistic and appealing draw. So you need the right capability to go with the ornamental and attractive factor and pendant illumination, and light fixtures benefit in accomplishing this important plus at instances, elusive and gentle combo.
Different Kitchen Island Illumination Concepts
Chicago Contemporary Kitchen
The falling pendant illumination fixtures in the kitchen recaps of the cries and tears which fall.
Denver Kitchenette
It includes unique and particular lights, which are clear rectangular pendant lighting fixtures that comparison the dark coloration of the wood kitchen bar chairs plus cabinetry as well!
Manhattan Seashore House
It includes a row of three white hanging pendant illuminations holds overhead the significant island, totaling a touch of mild on dwelling room.
Industrial Style Kitchen
Industrial style kitchen includes White, snowy plus stainless steel furniture that rules the stylish and utilitarian kitchen. Consuming the authentic brick niche to house a contemporary variety is a purposeful and smooth use of the area.
Vital West Estate
The hanging pendant lighting was bought at Benson illumination fixtures in Miami, and people cherished this layout due to the fact it is exclusive, unique plus classy.
Mirabelle Garage
Beautiful, attractive and elegant fallen ceiling plus industrialized hanging pendant illumination that marks the kitchen much more appealing, beautiful and modern.
New York Loft
Around the turn, a wet bar enable takes an individual of the impressive load off the kitchenette. Maximum of the similar materials had been used for consistency and cohesiveness – which include the slate ash cabinetry stands, counters plus not to refer the beautiful and attractive pendant illumination.
Orange Kitchenette
The large red hanging pendant light was the motivation for the appearance as well as creates a great focal theme. The vital and chief island element creates a useful and valuable brunch bar zone plus provides extra drawers as well as cupboards.
Pemberton crest and statures
Pemberton crest and statures include the beautiful hanging pendant illuminations and lightings of the kitchen, and it makes the overall kitchen fresh, beautiful, elegant and classy.
Shiny White Crystal Kitchenette
It includes the kitchen with smooth and glossy white snowy glass cabinetry, reflected and mirrored hanging pendants swung over the island plus herbal limed timber grounds makes a stylish and modern day sense on large airy kitchenette.
The most frustrating thing is while washing dishes you realize that the drain is clogged. The question is what an effective clogged kitchen sink home remedy is? Active clogged kitchen sink home remedy is better than waiting for the plumber who takes ages to reach and fix it. The first and foremost thing is to find the problem area only then can we solve it. Discover where exactly the clog is. If only the one drain is out of order and clogged, it is quite an easy task to execute, and if not, you may have to find the jam in the main drain pipe which ‘s hard comparatively but not impossible as we all know that nothing is impossible.
Clogged Kitchen Sink Home Remedy
Starting with checking the one drain, this will tell you where the real problem lies and how to solve it. After checking if you come across that this is the problem area then next thing you will need is to try and clean the drain with a plunger. To use the plunger correctly add a little water to make it runny and easy for the plunger to do its work. The plunger will suck the clog and clean the drain. If this does not help add petroleum jelly to the rims of the plunger it will add to the suction If this does not clear the sink, you still need to know how to get rid of clogged sinks so move on to the trap.
Drain the excess water in the pipe before accessing the trap. Remove the clean out plug if there is one or remove the couplings that hold the trap. Wash the trap out to remove any waste and examine it for deterioration or waste materials. Replace to see whether the problem is solved if not keep on trying to get to the solution. You have to use the snake if till now your drain has not been clog free, Push the snake through the drain until you come across the blockage. Bend the snake clockwise until the clog is removed. It will ultimately remove the clog.
Another simpler way without the stress of a plunger, trap or a snake to unclog is as follows, all you need is always available in your kitchen cabinets. These components are the ultimate solution to clogged drains. Baking soda and vinegar are the lethal combinations of getting rid of the clogged sinks.
Drain De-Clogger Recipe
1/2 cup baking soda
1 cup vinegar
1 gallon boiling water
Cautiously siphon off all the baking soda down the drain. Pour in 1/2 of the vinegar, covering the opening, so the froth is forced down, not up. Add the second half of the vinegar, following the similar procedure. Let it sit for 15 minutes or so, and then wash out with a whole gallon of boiling water.
How to Prevent Clogs in Your Drains
One of the best ways to avoid such slog in your drains and sinks is to be careful about what exactly you are putting into it.
“Prevention is better than cure.”
The essential elements that allow the drain to clog are coffee grounds, food remains, soap scum, cooking grease and hair are the main culprits. Avoiding these things throwing down the drain can help you with not letting your sink clog ever.
Following are the ways how to stop introducing these items to the drain
Save cooking grease in an old bean can or cardboard juice container. Then dispose of it in the garbage
Throw coffee grounds away in the trash.
Use a cover for the opening of the drain so that it is easy to clean and the residue will remain inside the drain and will prevent from clogging. It will minimize the maximum risk of getting the drain clogged. To get the perfect cover for the opening of your drain go to any plumbers shop and tell him the exact measurements of the drain so that the cover fits properly without any issue.
Cleaning your kitchen regularly at the end of the day is not a bad idea. To keep the kitchen clean all you need is a little motivation. There are many advantages of keeping the kitchen clean in a proper way and not just externally. Try the following methods to have a clean kitchen.
Run hot water through the sink after each use.
Hot water helps the oil from the food products fall off quickly from the drain without letting it clog inside the interior spaces of the pipe.
Throw baking soda into the drain and follow it with hot water.
Baking soda is an excellent cleaning agent, and it also absorbs foul odors and leaving your sink pipes smelling better than ever.
Pour 2 cups of vinegar down the drain and let it stay for 30 minutes; then chase it down with boiling water.
Vinegar is a miracle cleaner. It contains acetic acid, which acts as a terrific organic solvent in removing the organic buildup of wastes in pipes.
For drains with garbage disposals, here is a trick to follow:
Fill the ice cube tray with vinegar and water let it freeze.
Vinegar alone is unable to freeze therefore add water to it. To execute all this one should be highly careful as we do not want any drinks of yours ending up useless with vinegar ice cubes, not the best taste to try.
Turn the disposal on and then throw in the cubes.
Vinegar contains acetic acid as mentioned above this acid along with ice chills scrapes the greasiness off the walls of the drain.
Vinegar does not have an exquisite odor; you can add lemon juice to the cleaning elements. It will make the drain smell great.
Another very great drain cleaner which is easily available in the market is lye. It is an active element used to clean the drains. It dissolves the waste materials in the drain which clog the drains. Adding lye to a small amount of water cand wonders. Lye should be used in small amount and with caution.
If you are searching to improve the concluding touches and traces to your newly and recently planned, updated or modernized bathroom? Bathrooms are extremely significant as well as most used rooms in every house, your bathroom or toilet must be concrete, useful besides stylish. The variety of bathroom wall cabinets or dressers at Home base achieves these actual standards, uniting beautiful and attractive design along with functionality plus healthy and fine thought out usability.
Bathroom glass dressers get organized two truly valuable elements into 1 single part of the furniture – ample wanted storing space as well as a mirror.A mirror or glass is not merely valuable in its traditional and customary role, however, be able to also make the delusion of a larger room plus bring additional light into a minor space. Well-lit bathroom cabinets or dressers are additional great and abundant choice, acting as an additional wall well-lit, however, with a directed site where light or the illusion is required most.
Bathroom wall dressers or cabinets save the space, place as well as eye level storing creates for an informal approach to the entire of your bobs and bits, however standing free bathroom dressers or cabinets deliver a surface or shallow for showing and keeping additional items and stuffs, containing bathroom fundamentals and essentials, for instance a standard glass.
Following are different types of bathroom wall cabinets.
• Kinds of Bathroom Wall Cabinets
Bathroom wall cabinets are available in numerous colors, sizes, as well as configurations and shapes. Thus, before you buy, found where in your bathroom you need to place a wall cabinet, plus measure wisely to decide the ideal and the perfect width, height as well as depth. Attempt not to emphasize only on in what way more storing space you can gain; procure the size and magnitude which seems proportionally and uniformly precise on the wall.
1. Compact Bathroom Wall Cabinets
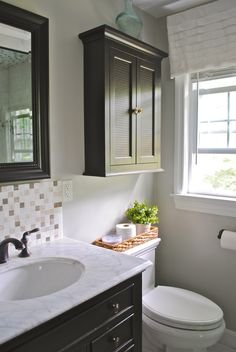
Many of the washrooms have a deficiency of flooring space. However, one or maybe two minor spaces of upper or higher wall that are open — as well as these are the perfect points to swing or hang dense and compact wall cabinets. It should not be very high, or should not too extensive, and comparatively shallow and low, these shortened cabinets are excessive for storage of minor objects, and for instance bath sponges as well as nail polish.
2. Tall Bathroom Wall Cabinets
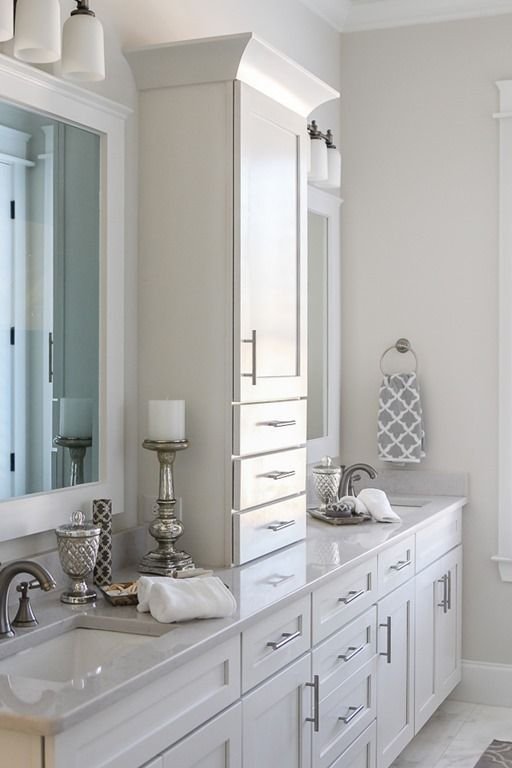
If your washroom has a free wall which is not really wide and extensive, bring the benefit of the vertical or upright space by hanging or dangling a tall, thin wall cabinet. Taller and higher cabinets propose the luxury of numerous shelves and tables, that are faultless for piling fluffy and feathery towels or else higher objects that rarely fit in a medication cabinet, for instance, hair dryers, shower gel bottles, and hairspray cans.
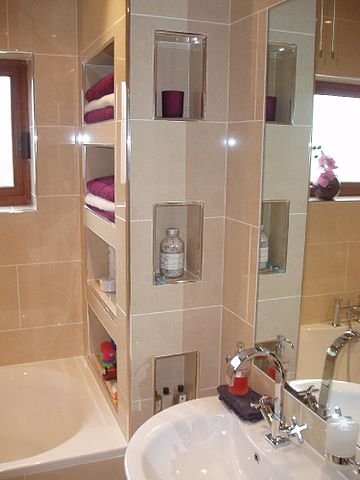
3. Open or Glass-Front Bathroom Wall Cabinets
Made for transparency and clearness, open-shelf, as well as glass-front wall dressers, are destined to show attractive and beautiful bathroom objects, for instance, hand-milled soaps, specialty linens, canisters, and cut-glass. It’s entirely about displaying off your private spa possessions.
4. Solid-Door Bathroom Wall Cabinets
Everyone has many of bathroom requirements, we did somewhat stock after locking doors — toilet paper, perhaps, or else beach towels that clatter through your color or shade scheme as well as decor. Retain your washrooms seeing peaceful and comforting by stowage the mess here.
• Buying Thoughts
Whatsoever material or style choice you make for the washroom wall cabinets or dressers, ensure that they match and balance the fit as well as the finish of additional washroom elements. Smooth and shiny cabinetry lends and imparts it to glossy and shiny hardware, as well as raised-panel doors plus top molding and detail telegraph traditional and customary style. Reliability and stability provide your bathroom a skillfully designed and planned look.
1. Placement of the Wall Cabinets
When you have measured and size your wall area as well as selected a wall cabinet or dresser that suits you, ensure to hang or swing it at the suitable height. You do not need to extend excessively high while you are putting folded and doubled towels, as well as you have no need of a cabinet door to smash your head if you are sitting on a counter underneath it either.
2. Combining Wall Cabinets
Let’s assume that you love and consider the appearance of a pedestal and base sink. However, hatred giving up the storing vanity offers. Crack and resolve the problem by neighboring the sink along with the tall wall cabinets or dressers as well as dangling a short mirrored and reflected cabinet overhead it. At this moment you have produced what is basically a vanity, however, through an extra open, efficient and streamlined look. Your alternatives to joining wall cabinets are boundless.
3. Materials and Supplies
Do not overlook that any of the bathroom cabinet or dresser should persist humidity as well as moisture. Select materials and supplies, for instance, plastic, coated wood, laminate, metal or aluminum through a baked-enamel surface.