Blog

  • Modern Rustic Living Room Ideas

    Coziest, Beautiful and Luxurious Modern Rustic Living Room Ideas

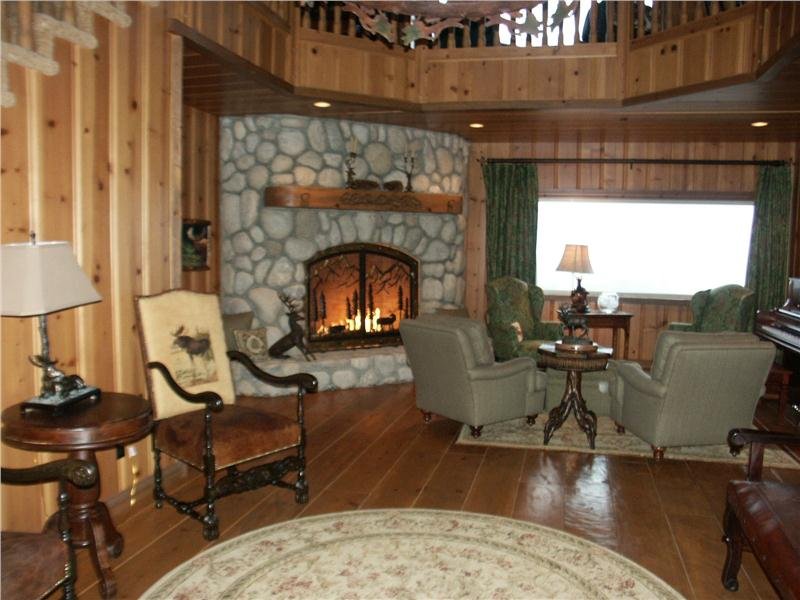
    One of the coziest, calming and welcoming design style is a rustic living room. One of the nicest and beautiful materials of nature is used in rustic decor that’s provided a warmth feeling. Get inspired by the most elegant modern rustic living room ideas.

    Coziest and the most beautiful and luxurious Modern Rustic Living Room Ideas

    Green and White Modern Rustic Living Room Ideas with pure, Rustic glamor

    A perfect living room should be adorned with a simple flooring, a smart sofa, and rustic wood. Swap traditional neutrals provide an extra refined, advanced and sophisticated look through silver-grey palette all over the space in a rustic living room. A subtle and delicate shimmer will beautifully feature the wallpaper pattern. From cushions to table and glass wear to windows will and all other beautiful accessories will give a gleaming and shiny finish to a rustic living room and enhance its beauty as well as elegance.

    Cozy Living Room with a Rustic French feel

    You can create a rustic, vintage style living room in your beautiful and stylish home using carefully and sensibly using tactile accessories as well as rough and luxe furniture. A room will be beautifully colored with some cool colors and use a large floor rug. A simple armchair of French Regency-style will be placed there along with cozy and comfortable accessories, for instance, plump cushion and faux-fur throw. Plenty of valuable and beneficial surfaces can be provided by an old steamer trunk cum coffee table and through a side table for cups of tea as well as for personal displays and both tables are with distressed paint finish. A light-colored cotton is used for floor length curtains that gave a vintage, and the rough-hewn country cabin feels.

    Cozy Living Room with a Rustic French feel

    Rustic Living Room with Wood-burning stove

    A wood burning stove is used to create a focal point as on it real fire dancing blazes and flames make individuals feel instantly and promptly at home. Above of the inglenook chimney corner, there are fairy lights that are hung on a beam. Moreover, the room will lighten up through a warming spark and glow that comes from the main supporting beam.

    Modern Rustic Living Room with stacked wood feature

    Wood and concrete are considered as a heavenly match. A rustic living room industrial look will be obtained by pairing both of them. Furniture of different eras will be mixed and matched, for instance, stylish chair of midcentury and Chesterfield sofa that will provide an eclectic modern and contemporary vibe and feel. Logs can also use in a work of art instead of a winter fuel when considerately stacked.

    Scottish-inspired Rustic Living Room with cozy fireplace

    Sometimes rustic means stripped timbers as well as bare walls by going back in the past if we think outside the box and also make sure to include a glimpse and trace of comfort in it. Endearing and appealing linocut motif theme wallpaper will be chosen, for instance, the wheat sheaf print that provides and reminds country cottage sense. Cosseting effect can be enhanced by the effect of woven wool fabrics as well as Brass accents.

    Rustic Farmhouse Style Living Room

    In a rustic farmhouse type living room, choose tailored pieces, for instance, stylish table lamp and an upholstered and furnished sofa that provides a bare brick rustic look as well as roughly hewn wood that creates a pleasing and attractive juxtaposition. For example, make sure to match and mix the smarter as well as clean-lined pieces that have an extra pared-back elements that are usually set up in the country rooms.

    Country Living Room with Wood Burning Stove

    Relaxed and calm autumnal look of the living room will be created through a color palette of gray and blue. Textures and patterns will be mixed in this modern and contemporary country room. Printed designs and linen cushions are together with the rustic textures, for instance, wicker pieces of footstools as well as occasional chairs. Seasonal touches, for instance, lanterns, as well as pumpkins, can be used to decorate and adorn the fireplace.

    Country Living Room with Wood Burning Stove

    Rustic Living Room in Neutral Shades and Textures

    Seasons with bright, glowing tones and country style sparkle, luster, shine and gloss to enhance the seasonal celebrations. Rust shades, glinting copper layers, felted textures of vintage style and blushes of the living room enhances the glamor of the living room in a laid back style. Linen sofas will be designed through textures of plush on which you may celebrate and rejoice with your friends. An artisan touch can be given to the rustic living room by introducing grain sack fabrics and woven floor cushions.

    Rustic Neutral Bedroom with four-poster bed

    Traditional, as well as modern styles, will be matched and mixed. A classic style includes Four-poster beds which are the ultimate in this style. Beside this, it is bespoke and personalized design along with a contemporary and modern look that has a dark chunky wood post. Such design provides a strong statement and declaration contrary to neutral walls. There is no need to overly and excessively ornate the four posters as this is one of the great examples.

    Rustic Neutral Bedroom with four-poster bed

    Rustic Bedroom in a Highlands-inspired country cottage

    Homely and soothing feel in the room is created through earthy tones. A small room along with timber wood walls and a beautiful cabin bed made of domestic wood for snug and warm. The texture will be added to the room with a thick rug that provides a luxurious and comfortable feel in contrast to the bare wooden timbers.

    Master Bedroom with Rustic furniture

    A rustic feel can be created for a bedroom through a bedside driftwood table, modern lamps, and wooden floor. Room’s comfortableness and warmness are ensured through quilted throws, luxury fur blankets as well as through the cushions. Numerous crannies and nooks in the room and sloping ceilings enhances the comfort and warmness of the room.

  • How to Clear Slow Draining Kitchen Sink not Clogged

    SLOW DRAINING KITCHEN SINK NOT CLOGGED

    The slow draining sink is a very common household problem, but you can fix it quite easily. A sink that drains too slowly is usually caused by the accumulation of trash and bunch of junk in the pipes. Do you ever face a situation with slow draining kitchen sink not clogged? The sooner you notice that the drain is “Acting funny” or no longer drain rapidly you should take action to clean a drain before it becomes a serious problem.

    How to unclog your kitchen sink without calling a Plumber

    By following one of the methods below, there would be no need to call a plumber. Now you can unclog your kitchen sink on your own in less than an hour by using inexpensive tools such as Plunger and Snake Auger. You also need to keep several other items handy such as a bucket or a plastic bin that fits under your drain, rubber gloves, and other such articles.

    Method 1

    How to Unclog SLOW DRAINING KITCHEN SINK NOT CLOGGED -USE A PLUNGER

    A plunger is a tool used to remove blockages in drains and pipes. It consists of rubber suction-cup with an attached stick. The stick is usually made of wood or plastic.

    First, fill the sink partially full of hot water. Then position the plunger over the drain then plunges up and down vigorously for about 20 seconds and see if the water starts to drain and continue using the plunge until the clog is clear.

    Method 3

    How to Unclog SLOW DRAINING KITCHEN SINK NOT CLOGGED With CAUSTIC SODA

    CAUSTIC SODA

    Caustic Soda (Sodium Hydroxide) can be used to unclog your kitchen sink. Pour 3/4 gallon of cold water into a bucket then add 3 cups of caustic soda and stir it well. It will begin to fizz and heat up. Pour it into the clogged drain and leave it for 20-30 minutes, then flush the drain with boiling water. Repeat the process if necessary. Sodium Hydroxide can cause nasty chemical burn so always use caution when handling it.

    METHOD 3

    How to SLOW DRAINING KITCHEN SINK NOT CLOGGED Using SALT AND BAKING SODA

    POUR SALT AND BAKING SODA INTO THE DRAIN

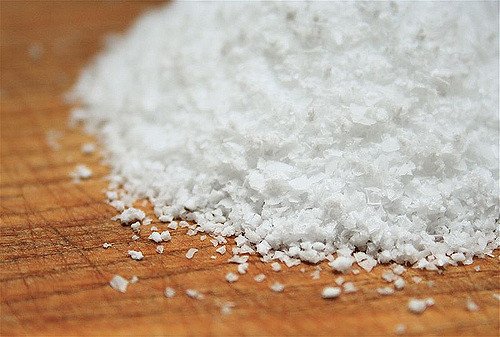
    First mix 1/2 cup of salt with a half cup of baking soda and pour down the blocked drain. Leave it for 10-20 minutes. Then flush the drain with boiling water. Salt Baking soda and boiling water will produce a chemical reaction that will dissolve some of the dirty blockages.

    METHOD 4

    How to SLOW DRAINING KITCHEN SINK NOT CLOGGED USING BAKING SODA AND VINEGAR

    USE BAKING SODA AND VINEGAR

    The first step is to remove the standing water. Pour about a cup of baking soda into the drain and an equal quantity of white vinegar. The solution will bubble. Then wait about 15 minutes. Next flush hot water to see if the clog clears. Repeat the process if necessary.

    METHOD 5

    P-TRAP

    It may be important to clear the P-Trap to remove the clog.Place a bucket underneath the drain to catch any debris that may fall out. Unfasten the P-Trap from the drain pipe and clear the stuck material. Then replace and run water through it.

    METHOD 6

    USE A PLUMBER’S SNAKE

    If neither the plunger nor the cleaning of drain unclog the sink, then Plumber’s snake also known as Snake Auger can be used to report this. Plumber’s snake is a flexible auger that is used for cleaning sink and bathtub drains. Plumber’s snake is often reserved for severe clogs that cannot be loosened with a plunger. Plumber’s snake is usually about 1/4 – inch thick with the handle on one end. They are long enough to reach the clogs that are deep within a drain pipe. The Snake Auger will help you gain access to the clogs so that you can pull it out.

    How to Prevent Draining Clogs

    There are many reasons for a drain to clog. Try to prevent the problems before it happens. Slow drains, the bad smell can create trouble in your main drains. Therefore, check it periodically. If your main sewer line becomes clogged or plugged, you will be left without a workable plumbing system. Clogs need to be prevented.

    You can prevent future clogs in the following ways.

    • Clean your sink on a regular basis and check the pipe fitting properly from top to bottom.
    • Don’t dump solid objects down the drain. Washing heavy products down the drain can cause clogs, therefore, throw all the solid objects in the trash
    • Once a week pours boiling water down your drain to clear away any residue and use filtered clean water.
    • Never pour grease, oil down the drain. Heavy oil, grease rich gravies should be thrown in the trash.
    • Don’t try to wash any garbage material in the sink.

    If your kitchen drain clogs frequently and these methods do not work, then you should call a Professional to resolve your matter.

  • Ways To Clear Clogged Tub Drain Standing Water

    CLOGGED TUB DRAIN STANDING WATER

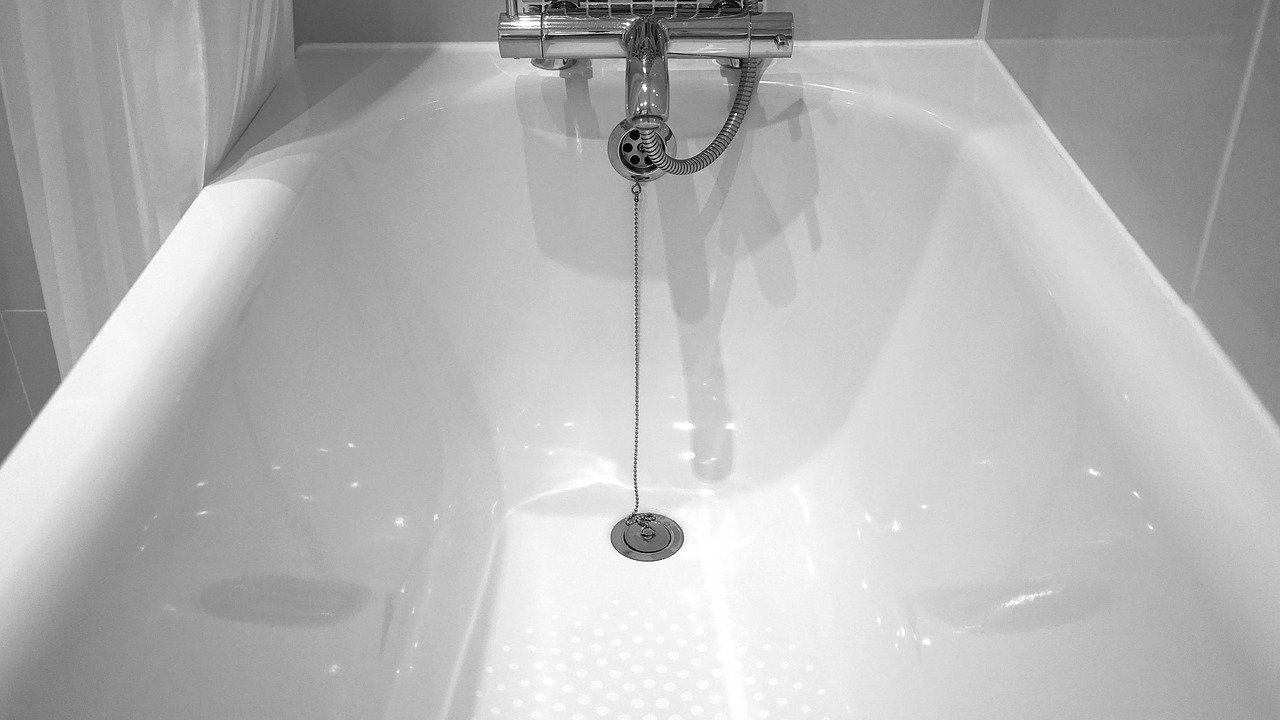
    A clogged tub drain standing water creates trouble in the home. If the water is always reaching your feet or even higher every time you take a shower, then you most likely have a clogged bathtub drain problem. It is a bigger problem to fix but not impossible. Mostly the hairs in the strainer are clogging the bathtub. It is important to fix this issue as soon as possible because standing water can create more problems for your home and bathroom.

    CLOGGED TUB DRAIN STANDING WATER

    HAZARDOUS STANDING WATER

    Standing water creates a spawning pool for mosquitoes which can be a nuisance to you if allowed to reach its adult form with the continuous breed. Standing water causes mold and mildew to form which is a breathing hazard for anyone in the home.

    WAYS TO UNCLOG CLOGGED TUB DRAIN STANDING WATER

    A clogged bathtub drain can be removed in several ways such as by using a Plunger or by cleaning the strainer or stopper and other methods. If after trying these all the tub is still clogged, then use a Snake to remove the drain.

    Method 1

    •Cleaning the Stopper

    If the water is draining slowly, then remove the strainer or stopper and clean out any junk.

    Method 2

    •Baking soda and vinegar

    Baking soda and vinegar

    Baking soda has a cleaning power. It gently wears away strains. When mixing with vinegar, it creates a carbonic acid, a weak acid that boosts the corrosive action of vinegar. As a weak alkali, baking soda neutralizes acids in odor molecules to eliminate the potent smell. Therefore,
    try baking soda. First, remove the stopper and pour boiling water into the drain with baking soda and vinegar. Wait about 15 – 20 minutes and then flush with hot water.

    Method 3

    •Using the Plunger

    Using the Plunger

    Mostly bathtub clogs are caused by unwanted hairs, soap scum or other bathroom products. These are easily visible and therefore can easily be cleared with your fingers.

    If after removing hairs and other visible products there is still a problem then use a Toilet Plunger to remove the blockage. A plunger is a tool which is used to remove blockages in drains and pipes.

    How to use the Plunger

    Following are the steps of using a plunger to unclog the bathtub.

    Fill the bath tub with few inches of water.

    Start plunging your bath tub’s drain. You have to use some force here. After about ten plunges, check if the dirty water and gunk are coming out of the drain.

    If the pipe looks cleared, then run some hot water to clear any residue remaining.

    If no positive results found, then you should use a different method.

    Method 4

    •Snaking a Tub drain

    If you have tried everything but the problem is still not resolved, then a Plumbing Snake is the last resort. Plumber’s Snake is a flexible auger which can be used for cleaning sink and bathtub drains.

    STEPS TO SNAKE A TUB DRAIN

    Feed the snake down through the overflow plate opening and turn the handle on the drum that contains the coiled up snake.

    Keep pushing more of the snake into the drain until you feel some resistance.

    Continue turning the handle until you feel the clog starts to break up.

    The snake will either break the clog, or your turning will hook the end of snake onto the clog, and you can pull it out.

    Try running water down the drain while moving the snake in the drain. If the clog is clear, the drain will run free. However, if the clog is not cleared, you may have to repeat the process to clear the drain.

    HOW TO AVOID A CLOGGED BATH-TUB DRAIN

    It is better to prevent the clog from happening in the first place. Instead of spending time and effort when the things get backed up, put effort on a monthly basis.

    Keep your Bathtub drains free flowing by following the tips below:

    Pour boiling water on a monthly basis.

    Pour half cup of baking soda into the drain and then add a half cup of vinegar. After few minutes rinse it with a hot cup of vinegar. It will not only clean the drain but clean smelling as well.

    Don’t drop pieces of soap by assuming that they will dissolve. It is how soap builds up in the drain.

    For slow drains in old houses, pour a bottle of bleach down the tub drain once a month in the evening. In the morning, heat up a tea kettle and pour one gallon of water down the clogged drain.

    The last option is to call the plumber if the situation is getting worse.

  • How to Replace a Garbage Disposal- The Easy Way

    Changing a futile trash disposer might appear intimidating. There is a reasonable fear about power as well as water, the unacquainted sink association as well as sufficient drain fixtures to make leakages an actual probability. Then there are the difficulties of contrast shopping as well as the doubt that the job might run into real money. Thus lastly, useless disposers do not frequently leak and escape, however, not at the start. Thus it is easy to set things off. So let’s take a look at the easy way of how to replace a garbage disposal.

    If theses noises familiar, then you will be glad to recognize that substituting a disposer is simple. Through today’s plastic leftover kits and tools, leakages are rarely a problem as well as the electrical networks are likewise rapid plus easy. Before you purchase, however, it pays to inspect your previous old unit to ensure that it is not merely jammed and blocked.

    How to replace a garbage disposal

    How to Replace a Garbage Disposal

    STEP 1: SWITCH OFF ELECTRICITY

    Start by switching off the electricity power to the unit on the service panel. Eliminate the shelter from the base of the disposer, release and loosen the ground bolt as well as remove both cable connectors.

    STEP 2: LOOSEN AND RELEASE THE BOLTS

    In this step, release the hose clamp on the dishwasher and discharge pipe as well as pull the hose pipe from its fixtures and fitting. To unfasten the drain support, release the screws that fix the drain projection to the disposer.

    STEP 3: ELIMINATE THE PREVIOUS UNIT

    Disposers attach to the basin sewer fittings in many ways certain practice threaded plastic and soft nuts, further large hose pipe clamps, however, the mounting ring Association is the most public. To eliminate the disposer, maintenance it from underneath as well as revolving the large, 3-tab mounting ring at the first counter-clockwise up until the unit drops away. Eliminate the rest of the drain association by untying the three nut bolts as well as snooping off the retentive ring. Push the sewer out by the basin hole as well as clear away several old putty or caulk.

    STEP 4: PUT ON PUTTY

    To put in the new and fresh drain association, you first need to roll a knoll of plumbers putty on the stand up until you have a 10-inch long piece and ½ inch thick. Now you need to stick this putty around the underneath of the sewer as well as press the sewer or drain firmly into the basin hole.

    STEP 5: FINISH THE DRAIN

    To stop the drain association, slip the cardboard washer as well as backup and standby ring on the sewer spud.

    STEP 6: SNAP THE RING

    In this step follow through the rising projection as well as the retentive ring. Snap the retaining or retentive ring on the sewer spud.

    STEP 7: TIGHTEN

    Tighten up the nut bolts through a positioned screwdriver up until best of the putty squeezes or crushers out as well as the sewer senses snug and warm in the basin.

    STEP 8: WIRE IT UP

    It is typically easier and informal to wire the fresh and original disposed of beforehand you fit it. If the previous fitting was ended deprived of flexible and elastic conduit or pipe, currently is the period to upgrade.

    Initiate by winding the previous box connector keen on the base of the fresh new disposer.

    STEP 9: FINISH IT UP

    Take along the circuit cables as well as a conduit or pipe into the connector plus save the conduit. Link the black color circuit cable as well as the black lead in single cable connector, plus the white color circuit cable as well as the white lead in another. Bind and fix the circuit ground cable below the green color ground bolt as well as a substitute the cover.

    STEP 10: FITTING THE NEW AND FIRST-HAND UNIT

    New and first-hand disposers come along through a dishwasher release nipple in place, on the other hand, the nipple comes plugged inside the case you do not have a dishwasher. If you aim is to practice the dishwasher fitting, push the plug or switch out through a screwdriver as well as approach into the disposer to recover it.

    STEP 11: FITTING THE NEW UNIT

    Lift up the disposer to the basin sewer as well as involving the tabs of the mounting and rising ring. Once the ring in progress, slip-up a screwdriver into any of the tab slots as well as revolves the ring in a clockwise direction up until it undersides out.

    STEP 12: FITTING THE FRESH AND FIRST-HAND UNIT

    In this step to plumb and aligned the disposer’s sewer outlet opening, fit the rubber seal washer properly over and above the flange finish of the soft and plastic cross piece, after that slide and slip the metallic flange protection on from the new end. Tip up the bottoms of the metallic flange hooked on its slit in the disposer as well as tighten up the fastening screw bolt by the top side of the flange.

    STEP 13: INSTALLING P-TRAP

    In the last step, you need to trim as well as the crosspiece to the dimension and length, link it to the sewer tee as well as fit the P trap.

  • Sunroom Furniture Ideas- A Comprehensive Guide to Sunroom

    A sunroom in your home depicts that how creative you are in your thoughts. We all know one’s mind need comfort and serene environment at a particular time in a day. This room has great importance if your house absorbs enough sunlight facing your home.The sunroom is one word, and there are no segments of this word. This sunroom is a place in your home where you can sit and look at the landscape surrounding your home whether its sea, greenery, backyard sea shore view, mountains or any other. Let’s start our comprehensive article about the sunroom where you will find sunroom furniture ideas, types, maintenance and much more.
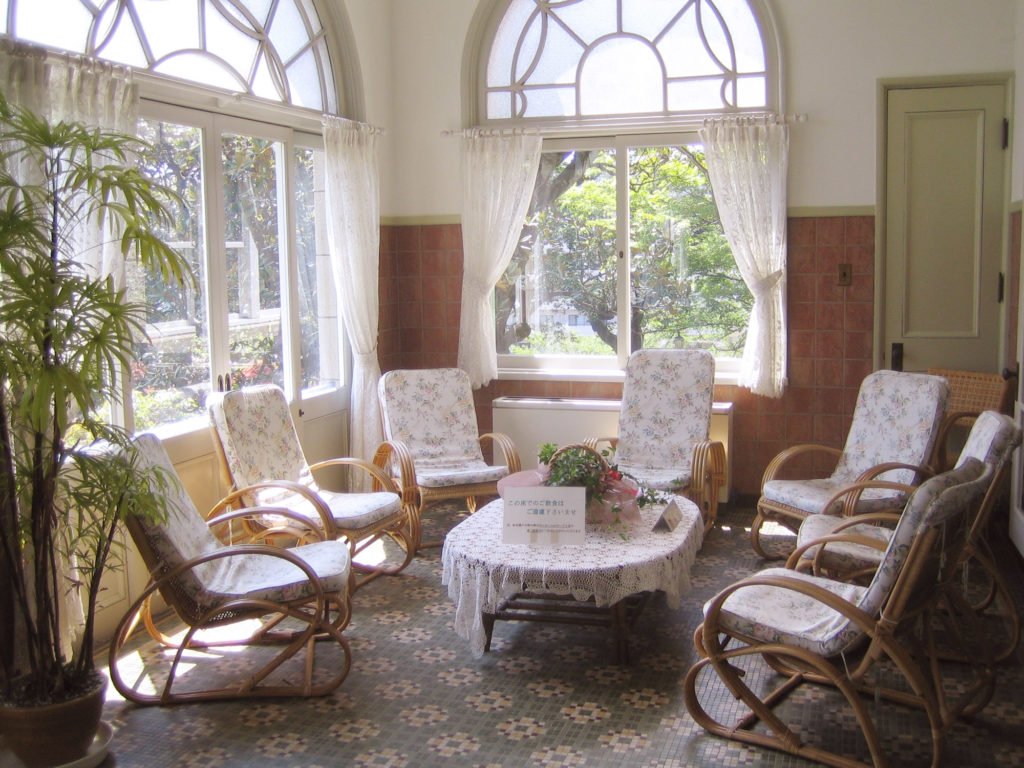
    Sunroom Furniture Ideas

    The fundamental purpose of this room is to create a space in your home where you can experience some great scenery or absorb sunlight in a shelter without bothering to adverse climate. You are sure, a fortunate enough to have this room in your home which could be one of the best room in your home.

    The sunroom was first idealized in the 17th century. However, it got fame in the 19th century when the material used in this room became budget friendly. The installation equipment in this room was previously wood. Now, the entire concept of sunroom has changed to its best, and one can imagine a sunroom as a luxury space in a home.

    Types of Sunroom Furniture

    Sunrooms are usually known as glass or screen rooms. Solariums suppose to have big wide windows with a high ceiling; here we will discuss some different types of sunroom for your better understanding. If you are looking forward to upgrading your sunroom looks, make sure you follow some of these interior design ideas to bring a glam factor.

    1. Modern Sunroom Furniture Ideas

    Modern sunroom does refer to the concept of modern furniture. Although, the installations usually remains the same, however, the furniture gets an edge on these types of sunrooms. The conservatories which fall in this category usually got high-end furniture with cutting edge technology. A modern fireplace, it could be hanging or in a fireplace frame. The separators and ceiling are made of glass and sleek steel panels which make worth of its appearance to double.
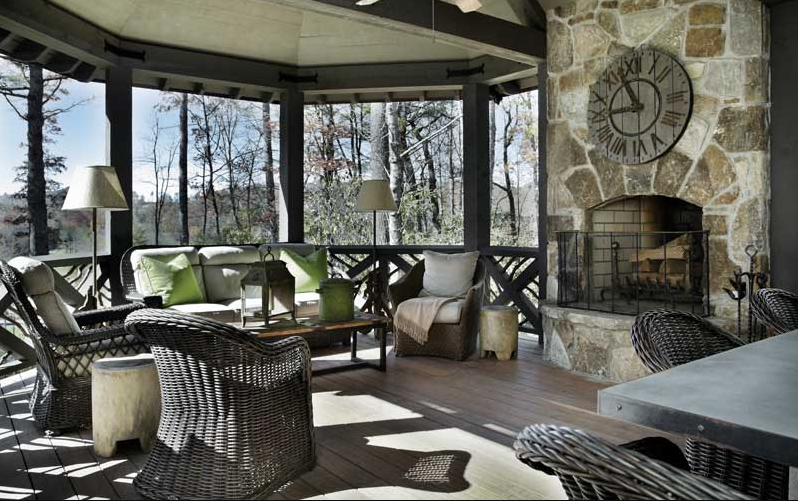
    Modern Sunroom Furniture Ideas

    In some modern sunrooms, fireplaces are missing, and ceilings are at a normal height, but the accent furniture products make this space even more worth time spending. Elegance in its furniture speaks loud of your interior design aesthetics.

    2. Rattan Garden Sunroom Furniture Ideas

    Rattan is a form of timber, which grows in the northeast of Asia like the Philippines where average rainfall is 80 inches. This grows in a horizontal direction but a tangled form. This is one of the finest timber used in the furniture due to its durability and beautiful bending characteristics.
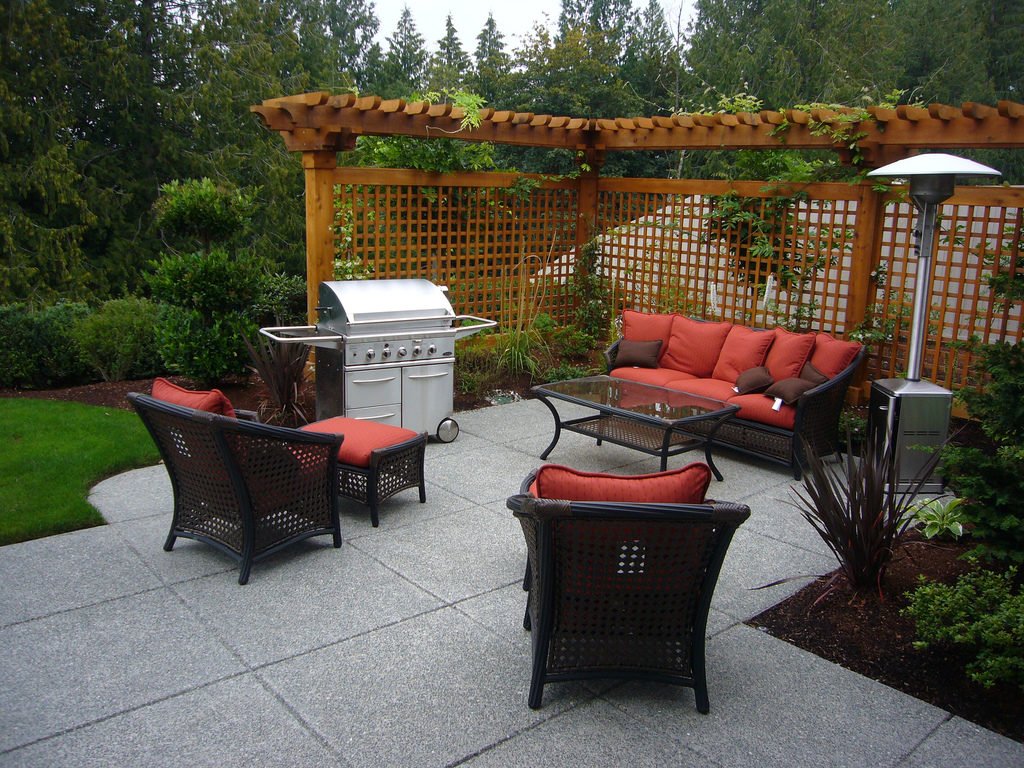
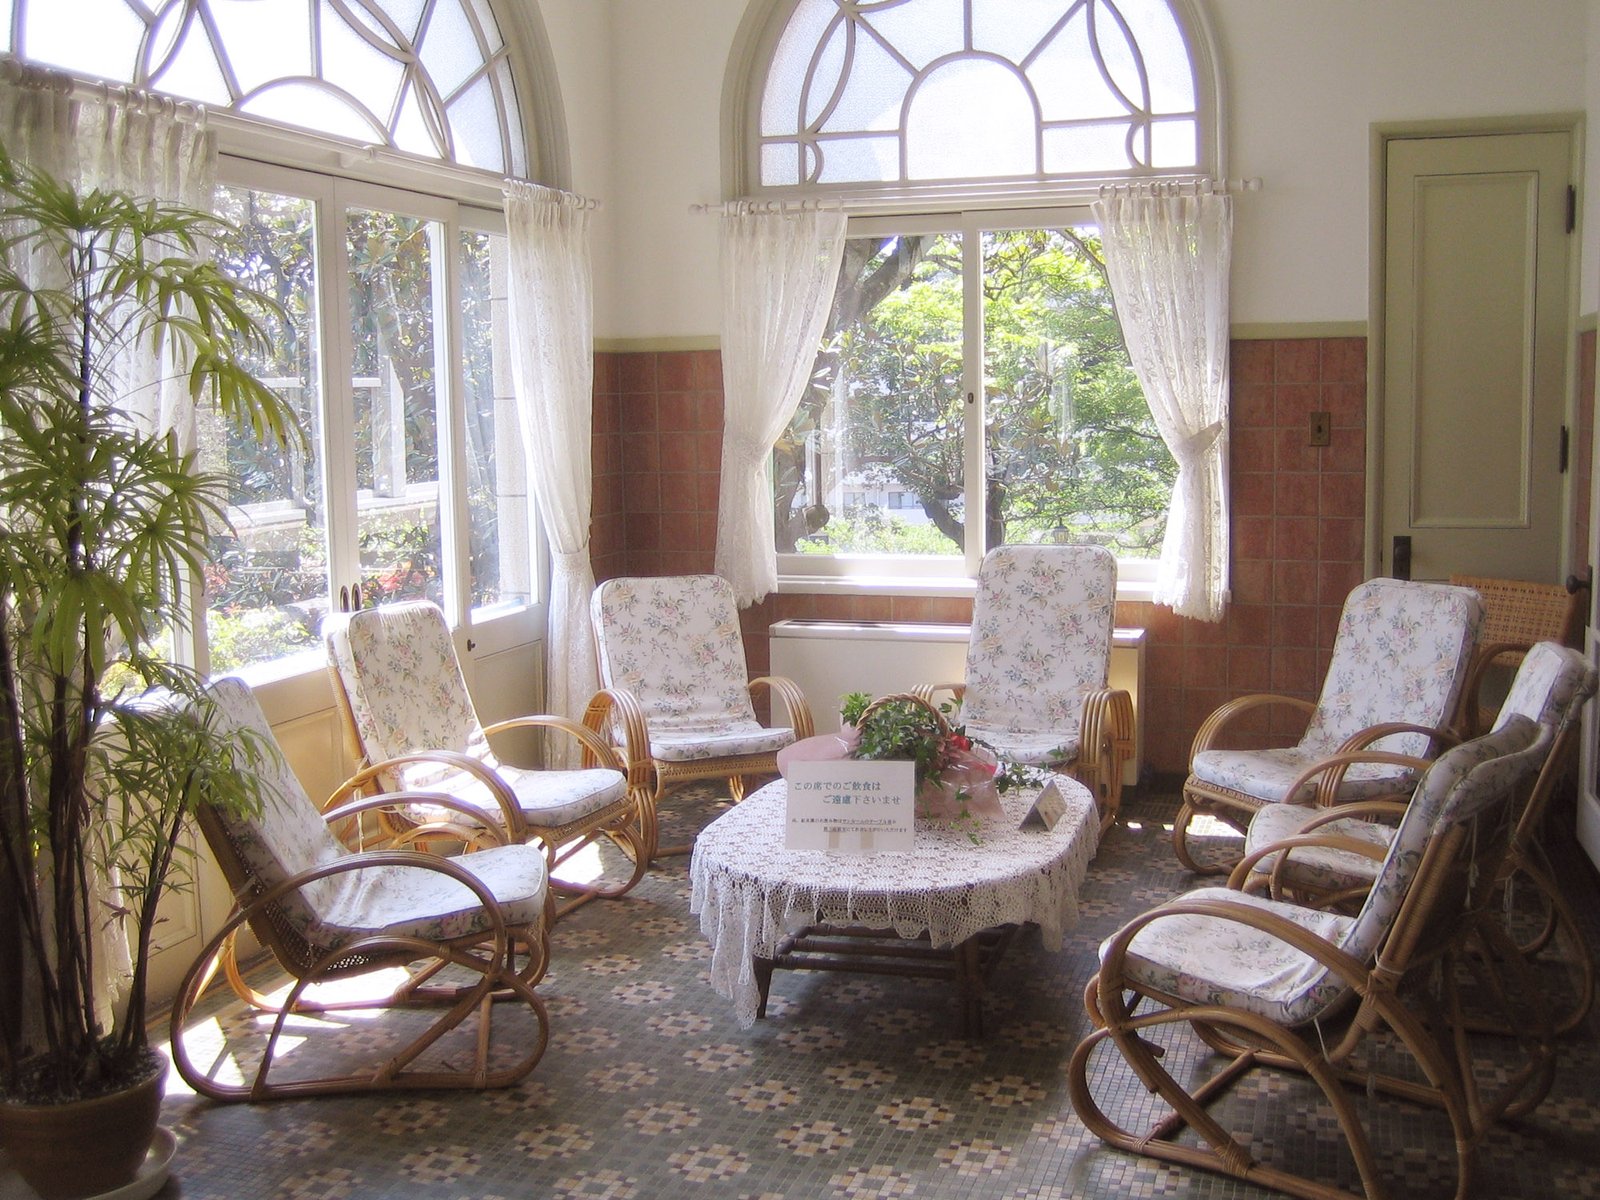
    Rattan Garden Sunroom Furniture Ideas

    Now for sunroom space, people wants to design and accommodate furniture made of rattan timber. This wood is sunlight proof and harms nothing to it except physical wear and tear. The old vintage furniture material is the best option to glorify your sunroom with its accent pieces. You can go online to get your hands on rattan garden furniture for your sunroom. The versatility in this furniture pieces is commendable as these items can easily combine with other decor ideas.

    3. Wicker Sunroom Furniture Ideas

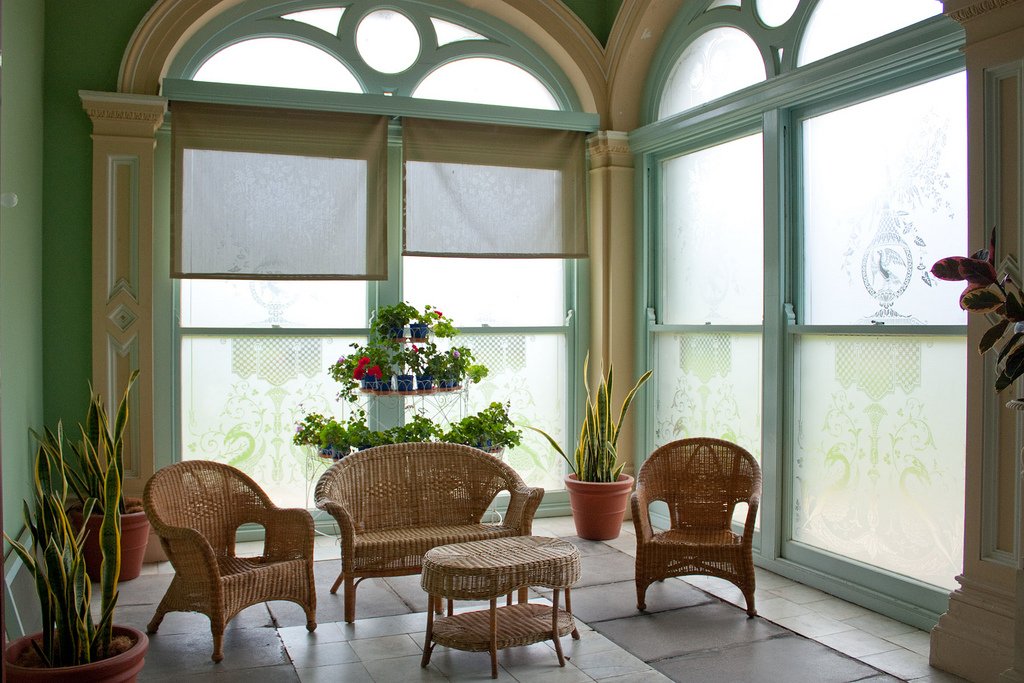
    Wicker wood furniture compliment sunrooms in all right ways. The wicker is itself anonymous to its existence. However, it is a processor design made by combining different furniture wood types like rattan, bamboo, cane and other such materials. These forms of wood are made wet so that it got easier to weave Wicker furniture designs.

    Wicker Sunroom Furniture Ideas

    These designs are versatile and can be placed in any space of your home. You can make your winters warmer and cozy by accommodating such plaited and woven wicker designed furniture in your sunroom. Reds, dark green and even dark rust shades cushions and seating on this furniture will bring more warm effect to your conservatory.

    Preppy wicker. You cannot turn out badly with an essential coordinating wicker furniture set (loveseat, rockers, and glass-beat foot stool) on the sun porch; the adornments can separate it. Give your furniture. Simplicity that all matters. Don’t overthink or over accessorize your sunroom. A beautiful and straightforward plan is all that is required, as in this to some degree nautical blue sunroom.

    4. Patio Sunroom Furniture Ideas

    Patio furniture does have an aluminum material in it which prevent it from rust. This furniture type usually conceptualized for an outdoor purpose, feasting, cocktail parties and get-togethers. We can make use of patio furniture for sunrooms due to its equal importance in a yard with a ceiling. This is most commonly used furniture type in different cafés restaurants, and other rooftop venues. Due to its high weather resistance capacity, it has a great price, and you have to go pocket full while buying patio table and chair for your sunroom.
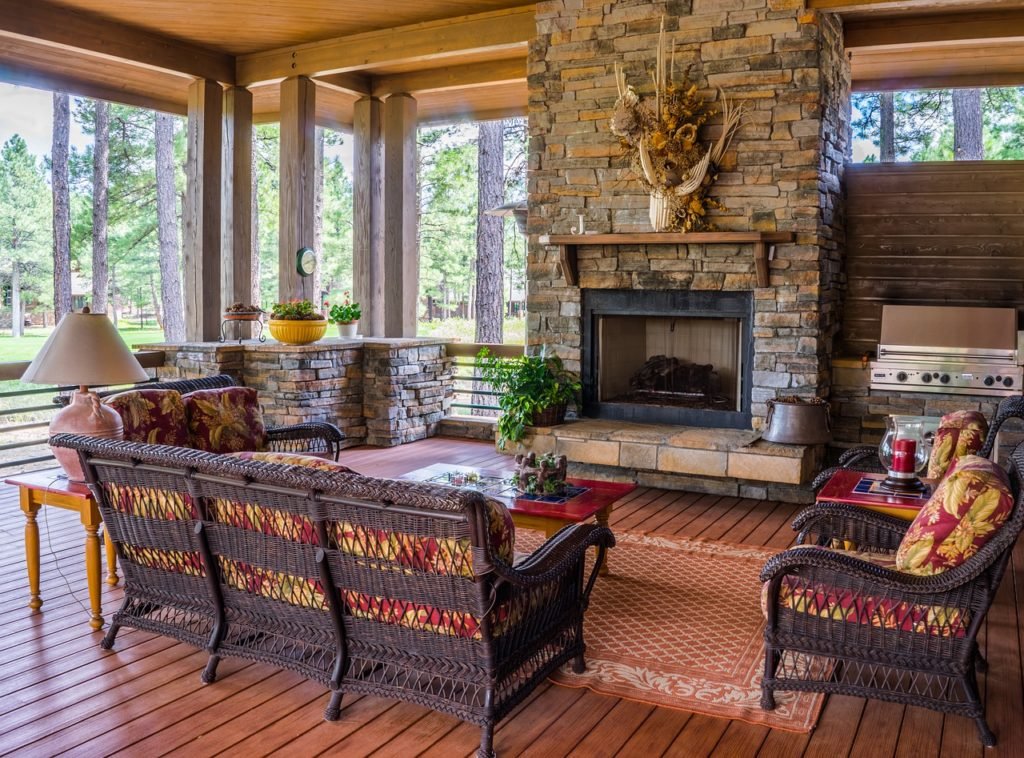
    Patio Sunroom Furniture Ideas

    Not every patio furniture is made up of similar materials; you can choose according to your preferences regarding material choice. It could be in wrought iron. Wood, wicker, rattan. Teak and other weather friendly material.

    5. Bamboo Sunroom Furniture Ideas

    Bamboo wood has always been our favorite wood material for casual furniture items. We used to see our grandMA weaving bamboo fruit baskets in our childhood. That creativity is lost somewhere, and now machines have taken over the human’s skillful hands. Bamboo is one of the most commonly used wood materials and has great importance.

    Bamboo Sunroom Furniture Ideas

    As simple sunrooms usually consist of simple yet rustic wood furniture and for that purpose, we suggest bamboo furniture for the sunroom is the best choice one can make. The original furniture of the seventies, produced using unmilled bamboo shoots and posts, is as yet accessible. Processed, sanded and completed bamboo furniture matches any hardwood furniture in sturdiness and magnificence.

    This furniture type can be placed in different areas of a home, for instance, from a porch to garden to even sunrooms. You can set two chairs centered with one coffee table wrapped in comfortable foams. If your sunroom is facing to the deep sea coast, bamboo furniture will work best in the shelter.

    How to get Cheap Sunroom Furniture

    High-quality accent pieces are not cheap and readily available at high prices. Going for cheap furniture for your home will result in not more than disappointment. It is better to spare some extra bucks which work best for you for a long time.

    One has different options to buy a cheap furniture. Custom made, or high quality refurbished furniture. Custom made is bargainable while refurbished ones are cheaper than ready-made in the stores. Make sure; you have the best vendor who has the best workshop of highly skilled craftsmen.
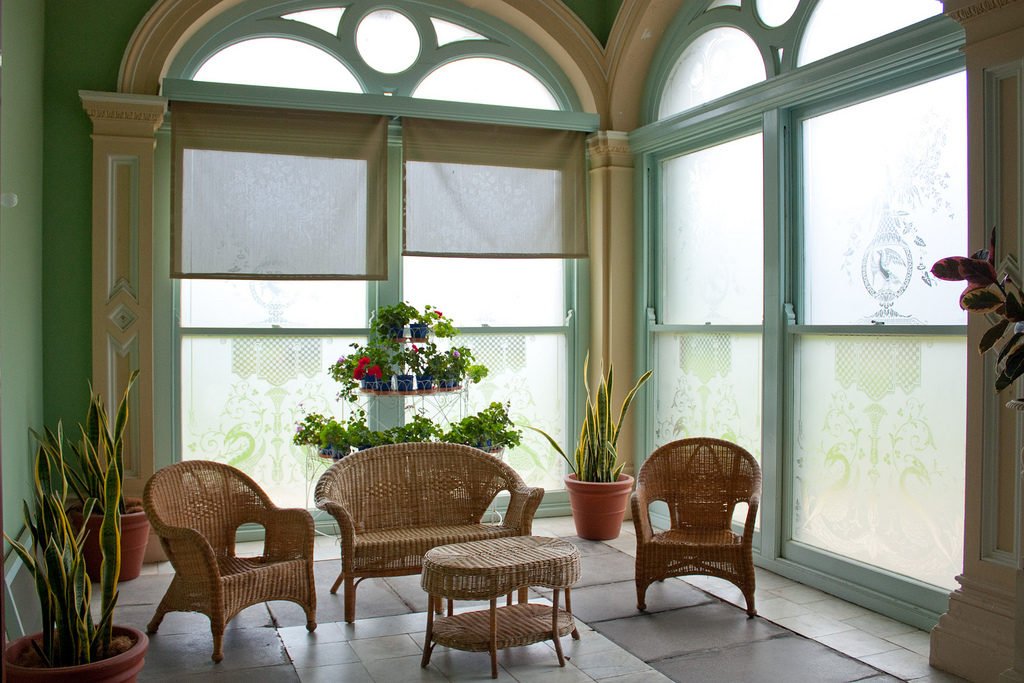
    How to get Cheap Sunroom Furniture

    It is hard to know where to draw the moral line in the current monetary atmosphere – would it be advisable for us to help stores to remain above water, or exploiting the massive investment funds to be made?

    Enormous retailers have been hit hard by few individuals moving home and are being compelled to offer tremendous value cuts. In any case, and also searching for customary rebates there are different approaches to outfit your home for less.

    Independent furniture stores

    It may be simpler to go to a High Street chain, and you may think they have the best arrangements to offer, independent furniture stores makes customized furniture on your demand and charge more. A similar exhortation applies to online shopping when it comes to its delivery charges. I would suggest that independent shops have their importance in carving a furniture of your choice and material. You can select a material by your own and instruct them to make accordingly.

    How to maintain the sunroom furniture for a long time

    Amid the mid-year months, your solarium’s furniture gets lots of usages. On the off chance that you live in a place that has a cool or wet atmosphere in the winter, you should ensure that your sunroom furniture is appropriately shielded from harm.
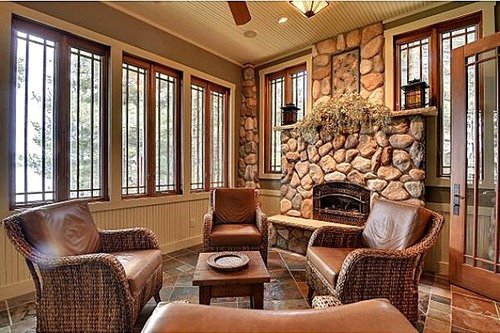
    How to maintain the sunroom furniture for a long time

    The days are short in winters which mean less sunlight exposure, and there’s a chill noticeable all around. Since you are not spending your time near hearth in the sunroom, it is better to set up your furniture for the winter months ahead. With open air living spaces turning out to be more well known than before, most people have not less than a couple of pieces that should be put away. Indeed, even furniture that is dealt with to be climate safe or is under a porch cover should be looked after and kept up. Furniture needs maintenance, and it may lose its worth.

     How to maintain your Sunroom Furniture for a long time- Prime Steps

    1. Clean it up

    If you want to store your furniture in the winters, you may apply these steps while preparing to store them. The most vital part of storing furniture for a season is to get it clean. Dampness and dirt left on the exposed things and can cause different harm or damage during the winter months. Mold can grow and spread rapidly, moving your furniture could be better when you are prepared to utilize it once more. Furniture items made up of wicker, iron, and plastic can be cleaned with a basic dish cleanser and water liquid.

    2. Cover your furniture with a cloth

    Furniture spreads/covers are incredible for extra assurance from damage, regardless of the possibility that you are putting away your furniture in a shed or carport. These covers come in an extensive variety of sizes and weights, contingent upon whether you will store things outside or under cover. We found a few choices to suit needs. You can go online to buy furniture covers from Amazon or even from your nearest furniture stores.

    Cover your furniture with a cloth

    The table and chair covers are a practical approach to cover your entire table set. Accessible in two unique sizes, it highlights versatile circles to secure it to the legs, and a flexible rope in the base sew.

    Sunroom Furniture Ideas- The Decorating Guide

    Get enlivened with smart design and lovely textures, furniture, and accents to change your sunroom into the most rustic space in your home. Here’s a guide to decorating sunroom furniture.

    Sunroom Furniture Ideas- The Decorating Guide

    1. Add entertainment elements

    If your sunroom is completely shielded from the components, then you can without much of a stretch incorporate indoor-just things, for example, lights, stereos, and TVs. Introducing the last two can help attract family and friends to more in the sunrooms at evening, permitting you to maximize sunroom hours. Here, a diverse blend of highly contrasting colors like black and white, red and white, blue and white and any vibrant colors for your summers would be the best choice.

    2. Adapt spare window as decorative wall space

    If your sunroom has more than one entrance door, one of which was seldom used. What it did not have a wall space by the arrangement of different elements. It could be anything from couch or piece of art. Here is an option, which you can utilize while being creative. You can place a sofa or couch at the front of the spare door to create more seating plan than usual.

    3. Use blinds if sunlight becomes disturbing

    There are various distinctive types for the sunroom. If your sunroom has more sun exposure, you may use blinds in that case. Blinds are available in different materials and textures, for instance, wooden, paper, plastic and fabric material. More bright tones can drop the real essence of a sunroom, you can go for light shades of blinds to just separate sunlight swiftly rather boldly. You can likewise fabricate it out of wood to make it feel warm and comfortable or, if you need to underline the perspectives, you can construct it out of glass. The rooftop can likewise be made of glass so you can admire and feel the natural process of sunlight dropping off from the sky and can enjoy the weather to its fullest.

    4. Decorate it with more natural affairs

    The sunroom is specially build to feel the natural beauty outside your home, in the backyard, porch, garden and even the exotic landscape if your residence is near seashore or even mountainous area. So, bring natural elements like plants, flower pots filled with marbles and stones to give the more natural look to your sunroom.

    5. Don’t exaggerate with the unnecessary furniture

    The sunroom is typically outfitted with agreeable, easy chairs, relax seats and couches. It is a space where you can engage visitors or unwind with the family. To underline the splendor of the room, you can paint the dividers while. Bay windows are likewise standard in sunrooms. Similarly, if you need to make a more grounded natural looking space, you can include plants and blooms.

    Too much lighting is not imperative in this room as you use it amid daytime and simple light assumes a vital part in the stylistic theme. The windows are extensive and let in much light. You can use a pendant light or divider mounted for a comfortable and agreeable environment.

    6. Boho-Chic Furniture

    Colorful vintage couches fit superbly in a boho theme sunroom. Indications of Rococo in scrollwork with wooden arms. Rich textures – think velvet and sateen – make a wonderfully beautiful canvas for the brushstrokes of other strong stylistic layout accents and frill.

    Where to buy the Best Sunroom Furniture

    The sunroom is regularly the entire most visited space in any home. Extensive windows and garden make sunrooms feel like open air withdraw while as yet giving the cover and warmth of indoor rooms. The sunrooms are associated more with the exterior view than some other room in your home. Think vigilantly about before buying the best sunroom furniture and other elements to enhance its décor and works best. Following are the tips before you go for sunroom furniture purchase.
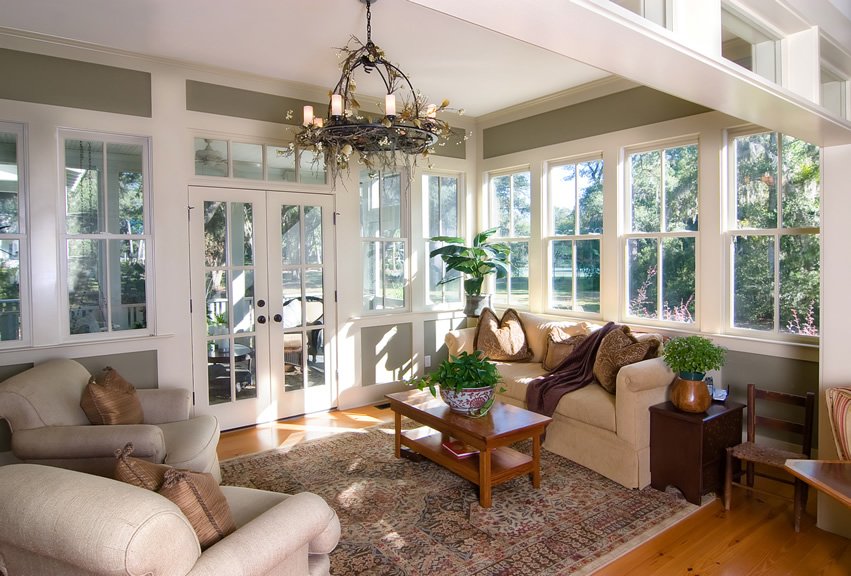
    Where to buy the Best Sunroom Furniture

    1. Seat Plan

    One of the most critical parts of a sunroom is the seating plan. Since you will likely need to spend many warm evenings and beautiful days in your sunroom, you will require warm yet cozy seating system. Sunrooms ordinarily include either wood furniture or created press seating. When choosing what’s ideal for you, consider the general look of the room and in addition the planned solace level. Wooden furniture with thick pads is hotter and more comfortable than metal. A wicker sectional couch with smooth, soft pads will function admirably as the design of a sunroom.

    2. Design and durability

    Although sunrooms are inside, they tie in nature and wonder at the outdoors. Choose a weather-resistant furniture and other components that bring both sun and nature into the room. Wicker plant pots can hold plants of your choice. You can put planters on side tables and on the floor alongside doors to give an intriguing impression as visitors go into the room.

    3. Coffee and center tables

    When selecting tables for your sunroom, consider its productivity as you will need it for many purposes. Pick a little table that can go about as a footstool for visitors to set down their drinks and even for books and newspapers. Tables with glass embed coordinate sunrooms well given encompassing glass windows.

    Where to find the Best Sunroom Furniture

    Now the question is where to get high quality and durable sunroom furniture for your home. Make sure you deal with a reliable vendor who can provide you with a high-quality furniture so that you do not need to make amendments so often. Now we can see that online retailers are dealing with the high-end furniture manufacturers all around the globe, though one may find them in local stores. You can simply google it, and you will the see the drop down of local store list of sunroom furniture and can pick of your choice.

    1. Lounging and Sunroom Furniture by IKEA

    One of the true and accent pieces you can get for your sunroom on IKEA. This brand is leading with its name since decades and proved its identity in the world of interior and furniture. The durability worth more than name and which we can experience with IKEA and other famous furniture providers.

    Give your outdoor and indoor the best experience with IKEA’s relaxing and unwinding furniture. You can explore heaps of styles and sorts, from sun loungers to rockers, and you can even make your particular mix with their couch variety. Browse upkeep free simulated materials or the natural warmth of wood, which requires a little care from time to time.

    The price range varies from $200 to $600 for seating plan for your sunroom and other rooms of your home. If you are looking to upgrade your sunroom with rustic furniture pieces, you can go online or physically to their outlets.

    2. Jcpenny Sunroom Furniture/curtains

    This is one of the famous names in furniture producers in the world. For the best sophisticated sunroom, invest in quality furniture. We believe that curtains and blinds can roll out for the greatest improvement in a room along with wall paint. They are immensely valuable to a noteworthy makeover and can add sophistication, accent look, softness, and even a punch of shading.

    Jcpenny specializes in window treatments, home decor, clothing, bedding, and appliances. Approach your nearest outlet and shop in its home improvement section to get your hands on the immaculate furniture for your sunroom. Price range varies from furniture styles and design.

    Online stores for shopping Sunroom Furniture

    1. Lowe’s store

    This online store is impeccably made its name in the online sale of furniture items all over the US. The prominence of its quality product and timely delivery made it most visited online furniture site in the US.

    2. Sears

    A place where you can fulfill your desire of buying anything you want. SEARS also specialized in patio and sunroom furniture and other necessary interior items for your home. You can make an online purchase right over this website and can receive your masterpiece at your doorstep in the US.

    3. Amazon

    The giant of online shopping Amazon has a same variety and range from patio and sunroom furniture. We know that Amazon is the most reliable and certified online store and we can blindly trust the product delivery of a high quality yet in a time restriction.

    4. Kmart

    Kmart has a variety of home improvement products for your home. Whether you are visiting the United States, or know someone here, you can do your online shopping here. From sunroom furniture to the toys, you can find all under one roof.

    5. Walmart

    Walmart is known for its best deals for its consumers. ‘Save big and live better’ is the slogan of this giant online retailer. You can grab sunroom furniture from a potential vendor on Walmart and can receive at your doorstep in the US.

    Things to know about Sunrooms

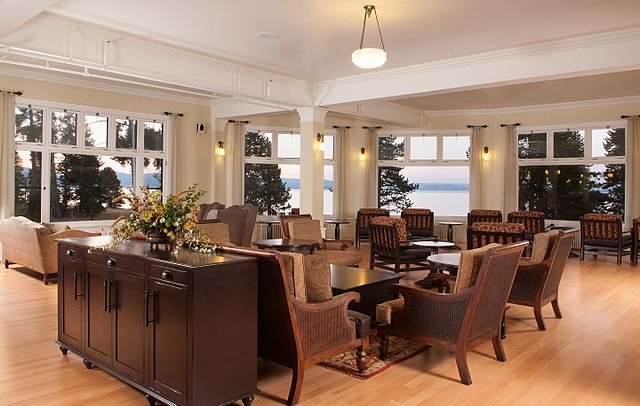
    Today, sunrooms are of high need in both newly built and sea view resorts in the different region. They grasp particular styles and may incorporate French door that open to a deck or yard, and vinyl, wood, block or aluminum around windows that, in many designs and shapes, traverse floor to roof.
    Things to know about Sunrooms

    Usually, sunrooms formally called solariums or studios, and have glass ceiling nowadays. Today, sunrooms are being used all year round with its heating and cool resistant interior décor. Now, the sunrooms are designed in a way that one can use it any time of the year. Technology has played a significant role in the transformation of simple sunroom into the accent one.

    They are the interior of a sunroom can be as sumptuous or minimal as per your choice. Components, for example, draperies or sheers and chimneys — either wood-burning, gas or electric models — can be used. Crystal fixtures, modern ceiling fans, and printed texture walls can enhance the entire appearance of your sunroom.

  • Easy Canvas Painting Ideas for Beginners Step By Step- The Noob’s Guide

    If you really want to devote your time for canvas painting, so believe me, it’s among the best and beautiful branches of painting. First of all, you need to set a particular and specific aim, whether it’s a professional intention or you want to do it for the purpose of house decoration. Experience is the basic thing required for canvas painting as well as concept’s visualization should also be in your mind. You need to have some experience in painting before taking on to canvas painting if you are a beginner. And if you have enough experience and skill of many years regarding canvas painting then go for it. We are going to share very simple and easy canvas painting ideas for beginners step by step.

    Easy canvas painting ideas for beginners

    One of an excellent opportunity for artists or the painters is a blank canvas. But it will be the reason of great stress for you if you are a real painter. It’s really tough and hard to know from where to start even though if you have a framework or rough idea related to painting. Thus to get the right track in canvas painting, you require going through some useful and valuable tips. Above all, the main thing is that you have at least some idea about canvas.

    Canvas is used for a lot of purposes as it is a woven fabric such as for marquees backpacks are prepared. We should also have a great deal of knowledge about the use of painting, especially in painting arena. A wooden frame is normally used to sketch the canvas to paint. It basically offers a great platform for different and dissimilar painting forms such as oil or acrylic painting.

    So following are some important tips and ideas related to canvas painting that will help all the painters in the future.
    Firstly, you should know about the preparation of the canvas as it will cost a lot if it is bought from the market. An extremely high-cost rate canvas is accessible in the market named as a pre-stretched canvas. A regular painter can make it easily at home. You just need to know the exact method to make it as making a canvas is very tough.

    The use of tonal background color will be the next step in making a canvas. At many times canvas’s white background might not be valuable, useful as well as moody so does something different by choosing different and unique background colors. A relevant idea should be selected that will be according to the subject of your painting.

    Easy canvas painting ideas for beginners

    After this, the perfect painting brushes will be selected for the painting. Actually, you need to select the accurate and exact painting brushes that are required for the specific and the particular painting technique. You should have mastered skills related to the selection of brushes when you are going to start the canvas painting. And if you don’t have enough knowledge about the brushes so master the brushes as quickly as feasible as it is one of the major skill requires for canvas painting, in fact, any kind of painting.

    You also need to select the colors properly as color theory’s knowledge is extremely vital and crucial. And all this color knowledge will help you to give knowledge about hue, color temperature, and intensity. One of the important points that you need to remember is that whenever you are working on oil painting, you need to remember that its color remains similar as it will dry, but color will be a minute darker as it dries up when you are working on an acrylic painting. Therefore, mixing of color will need to be adjusted by that. Before putting it on the paint, the painter should need to test or examine the color. In reality painting, a canvas is just like playing with a medium.

    Easy canvas painting ideas for beginners

    Cool effects can be created by adding the medium to oil painting or acrylic painting. For canvas painting, the painter can select among different forms. But the most important thing is that different techniques are associated with each form that a painter must learn first. Oil painting has a different technique while acrylic painting has a different technique, you cannot use the same technique for both oil painting and acrylic painting. Thus, you also need to learn about different techniques for different forms thoroughly. Therefore, at the end to dry your canvas rapidly, you must need to have a proper channel or passage. You need to place it in an area with sufficient air and light.

    Easy CANVAS PAINTING IDEAS FOR BEGINNERS STEP BY STEP- An Example


    •STUDY THE WAY TO PAINT SUNFLOWERS EFFORTLESSLY BY CANVAS PAINTING

    First of all, you need to assemble basic instruments and important materials that include a set of flat brushes, a white canvas, a glass or plastic cup for water as well as for acrylic paint- you are going to use basic yellow black and maroon.

    STAGE 1

    In the first stage center of the sunflower will be drawn and the center will be of ellipse shape. Acrylic tones of your desire will be selected. You may use the mixture of maroon and black by mixing them. To color the flower’s center, you may use a large bushy brush.

    STAGE 2

    The exact contour set will not be respected when you are filling the ellipse. Before the paint applies, you will witness that tones are not entirely mixed.

    STAGE 3

    Now in this stage petals of the sunflower will be added. Distinct petals will be created by using bright yellow tone and for this flat side of the paint brush will be used, and sides of the paint brush will be used for petal tips.

    STAGE 4

    Now petal’s first layer is almost ready. Gold or ocher petal’s additional layer will preferably add to include the depth in the design of sunflower.

    PHASE 5

    The flower’s center will be cleaned when petal’s second layer will be added, and this will define the painter’s end creation.
    Following are some of the easy canvas painting ideas that have been composed for the beginner’s inspiration and motivation.

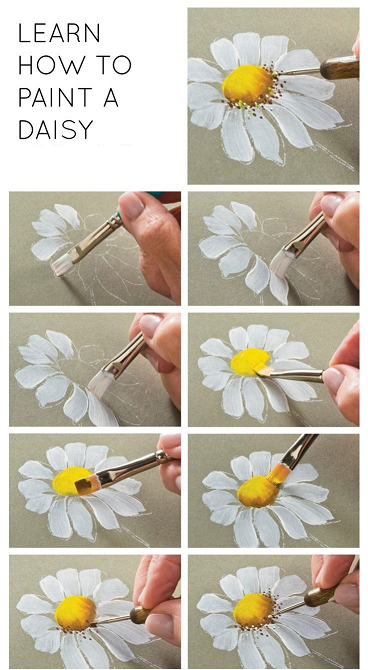
    1. How to make a simple flower

    Learn how to make a simple flower

    2. Learn about how to mix up tones as well as how to make transitions

    Learn about how to mix up tones as well as how to make transitions

  • How to Clean Old Wood Furniture- The Right Ways

    The air in your home is full of pollutants, such as smoke from cigarettes, cigars, and pipes; grease from the kitchen; and dust. Homeowners often show negligence while repairing and cleaning home stuff when they rent out their homes. It is the duty of the owners to keep the installed furniture, sanitary and electricity issues well maintained regularly. It does not mean that tenant is free from any responsibility and care. However, regular maintenance is must to prevent any harm and damage to the furniture and other important things in a home. Here are the rights ways for how to clean old wood furniture at home easily.

    If you are living as a tenant, it is also your duty to keep house damage free and show courteous approach to the homeowner. You are an employee, and you have to accept the commands of your employer.

    Cleaning furniture requires lots of time, or you can split the cleaning process of few days processes. Make a work plan and give each room one day for cleaning.

    Now how to get the hold on professional cleaning of old wood furniture at home. You should arrange a proper cleaning toolbox finely equipped with wiping tools.

    This tool arsenal must have followed things:

    • Two ragged pieces
    • Dishwashing liquid
    • Detergent soap
    • One near duster or spare wall paint brush
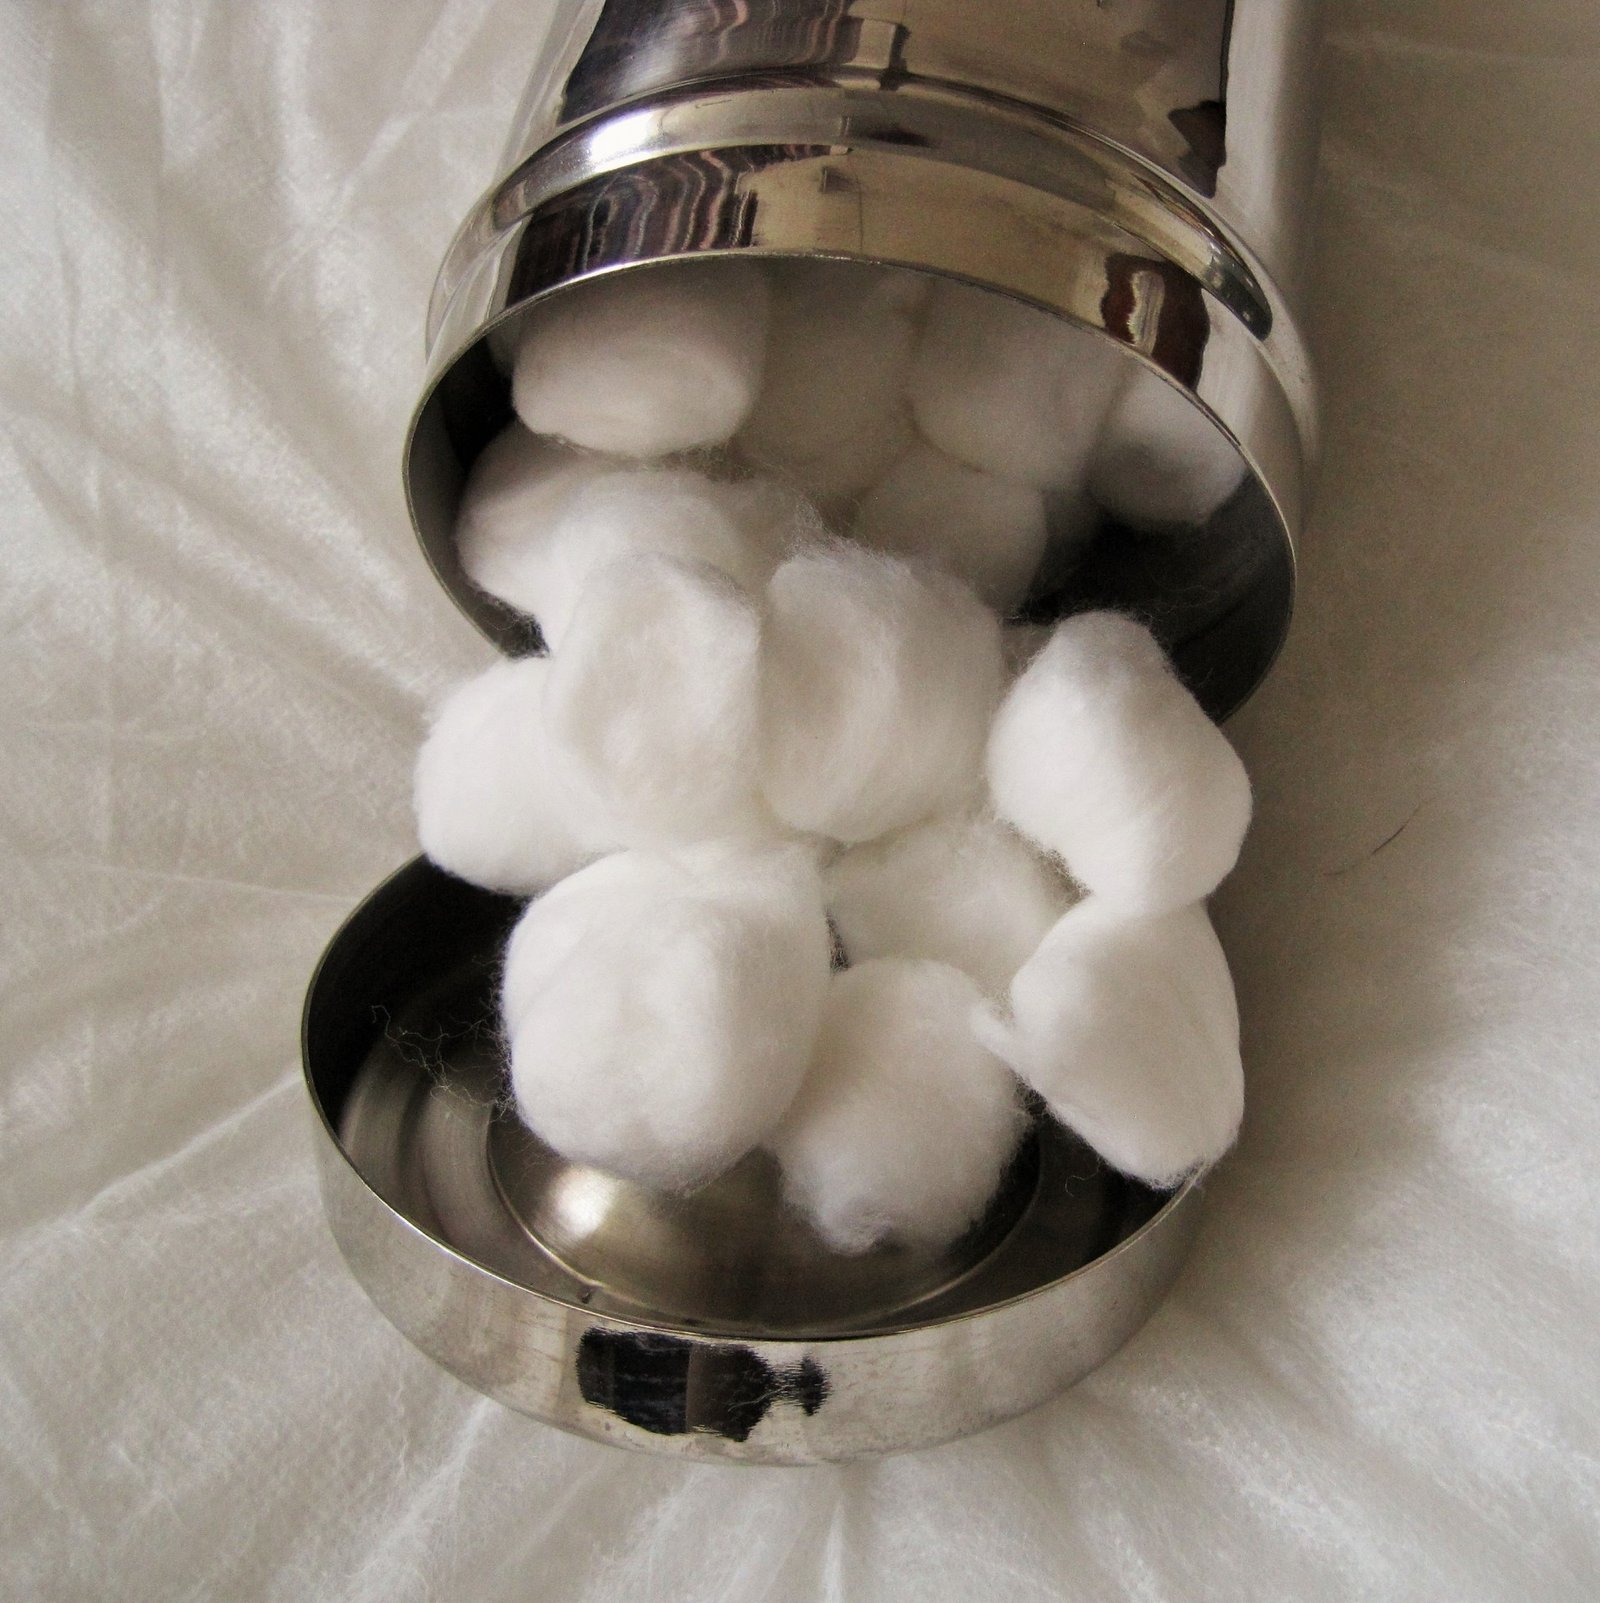
    • Cotton balls
    • Wood Polisher
    • Commercial wood cleaner (If available/ optional)

    The Right Ways for How to Clean Old Wood Furniture like a Pro

    Duster/ Spare Wall Painting Brush

    Duster/ Spare Wall Painting Brush

    We usually show negligence while dusting other areas of a home and leaving wooden furniture. It sounds a bit rude, and we let them stay without brushing off the dirt on them. So, if you want to start cleaning an old furniture in your home, start with a duster. It could be an extra piece of soft cloth or a wall paintbrush (never used for paint before).

    Brush off the dirt and make sure you didn’t leave any part of it without dusting. Make it dust free that following procedures will get easier.

    Dilute Soap Liquid in Water

    Dilute Soap Liquid in Water

    These ingredients are almost easily available in every home, and one can use it with stressing out. You can take a liquid soap/detergent/dishwashing liquid and mix it well in the water, so it makes a soapy fluid.

    Take one broken piece of soft cloth moisture it in a liquid, squeezed it and swiftly rub to clean the furniture. Make sure you don’t scrub harshly, this will harm or even damage the originality of your old wooden furniture. Reach every single corner and part so that no place remains free of liquid.

    Cotton Balls for complex parts of your Furniture

    Cotton Balls for complex parts of your Furniture

    Cotton balls will reach those parts of your furniture where hand barely to approach. Lightly moisture a cotton ball in the soapy liquid and clean the complex parts of your furniture.

    Wipe off with a Clearwater

    Once you finished cleaning with detergent liquid, wipe off with clean rag cloth moisture in clear water. You don’t need to overflow water on your furniture, so it leaves stains of water after drying.

    Wood polish to give your Furniture a New Life

    Wood polish to give your Furniture a New Life

    If you are struggling in cleaning your old wooden furniture and still it doesn’t provide any change, make a use of wood polisher. Carefully, read and application directions before you seal of the bottle. Build courage to do the process and do that according to the provided instructions.

    Wood polish will bring a new life to your old furniture with an entirely new shine. High-quality wood never loses its worth no matter how old it got.

    Trisodium Phosphate solution (optional)

    Trisodium phosphate (TSP) is a well-responding wood cleaner, usually used by the painters to clean mold and amassed dirt from the exterior walls. It can be utilized on exceptionally filthy furniture. However I would suggest it just on painted, enameled, or varnished pieces; and not on polishes, shellac, or veneer wraps up. This chemical can provide profound results of the old rusted furniture laying in the store room for years.

    Step 1: Preparing the Mixture

    Make a blend of two tablespoons of TSP and one quart of warm water.

    Step 2: Applying the Mixture

    Since it is an effective concoction, you should wear rubber gloves and eye protection specs when preparing this chemical solution. You don’t need a compound smolders, and regardless of how cautious you might be, any fluid can sprinkle or splatter.

    Prevention is Better than Cure

    Environment/Climate

    UV or bright light is harming to old fashioned furniture. Daylight can corrupt original finish of the wood. Antique furniture ought to be set out in direct daylight, and draperies or curtains should be used to block direct sunlight. Furniture may turn opaque or gets to fade with direct exposure to sunlight.

    Abstain from setting your antique furniture before warming and cooling vents, radiators, chimneys or stoves. The heat can shrink the wood spaces, polishes, trims, and marquetry.

    Your antique furniture is additionally influenced by the measure of dampness noticeable all around. Changes in relative moistness can make wood to expand and contract. The expansion and compression can affect the movability of the drawers and doors to drag or get to be distinctly stuck in their opening.

    Along humid season can cause mold growth, decay, and even insect infestation. The utilization of a humidifier or dehumidifier is prescribed to help keep up the relative moistness and limit the unfavorable impacts that dampness can have on your wooden old fashioned furniture.

    Pest’s Habitat

    Longed untouched wooden material, clothes, leather and other items can welcome insects or pests to reside. Old wood furniture needs to be checked regularly to prevent any damage by the pests. Creepy crawlies, for example, beetles or termites eat their way along the grains of wood until they live.

    Keep an eye on your wooden furniture and keep it safe by preventing from the smooth passage of the pests and other chronic harm.

  • Best Ways to Clean Old Wood Furniture- Five Simple Ways

    Grandma’s furniture in a home and you certainly don’t want to push it off even if it is old-fashioned. Disposing of is not a remedy to get rid of this antique beautiful wooden pieces in your home. Old wood is like an old vine, the more it gets old more it becomes precious. Here are five best ways to clean old wood furniture.

    We do not want you to throw away your precious wooden pieces due to its dust and dirt cleaning factor. Now you can make your furniture dust free from simply these easy-to-do steps in your home without calling a professional or even not by using some chemical cleansers.

    Here are the best ways to clean old wood furniture to bring back their shine and lost charm.

    Five Best Ways to Clean Old Wood Furniture

    Spare wall paint brush

    While starting this operation, you must need an extra thick hair wall paint brush to remove dust from your wooden furniture. It could be your wooden cupboard, chairs, bed, dressing table or any wooden material that you want to clean after so many days or even months.

    Take a spare wall paint dry brush and start brushing the dust stuck on the cupboard since long. Go to every inch and corner of the cupboard to make sure that you will not find dirt particle living inside.

    Mild and soft cleanser

    This cleanser is required to remove stubborn dirt on your furniture. Go for a mild cleanser as harsh chemical formulas may bring harm to your precious wooden furniture. Active chemical methods can fade the color and even scratches off the wood polish. Do consult with the expert first before buying a mild cleanser.
    The best way to go with is using a hand wash or dishwashing soap diluted in the water. It makes a slight texture and won’t harm your furniture.

    Dip any soft cloth in the diluted solution and squeezed it off then swiftly rub the surface of the furniture. Avoid scrubbing as it may cause harm. Move that piece of cloth in the direction of wood grains.

    Toothbrush or hair color brush

    If your wooden furniture got some creative yet intricate designs and its hard for your hand to reach there? Make a use of a spare toothbrush or even a hair dying brush with a small face can work. The ultimate advantage of using such brushes is that it would reach out those areas where your hand is unable to enter.

    Dip a toothbrush in your cleaning solution. Following the grain, scrub down hard-to-reach areas until dirt and grime are gone.

    Pat it down with a dry piece of cloth:

    Once you are finished with cleaning, pat or wipe off it with a soft slightly moistened rag cloth. Remember, do not rub or scrub harshly to lose its excellent finishing and original worth.

    Use a wood polish

    If you think that your furniture is fading and losing its polish, make sure you bring in the wood polish stuff. Doing this activity may require training and tactics to adopt while performing this as polishing is not a piece of cake for those who never use it before.

    Carefully read the terms and application directions written on wood polish pack. Once you clear with the directions, try little on any spare wood twice to perform this activity like an expert, not a beginner.

    Preventing the Damages

    Preventing the Damages

    In the wake of repairing your wooden stylish old furniture, it is essential to counteract future scratches and harm to keep up its significance. Accordingly, wood furniture needs cleaning regularly or at least twice or thrice a week if dust factor is minimum in your area. Build up free expandable soft cloths are essential to your cleaning toolbox. These fabrics will expel tidy without sending it airborne. Glue or fluid wax made particularly for wood will include a harder complete than run of the mill furniture shower and finish, and your Natural Oil Soap will set up your furniture for wax application.

    Cleaning a wood complete may incorporate finishing, patching and touching up surface scratches with a specific end goal to give an old bit of wood furniture a new life in your home.

    Be vigilant when cleaning, and screen the Wood Furniture as you go. As you clean scratches, some more profound chips and gouges will seem to tell you precisely what you will require revamping your wooden items. Never use too watery elements as these may cause harm.

    Use Tips for Furniture Care

    • Abstain from setting wooden furniture opposite to window or direct daylight.
    • Abstain from setting collectibles close aerating and cooling and warming vents.
    • Try not to put your antique furniture close to chimneys and stoves.
    • Blotch up spills promptly.
    • Tidy regular use of a build up free material.
    Never use wood polish so frequent as stripping and revamp discharged the original finish of your wood and harms the patina also. Once expelled, it can never be recuperated. Examples of wear showing the historical backdrop of utilization are likewise lost amid revamping.

    This fact should never be ignored that old-fashioned furniture has noteworthy financial, imaginative or original worth. The idea that expelling the complete from any old-fashioned or collectible household item damage the worth is just overstated by the simple interpretation of the remarks, for example, this seen on public television shows.

    You need to look for an expert suggestion before performing this activity on your own at home. As old wooden pieces are precious and made from the finest wood. As usual, it is best to fail for alert while considering performing this operation on your wooden pieces or repairs to your old fashioned furniture.

  • How to Unclog a Toilet without a Snake- 5 Easy Ways

    This is a very embarrassing situation when you arrange a meeting, a party or family get to gather, and your toilet gets clogged. So it is necessary to know how to unclog a toilet without a snake. It is an awful feeling when you and your guest face this frustrating situation. Immediately some questions click into your mind such as:

    • How can I unclog toilet within a short time?
    • Is my toilet flush is not working properly?
    • Do I frequently check pipeline of my toilet?

    So, it is time not to think and worry. Let’s start working on it and follow the mentioned below methods that you can use to unclog a toilet without a Snake.

    Reasons of Toilet Clogs

    The soap, hairs, detergents and other stuff flows down your toilet and over the time accumulate in the inner walls of the pipes and thus creates the clog. A clogged toilet is irritating and frustrating. Regular monitoring of the toilet is essential. You should watch carefully what you are flushing and pour hot water on a regular basis is also beneficial and may prevent future clogs.

    There are several ways of removing the blockage from the toilet. Using the Plumber’s Snake is the fastest method, but not everyone has Snakes to deal with clogged toilet. Snake is a dangerous tool as well as it can damage the pipes. Further operating the Snake effectively is not possible for everyone.

    There are other ways to unclog the toilet by using the household items. These methods would be cheaper and easy, but they will also be time-consuming.

    How to Unclog a Toilet Without a Snake

    Following are five easiest and efficient solutions for how to unclog a toilet without a snake.

    Method 1

    Hot Water Trick

    Heat the water on the stove before the water comes to a complete boil, take it off the stove. Then pour it into the toilet bowl. However, this method will be successful for minor clogs only. Moreover, here the main thing is to pour the water quickly but not so fast that you splash yourself.
    If this method does not work, then you should try another one.

    Method 2

    Baking Soda and Vinegar

    Baking Soda has cleaning power which gently wears away strains. When it mixes with vinegar, it produces carbonic acid that boosts the corrosive action of vinegar. This method is also easy. First, gather the ingredients that are required for this process which is Baking Soda and Vinegar.

    Process

    Scoop 1 cup of Baking Soda in the toilet bowl and then very slowly add 2 cups of Vinegar. Allow the mixture to sit for a while and then flush your toilet with hot water. Distilled white vinegar is commonly used, but any vinegar will work.

    Method 3

    Using Dish Soap And Boiled Water

    If you do not want to involve in a messy work, then you should use this method. Dish soap is easily available in our homes, restaurants even in offices. It is the cheapest way to unclog your toilet.

    Process

    First, take a bucket of hot water and some dish soap. Dish soap may help to loosen the clog Squirt a bunch of dish soap in the toilet bowl then add a bucket of warm water. Wait for almost 30 – 40 minutes. If the water in the toilet is slowly going down, then you are successful otherwise repeat the process over again, but remember this method will not work for hard obstruction, such as toys.

    Method 4

    Unclogged Toilet by using Chemicals

    There are several ways to unclog a toilet faster but using chemicals for unclogging is top of them. Chemicals are readily available in our homes and can be managed easily.

    Step 1

    Go to the grocery or hardware store to buy a bottle of drain cleaner. In the markets, chemicals are available that help you out to unclog a toilet.

    Step 2

    Gently pour the bottle of chemical and wait for some minutes. Keep safe yourself and your children and also keep away children from the toilet.

    Step 3

    After waiting for some time, check whether your toilet is functioning properly. If it does not then you will have to wait a little longer. The toilet should drain once the clog is cleared.

    Method 5

    Using Wire Hanger

    You can make your own Auger out of wire hanger and use that to remove the blockage.

    Process

    First, unbend the wire hanger leaving a hook at the end. Wear the rubber gloves and insert the hanger into the drain opening in the bottom of the toilet bowl carefully.

    When you encounter the blockage, you can either dislodge the blockage or pull out the blockage with the hook at the end of the hanger.

    Once the clog is cleared flush the toilet properly, Repeat the process if necessary.

    Now you know how to unclog a toilet without a snake. Hopefully, this valuable information may save you from any future embarrassing situations. However, if none of the above methods work it is definitely the time to call a professional Plumber.

  • How to Unclog a Toilet with Dish Soap

    Dealing with a clogged toilet can be very irritating and frustrating. Typically people are using the Plunger to avoid the problem. It can be a bit expensive and can out of the budget sometimes. Dish soap is under budget and is the easiest way of unclogging the toilet. Always use the simplest way to unclog the toilets. Let’s take a look on how to unclog a toilet with dish soap.

    There are several reasons of a clogged toilet. We should need to find out the cause together with the solutions of the plugged toilet.

    DISH SOAP

    Dish soap is easily available in our homes, hospitals, and restaurants even in offices. Most of the people do not think that dish soap can unclog the toilet bowl. If you do not have a plunger handy, then dish soap can help you to unclog a toilet. Now, the question is how to unclog a toilet with dish soap and with no plunger?

    How to Unclog a Toilet with Dish Soap

    What to use An Auger or Dish Soap?

    An auger is not the easiest item to unclog the dirty toilet. Plunger and auger both are dangerous tools.

    Unclog a toilet from dish soap and hot boiled water is the easiest way of unclogging. Plumbing Snake should be avoided as it can cause damage to the pipes. Further, the metal of the plumbing snake can leave scratches in the porcelain of your toilet bowl.

    Describing below the most common causes of clogging together with its practical solutions;

    Causes of Clogged Toilet

    1. Overflowing of Waste Water

    Average 40% of home water consumed in the toilet. Using of extra water (Flushing) can be a reason of clogged toilet. We can save water by proper using of water in the toilet and as a result, can save ourselves from a big hassle of a clogged toilet.

    2. Toilet Papers Overload

    Sometimes toilet gets clogged because toilet papers are not properly flushed. Sometimes a simple flush dislodges the toilet paper immediately as the toilet paper becomes soft. Proper flushing after waste and using of toilet papers can control the clogging of the toilet.

    3. Clogged Drain Lines

    Dirty drain lines can be a cause of clogged toilet bowl. Drain lines should be checked on a regular basis from professional to avoid trouble in the future.

    4. Children Toys

    Keep children away from a toilet to avoid any hassle created by them. When children are alone in the toilet, they start playing and can flush their toys in the toilet bowl. Always keep an eye on the children when they are using the toilet.

    How to Unclog a Toilet with Dish Soap Quickly

    Unclogging of Toilet with Dish Soap

    If you have tried everything to unclog your toilet bowl, then you should give this method a chance to save yourself from an unwanted headache. Dish soap is commonly used to clean our pots and other household items. The dish soap can help out to remove toilet clogs easily and in less time. Below are the step by step ways and guidelines on how to unclog a toilet with dish soap.

    Things you will need :

    •Dish soap such as Palmolive or Dawn
    •Some boiling water
    •A Plunger

    Directions:

    Step 1:

    Dish Soap:

    Arrange liquid dish soap and pour ¼ cup of it into the toilet bowl. Before moving to the next level, wait 30-40 minutes till the liquid dish soap sits in the bowl.

    Step 2:

    Pour Boiled Water:

    After waiting for 30-40 minutes when the liquid soap has been in the toilet, take the jar/pot of hot water and pour it into the toilet bowl with a little bit of force. You have to work very carefully when pouring the hot water. Once the hot water has been added, you may not have to do anything else. Sometimes the clog clears up right away.

    Step 3:

    Using a Plunger:

    If the toilet is still clogged, then use a plunger and plunge few times. The clog should vanish, and your toilet should just work fine. Repeat the process once again with the liquid dish soap and hot water if the clog remains.

    If the water level remains the same in the toilet bowl, then call a Plumber to resolve the problem.

    Tips to Prevent Toilet Clog

    •Flushing the toilet twice will reduce the chances of creating a clog.
    •Watch carefully what you are flushing to avoid clogging problems.
    •If you have many clogs and your toilet is backing up, then there could be problems in sewer line then don’t wait to call a Plumber.