Category: Kitchen

  • Kitchen Island Pendant Lighting: Complete Guide to Size, Spacing, and Design

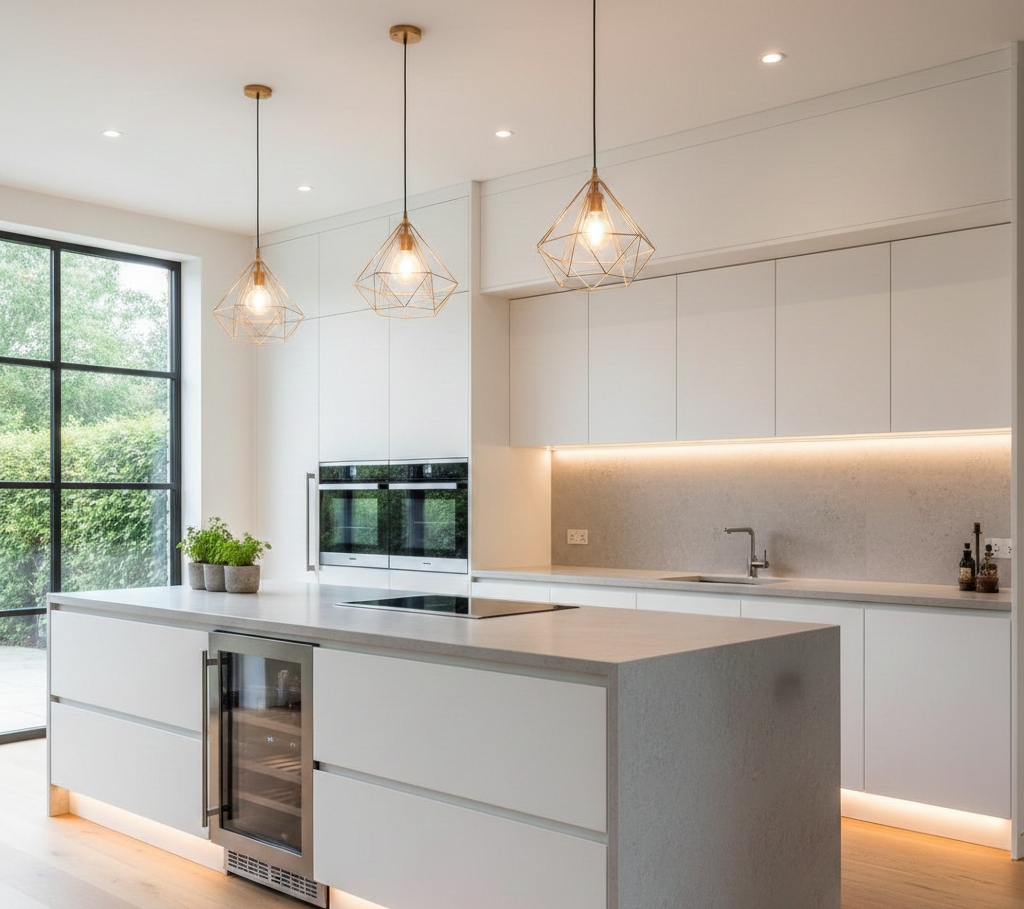
    Kitchen island pendant lighting provides focused task lighting while enhancing the visual appeal of your kitchen. The ideal setup depends on island size, pendant size, spacing (24–36 inches), height (30–36 inches above the surface), and balanced brightness to avoid shadows and glare.

    Pendant lighting is one of the most impactful design and functional elements in a kitchen. It influences visibility, ambiance, and overall usability of the island space. A well-planned lighting system ensures proper illumination for cooking, dining, and social interaction without creating visual discomfort or uneven lighting.

    What Is Kitchen Island Pendant Lighting and Why Is It Important?

    Kitchen island pendant lighting refers to suspended light fixtures installed above the island to provide direct illumination and design enhancement. These lights act as both task lighting and decorative focal points.

    They are important because they define the usability of the island. Without proper lighting, even a well-designed island becomes inefficient for tasks like chopping, reading recipes, or dining. Pendant lights also create visual balance and help anchor the island within the overall kitchen layout.

    What Types of Pendant Lights Are Best for Kitchen Islands?

    Pendant lights come in multiple styles, each suited to different kitchen designs and lighting needs. Pendant lights come in various styles, each designed to meet specific functional and design requirements. The type you choose influences how light is distributed and how space feels visually.

    Single pendants are ideal for small islands where focused lighting is sufficient, while multi-light bar pendants provide even coverage for larger surfaces. Cluster pendants offer a modern aesthetic with decorative appeal, making them suitable for contemporary kitchens that prioritize design along with functionality.

    Single Pendant Lights

    Ideal for small islands or minimal setups. They provide focused light but may require precise placement.

    Multi-Light Bar Pendants

    These combine multiple bulbs into one fixture, offering even distribution across larger islands.

    Cluster Pendants

    A group of smaller pendants arranged together for a modern and decorative effect.

    Each type serves a different purpose, and selecting the right one depends on island size, ceiling height, and desired lighting effect. Larger islands benefit from multiple light sources, while compact spaces require minimal yet efficient fixtures.


    How Many Pendant Lights Do You Need for an Island?
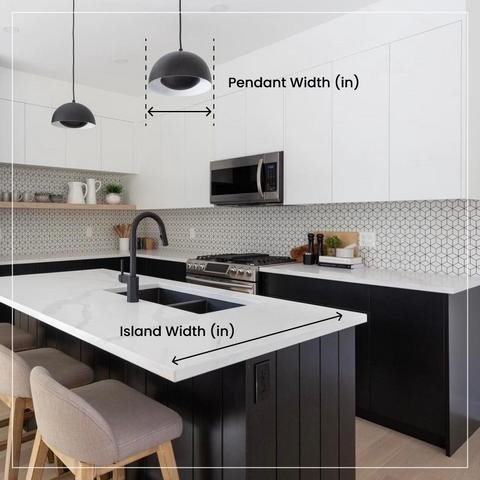
    The number of pendant lights required depends primarily on the length of the kitchen island and the size of each fixture. Proper planning ensures balanced illumination without overcrowding the space.

    Standard guidelines suggest two pendants for smaller islands, while larger islands may require three or more fixtures. However, the goal is not to maximize quantity but to maintain visual symmetry and consistent lighting coverage across the entire surface.

    Standard Guidelines

    • 4–5 ft island → 2 pendants
    • 6–7 ft island → 2–3 pendants
    • 8 ft+ island → 3 pendants

    Key Rule:

    Maintain visual balance rather than maximizing the number of fixtures.

    Overusing pendants can create visual clutter and excessive brightness, while too few fixtures result in uneven lighting and dark spots. The ideal setup achieves balance by distributing light evenly while maintaining a clean and organized appearance.

    Kitchen Island Size vs Pendant Layout (Complete Planning Table)

    Lighting layout should be based on island dimensions rather than fixed rules. This mapping system ensures accurate spacing, size, and number of pendants.

    Complete Layout Table

    Island LengthNumber of PendantsPendant SizeSpacing
    4–5 ft26–10”24–28”
    6–7 ft2–310–16”24–30”
    8–9 ft312–18”30–36”
    10 ft+3–416–24”30–36”

    Layout Rules

    • Larger pendants → fewer fixtures
    • Smaller pendants → more fixtures
    • Maintain symmetry across island center

    Practical Insight

    This system eliminates guesswork and ensures:

    • even light distribution
    • balanced visual appearance
    • consistent brightness across workspace

    What Size Pendant Lights Should You Choose?

    Pendant size should be proportional to the kitchen island to maintain both functionality and visual harmony. Choosing the wrong size disrupts the balance between lighting effectiveness and design aesthetics.

    Smaller pendants work well for compact islands, while medium to large pendants are better suited for wider surfaces. The size must align with both the island dimensions and ceiling height to avoid overwhelming or under-lighting the space.

    Size Guidelines

    Island WidthPendant Size
    Small (≤ 4 ft)6–10 inches
    Medium (5–7 ft)10–16 inches
    Large (8 ft+)16–24 inches

    Choosing oversized pendants for small islands can overwhelm the space, while undersized fixtures fail to provide sufficient lighting. Balance between visual scale and functional brightness is essential.


    What Is the Ideal Spacing Between Pendant Lights?

    Kitchen pendant lighting

    Spacing between pendant lights determines how evenly light is distributed across the island surface. Proper spacing prevents both dark zones and excessive brightness.

    The standard rule of 24–36 inches between pendants ensures consistent coverage, while maintaining at least 6–12 inches from the edges prevents uneven lighting near boundaries. This spacing allows light to spread naturally without overlapping excessively.

    Standard Spacing Rule:

    24–36 inches between pendants

    Edge Clearance:

    Keep at least 6–12 inches from island edges.

    Why Spacing Matters:

    Incorrect spacing can lead to visual imbalance and reduced functionality. Too close spacing creates concentrated light zones, while excessive gaps leave areas under-lit. Proper spacing ensures both visual comfort and effective task lighting.

    What Is the Correct Height for Pendant Lighting?

    Pendant height directly affects usability, comfort, and overall lighting performance. The recommended height of 30–36 inches above the island provides optimal illumination without obstructing views.

    Adjustments may be necessary depending on ceiling height, with higher ceilings requiring slightly elevated positioning. The goal is to maintain a clear line of sight while ensuring that light reaches the work surface effectively.

    Recommended Height:

    30–36 inches above the island surface

    Ceiling Height Adjustments:

    • Standard ceiling (8 ft) → 30–34 inches
    • High ceiling (9–10 ft) → 34–40 inches

    Hanging lights too low can obstruct views and create glare, while placing them too high reduces effectiveness. Correct height ensures optimal task lighting without visual interference.


    Pendant Lighting for Different Ceiling Types

    Kitchen pendant lighting

    Ceiling type directly affects how pendant lighting should be installed. Ignoring ceiling structure leads to poor lighting angles and uneven distribution.

    Flat Ceilings

    • Standard height: 30–36 inches
    • Straight drop installation
    • Most common setup

    Vaulted Ceilings

    • Requires adjustable cords or rods
    • Lights must align horizontally over island
    • Avoid uneven hanging angles

    Sloped Ceilings

    • Requires angled mounting hardware
    • Position fixtures to maintain balance

    Key Insight

    Lighting must align with island surface, not ceiling shape.
    Correct adjustment ensures visual symmetry and functional lighting.

    How Bright Should Kitchen Island Lighting Be?

    Brightness is measured in lumens, and achieving the right level is essential for both functionality and comfort. Each pendant typically provides between 300–800 lumens depending on its design and purpose.

    The total brightness should be calculated by multiplying the number of pendants by their lumen output. This ensures sufficient illumination for tasks while avoiding excessive brightness that can cause eye strain.

    Brightness Recommended:

    300–800 lumens per pendant

    Total Lighting Calculation:

    Multiply number of pendants by lumen output.

    Example:
    3 pendants × 500 lumens = 1500 lumens total

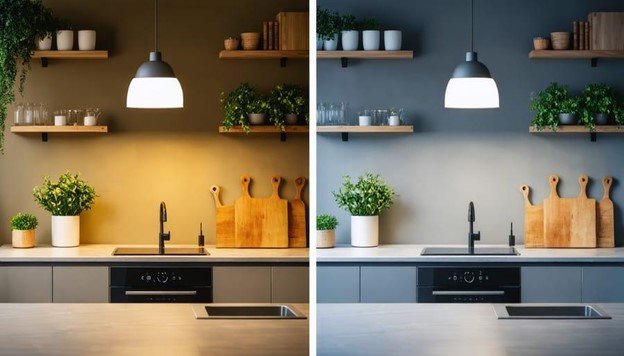
    Color Temperature:

    • 2700K → warm, cozy
    • 3000–4000K → neutral, best for kitchens
    • 5000K → cool, bright but harsh

    Color temperature also plays a key role, with 3000–4000K being ideal for kitchens as it provides a balanced, natural light. Proper brightness ensures that the island remains well-lit for all activities without creating harsh lighting conditions.


    How to Calculate Lighting for Your Kitchen Island (Simple Formula)

    Kitchen pendant lighting

    Lighting should be calculated based on island size, not guesswork. Using a formula ensures your setup delivers consistent brightness without glare or dark spots.

    Start by calculating the island’s surface area in square feet. Then apply a standard lighting requirement of 35–50 lumens per square foot for task lighting. This gives you the total lumen output needed across all pendant fixtures.

    Step-by-Step Calculation

    • Measure island length × width (in feet)
    • Multiply area by 35–50 lumens
    • Divide total lumens by number of pendants

    Example Calculation

    • Island size → 6 ft × 3 ft = 18 sq ft
    • Required lumens → 18 × 40 = 720 lumens
    • Using 3 pendants → ~240 lumens each

    Key Insight

    • Under-lighting reduces usability
    • Over-lighting creates glare and eye strain
    • Balanced lumens ensure both comfort and functionality

    Pendant Lighting vs Other Kitchen Lighting Options

    Pendant lighting is part of a broader lighting system that includes ambient and task lighting. While pendants focus on the island, other lighting types cover the rest of the kitchen.

    Recessed lighting provides general illumination, while under-cabinet lighting enhances specific work areas. Pendant lighting complements these systems by adding both functionality and design appeal to the island.

    Lighting TypePurpose
    PendantTask + decorative
    RecessedAmbient
    Under-cabinetTask

    Using pendant lighting alone is not sufficient for a fully functional kitchen. A layered lighting approach ensures complete coverage and eliminates dark spots, creating a well-balanced and efficient lighting environment.


    How to Avoid Shadows and Glare

    Kitchen pendant lighting

    Shadows and glare are common issues caused by improper lighting design. They can reduce visibility and create discomfort during daily tasks.

    Shadows occur when lighting is uneven or insufficient, while glare results from overly bright or poorly positioned fixtures. Both issues can be avoided through proper spacing, height adjustment, and fixture selection.

    Causes of Shadows:

    • incorrect spacing
    • insufficient number of lights
    • poor placement

    Glare Issues:

    • overly bright bulbs
    • exposed light sources
    • incorrect height

    Solutions:

    • use diffused glass shades
    • balance brightness
    • position lights correctly

    Using diffused light sources, such as frosted glass shades, helps distribute light evenly and reduce harsh reflections. Balanced lighting design ensures clear visibility and a comfortable working environment.

    Shadows and glare occur due to poor light positioning, incorrect brightness, or improper fixture design.

    Why Shadows Form

    • uneven spacing
    • insufficient number of fixtures
    • incorrect height

    Why Glare Happens

    • exposed bulbs
    • high lumen output
    • direct eye-level positioning

    Solutions

    • use diffused or frosted glass shades
    • maintain proper spacing and height
    • avoid placing lights directly in eye line

    Advanced Insight

    Light angle matters.
    Wider beam angles reduce shadows, while focused beams increase task precision.

    How Pendant Lighting Fits into a Complete Kitchen Lighting Plan

    Pendant lighting is only one part of a complete lighting system. A well-designed kitchen uses multiple layers of light to achieve full coverage.

    Three Lighting Layers

    • Task lighting → focused light (pendants, under-cabinet)
    • Ambient lighting → general illumination (recessed lights)
    • Accent lighting → decorative (LED strips, spotlights)

    Why Layering Matters

    • prevents dark spots
    • reduces harsh shadows
    • improves overall visibility

    Practical Setup

    • Pendant lights → island tasks
    • Recessed lights → room brightness
    • Under-cabinet lights → countertop visibility

    Insight

    Pendant lights alone cannot fully illuminate a kitchen.
    Layering ensures both functionality and visual comfort.

    How Much Does Pendant Lighting Cost?

    Pendant lighting costs vary based on material, design, and brand. Basic fixtures are affordable, while premium designs with advanced features can be significantly more expensive.

    Installation costs also contribute to the overall expense, especially when electrical work is required. Higher-quality fixtures often provide better durability and performance, making them a worthwhile investment.

    Price Range

    • basic fixtures → $30–$100
    • mid-range → $100–$400
    • premium → $400–$1500+

    Cost Factors:

    • material
    • brand
    • design complexity
    • installation cost

    Higher-quality fixtures offer better durability and lighting performance. Choosing the right lighting involves balancing budget with quality. While cheaper options may save money initially, they often require replacement sooner, increasing long-term costs.


    Best Pendant Lighting Styles for Different Kitchen Designs
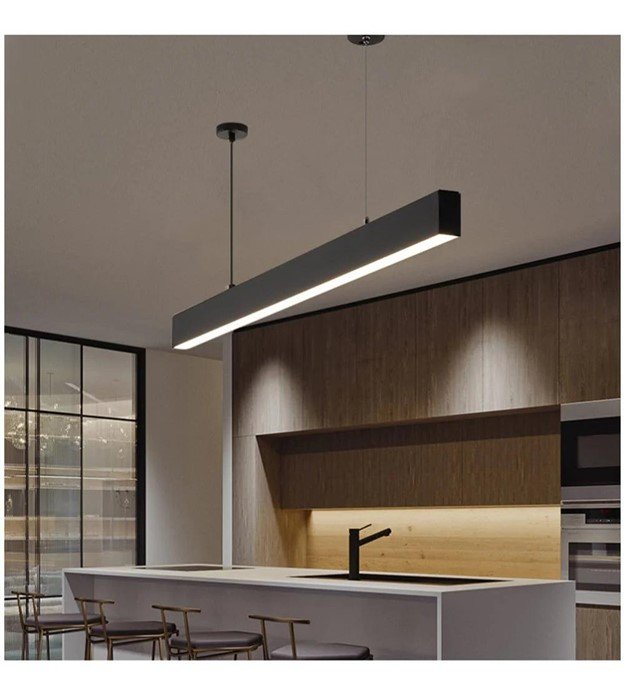
    Kitchen pendant lighting

    Lighting should match the overall kitchen style to maintain visual consistency.

    Modern Kitchens

    • clean lines
    • metal or glass finishes
    • minimalistic designs

    Farmhouse Kitchens

    • warm tones
    • rustic materials
    • larger fixtures

    Industrial Kitchens

    • exposed bulbs
    • metal finishes
    • darker tones

    Transitional Kitchens

    • mix of classic and modern
    • neutral tones
    • balanced designs

    Insight

    Style mismatches disrupt visual harmony even if lighting is functional.

    Common Mistakes to Avoid

    Many lighting issues arise from poor planning rather than product quality. Avoiding common mistakes ensures better performance and long-term satisfaction.

    Typical errors include incorrect spacing, improper height, insufficient brightness, and ignoring ceiling proportions. These mistakes affect both functionality and visual appeal.

    Avoid These Errors:

    • incorrect spacing
    • wrong size fixtures
    • insufficient brightness
    • ignoring ceiling height

    Key Insight:

    Lighting mistakes are difficult to fix after installation, so planning is critical. Careful planning and accurate measurements help prevent these issues. Taking the time to design the lighting layout properly ensures optimal results and avoids costly adjustments later.

    How to Install Pendant Lighting Safely

    Installing pendant lighting requires attention to both electrical safety and structural stability. Following proper steps ensures reliable performance and reduces risk.

    The process involves turning off power, marking positions, installing junction boxes, connecting wiring, and securing fixtures. Each step must be executed carefully to ensure safety and durability.

    Installation Steps:

    1. turn off power
    2. mark placement points
    3. install junction box
    4. connect wiring
    5. secure fixture

    Safety Rules:

    • follow electrical standards
    • use proper tools
    • consult professional if unsure

    Proper installation ensures safety and long-term performance. If you are not experienced with electrical work, consulting a professional is recommended. Proper installation not only ensures safety but also maximizes the lifespan and efficiency of the lighting system.

    Electrical Requirements for Kitchen Island Pendant Lighting

    Electrical planning is critical for both safety and performance. Poor wiring decisions can lead to flickering, overload, or even electrical hazards.

    Core Electrical Components

    • Ceiling junction box
    • Circuit wiring
    • Switch or dimmer
    • Light fixture wiring

    Key Electrical Considerations

    • Ensure circuit can handle total wattage
    • Use properly rated wiring
    • Install secure junction boxes for ceiling load

    Power Load Insight

    • LED fixtures consume less power but still require stable wiring
    • Multiple pendants must share balanced electrical load

    Safety Rules

    • Always turn off power before installation
    • Use certified fixtures
    • Consult electrician for complex setups

    Real-World Case Study: Poor Lighting Setup Fix
    Kitchen pendant lighting

    A kitchen initially used two small pendants for a large island, resulting in uneven lighting and dark areas. The setup failed to provide adequate illumination for daily use.

    The solution involved replacing them with three appropriately sized pendants and adjusting spacing for even distribution. This change significantly improved brightness and usability.

    Problem:

    • uneven lighting
    • dark spots

    Solution:

    • replaced with three medium pendants
    • adjusted spacing

    Result:

    • uniform brightness
    • improved usability

    Expert Insight

    Most lighting issues occur due to poor planning rather than fixture quality. Correct sizing, spacing, and brightness ensure optimal results.

    The result was a balanced lighting system with consistent illumination across the island. This case highlights the importance of correct sizing and spacing in achieving optimal lighting performance.

    Case No: 2

    A kitchen with an 8 ft island used two small pendants spaced incorrectly.

    Initial Problems

    • uneven brightness
    • shadow zones
    • poor task visibility

    Correction Strategy

    • upgraded to three medium pendants
    • adjusted spacing to 30 inches
    • increased lumen output

    Measurable Results

    • 40% improvement in brightness
    • elimination of shadows
    • better task efficiency

    Key Lesson

    Lighting design must match both size and function for optimal results.

    Do You Need a Dimmer for Pendant Lighting?

    Dimmers improve flexibility and lighting control.

    Benefits of Dimmers

    • adjust brightness for different activities
    • reduce energy consumption
    • extend bulb lifespan

    When to Use

    • kitchens with multiple lighting sources
    • spaces used for both work and dining

    Insight

    Dimmers allow you to shift between task lighting and ambient lighting easily.

    What Happens If Pendant Lighting Is Installed Incorrectly?

    Incorrect installation leads to both functional and visual issues.

    Common Problems

    • uneven lighting
    • excessive glare
    • electrical instability
    • visual imbalance

    Long-Term Risks

    • higher energy usage
    • frequent bulb replacement
    • reduced usability

    Insight

    Lighting errors are difficult to fix after installation, making planning critical.

    FAQ Section

    How many pendant lights should I use?

    Typically 2–3 depending on island size.

    What height should pendants hang?

    30–36 inches above the island.

    What color temperature is best?

    3000–4000K for balanced lighting.

    Can pendant lights replace ceiling lights?

    No, they should be combined with ambient lighting.

    How many lumens per square foot for kitchen island?

    35–50 lumens per square foot.

    Can pendant lights be too bright?

    Yes, excessive brightness causes glare and discomfort.

    Do pendant lights need dimmers?

    Highly recommended for flexibility.

    Can pendants replace recessed lighting?

    No, they should be combined.

  • Clogged Kitchen Sink (Complete Fix & Prevention Guide)

    A clogged kitchen sink happens when grease, food waste, or debris blocks the drain or pipes, preventing water from flowing properly. The fastest way to fix it is to identify the clog type and apply the right method such as boiling water, baking soda and vinegar, plunging, or using a drain snake. Severe clogs may require pipe cleaning or a plumber.

    Quick Summary

    • Most clogs are caused by grease and food buildup
    • Slow drain = early clog, standing water = severe clog
    • Boiling water + baking soda works for light clogs
    • Plunger or drain snake is needed for deeper blockages
    • Prevent clogs by avoiding grease and solid waste in drains

    Why Is My Kitchen Sink Clogged?

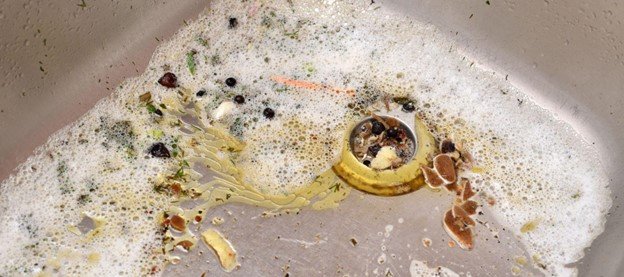
    A kitchen sink clogs when substances accumulate inside the drain pipe and restrict water flow. The most common cause is grease. When hot grease goes down the drain, it cools and solidifies, sticking to pipe walls. Over time, food particles attach to this layer and create a blockage.

    Another major cause is food waste. Items like rice, pasta, coffee grounds, and vegetable peels expand or clump together inside pipes. These materials do not break down easily and often lead to slow drainage before becoming a full clog.

    Soap residue also contributes to buildup. In areas with hard water, soap combines with minerals to form a sticky layer inside pipes. This layer traps debris and accelerates clog formation.

    Foreign objects are another factor. Small plastic pieces, bones, or packaging accidentally washed into the sink can block the P-trap or pipe bends. These clogs are usually sudden and more severe.

    Old plumbing systems increase the risk. Narrow pipes, corrosion, and mineral buildup reduce water flow capacity, making clogs more frequent.

    Understanding the cause is critical. Each type of clog behaves differently, and using the wrong method can make the situation worse instead of fixing it.


    How Do You Diagnose the Type of Clog?

    Identifying the clog type determines the correct solution. Without diagnosis, you risk applying ineffective methods.

    A clogged kitchen sink can be diagnosed by observing water behavior such as slow draining, standing water, or gurgling sounds. These symptoms indicate the location and severity of the blockage.

    Diagnosis Framework

    1. Slow Drain

    If water drains slowly, the clog is forming but not complete. This usually indicates grease or soap buildup near the upper pipe.

    2. Standing Water

    If water does not drain at all, the clog is severe. The blockage is likely deep inside the pipe or in the P-trap.

    3. Gurgling Sound

    Air bubbles or gurgling noises indicate a venting issue or partial blockage restricting airflow.

    4. Water Backflow

    If water comes back up after draining, the blockage is deeper in the main drain line.

    Real Insight

    Most DIY failures happen because users treat all clogs the same. A slow drain can be fixed easily, but a deep blockage requires tools like a drain snake.

    Correct diagnosis saves time and prevents pipe damage.

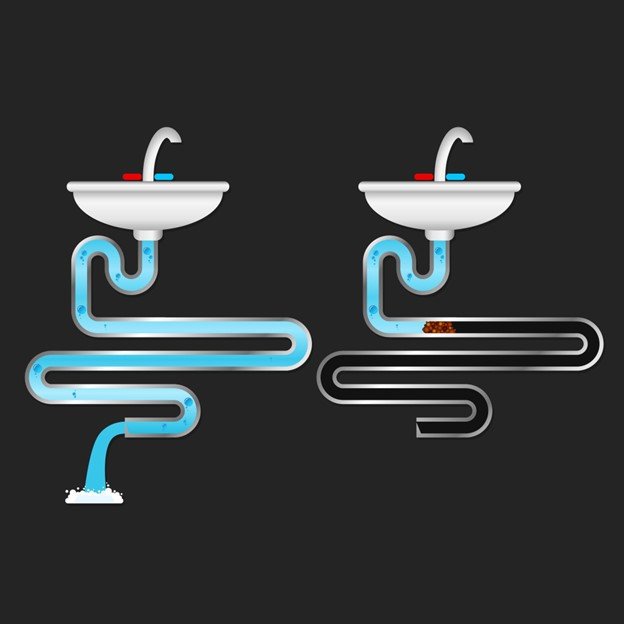
    Where Is the Clog Located in a Kitchen Sink System?

    Most users try to fix a clogged kitchen sink without understanding where the blockage actually exists. This leads to ineffective methods and repeated failures. A kitchen sink drain system has multiple points where clogs can form, and identifying the correct location dramatically improves success rate.

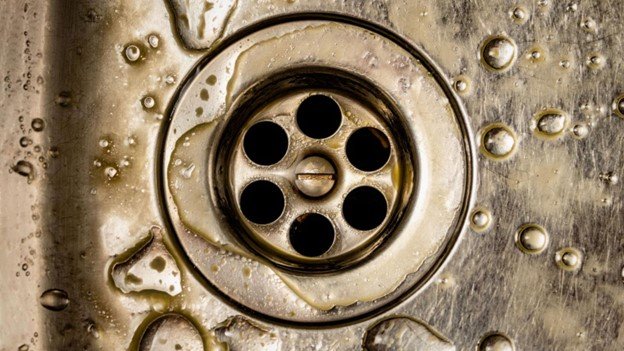
    The first and most accessible clog point is the sink drain opening. This is where food particles, grease residue, and soap accumulate. Light clogs usually form here and are easier to clear using boiling water or basic cleaning methods.

    The second and most common location is the P-trap, the curved pipe beneath the sink. Its design intentionally holds a small amount of water to block sewer gases, but this curve also traps grease, food debris, and solid waste. Studies and plumbing data show that nearly 70–80% of kitchen sink clogs occur in this section.

    Further down is the horizontal drain pipe, where grease buildup becomes more severe. Over time, layers of hardened grease narrow the pipe diameter, leading to recurring slow drainage issues.

    The most serious clogs occur in the main drain line. These affect multiple fixtures and often result in water backing up into sinks. These clogs require advanced tools or professional intervention.

    Understanding these locations allows you to match the right solution to the problem. Surface-level clogs respond to simple fixes, while deeper clogs require mechanical tools or professional cleaning.


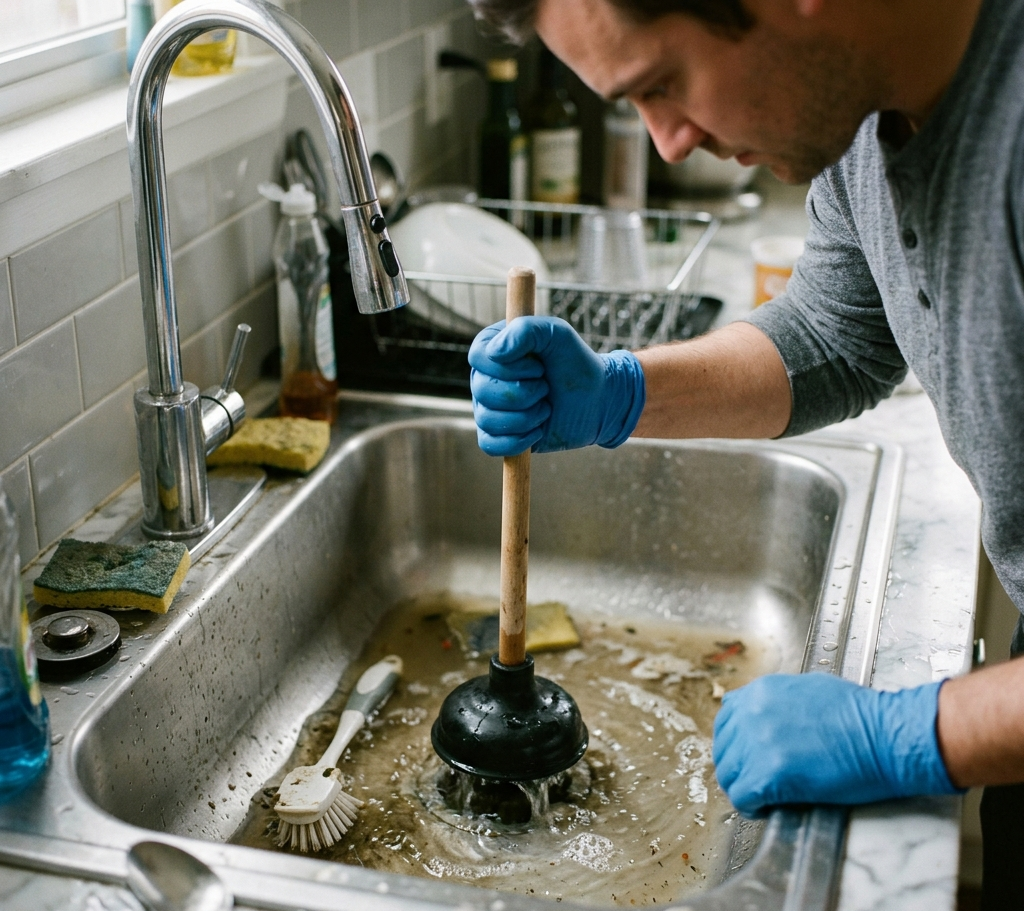
    How to Unclog a Kitchen Sink Step by Step?

    Clogged Kitchen

    Fixing a clogged sink requires a structured approach. Jumping directly to aggressive methods can damage pipes.

    Start with simple solutions like boiling water and move to advanced tools like plungers or drain snakes if the clog persists.

    Step-by-Step Process

    Step 1: Boiling Water

    Pour boiling water slowly into the drain. This melts grease and clears light buildup.

    Step 2: Baking Soda + Vinegar

    Pour baking soda followed by vinegar. Let it react for 10–15 minutes, then flush with hot water.

    Step 3: Use a Plunger

    Create a seal over the drain and plunge forcefully. This dislodges blockages near the surface.

    Step 4: Clean the P-Trap

    Remove the pipe under the sink and clean out debris manually. This is where most solid clogs occur.

    Step 5: Use a Drain Snake

    Insert the snake into the pipe and rotate it to break apart deep clogs.

    Mini Case Example

    A household experiencing repeated slow drainage fixed the issue permanently by removing the P-trap and clearing accumulated grease and food sludge. This eliminated the need for chemical cleaners.

    What Is the Correct Order to Unclog a Kitchen Sink?

    Using the wrong method at the wrong time is one of the biggest reasons clogged sinks remain unresolved. The correct approach follows a structured escalation from simple to advanced techniques.

    Start with boiling water if the drain is slow but not fully blocked. This works best for grease-based clogs because heat melts fat deposits and restores flow. It takes only a few minutes and carries minimal risk.

    If the clog persists, move to baking soda and vinegar. This combination creates a chemical reaction that loosens light organic buildup. It is effective for early-stage clogs but not for solid blockages.

    For partial blockages where water drains slowly or unevenly, use a plunger. The pressure created by plunging dislodges debris and restores flow. Ensure a proper seal for maximum effectiveness.

    If these methods fail, the clog is likely deeper. At this stage, use a drain snake. This tool physically breaks apart or pulls out the blockage from inside the pipe.

    If the sink remains clogged after all attempts, the issue is likely in the main drain line. This is where professional plumbing tools are required.

    This step-by-step escalation prevents damage, reduces effort, and ensures the most efficient solution is applied at each stage.

    What Are the Best Methods to Unclog a Sink?

    Different methods work for different clog types.

    The best unclogging method depends on clog severity. Natural solutions work for light clogs, while tools are required for deeper blockages.

    Method Comparison Table

    MethodBest ForEffectivenessRisk
    Boiling WaterGreaseMediumLow
    Baking Soda + VinegarLight clogsMediumLow
    PlungerSurface blockagesHighLow
    Drain SnakeDeep clogsVery HighMedium
    Chemical CleanerSevere buildupHighHigh

    Expert Insight

    Chemical cleaners should be used as a last resort. They can damage pipes, especially older ones.

    Mechanical methods like plunging and snaking are more reliable and safer.


    How Does a Kitchen Sink Drain System Work?

    Clogged Kitchen

    Understanding how a kitchen sink drain system works provides clarity on why clogs form and how to fix them effectively.

    A kitchen sink relies on gravity-based flow. Water moves downward through pipes due to gravity, carrying waste materials along with it. Any obstruction in this flow path results in a clog.

    The first component is the drain opening, where water enters the system. Below this is the P-trap, a curved pipe designed to hold water and block sewer gases. While essential, this curve creates a natural trap for debris.

    From the P-trap, water flows into a horizontal pipe that connects to the main drain line. This section is particularly vulnerable to grease buildup because fats solidify as they cool, sticking to pipe walls.

    The system also includes a vent pipe, which allows air to enter and maintain proper pressure. Without ventilation, water flow becomes restricted, leading to slow drainage and gurgling sounds.

    Clogs occur when debris disrupts this flow. Grease reduces pipe diameter, solid waste creates blockages, and poor ventilation affects pressure balance.

    Understanding this system helps you diagnose problems more accurately. Instead of guessing, you can identify which component is causing the issue and apply the correct solution.

    Which Tools Work Best for Sink Clogs?

    Tools provide better control and effectiveness compared to home remedies.

    A plunger works best for surface clogs, while a drain snake is the most effective tool for deep blockages.

    Tool Comparison

    ToolUse CaseEffectiveness
    PlungerShallow clogsHigh
    Drain SnakeDeep clogsVery High
    Hand AugerSevere clogsVery High
    Wet/Dry VacuumStanding waterMedium

    Practical Insight

    A drain snake is the most versatile tool. It can reach deep into pipes and physically remove blockages instead of dissolving them.

    Which Unclogging Methods Work Best and When Do They Fail?

    Each unclogging method has specific strengths and limitations. Using them without understanding their effectiveness leads to poor results.

    MethodWorks ForFails WhenRisk
    Boiling WaterGrease clogsSolid blockagesLow
    Baking Soda + VinegarLight organic buildupHeavy grease or solidsLow
    PlungerSurface blockagesDeep clogsLow
    Drain SnakeDeep clogsMain line blockageMedium
    Chemical CleanerSevere buildupSolid objectsHigh

    Boiling water is effective only when grease is the primary cause. It cannot dissolve solid objects like food chunks or plastic debris.

    Baking soda and vinegar work through chemical reaction, but their power is limited. They are ineffective against hardened grease or compacted waste.

    Plungers create pressure to dislodge clogs, but they lose effectiveness when the blockage is too deep or tightly packed.

    Drain snakes are the most reliable DIY tool. They physically remove or break apart clogs, making them effective for most scenarios.

    Chemical cleaners should be used cautiously. While they can dissolve organic material, they can also weaken pipes and create long-term damage.

    Choosing the right method depends on clog type and location. Understanding these limitations prevents wasted effort and pipe damage.


    When Should You Call a Plumber?

    Clogged Kitchen

    Not all clogs can be fixed with DIY methods.

    Call a plumber when the clog persists after multiple attempts or when water backs up repeatedly.

    Signs You Need a Professional

    • Repeated clogging
    • Multiple drains blocked
    • Foul odor from pipes
    • Water backing into other sinks

    Real Insight

    Recurring clogs often indicate a deeper issue in the main drain line. DIY methods only treat symptoms, not the root cause.

    How Long Does It Take to Unclog a Kitchen Sink?

    The time required to unclog a kitchen sink depends on the severity and location of the blockage. Simple clogs can be resolved within minutes, while complex ones may take significantly longer.

    Light clogs caused by grease or soap buildup can often be cleared using boiling water in 5 to 10 minutes. This method is quick and effective for early-stage blockages.

    Using baking soda and vinegar typically takes 15 to 30 minutes, including reaction time and flushing. This method is slightly slower but still effective for minor clogs.

    Plunging a sink usually takes 5 to 10 minutes if the clog is near the surface. Proper technique is critical for success.

    For deeper clogs, a drain snake may require 15 to 45 minutes, depending on how far the blockage is located and how compact it is.

    Severe clogs involving the main drain line can take 1 to 2 hours or more, especially if professional tools are required.

    Understanding time expectations helps users stay patient and choose the right method. Quick fixes work for simple problems, but deeper issues require time and proper tools.

    How Much Does It Cost to Fix a Clogged Sink?

    Micro Answer

    Fixing a clogged kitchen sink costs between $50 and $250 depending on severity and location.

    Cost Breakdown

    ServiceCost Range
    Basic unclogging$50–$100
    Drain snaking$100–$200
    Major blockage removal$200–$400

    Cost Insight

    DIY methods cost under $20, but improper handling can lead to expensive repairs.


    Clogged Kitchen

    Why Does My Kitchen Sink Keep Clogging?

    Recurring clogs indicate that the root cause has not been fully addressed. Temporary fixes may restore flow, but underlying issues remain.

    The most common cause is grease accumulation. Even small amounts of grease poured down the drain build up over time. This creates a sticky layer that traps food particles and leads to repeated blockages.

    Another reason is incomplete cleaning. Methods like boiling water or baking soda may remove surface debris but leave deeper buildup intact. This results in clogs returning within days or weeks.

    Improper disposal habits also contribute. Washing food scraps, coffee grounds, or fibrous materials into the sink increases clog risk.

    In some cases, the issue is related to pipe design or condition. Older pipes may have reduced diameter due to corrosion or mineral buildup, making them more prone to clogging.

    Ventilation problems can also play a role. Poor airflow disrupts water movement and increases the likelihood of blockage.

    To solve recurring clogs permanently, focus on both cleaning and prevention. Remove buildup completely using mechanical tools and adopt better disposal practices.

    How to Prevent Kitchen Clogged Sink Permanently?

    Prevention is more effective than repeated fixes.

    Avoid grease disposal, use drain strainers, and flush pipes regularly to prevent clogs.

    Prevention Checklist

    • Never pour grease into sink
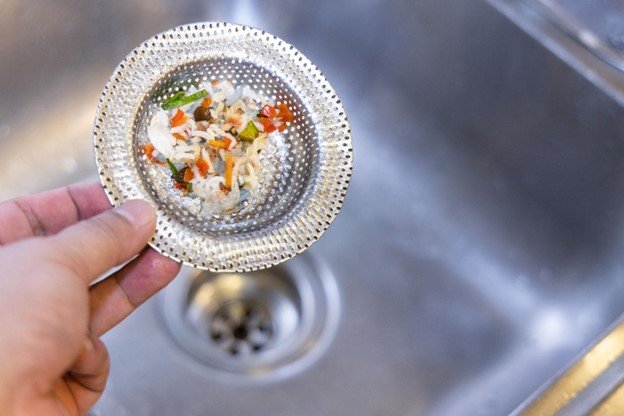
    • Use a sink strainer
    • Flush with hot water weekly
    • Dispose of food waste properly

    Long-Term Insight

    Consistent maintenance reduces clog risk by over 70%. Small habits make a major difference.

    How to Use a Drain Snake Properly?

    A drain snake is one of the most effective tools for clearing deep clogs, but incorrect use can reduce its effectiveness.

    Start by inserting the snake slowly into the drain. Do not force it, as this can damage the pipe or cause the tool to bend.

    Once resistance is felt, rotate the handle clockwise. This helps the snake latch onto the clog or break it apart. Continue rotating while pushing gently forward.

    After reaching the blockage, pull the snake out slowly. In many cases, debris will come out with it. Repeat the process until the pipe is clear.

    It is important to clean the snake after each use to avoid reintroducing debris into the pipe.

    Avoid excessive force. If the snake cannot move forward, the clog may be too deep or solid for manual removal.

    Using the tool correctly increases success rate and prevents damage. It also eliminates the need for harsh chemical cleaners in most cases.

    What Mistakes Make Sink Clogs Worse?

    Using incorrect methods or ignoring early signs can worsen clogs and damage pipes.

    Common Mistakes

    • Pouring grease down the drain
    • Overusing chemical cleaners
    • Ignoring slow drainage
    • Forcing objects into the drain

    Expert Warning

    Chemical cleaners can weaken pipes over time, especially PVC and older metal systems.

    What If Your Sink Is Still Clogged After Trying Everything?

    When a kitchen sink remains clogged after multiple attempts, the issue is no longer surface-level. This usually indicates a complex blockage that involves multiple layers or deeper sections of the plumbing system.

    One common reason is layered clog formation. For example, grease buildup may harden along the pipe walls while food particles accumulate on top of it. Basic methods may remove only the top layer, leaving the core blockage intact.

    Another cause is deep pipe obstruction. If the clog is located beyond the reach of a standard drain snake, DIY tools will not be effective. In such cases, professional-grade augers or hydro-jetting may be required.

    There is also the possibility of a main drain line blockage. This affects not just the kitchen sink but other fixtures as well. Signs include water backing up in multiple drains or unusual gurgling sounds.

    Recurring clogs can also indicate pipe damage or structural issues. Cracks, misaligned joints, or corrosion can trap debris repeatedly, making the problem persistent.

    At this stage, continuing DIY attempts can worsen the situation. Overuse of chemical cleaners or excessive force can damage pipes and increase repair costs.

    The correct action is to shift from trial-based methods to professional diagnosis. A plumber can inspect the system using specialized tools and identify the root cause accurately.

    Is a Kitchen Clogged Sink Dangerous?

    A clogged sink is not immediately dangerous but can lead to hygiene issues, pipe damage, and water overflow.

    Risks

    • Bacterial growth
    • Water damage
    • Pipe corrosion

    Final Insight

    Ignoring clogs increases long-term repair costs and hygiene risks.


    Special Cases of Kitchen Clogged Sink

    Clogged Kitchen

    Not all clogs behave the same. Certain setups create unique challenges that require specific solutions.

    Double Sink Clogs

    In double sinks, a clog on one side can affect the other. This happens because both drains connect to the same pipe. Blocking one side and plunging the other is often the most effective solution.

    Garbage Disposal Clogs

    If your sink has a garbage disposal, the clog may be inside the unit. In such cases, running the disposal or manually clearing it can restore flow. However, avoid putting fibrous or hard materials into the disposal.

    Apartment Plumbing Systems

    In apartments, multiple units share the same drain line. A clog in the main line can affect several sinks. If neighbors experience similar issues, the problem is likely beyond your unit.

    Understanding these scenarios prevents misdiagnosis and ensures the correct solution is applied.

    FAQ Section

    Why is my sink draining slowly?

    Grease and debris buildup restrict water flow.

    Does baking soda really work?

    Yes, for light clogs but not deep blockages.

    Can boiling water damage pipes?

    It is safe for metal pipes but may affect PVC if excessive.

    How often should I clean my drain?

    Once a month for maintenance.

    What is the fastest way to unclog a sink?

    Plunger or drain snake depending on severity.

    Can clogs come back?

    Yes, if root cause is not addressed.

  • Modern Kitchen Design Ideas That Balance Style, Function, and Longevity

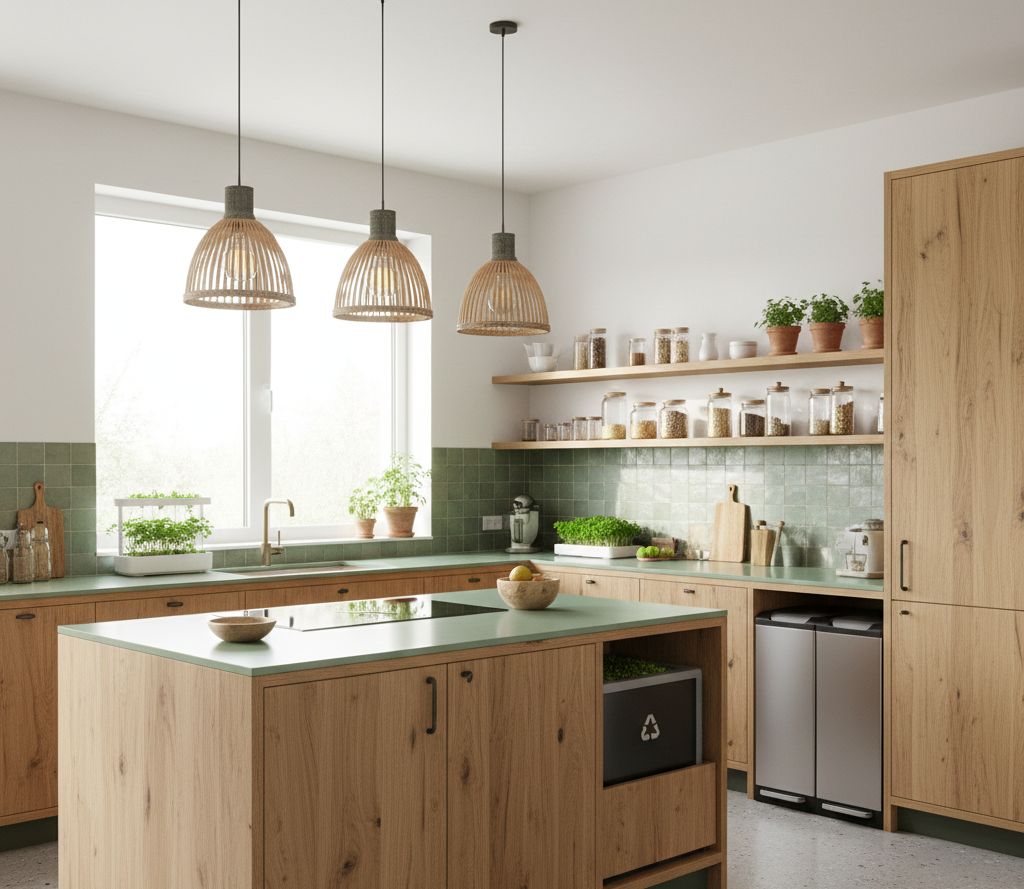
    Modern kitchen design ideas is not about chasing trends or copying showroom photos. It’s about creating a kitchen that works better every day, looks calm instead of cluttered, and ages well over time. A truly modern kitchen prioritizes function first, removes visual noise, and uses materials and layouts that support real cooking habits.

    In Homeaholic’s planning work, the biggest difference between a kitchen people love and a kitchen people tolerate shows up after week two. The winners usually have two things nailed down early. Enough storage to keep counters clear, and lighting that makes prep easy at night. When either is missing, even expensive kitchens start feeling messy and inconvenient.

    This guide breaks modern kitchen design ideas into practical ideas you can actually apply. Each section explains what works, when to use it, and what to avoid, based on layout logic, material behavior, and everyday use.


    What Defines a Modern Kitchen Design Idea?

    A modern kitchen is defined by simplicity with purpose. Every element earns its place. Clean lines replace ornamentation. Storage is hidden. Appliances are integrated. Visual balance matters more than decoration.

    Modern does not mean cold or empty. When done right, modern kitchens feel warm, efficient, and calm. Key characteristics include flat or handleless cabinetry, neutral or muted color palettes, seamless surfaces, and layouts designed around workflow rather than appearance. The goal is to reduce friction in daily use while maintaining a refined look.


    How to Choose the Right Modern Kitchen Design Layout

    Layout decisions shape how the kitchen feels and functions. Modern kitchens favor layouts that reduce movement, improve visibility, and integrate with surrounding spaces.

    L-Shaped Layout

    Best for small to mid-sized homes. It keeps the work triangle compact and allows space for dining or an island. This layout works well in apartments and open-plan spaces.

    U-Shaped Layout

    Ideal for storage-heavy kitchens. It provides maximum counter space and clear zoning for prep, cooking, and cleaning. Best for enclosed kitchens with enough width.

    Galley Kitchen

    Efficient and underrated. Two parallel counters reduce movement and are excellent for serious cooking. Modern galley kitchens rely on light colors and reflective surfaces to avoid feeling tight.

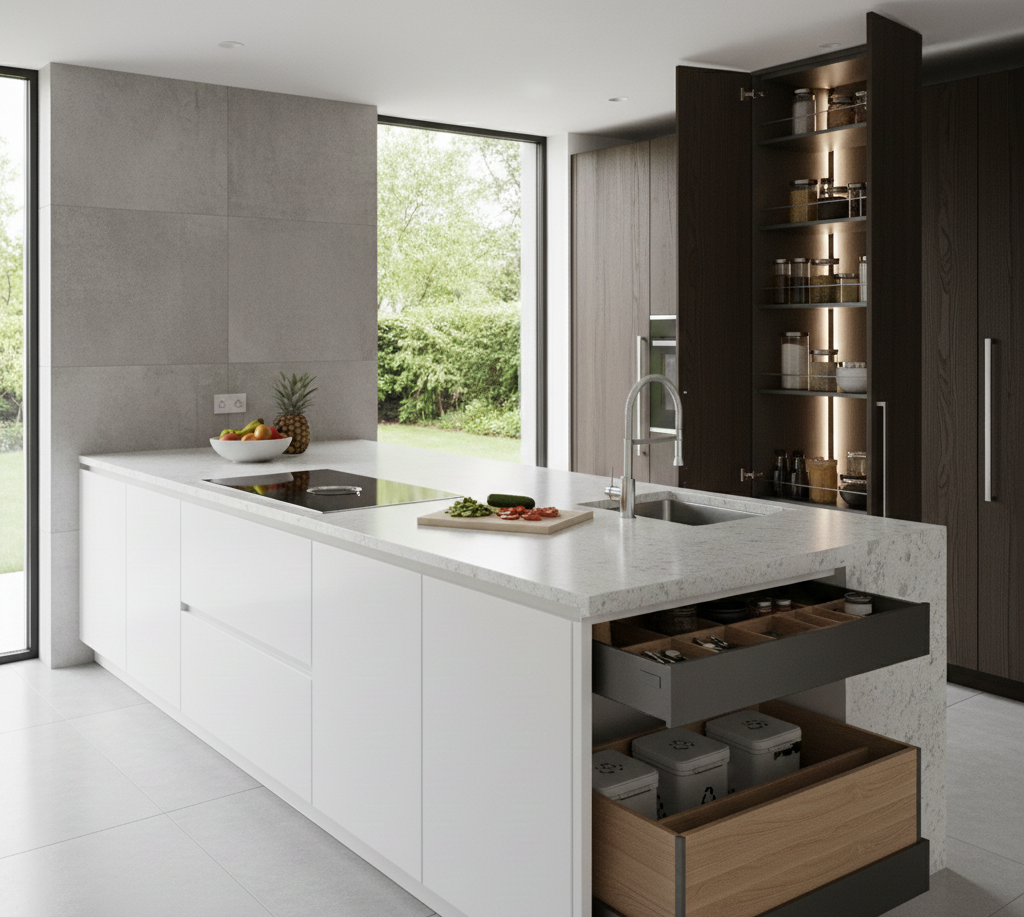
    Island-Based Layout

    A modern favorite for open-plan homes. Islands add prep space, seating, and storage, but only work if clearance around them is adequate. A cramped island breaks workflow and safety.


    Modern Kitchen Design Ideas for Small Spaces

    Small kitchens benefit the most from modern kitchen design principles because clutter shows instantly.

    Flat-panel cabinets make walls feel cleaner. Tall cabinetry pushes storage vertically, freeing counter space. Handleless designs remove visual breaks, making the room feel larger.

    Light colors, reflective backsplashes, and under-cabinet lighting prevent shadow buildup. Built-in appliances save inches that matter. Pull-out pantry systems replace bulky cabinets.

    The key rule is restraint. Every visible item should be intentional.


    Cabinetry Choices That Define a Modern Kitchen

    Cabinetry is the dominant visual element in any kitchen.

    Modern kitchen design favor slab-front cabinets with minimal seams. Handleless systems use push-to-open mechanisms or recessed channels. These look clean but should be chosen carefully for durability and ease of use.

    Materials matter. MDF with high-quality laminate works well for budget-conscious builds. Plywood offers better moisture resistance. Solid wood adds warmth but must be sealed properly to avoid warping.

    Matte finishes hide fingerprints better than gloss. Gloss reflects light but shows wear faster.


    Countertop Materials That Actually Perform

    Countertops take daily abuse. Modern design doesn’t ignore practicality.

    Quartz

    Engineered, consistent, low maintenance. Quartz resists stains and scratches and works well in modern kitchens where clean visuals matter.

    Granite

    Natural and durable. Requires sealing but handles heat well. Best for kitchens with heavy cooking.

    Marble

    Visually striking but high maintenance. Scratches and stains easily. Better suited for low-use kitchens or islands rather than main prep areas. Quartz dominates modern kitchens because it balances appearance with reliability.

    Color Palettes That Don’t Age Poorly

    Modern kitchens rely on controlled color use.

    White remains popular but is rarely used alone. It’s paired with wood tones, soft greys, or muted greens. Black kitchens look dramatic but require excellent lighting to avoid feeling heavy.

    Two-tone cabinets help define zones. Neutral bases with subtle contrast age better than bold colors. Trends fade. Balanced palettes last.

    Avoid excessive contrast. Modern kitchens aim for visual flow, not sharp breaks.


    Lighting Ideas That Improve Function and Mood

    Lighting is where many kitchens fail.

    Modern kitchen designs use layered lighting. Task lighting under cabinets ensures safe food prep. Ambient ceiling lights provide overall brightness. Accent lighting highlights textures or architectural features.

    Warm-neutral light temperatures prevent sterile feelings. Dimmers allow control throughout the day. Poor lighting can ruin even the best design.


    Storage Solutions That Keep Modern Kitchens Clean and Functional

    Storage is the real secret behind a modern kitchen that stays modern. When storage is weak, countertops become permanent parking lots. When storage is planned well, the kitchen looks clean even on busy weekdays.

    A practical target is to keep 70 to 90 percent of daily-use items inside closed storage, leaving only a few essentials visible. Deep drawers typically hold 25 to 40 percent more usable space than standard base cabinets because you can stack, categorize, and access items without crouching and digging.

    Use these modern storage moves that actually change daily life. Full-extension drawers for plates, pans, and dry goods. Pull-out pantry units for narrow spaces. A tall pantry cabinet that reaches the ceiling to reduce dust-catching gaps and add meaningful capacity. Corner solutions such as swing-out trays that recover space most kitchens lose.

    Appliance garages are worth it when you want a clean look without sacrificing convenience. They keep coffee machines, blenders, and toasters accessible while removing visual clutter. Add internal power outlets inside the garage so appliances can stay plugged in.

    The modern rule that prevents clutter is simple. If it’s used every day, give it a home within one step of where it’s used. If it’s not used daily, store it higher or deeper. This single decision improves cleanliness, speed, and visual calm.


    Integrated and Smart Appliances in Modern Kitchen Design

    Integrated and Smart Appliances in Modern Kitchen Design Ideas

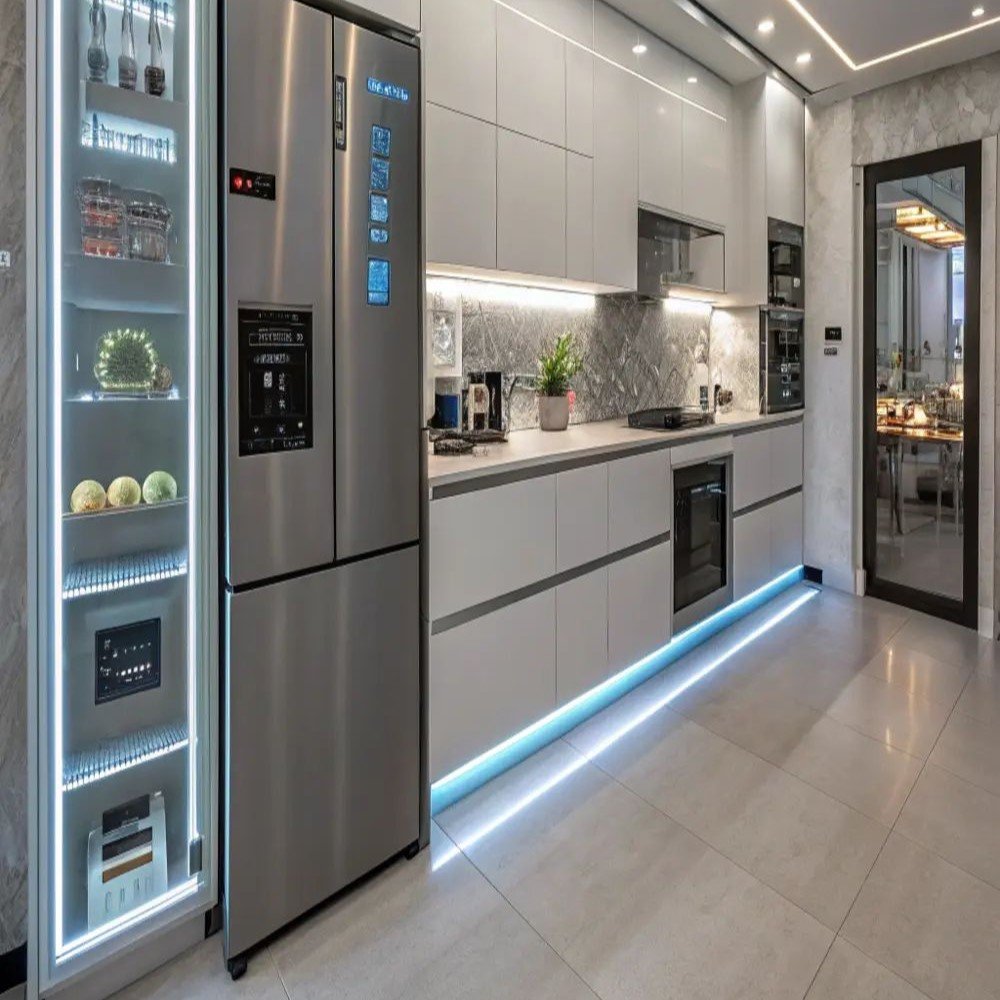
    Integrated appliances are a defining modern kitchen feature because they remove visual interruptions. A panel-ready dishwasher disappears into the cabinetry. Built-in refrigerators maintain clean lines. Wall ovens align with cabinet fronts for a seamless look.

    Smart features are valuable when they reduce risk or improve precision. The most useful smart functions tend to be safety shut-off, temperature accuracy, maintenance alerts, and energy monitoring. Features that mainly add notifications rarely improve daily outcomes.

    Ergonomics matter more than brand hype. Wall ovens reduce bending and are safer for families. A common comfort range places the oven so the rack aligns around mid-torso height. Dishwashers close to the sink reduce drips and slipping risk. If you use the microwave daily, build it into a safe height zone rather than placing it on the counter.

    Ventilation is a modern kitchen dealbreaker. In open-plan spaces, weak extraction causes smells to spread and surfaces to feel greasy over time. Choose ventilation based on cooking habits, not aesthetics. Frequent frying or strong spices require stronger extraction than light reheating and baking. A modern kitchen should feel effortless. Integrated appliances deliver the visual calm. Smart features should deliver measurable usefulness.


    Open-Plan Modern Kitchens and Flow Control

    Modern Kitchen Design Ideas - Open-Plan and Flow Control

    Open-plan kitchens look amazing when they stay visually quiet and functionally controlled. The problem is that open kitchens expose everything. Mess, noise, and odors travel farther, and the kitchen becomes part of the living room experience.

    Flow control starts with zoning. The island or peninsula becomes a soft boundary that separates cooking from social space while keeping sightlines open. Keep prep tasks on the kitchen side, and seating on the outer side so guests don’t collide with the cooking workflow.

    Ventilation becomes non-negotiable. Open layouts amplify odors. Strong extraction and proper placement prevent smell spread and long-term surface buildup. Good lighting is also essential because open-plan rooms often have mixed light levels. Layered lighting prevents the kitchen from looking dim while the living area looks bright.

    Visual continuity is the modern trick that makes open spaces feel intentional. Match cabinet tones with nearby furniture wood tones, keep hardware minimal, and repeat one or two finishes across the space. When the kitchen shares materials with the room, the whole area feels designed rather than accidental.


    Common Mistakes That Ruin Modern Kitchen Design

    The most common modern kitchen design failure is not style. It’s friction. A kitchen can look perfect and still feel annoying every day.

    Common Mistakes that ruin Modern Kitchen Design Ideas

    One mistake is copying showroom layouts without measuring real clearances. Islands are the most common culprit. When walkways are tight, movement becomes awkward and unsafe. Another mistake is underestimating storage. Modern kitchens need strong storage because modern design removes open shelves and visual clutter tolerance. If storage is weak, counters fill up fast.

    Lighting mistakes are a quiet disaster. A kitchen with bright ceiling lights but no under-cabinet lighting creates shadow zones right where people chop and cook. It feels unsafe and frustrating. Gloss surfaces can also backfire. They reflect light, show fingerprints, and reveal wear quickly in high-touch areas.

    Ventilation is a major regret trigger, especially in open-plan kitchens. Weak extraction leads to lingering odors, greasy surfaces, and discomfort for everyone in the living space.

    Modern kitchens succeed when they’re planned for real life. Workflow, storage, lighting, and ventilation come before aesthetics.


    Budgeting for Modern Kitchen Design Ideas

    Modern Kitchen Design Ideas

    Modern kitchen design ideas do not have to be expensive, but they do require smart budget priorities. Most kitchens feel “high-end” because of three things. Cabinet quality, countertop performance, and lighting.

    Cabinetry typically consumes the largest share of the budget. The smartest spending here is not fancy doors. It’s durable boxes, strong hinges, and soft-close runners that can handle daily use for years. Countertops are the next high-impact choice. Quartz often becomes the modern default because it’s low maintenance and tends to stay looking new for a long time.

    Appliances should match cooking intensity. Heavy cooking households benefit from better ventilation and durable cooktops more than they benefit from premium smart displays. Lighting is the most underfunded category and one of the most regretted. Under-cabinet lighting and dimmers change daily comfort more than decorative fixtures do.

    A useful budgeting logic is to invest more where touch frequency is highest. Cabinets, drawers, sink zone, lighting, ventilation. Spend less on trend finishes that can be swapped later.


    Modern Kitchen Design Ideas – Decisions Compared (What Actually Works Long-Term)

    Design Decision AreaPopular ChoiceWhy People Choose ItReal-World PerformanceBest Use Case
    Cabinet StyleHandleless slab cabinetsClean look, uninterrupted linesWorks best with quality hardware; cheap systems lose alignment over timeModern kitchens prioritizing minimal visuals
    Cabinet FinishHigh-gloss laminateReflects light, looks premium initiallyShows fingerprints and scratches quickly in high-touch zonesLow-traffic or display-heavy kitchens
    Cabinet FinishMatte laminate or satinSofter look, hides wear betterAges more gracefully with daily useFamily kitchens and heavy-use homes
    CountertopQuartzLow maintenance, uniform lookTypically lasts 15–25 years with minimal careMost modern kitchens
    CountertopMarbleLuxury appearanceScratches and stains easily; high upkeepLight-use islands or statement zones
    LayoutIsland kitchenSocial, flexible workspaceNeeds proper clearance or becomes a traffic blockerOpen-plan homes with enough space
    LayoutGalley kitchenHighly efficient workflowOften outperforms islands in small homesApartments and compact layouts
    StorageDeep drawersEasy access, better organizationImproves usable storage by 25–40%Daily cookware and utensils
    StorageStandard shelvesLower upfront costItems get lost; inefficient vertical useLow-budget or secondary kitchens
    LightingCeiling lights onlySimple installationCreates shadow zones on prep surfacesRarely sufficient alone
    LightingLayered lightingTask + ambient controlImproves safety, comfort, and usability immediatelyAll modern kitchens
    AppliancesIntegrated appliancesSeamless appearanceLong-term visual calm, higher resale appealDesign-focused modern kitchens
    AppliancesFreestanding appliancesLower upfront costBreaks visual flow, more visual clutterBudget-first builds

    Quick Reality Benchmarks That Help Decisions

    Quartz tends to stay visually consistent with minimal maintenance for 15 to 25 years in typical home use. Deep drawer systems often improve usable storage by 25 to 40 percent compared with standard cabinet shelving. Under-cabinet task lighting is one of the highest-impact upgrades because it eliminates shadow zones on prep surfaces, which improves comfort and safety immediately.


    Sustainability in Modern Kitchen Design Ideas

    Sustainability in Modern Kitchen Design Ideas

    Sustainability in modern kitchens is mainly about longevity and efficiency. The most sustainable kitchen is the one you don’t have to renovate again in a few years.

    Start with energy-efficient appliances and LED lighting because they reduce long-term power use. Choose low-VOC finishes to improve indoor air quality. If you’re using wood, choose certified sources where possible and prioritize durable construction that resists moisture and heat.

    Material durability is a sustainability choice. Countertops that resist staining and chipping reduce replacement cycles. Cabinets with stable core materials and strong hardware last longer and reduce waste.

    Sustainable modern design is not about trendy eco labels. It’s about building a kitchen that stays functional, safe, and visually stable for the long haul.


    A Practical Modern Kitchen Design Ideas Checklist

    Use this checklist before finalizing plans. It prevents the most common modern-kitchen regrets.

    Practical Checklist for Modern Kitchen Design Ideas

    Layout and workflow:

    The cooking path feels natural and doesn’t cross the main walking route. Prep, cook, and clean zones are clearly placed.

    Storage capacity:

    Storage is strong enough that counters stay mostly clear. Deep drawers exist for daily items. Pantry space is planned for real grocery volume.

    Lighting layers:

    Task lighting covers prep surfaces. Ambient lighting fills the room evenly. Accent lighting adds depth without glare.

    Ventilation strength:

    Extraction matches cooking habits, especially in open-plan layouts.

    Material reality:

    Countertops match maintenance tolerance. Cabinet finishes fit daily use and fingerprint expectations.

    Appliance ergonomics:

    Ovens and microwaves are placed for safe use. The sink and dishwasher are positioned to reduce dripping and back-and-forth steps.

    If all boxes are checked, the design will feel modern for the right reason. Because it works.


    Why Homeaholic Designs Modern Kitchens That Last

    Homeaholic Authority on Modern Kitchen Design Ideas

    Homeaholic approaches modern kitchen design as a connected system. Layout decisions are made with workflow in mind. Storage is designed to keep counters clear. Materials are selected based on durability and maintenance reality. Lighting is planned as a functional layer, not decoration.

    The goal is a kitchen that stays visually calm during real life, not only in staged photos. That means planning for high-touch zones, cleaning habits, cooking intensity, and open-plan airflow. When those factors are handled early, the kitchen stays modern because it stays usable.

    This is why Homeaholic focuses on clean-line cabinetry, integrated appliances, smart storage solutions, and lighting that supports daily prep. Modern kitchens last when the design solves friction, not when it copies trends.


    Frequently Asked Questions About Modern Kitchen Design Ideas

    What makes a kitchen truly modern?

    A modern kitchen uses clean lines, integrated storage, functional layouts, and minimal ornamentation to prioritize efficiency and visual balance.

    Are modern kitchens suitable for small homes?

    Yes. Modern design principles reduce clutter and maximize storage, making them ideal for compact spaces.

    Are handleless cabinets practical?

    They look clean but require quality hardware. Soft-close mechanisms and proper spacing are essential for long-term use.

    Which countertop is best for modern kitchens?

    Quartz offers the best balance of durability, appearance, and low maintenance for most homes.

    Do modern kitchens feel cold?

    Only if poorly designed. Warm materials, proper lighting, and wood accents prevent sterility.

    Is a modern kitchen more expensive?

    Not necessarily. Smart planning and material selection can make modern kitchens cost-effective.


  • How to Remove Scratches From a Stainless Steel Sink Without Ruining It

    Light scratches on a stainless steel sink can be reduced using baking soda or a non-abrasive polish, always following the grain. Deeper scratches may require fine-grit sanding and polishing. Scratches cannot always be erased completely, but they can be blended to restore a uniform finish. This guide thoroughly explains how to remove scratches from a stainless steel sink without

    Why Stainless Steel Sinks Scratch So Easily

    Stainless steel sinks look tough, but their surface finish is surprisingly sensitive. Most kitchen sinks use brushed stainless steel, which means the surface has fine directional lines called grain. These lines create the matte look, but they also make scratches more visible when disturbed.

    Everyday actions cause damage. Sliding pots, metal utensils, abrasive sponges, and gritty debris act like sandpaper. Over time, small marks accumulate and turn into visible scratches.

    Understanding the grain and scratch depth is the key to fixing the problem correctly.

    Before touching any cleaner or abrasive, inspect the scratch carefully.

    Stainless Steel Sinks

    Step One: Identify the Type of Scratch

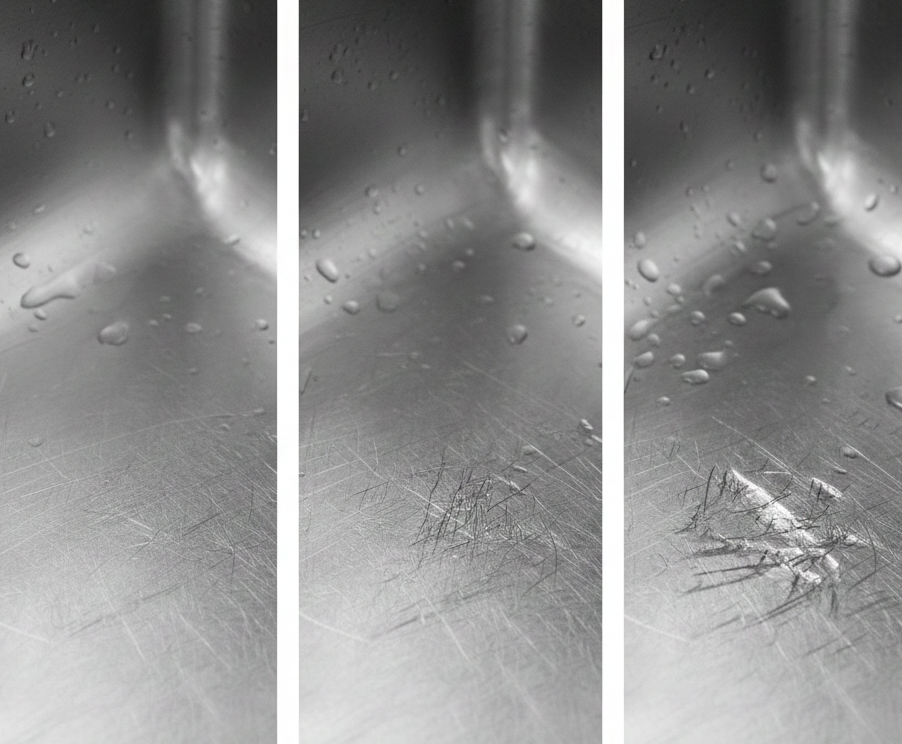
    Light Surface Scratches

    These are shallow marks you can barely feel with a fingernail. They usually appear as dull lines that interrupt the grain.

    Medium Scratches

    You can feel these when you run a fingernail over them. They’re deeper but haven’t gouged the metal.

    Deep Scratches

    These are grooves that cut into the steel. You can clearly feel them, and they often catch light differently.

    Scratch depth determines the method. Treating a deep scratch like a light one wastes time. Treating a light scratch aggressively can damage the sink.


    The Most Important Rule: Always Follow the Grain

    Stainless steel sinks have a directional finish. Look closely and you’ll see lines running in one direction.

    Every cleaning, polishing, or sanding motion must follow this grain. Working against it creates new scratches and leaves swirl marks that are much harder to hide.

    This rule applies to every method below.

    How to Remove Light Scratches From a Stainless Steel Sink

    Stainless Steel Sinks

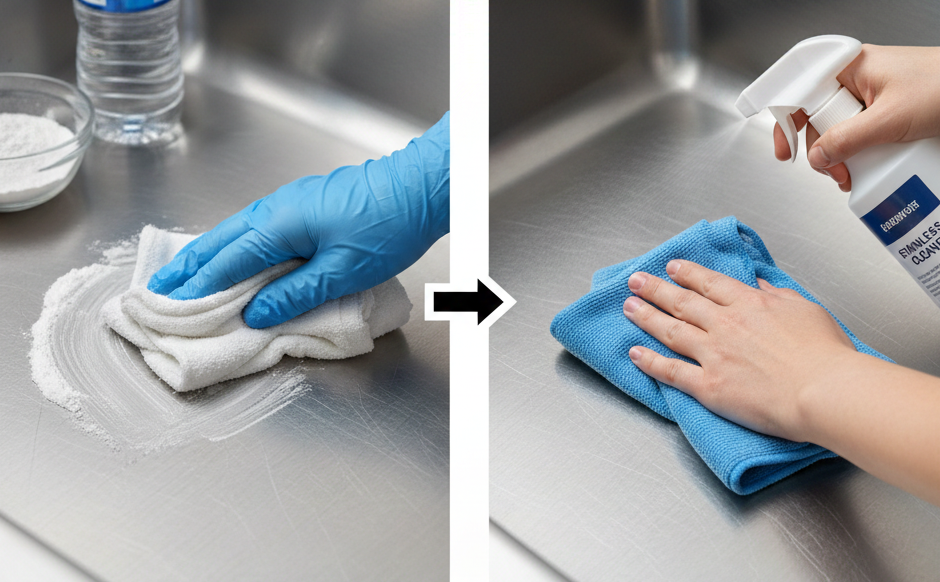
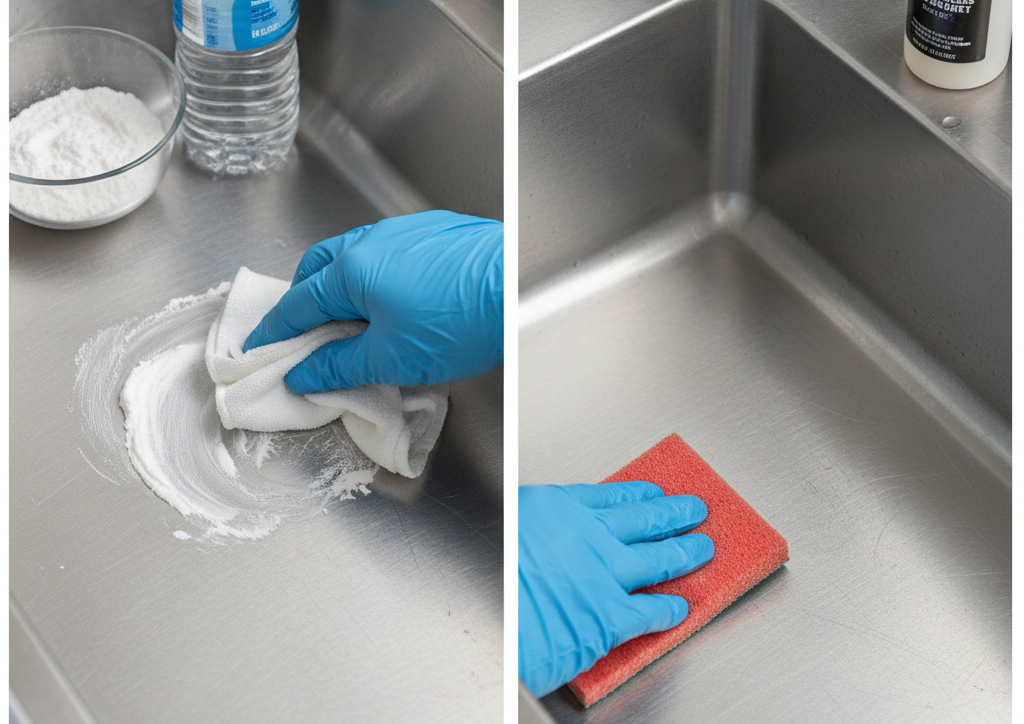
    Method 1: Baking Soda Paste

    Baking soda works because it’s mildly abrasive without being destructive.

    Mix baking soda with water until it forms a thick paste. Apply it to the scratched area using a soft microfiber cloth. Gently rub with the grain, using light pressure.

    After 1–2 minutes, rinse with water and dry the surface. Many light scratches will fade or disappear completely.

    This method is ideal for maintenance scratches and early wear.

    Method 2: Non-Abrasive Stainless Steel Cleaner

    Commercial stainless steel cleaners or polishes are designed to clean and lightly buff the surface.

    Apply a small amount to a microfiber cloth and rub along the grain. These products won’t remove deep damage, but they blend surface scratches and restore shine.

    This is a low-risk option if you’re unsure about abrasives.


    How to Fix Medium Scratches Safely

    How to remove scratches from a stainless steel sink

    Method 3: Baking Soda + Controlled Pressure

    For scratches you can feel but not gouges, baking soda can still work with patience.

    Apply the paste and rub with slightly more pressure, still following the grain. Work in short sections and stop frequently to check progress.

    Multiple gentle passes are safer than one aggressive attempt.

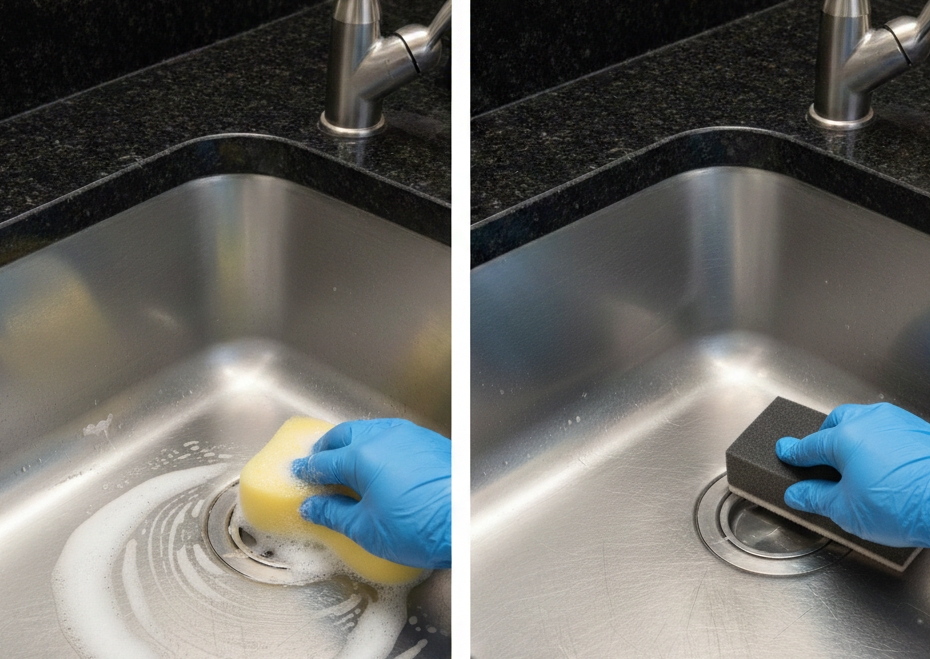
    Method 4: Fine Non-Woven Abrasive Pads

    Ultra-fine non-woven pads (often labeled “fine” or “ultra-fine”) can help reduce moderate scratches.

    Use them dry or with water. Move in straight lines along the grain. Never scrub in circles. This method removes a microscopic layer of metal, blending the scratch into the surrounding finish.


    How to Reduce Deep Scratches (Realistic Expectations Matter)

    Deep scratches cannot usually be erased. The goal is to blend, not remove.

    How to remove scratches from a stainless steel sink

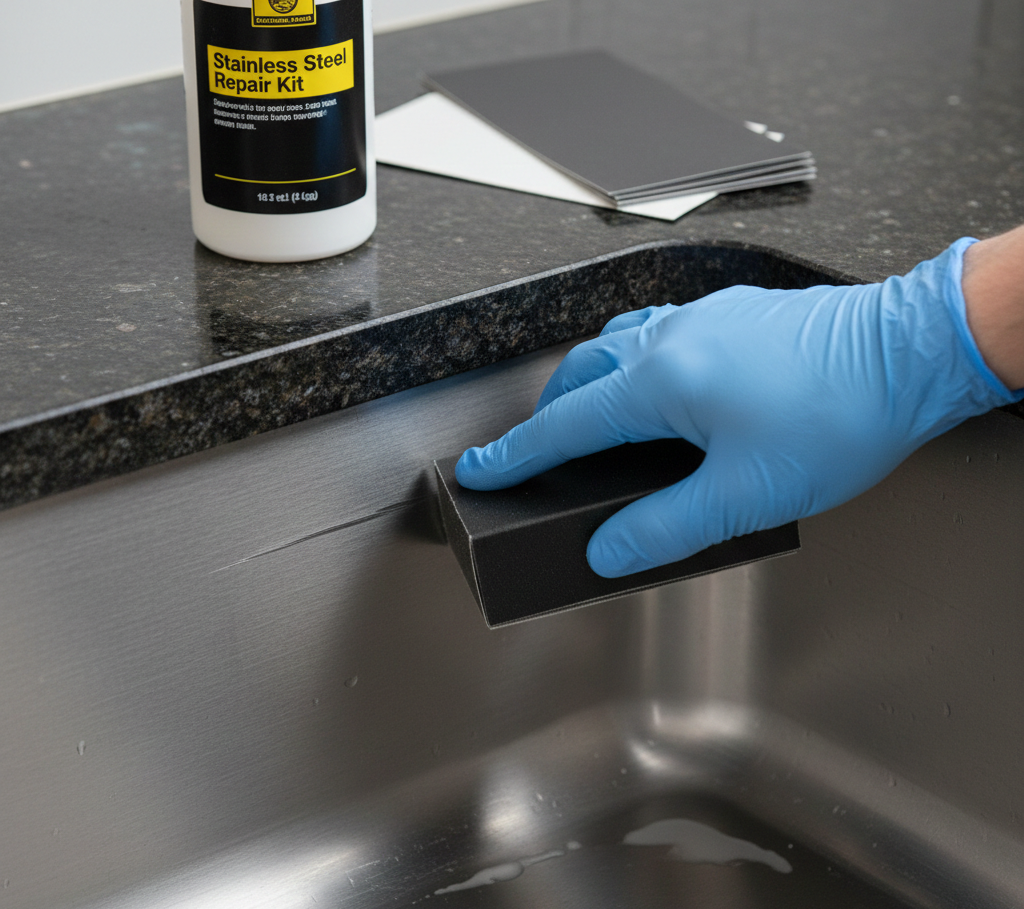
    Method 5: Fine-Grit Sandpaper (Advanced DIY)

    Use only very fine grits, typically 800 to 2000 grit. Anything rougher will damage the sink.

    Lightly sand the scratch with the grain, keeping the area wet. Use minimal pressure. Stop often to inspect.

    Once the scratch softens, follow up with a stainless steel polish to even out the finish.

    This method permanently alters the surface, so test on a hidden area first.


    When Deep Scratches Should Be Left Alone

    If sanding makes the area look uneven or shinier than the rest of the sink, stop. Overworking creates patchy finishes that draw more attention than the original scratch.

    In some cases, living with a softened scratch is better than chasing perfection.


    How to remove scratches from a stainless steel sink

    Cleaning vs Scratch Removal:

    A Common Mistake

    Many people confuse cleaning with refinishing.

    Cleaning removes residue, water spots, and discoloration. Scratch removal reshapes the surface. Using harsh cleaners won’t fix scratches and may create new ones.

    If a product claims to “erase scratches instantly,” be skeptical.


    What Not to Use on Stainless Steel Sinks

    This is where most damage happens. Most guides on “how to remove scratches from a stainless steel sink” leave out this part because they either purposely do it or think that it is supposed to be public knowledge.

    Steel wool creates deep, permanent scratches. Chlorine bleach dulls the surface and causes discoloration. Powder cleaners are often too abrasive. Scouring pads designed for cookware are usually unsafe for sinks. Anything gritty or metal-based should be avoided.


    How to Restore Shine After Scratch Treatment

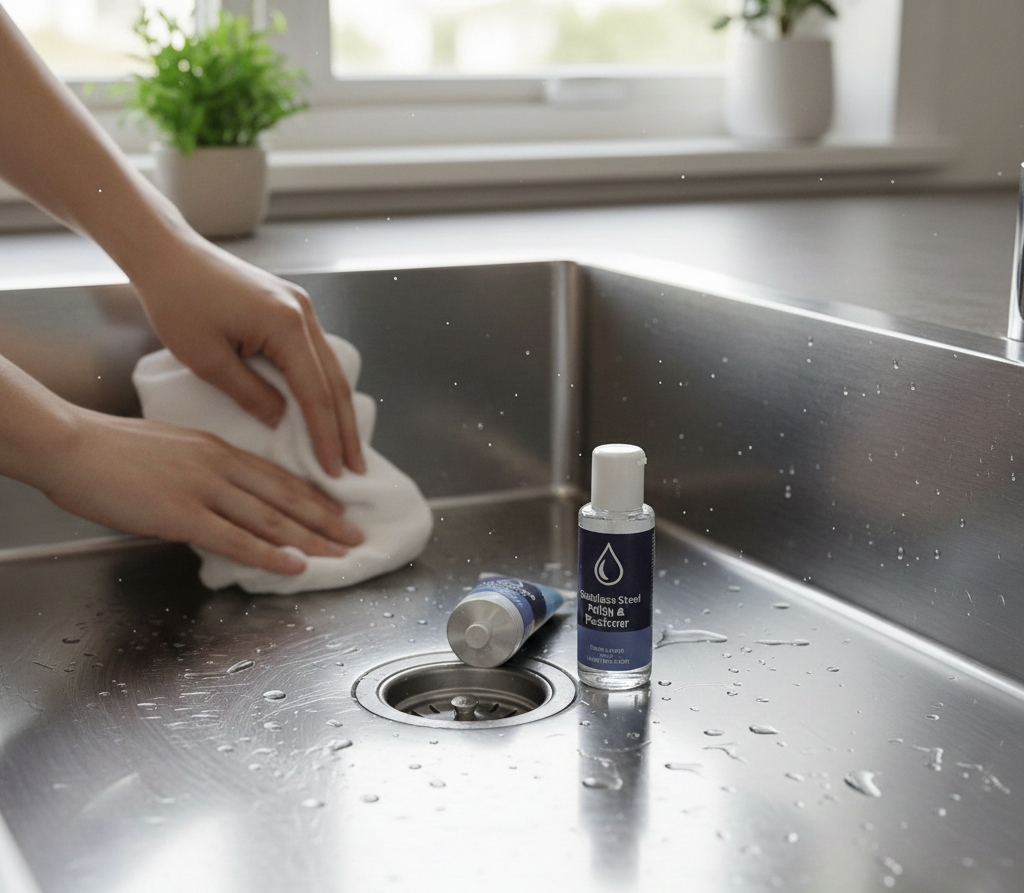
    Once scratches are reduced, polish restores visual uniformity.

    Apply a stainless steel polish or a small amount of mineral oil to a clean microfiber cloth. Wipe with the grain and buff lightly.

    This doesn’t remove scratches, but it evens out reflection and makes the sink look newer.

    How to remove scratches from a stainless steel sink

    Preventing Future Scratches (Long-Term Wins)

    Prevention is easier than repair.

    Avoid dragging heavy cookware across the sink. Rinse away grit before cleaning. Use sink mats if you frequently wash large pots. Stick to soft cloths instead of abrasive sponges.

    These habits preserve the brushed finish and slow wear dramatically.


    Brand Authority Note

    Practical surface-care guides like this reflect how Homeaholic approaches everyday home maintenance. The focus isn’t quick fixes. It’s using the right method for the right problem, with realistic expectations.


    Final Takeaway

    Scratches on stainless steel sinks aren’t a sign of failure. They’re a sign of use. With the right method, most scratches can be softened, blended, or minimized without damaging the finish.

    How to remove scratches from a stainless steel sink

    FAQ Section

    Can scratches be completely removed from stainless steel sinks?

    Light scratches often can be removed or nearly erased. Deep scratches usually cannot be fully removed, but they can be blended to reduce visibility.

    Does baking soda damage stainless steel?

    No, baking soda is mildly abrasive and safe when used gently with the grain. Excessive pressure can still dull the finish.

    Can toothpaste remove scratches from stainless steel?

    Non-gel toothpaste has mild abrasives and may help very light scratches, but it’s less consistent than baking soda or proper polish.

    Is sanding stainless steel sinks safe?

    Fine-grit sanding can be safe if done carefully along the grain. It permanently alters the surface, so it should be a last resort.

    Why do scratches look worse after cleaning?

    Cleaning removes oils that mask scratches. Once dry, scratches reflect light differently and become more noticeable.


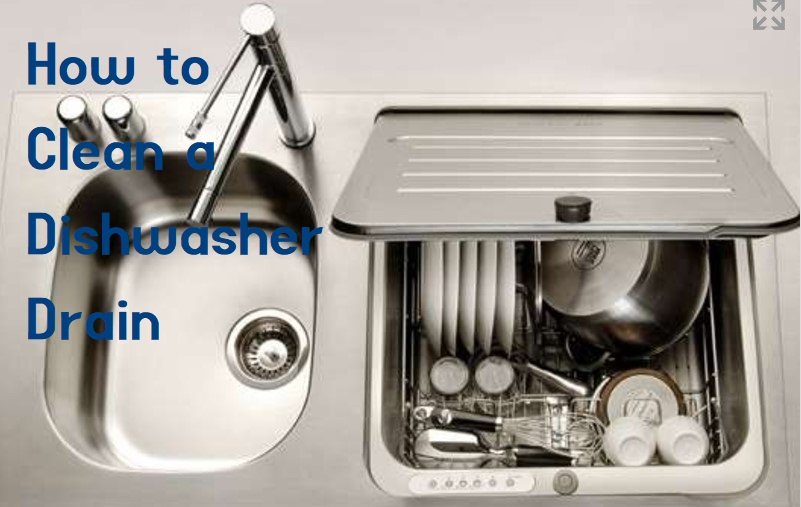
  • How to Clean a Dishwasher Drain

    Dishwasher drains often gets clogged with grease build-up, food debris etc. When your dishwasher stops draining completely after it is used then it indicates your drain is clogged. So the question is how to clean a dishwasher drain effectively. There are many ways to clean a dishwasher drain at home. Here are some easy ways for how to clean a dishwasher drain.

    How to Clean a Dishwasher Drain

    1.How to Clean a Dishwasher Drain by Cleaning the Drain Filter

    Take a damp cloth to clean the filter and remove debris. Remove any debris or food waste remained in your dishwasher. Take a damp cloth and wipe around the filter and catch basin.

    For example, you can find small particles like seafood shells, noodles, bones or glass shards.

    Unscrew the Filter

    Use owner’s manual for how to remove the filter on your dishwasher. Commonly, four screws hold the filter. In order to access the filter, you need to remove the bottom rack of the dishwasher.

    Wash the dishwasher filter with water and remove grease or debris attached to the filter. The dishwasher will not drain properly if the filter is clogged.
    You can use a wet vac to clean off grease or other remaining from the filter.

    After cleaning the dishwasher filter, reconnect it using a screwdriver. Remember put all the screws in place before tightening. You will not need to unscrew all the screws if you drop a screw into the dishwasher bottom.

    2.How to Clean a Dishwasher Drain- Unclogging the Drain

    How to Clean a Dishwasher Drain- Unclogging the Drain

    Remove the bottom rack to unclog the dishwasher drain from inside. You will be able to access to the drain, filter and catch basin. Disconnect the power before working on the dishwasher.

    Remove the drain catch and filter using a screwdriver located in the center bottom of the dishwasher. Read the owner’s manual to locate and remove the dishwasher filter.

    After removing the filter and drain catch, the drain will appear in front of you. Remove the clogs from the drain with an auger or straightened wire hanger.

    Cleaning Procedure

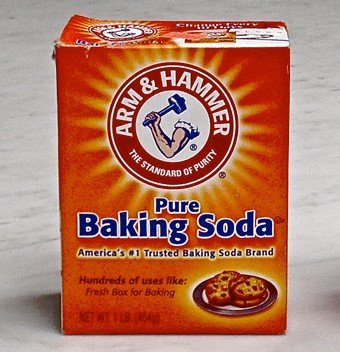
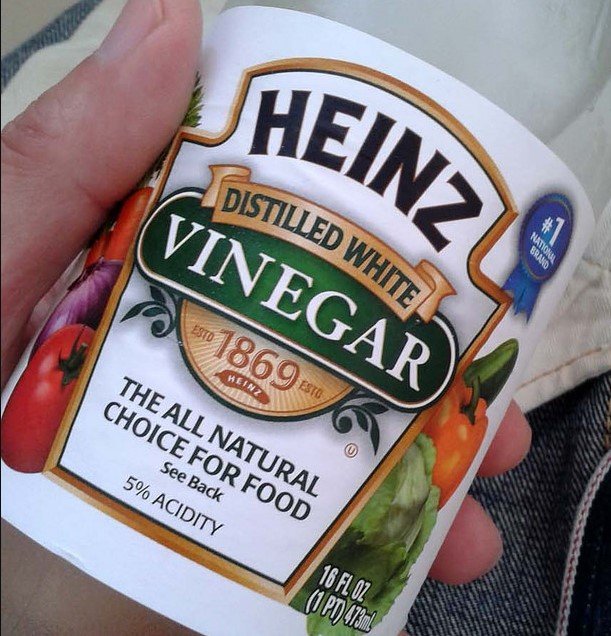
    Pour vinegar and baking soda mixture down the drain. Use vinegar and baking soda solution to flush out the drain. Pour two tablespoons of vinegar and one tablespoon of baking soda down the drain.

    You can also use commercial drain cleaner for unclogging drain but they may contain harsh chemicals which mostly remain in a dishwasher.

    Give the solution 10-15 minutes to sit properly. The vinegar and baking solution helps to break up clogs that remain in the drain. Pour hot water down the drain after 15 minutes to remove the mixture along with any remaining debris.

    Now connect and run the dishwasher on a normal cycle after unclogging the drain. The dishwasher will drain properly and water will no longer pool in machine bottom.

    3.How to Clean a Dishwasher Drain- Removing Clogs from the Drain Hose

    How to Clean a Dishwasher Drain- Removing Clogs from the Drain Hose

    Turn off the dishwasher power by removing the plug before doing anything.

    Read given instructions on a dishwasher owner’s manual to know how to locate and disconnect the hose from the dishwasher.

    After locating the hose, use pliers to pinch the wire clamp and slide it up the hose. Place a catch basin under the hose also to collect any spills that can come out of the hose.

    After disconnecting the hose, trying wiggling the hose to loose remaining that may be trapped.

    After removing the clog from the hose, attach the hose to the dishwasher. Now plug in the dishwasher and run it on normal cycle without dishes. The dishwasher will drain properly and water will not pool in the machine bottom.

    4.How to Clean a Dishwasher Drain- Maintaining a Clean Dishwasher

    You can also use precautionary tips to ensure the dishwasher drain doesn’t clog again. Your dishwasher also shares a drain with the kitchen sink. If kitchen sink is clogged then it can also a backup dishwasher. Immediately run garbage disposal before using the dishwasher. It will help to clear the drain and also makes the dishwasher even more efficient.

    In most cases, the dishwasher drain gets clogged with large food particles that trap in the drain or filter. Removing the food particles from the dishes before loading them in a dishwasher can help you to prevent this problem. You can keep a dishwasher clog-free and clean in such way.

    Don’t over rinse your dishes. It is a good idea to remove food particles from dishes before loading the dishwasher, don’t soak your dishes. The dishwasher needs a little grease. Without grease or grime, the soap will form during the washing cycle and it can be dangerous to the machine too.

    Over usage can also cause clogs in dishwashers. You can also save money and extend the dishwasher lifespan by running it when it is full. Don’t run the dishwasher for partial loads.

    Additional Tips

    Before cleaning the drain, always unplug the dishwasher.

    Contact a licensed plumber if you are not able to unclog the dishwasher drain. An expert plumber will help you to fix the clogs and keep your dishwasher running in proper shape again.

  • How To Clean Aluminum Pots

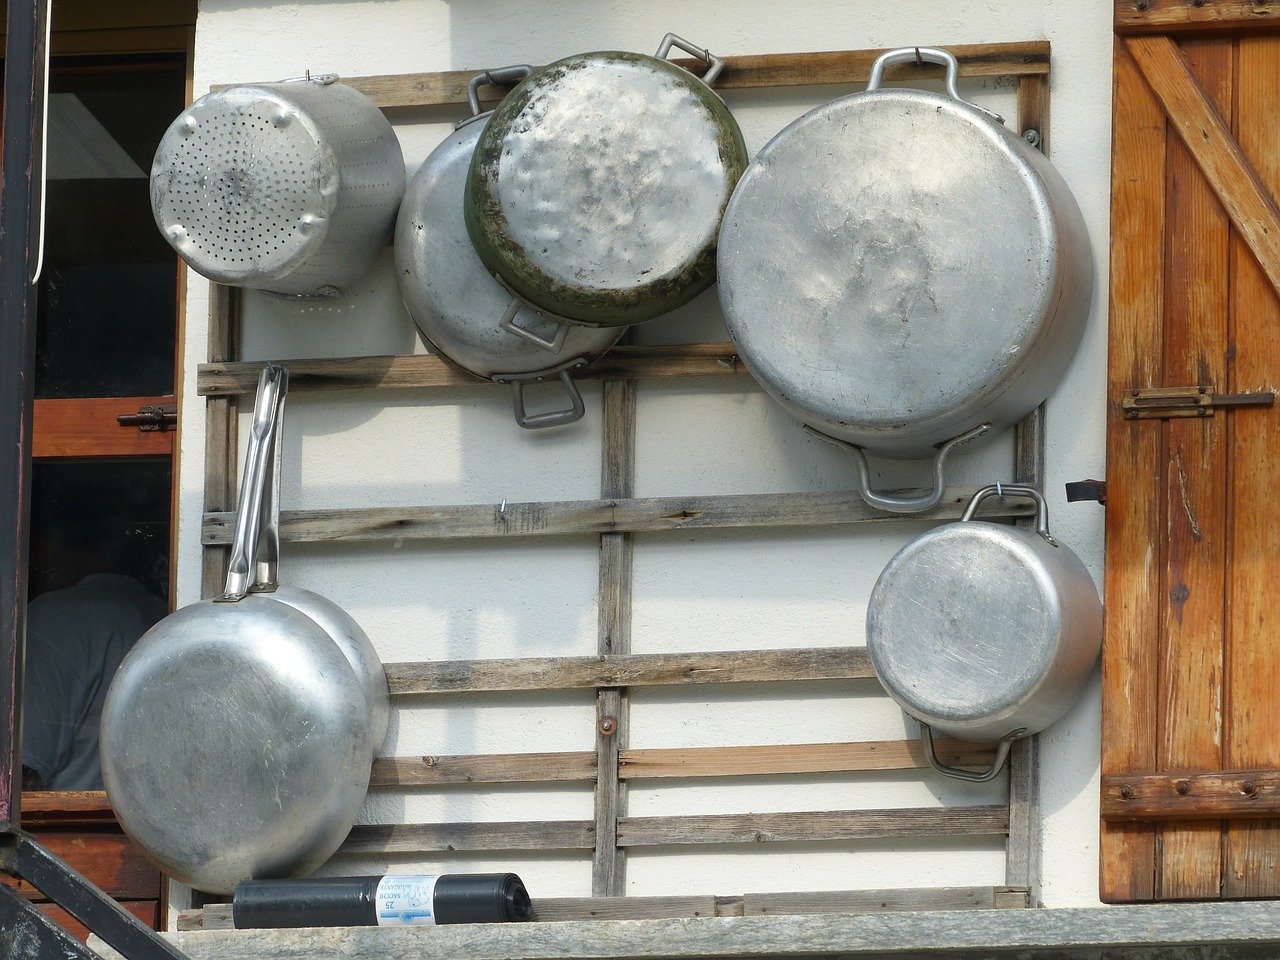
    Aluminum is one of the plentiful metals available on the earth. It’s a soft and light metal used for multiple purposes. Sometimes it is mixed with other metals to make its properties stronger like magnesium, zinc, and copper. Aluminum is used for different purposes like electric works, siding, paints, wheels, motors, gutters etc. Mainly aluminum is used to make household items like Pots, tables, and pans.

    Multiple coating on surface replies to Oxygen exposure. Aluminum pots are often used to cook food at home so it develops a undesired coating on the surface of the pot and leaves stubborn stains to clean and restore its shine and beauty. Do you want to know how to clean aluminum pots easily? Let’s share some useful ways on how to clean aluminum pots and pans at home.

    How to Clean Aluminum Pots

    More clean pots you use more comfortable you feel while cooking and washing the aluminum pots. Sometimes burnt cooked food leaves unpleasant and stains on its surface which becomes so hard to clean and return back its shine like it was purchased brand new. If we don’t take corrective action at the right time so our pots will turn into dull gray and may be its permanent to remove.

    How to Clean Aluminum Pots

    Hence, there are numerous ways to clean out dirt and debris on the surface of aluminum pots but we have to pick few which work out the most effective and efficient and provide us the best-desired solution forever. There are various ways to clean out aluminum pots at home which are not only easier but effective too.

    How to Clean Aluminum Pots

    How to Do it

    • Wash out all the dust or dirt visible and layered on the pots. Fill it out with warm water and leave it for few minutes as required or until it makes stains weaker then wash it out with soap. Escape from the aluminum oxide by washing out grease first. You can use a scratch pad to remove all grease on the surface and from the surrounding edges.


    • How to clean out burnt food on the underneath surface of the pots. Pour some water into the pot and boil it for the five to ten minutes then rub it with long sharpen flat edge spatula made of wood. Repeat the process until it gets clean.


    • Always never use harsh items to remove the nastiness on the surface on the pots. Use soft plain steel wool. The disadvantage of using harsh abrasive is that it leaves permanent scratches on the pot which is so difficult to remove in the near future.


    • Cleaning with Acid. Though it is uncommon practice to use this method. It can be effective to enhance the look of the aluminum pots. Fill out the pot with water by adding two tablespoons of vinegar, cream tartar or lemon juice. Let the water boil in the pot for at least fifteen minutes. It also plays a crucial role to remove the dirt or burnt cooked stains.


    • If above-mentioned method a is a bit hard to apply so just pick a lemon and slice it to rub on the surface of the aluminum pots gently. Lemon juice is also same effective but rubbing too hard can be hazardous for the look of pots.


    • Never use chemicals to clean it up because using chlorine bleach or other acids can be harmful to the human skin as it causes to skin, eye and lung irritation. It can also cause diarrhea or vomiting. Use simple and homemade remedies or natural things.


    • There are also various items to increase the brightness of the aluminum pots and it also works as a cleanser. It’s not only biodegradable but also environmental friendly items and nontoxic. It is popular as Aluminum Cleanser and brightener.


    • Baking soda is also useful to eradicate grease on the surface and edges of the pot.


    • Creamer of tartar can also be effective so add two tablespoons of creamer tartar in the quarter of the water and boil for the ten minutes until the mixture dissolved in the water.


    • There is a traditional and easy method to clean the burnt food or debris or shine the brightness of the pot is rubbing tiny chunks of sand with wool steel can easily clean out but rubbing too hard can leave permanent scratches on the surface of the pot.


    • Tomatoes, lemons, and apples are also effective for cleaning aluminum pots. They also work like natural acid which is non-toxic and less harmful but it’s uncommon in practice by household wives.

    CONCLUSION

    In short, there are various unique and old methods for cleaning aluminum pots. But always choose the best possible and feasible method which provides more effective outcome with a permanent solution to all of our queries. Choosing not only economical method which not only cleans the dirt or debris of gray lines or greasy texture but it is also appropriate to the human health.

    CONCLUSION

    There are various acids which are effective to clean the aluminum pots. But they are really harmful to the human health. They may not only create skin issues but also eyes irritation issues. So we have to look at all of the other health factors and side effects of the adopted method. A fine grade of steel wool and pad is handy for its benefits. Vinegar and creamer tartar mixture is greatly effective to achieve our goal. While lemon juice method is not only economical but also homemade remedy and equally effective.

  • How to Clean Grease Off Stove Hood

    Your range hood channel takes a great deal. The majority of that oil and smoke from your day by day cooking gets consumed by the channel, particularly in the event that you cook with stainless steel cookware, abandoning it looking corroded, dry, and only straight up gross. Would you need to cook or engage in a kitchen where your range channel is truly canvassed in rottenness? We thought not. In case you’re hoping to clean your range channel yet don’t know where to start, we don’t censure you. It’s a dark piece of the kitchen that you’re never truly instructed how to clean. All things considered, never fear! The biggest problem is how to clean grease off stove hood right?

    How to Clean Grease Off Stove Hood

    To stay away from your channels getting to where they are, making a point to check your fan channels consistently. In the event that you want to profound sear sustenance, you ought to check considerably MORE routinely, in light of the fact that chances are your channel isn’t looking so hot.

    Moving on, It began with a worn out light. I was making a flame broiled cheddar sandwich for myself on the stove when the light over the stove went out. Since I have this thing about expecting to perceive what it is I’m cooking, I needed to put the cheddar sandwich on hold while I went looking for another globule.

    As I was changing the globule I sadly saw the state of the underside of the hood over my stove. YUCK! Kinda wish I hadn’t done that. Typically all I see is front of the stove hood, which I figure out how to keep entirely perfect. Well, don’t let that trick you, underneath sneaks a monster!

    How to Clean Grease Off Stove Hood

    I more likely than not taken a gander at that thing a hundred times and not mulled over how filthy it must be – until today that is. So slight change of arrangements for the evening. I completed the barbecued cheddar sandwich and went to counsel with my companion Google.

    How to Clean Grease Off Stove Hood

    Pull out your greatest pot, fill it with water and heat it to the point of boiling. At that point include 1/2 measure of heating pop, gradually! Truly, you need to include it about a tablespoon at any given moment since it promptly bubbles up alarmingly! (The bubble goes immediately.) Then bring your built up with oil channel and submerge it in the pot. (All things considered, 1/2 of it in any case.)

    For an initial couple of minutes, I viewed in interest as the bubbling water went to deal with the oil. I could see it simply softening off. In any case, my interest soon swung to sicken as I keep on watching my channel “cook” in the water.

    The Cleaning Process

    I couldn’t trust how much oil simply kept rising to the surface! I at long last concluded that I ought to discharge this pot o’ muck, and give the vent another treatment with a perfect pot of water and additionally preparing pop. So I took out the vent, and dumped the oil smooth out in the lawn (I wasn’t going to dump it down my sink!) When I got back in I chose to have a go at flushing the vent with truly high temp water out of the tap before bubbling it once more, however it worked out that is all it took to get whatever remains of the oil out. I continued flushing until the water ran clear, and that was that.

    In the wake of giving the vent a chance to dry for whatever remains of the day propped up on top of the stove, I returned it to its home and it was a quite extraordinary feeling knowing it was presently an oil free zone.

    All things considered, it truly was a straightforward settle – one that could have been a great deal more terrible had it included a hand-to-hand battle with the oil.

    Come to consider it, the main time my hands touched oil was taking the sift through in any case.

    How to Clean Grease Off Stove Hood- The Simple Way

    How to Clean Grease Off Stove Hood- The Simple Way

    Be that as it may, to manage the channel you have now, attempt this basic system:

    You Need:

    • OxiClean
    • Hot water
    • Bucket

    You can use many other products here, such as dish soap or even hot steam, but this method works extremely well.

    1.  Fill up a basin with bubbling high temp water.
    2. Add a couple scoops of OxiClean.
    3. Place the channel in the blend and leave in for 10-30 minutes.
    4. Scrub with a swarm brush if need be.
    5. Dry and supplant the channel.
  • How to Remove Rust from Stainless Steel Sink

    It is fact that Stainless steel and tenacious rust is each kitchen darling’s foe. Every kitchen lover wants to know how to remove rust from stainless steel sink? What’s more, since we’ve all been there (gracious, have we ever), we thought it just appropriate to impart to you some accommodating tips that make freeing your sink of that unattractive rust super simple. I’m talking everything from lemon juice to lighter liquid keeping your kitchen shining clean.

    How to Remove Rust from Stainless Steel Sink

    In spite of its name, stainless steel rusts. Be that as it may, if your stainless steel sink is eroded, there’s no compelling reason to supplant it at this time. With a touch of know-how and simple cleaning deceives, you can evacuate rust in a glimmer.

    Nothing’s more terrible than washing plates after supper in a corroded sink. While stainless steel doesn’t rust as effectively or in an indistinguishable way from standard steel, in spite of prevalent thinking, it is not recoloring verification. Stainless steel kitchen sinks are at times significantly more helpless to rust when other wet articles, for example, cast press container, utensils or flatware are left in the sink for drawn out stretches of time. The metal responds with the water and Galvanic Corrosion happens, prompting the staining you see on the sink’s surface zone.

    There are more than 150 evaluations of stainless steel, and some are more inclined to consumption than others. As a rule, the higher the chromium content, the more improbable the steel will rust. Check with your maker or guarantee to decide the chromium substance of your stainless-steel sink, and if looking for a substitution, make sure to settle on a high chromium number.

    How to Remove Rust from Stainless Steel Sink

    How to Remove Rust from Stainless Steel Sink

    Fortunately, you don’t have to purchase another sink to handle rust at this point. Attempt these simple, natively constructed cleaning answers for making your stainless-steel shimmer:

    How to Remove Rust from Stainless Steel Sink with Vinegar

    How to Remove Rust from Stainless Steel Sink with Vinegar

    Simply pour a liberal measure of vinegar onto a delicate scouring pad* for an eco-accommodating contrasting option to cruel chemicals. The stain will lift instantly.

    How to Remove Rust from Stainless Steel Sink with Lemon

    How to Remove Rust from Stainless Steel Sink with Lemon

    Lemon squeeze and preparing pop: Create glue from equivalent amounts of lemon squeeze and heating pop, and then clean with a moist wipe. For harder stains, leave the glue on for 15-30 minutes, then wipe clean.

    Lemon squeeze and cream of tartar: Mix one tablespoon of cream of tartar with a couple drops of lemon juice to make glue, then smooth it on rust spots and rub it in overwhelmingly with a delicate wipe.

    Club pop: Buff rust scrapes with a pop hose material.

    Lighter liquid: If all else comes up short, take a stab at pouring lighter liquid on a perfect material and scouring the rust spots clean. For security, remember that lighter liquid is exceptionally combustible and can be lethal for the earth, so utilize this choice if all else fails – and never around an open fire (ensure all adjacent stove burners are off).

    In the blink of an eye by any means, your stainless sink will sparkle brighter than that cast-press pot – simply keep the two far from each other to stay away from more rust later on.

    How to Remove Rust from Stainless Steel Sink Easily

    Here are a couple of things to attempt to expel rust stains from stainless steel.

    Attempt Comet or Bar Keepers Friend. I had one and it got it out of mine.

    On the off chance that that doesn’t work Try CLR. Give it a chance to sit for somewhat then clean.

    If it doesn’t work then make a glue of lemon squeeze and salt and let it sit on it over
    night and after that delicately rub.

    If it doesn’t work then you can simply have a go at sending it out with 600 coarseness sandpaper. This worked truly well on my porcelain sink that nothing would get it out.

    Try not to let rust run widespread in your home. Battle the nosy stain with these surefire techniques and your ledges and apparatuses will soon flicker at the end of the day

    For Little Stainless Steel Rust Spots

    For Little Stainless Steel Rust Spots

    STEP 1

    When evacuating just a couple of ignoble spots from the side of a skillet or the front of your dishwasher, blend a glue from 1 tablespoon of preparing pop and some water. (For bigger rust spots, skip ahead to the following arrangement of steps.) Baking pop is an extremely gentle rough, so you can sit back and relax realizing that you’re vanquishing erosion in a totally synthetic

    STEP 2

    Rub the glue onto your stainless steel surface toward the grain utilizing a delicate, clean fabric.

    STEP 3

    Finally, wash and tenderly wipe the influenced zone with a moist paper towel.

    For Serious Stainless Steel Rust

    For Serious Stainless Steel Rust

    STEP 1

    Rinse the bigger surface region—be it the bowl of your sink or a segment of your stainless steel counters—completely to expel any garbage and hose the surface. Quickly after, sprinkle a layer of heating pop over it, making a point to coat the whole rusted district.

    STEP 2

    Let the layer of preparing pop to sit for between 30 minutes and 60 minutes.

    STEP 3

    Roll up those sleeves and begin scouring! You can scour with a delicate swarm brush, or—in case you’re crisp out of cleaning brushes—utilize an old toothbrush that you may have put something aside for these kinds of cleaning purposes.

    STEP 4

    Rinse and precisely dry with a paper towel.

  • How To Clean a Refrigerator That Smells

    A refrigerator is one of the most electronic equipment in which you store food, fruits, frozen foods, meats, fish, chocolates, drinks, sauces and ice cream and so many other perishable items. A refrigerator is the biggest blessing for us in a modern age. We can’t store the frozen items outside because it will cause rotten and smelled and we, not enough space outside. But sometimes refrigerator smell really awful and need to be cleaned properly. So let’s find the best answer for how to clean a refrigerator that smells.

    How To Clean a Refrigerator That Smells

    Refrigerator not only stores all multiple varieties of items but it also cools down and we can use it when required. But all electronic equipment requires maintenance so as refrigerator requires great maintenance so that items never leave a smell or turn rotten. There are different best ways to clean a refrigerator especially that smells.

    Advantages of Refrigerator

    Advantages of Refrigerator

    • It is a great way to keep food cool.
    • It also keeps away perishables items from spoiling.
    • Enables to stores for the long period of time such as weeks or months.
    • Also maintainability of the freshness of the eatable items.
    • Freezer component freezes items at freezing temperature.
    • It saves food from spoilage.

    Disadvantages

    Disadvantages

    • It requires heavy electricity consumption.
    • Electricity breakdown can cause perishable items to spoilage and smells.
    • Though it is expensive to afford for poor people.
    • It’s not considered economic friendly.
    • Great repair and maintenance are attached to the refrigerator cooling problems, ice making malfunction, motor replacement.
    • Cost required for the repair and maintenance.

    How To Clean a Refrigerator That Smells- Initial Steps

    How To Clean a Refrigerator That Smells- Initial Steps

    •Very first step is to turn off the refrigerator and unplug it in a manner to avoid any harm.

    •Secondly, remove all the items from the fridge.

    •Discard all expired food may be it is the main cause of the smell.

    •Later on, place food to keep in a cooler by adding ice as it will be outside for some time.

    •Then make a mixture of baking soda and warm water which will work effectively.1/2 cup of baking soda into warm water is preferred.

    •Next step is to take out all shelves, bins and any other removable parts.

    •Wash all the parts which you took out and leave to dry.

    •Carefully clean out the drip tray which contains dirty water.

    •Lastly, remove the grill from beneath the doors.

    How To Clean a Refrigerator That Smells

    How To Clean a Refrigerator That Smells

    How To Clean a Refrigerator That Smells with Baking soda

    How To Clean a Refrigerator That Smells with Baking soda

    Use baking soda to escape from the unpleasant smell. Pace the baking soda sheet across the refrigerator then close the doors of the fridge until smell vanishes. Later on throw away baking soda.

    Dump baking soda on a sponge and scrub the sides, shelves, and all parts inside the fridge then rinse with a clean, wet sponge.

    In a manner to get an effective result on the regular basis keep an open box of baking soda in your fridge at all times.

    For the cleaning purpose add up 1/2 cup of baking soda into water and clean by using it.

    How To Clean a Refrigerator That Smells with Salt

    How To Clean a Refrigerator That Smells with Salt

    Remove all the food and also racks from the fridge. Now mix up a salt in 1 gallon or with warm water. Use the mixture with a sponge to clean the inside of the refrigerator.

    Benefits of using mixture are like it won’t scratch the surfaces and it’s also chemical free.

    Cotton Balls

    Cotton Balls

    Use cotton balls with vanilla extract and keep it on a shelf because it serves as a deodorizer.

    Lemons

    Lemons

    Lemons are naturally effective remedies. Use lemon juice on the cotton balls and place it in the refrigerator for many hours.

    Plastic Lids

    Plastic Lids

    Plastic lids are effective to clean the mess on the fridge shelves. It is preferred to keep lids under food containers.

    Vanilla Extract

    Wiping down the fridge after scrubbing with vanilla essence is the ideal way to vanish smell.
    You can also dip cotton balls for the long terms time in the fridge.

    Vinegar

    Vinegar

    Wash refrigerator with water by adding white vinegar to it and clean gently outside and inside of the fridge. Add white vinegar which counterbalances smells and works like baking soda does.
    It is preferred to keep an open bowl of white vinegar in the fridge mixing with water is also effective.

    Oats as an odor absorber

    Leave a bowl of oats out in your fridge and this will be useful to vanish bad smells.

    Coffee grounds

    Placing dry, fresh coffee grounds in shallow bowls is effective.

    Or keep the coffee grounds on the different levels of a refrigerator. This way will enable to remove smell in few days.

    WD-40

    WD-40

    After washing fridge spray WD-40 then wipe them away with a rag or sponge.

    Be careful to wash off all the WD-40 before returning food to the fridge.

    Conclusion

    Refrigerator serves several functions to of storing, cooling and freezing food, beverages, meats etc. it has become a necessity of life nowadays. In the summers break down of electricity causes various losses of food stored inside and won’t be able to maintain freshness for the longer period of time in the absence of electricity for many hours.
    Sometimes food leaves smell all over the fridge and smell taste also is felt in water kept for cooling in the fridge or felt in other food items ad may cause food spoilage.

    How To Clean a Refrigerator That Smells
    A fridge will smell bad due to its contents. Going vegetarian is the best solution to avoid any smell because meat and dairy items may quicker rotten or spoiled or leave smell than vegetarian items. Therefore, we need to follow multiple ways to clean the refrigerator that smells such as removing all food outside, cleaning shelves and drawers by the paste of water and baking soda. It will eradicate all smell.
    Vinegar, salts and fresh coffee grounds also serves the same functions to clean the refrigerator and its smell too.
    These tips can be adopted on the daily basis which is effective and appropriate. All tips are by using natural things so no harm to use it.

  • Homemade Oven Cleaner Without Baking Soda

    Why do people love natural oven cleaner? Do you open your oven for cleaning it up and then close it as for later on home chores? Do you frequently think of clearing out your oven but cannot do it due to its visible messy condition? Let’s share homemade oven cleaner without baking soda with you.

    Homemade Oven Cleaner Without Baking Soda

    Well, I will be honest that it has happened with all the people availing oven facilities at their places pretty much repeatedly on daily basis. It can also be blamed for laziness or lethargic behavior but somehow it can also be held responsible towards the time taking and long procedure to make the oven tidy and back to its original looking organized position. Not to mention, but I cannot tell anyone else before that how to clean an oven so I used to put it aside until and unless my oven seems to look downright scary.

    It is not like I never tried to clean it up because I saw the pictures claiming that baking soda and vinegar can act together as natural oven cleaner that would magically dissolve away all the oven grease, I exclaimed wow that’s so easy.

    But unfortunately, it didn’t happen. So again I was standing with a filthy looking oven. Also, it can be said with a bad case of procrastination and it was more than resentment. Good thing was that it was not a condition of all is lost. From that time, I came to know and manage cleaning of the oven without using chemicals and hopefully with finger crossed it would also assist someone else in the same similar pinch.

    Homemade Oven Cleaner Without Baking Soda

    Here one question arises, whether to scrub or not to scrub? When it comes to the real world of doing that dirty work, reality tells that we need some elbow grease. I avoid cleaning but especially detest scrubbing. Some heavy usage of chemicals claims to clean without it, but the problem arises that firstly that these type of chemicals don’t always work and if it works well then also it’s not worth the risk I can take to do it.

    Homemade Oven Cleaner Without Baking Soda

    During the struggle of finding out how to clean the oven without baking soda, vinegar all that of other presumed chemical techniques, I have found some important keys to doing it in a very convenient, easy and least complicated manner. Here is what you need to do and follow some of the trouble-free steps:

    1.Doing the Right Preparation

    You will have to realize that it is not a spray and wipe it out the job. It requires some preparation to be done.
    You have to soak the grime for almost overnight. An overnight soaking will be most likely your best step especially when you have years of grease in your oven.

    2.Choosing the Right Tools

    It is always seen and suggested that perfect picking up of tools can turn oven cleaning into a relatively much unproblematic task. Some of the most commonly used tools for oven cleaning to have on hand are:

    • .Stainless steel scouring pads: For scrubbing so to make it easy for you and not to make it hard.
    • A good pair of cleaning gloves: For securing your fingers and nails and not making it greasy as your oven.
    • A few pieces of microfiber wash clothes to wipe out the grease. You can also use the paper towels if you want easier disposal as I am also not a big paper towel fan unless there is something really big to wrap it up.

    3.The Right Selection of Cleaner

    As already said above that vinegar and baking soda didn’t cut it all for my oven, then also I was not ready to quit and give up finding a natural oven cleaner that actually worked out. That was so-called green natural cleaner. I really worked out because all I have done above was the right and appropriate method to clean it up. A simple choosing of oven cleaner will also surprise you and will make you impress.

    4.Get Scrubbing

    Need to get to work, use your scouring pads to get the bulk of grime stick on to your oven and also the steel brush will now take care of your grease in the corners.

    Get Scrubbing

    5.Wipe it Down as Needed

    Now, all that melted stains and dirt should be wiped out so to know what still left to be cleaned. Wipe the excess off with the wash cloths. Rinse it out with warm water and if required again, get on the scrubbing. Repeat it if desired again. Scrub any remaining tough spots. Give your oven a last and then have a full and final wipe down.

    I will not say that my oven turned to look branded and unused. But still, after a little scrubbing, it was not in a bad condition that I imagined. Before that cleanup it can be said it totally turned around. I am not claiming that my oven seems brand new because it’s not a fairytale. One thing for I can say is that I just wanted a clean oven and that I actually had.