Category: Furniture Tips and Tricks

  • How To Unclog a Toilet Without a Plunger

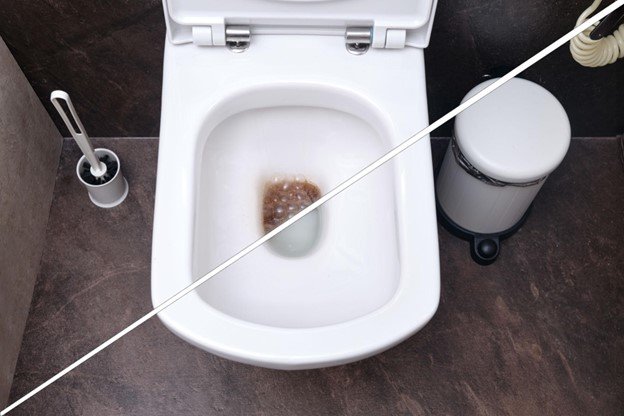
    Yes, you can unclog a toilet without a plunger if the blockage is minor and you choose the right method for the situation. The safest starting options are usually hot, not boiling, water and dish soap for soft clogs, while tougher or deeper clogs are better handled with a toilet auger. If the bowl is already full or water is rising, stop flushing first and control overflow before trying anything else.

    Freshness note

    This guide reflects current plumber-backed and home-repair guidance on no-plunger toilet unclogging methods, with emphasis on safest-first decisions, overflow control, and knowing when to switch to a stronger tool.

    Homeaholic recommends starting with the lowest-risk method first, then escalating based on bowl level, clog type, and whether the toilet shows any real improvement after the first attempt.

    Can you unclog a toilet without a plunger?

    Yes, you can unclog a toilet without a plunger if the clog is minor and you choose the right method for the clog type and bowl condition.

    You usually can, but only if the clog matches the method. Current guidance from plumber-backed and home-repair sources consistently treats no-plunger fixes as most effective for minor obstructions such as excess toilet paper or soft organic buildup. That is why this topic should not be framed as a list of magic tricks. It should be framed as a decision guide. If the clog is soft and recent, several household methods can work. If the problem involves wipes, a foreign object, or repeated backups, the right answer changes quickly.

    What makes this page useful is not just the number of methods. It is the order. The best-performing advice today follows a simple logic. Start with the safest low-force method, watch the bowl level, and escalate only when the signals tell you the blockage is deeper or tougher than a light DIY fix. That is how you avoid turning a small clog into an overflow, scratched porcelain, or wasted time.

    • Minor soft clogs can often clear without a plunger
    • Deeper or repeat clogs usually need stronger tools
    • Rising water changes the first step completely
    • The safest method is not always the strongest method

    What should you do first before trying any method?
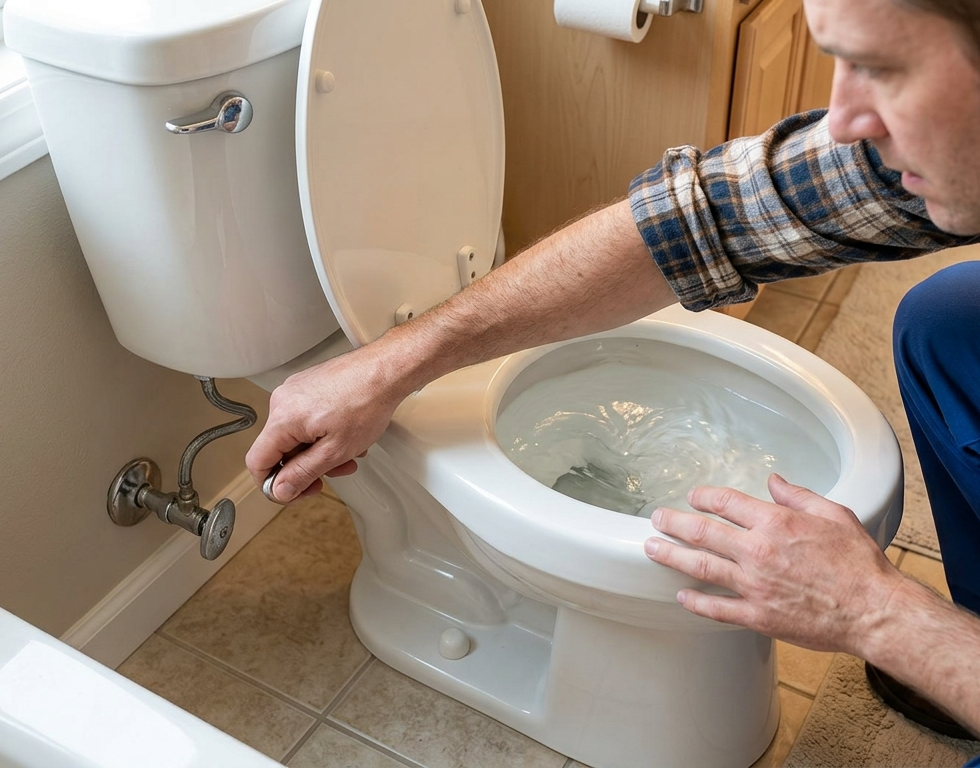
    Stop flushing first and control overflow risk before trying any no-plunger method.

    If the toilet is clogged and the water level looks high, your first job is not clearing the clog. It is preventing overflow. Current guidance says to stop flushing and, if needed, turn off the water using the shutoff valve near the toilet base. That single step prevents more water from entering the bowl and gives you room to think clearly. If the bowl is high but stable, let it settle before adding soap, water, or anything else.

    Once the situation is stable, assess the likely cause. A fresh paper-heavy flush is very different from a toilet that clogs every week or one that may have a toy, wipe, or hygiene product stuck inside. This assessment matters because the safest-first route works best when the clog is soft and recent. It matters less when the blockage is physical, deep, or recurring. Users get better results when they identify the clog type before choosing the method.

    • Stop flushing if the bowl is high
    • Turn off the shutoff valve if water keeps rising
    • Let the level settle before adding anything
    • Think about what was flushed last
    • Choose the method based on the likely clog type

    Which no-plunger method should you try first?

    Start with the lowest-risk method first, usually hot water or dish soap and hot water for a soft recent clog.

    For a standard household emergency, the safest first option is usually dish soap plus hot, not boiling, water. Current sources repeat this because it is low-risk, easy to try, and especially useful for clogs caused by excess toilet paper or organic material. The soap helps lubricate the blockage, while the hot water can help loosen it enough to move through the trap. This is not the strongest method, but it is often the smartest first step when the bowl is stable and the clog seems soft.

    If you want the bigger picture, think in layers. Dish soap and hot water are the low-risk first layer. Baking soda and vinegar are an alternative for some soft clogs. A toilet brush can sometimes work as a temporary pressure tool if nothing else is available. A toilet auger is the strongest real no-plunger tool because it is designed for toilet clogs specifically. That layered approach gives the page a stronger intent match than treating every method as equally good.

    • Start with the lowest-risk method first
    • Use soap and hot water for soft recent clogs
    • Use a toilet brush only as a short-term backup
    • Use a toilet auger for deeper resistance
    • Skip weak repeats when there is no progress

    Can Hot Water Alone Unclog a Toilet?

    Hot water alone can help with a soft recent clog, but it should never be boiling.

    Hot water alone can sometimes clear a toilet clog when the blockage is soft, recent, and not packed tightly into the trap. This method works best when the clog is mostly excess toilet paper or light organic waste and the bowl is stable enough to handle added water safely. The key detail is temperature. Use hot water, not boiling water. Current home-repair guidance consistently warns that boiling water can crack porcelain and create avoidable damage, which makes controlled hot water the safer version of this method.

    Hot water alone is usually less effective than dish soap plus hot water because soap improves lubrication and helps soft material slide through the trap more easily. That means hot water by itself is a reasonable first try when you have no soap nearby, but it should still be treated as a quick test, not a guaranteed fix. If the bowl does not improve after one careful attempt, move up to dish soap, a toilet auger, or a stronger escalation step instead of repeating weak methods too long.

    • Best for fresh toilet paper clogs
    • Use only when the bowl is stable
    • Never use boiling water
    • Escalate quickly if nothing changes

    How do you unclog a toilet with dish soap and hot water?

    Add dish soap, wait a few minutes, pour in hot non-boiling water, and flush only when the bowl looks stable.

    The usual process is simple. Add dish soap to the bowl, wait several minutes, then pour in hot, not boiling, water. Current guidance commonly places the wait time around 10 to 15 minutes, though some sources allow longer depending on the clog. The important part is not speed. It is letting the soap move toward the blockage before adding controlled heat and water pressure. Multiple sources also warn against using boiling water because it can crack porcelain or create other damage risks.

    This method works best when the clog is soft and the toilet still drains at least a little. It is a poor fit for wipes, toys, or dense obstructions. Real-world success usually shows up in small signs first. The bowl may stop looking tense, the water may lower slightly, or the flush may improve instead of fully clearing at once. If nothing changes after one careful attempt, that is usually your cue to switch methods rather than keep repeating the same one.

    • Add dish soap first
    • Wait before adding water
    • Use hot, not boiling, water
    • Flush only when the bowl level looks stable
    • Switch methods if there is no visible improvement

    Can baking soda and vinegar clear a toilet clog?
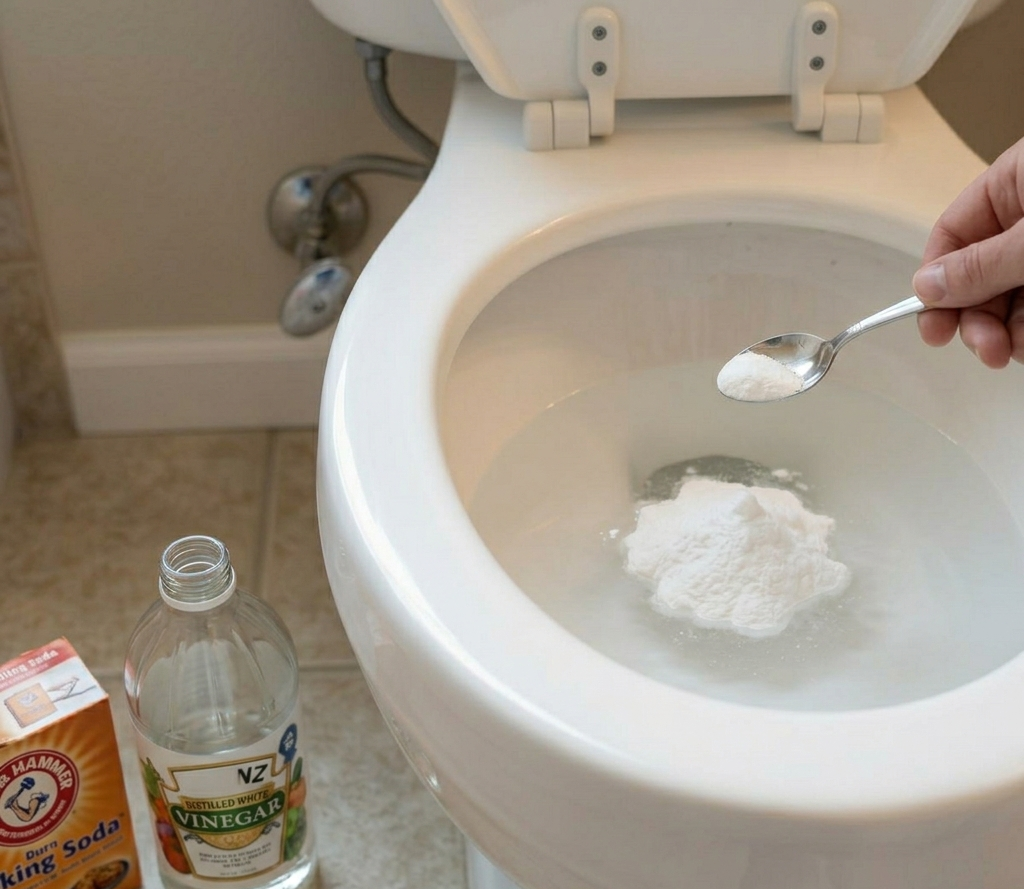
    Unclog a Toilet

    Baking soda and vinegar can help with a light soft clog when the bowl has enough room for a safe reaction.

    Baking soda and vinegar can help with some soft clogs, but it is still a secondary method, not a universal fix. Current toilet-specific guidance recommends adding baking soda before vinegar so the reaction happens in the bowl rather than too early. The foaming action may help loosen buildup, especially when the blockage is light and the bowl is not already near overflow. It is still aimed at minor clogs, not deep or solid obstructions.

    The main decision here is whether the bowl has enough space for a foaming reaction. If the water is already high, this is not the first method to test because an active reaction can make a stressful situation messier. That is why soap and hot water often win as the safer first option. Baking soda and vinegar are more useful when the water level is controlled and you want another soft-clog method before moving to a physical tool.

    • Add baking soda before vinegar
    • Use it only when the bowl has room
    • Best for minor soft buildup
    • Not suitable for foreign objects
    • Move to a physical tool if it fails

    Can a toilet brush work instead of a plunger?

    A toilet brush can work as a short-term backup for a very light clog, but it is weaker than a plunger or auger.

    A toilet brush can work as a short-term substitute when you have nothing else and the clog seems light. Current guidance suggests angling the brush into the drain opening, twisting, pushing, and pulling to loosen the blockage. This is not as effective as a real plunger, but it can help shift a minor obstruction when the bristles or handle create enough movement to disturb the clog. It is an emergency workaround, not a primary long-term solution.

    The key limitation is control. A brush is less efficient, less hygienic, and less specialized than a plunger or auger. It may help if the clog is shallow and soft, but it should not keep you stuck in repeat attempts. If the brush does not produce a quick change, the better next move is usually a stronger tool, especially a toilet auger if the blockage feels deeper. This is one of those methods that is useful because it is available, not because it is best.

    • Use a toilet brush only as a backup
    • Twist and push gently, not aggressively
    • Stop quickly if it is doing nothing
    • Treat it as an emergency substitute, not a full solution

    Should you use a wire hanger, wet-dry vacuum, or other tools?

    These methods exist, but they belong lower in the decision order. Current guidance mentions a wire hanger, wet-dry vacuum, and even improvised pressure methods as possible no-plunger options. The problem is that they carry more risk, more mess, or both. A wire hanger can be rough on the toilet if used carelessly. A wet-dry vacuum can work, but only if the person already has the right setup and knows how to handle the mess safely. These are not the best first answers for most households.

    A better rule is this. If you are already stepping beyond soap, water, baking soda, or a toilet brush, you are near the point where a purpose-built toilet auger becomes the smarter choice. Current guidance is very clear that a toilet auger is designed for toilets in a way that standard tools are not. So while improvised tools can sometimes work, they are often outclassed by a proper auger in both safety and effectiveness.

    • Wire hangers are possible but not preferred
    • Wet-dry vacuums are optional, not first-line
    • Improvised tools usually lose to a toilet auger
    • Avoid standard drain snakes in a toilet

    When is a toilet auger the best no-plunger option?
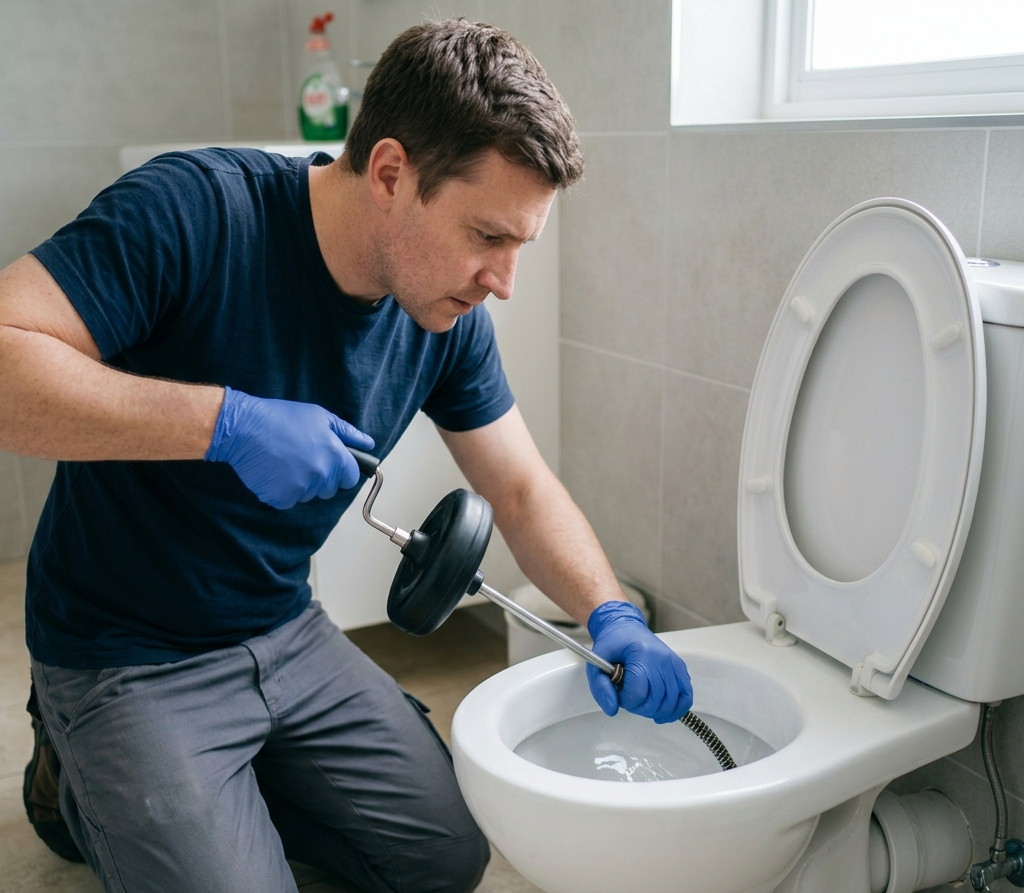
    Unclog a Toilet

    A toilet auger is the best no-plunger tool when low-risk methods fail or the clog feels deeper and tougher.

    A toilet auger, also called a closet auger, is the best no-plunger option when the blockage feels deeper, tougher, or unmoved by low-force methods. Current guidance describes it as a toilet-specific drain-clearing tool with a cable and protective design meant to reach into the toilet trap without scratching the bowl. Compared with generic drain tools, it is the more appropriate choice because it is built for this exact job.

    This is the point where many articles become too vague, but the user needs a clear threshold. If soap and hot water do nothing, if the clog returns quickly, or if the obstruction feels physically lodged, an auger is the right escalation. It is stronger than the household hacks but still sits below calling a plumber in the decision chain. For this topic, that makes the auger the true bridge between “quick DIY” and “professional help.”

    • Best for deeper or stubborn clogs
    • Safer for toilets than a standard drain snake
    • Good next step after failed low-risk methods
    • Stronger than soap, vinegar, or a brush

    What if the toilet bowl is already full?

    Do not flush again, stabilize the water level first, and only try a method when the bowl is safe to work with.

    If the bowl is already full, do not flush again. Turn off the water at the shutoff valve if the level keeps rising, then wait for the water to settle before trying any unclogging method. That is the clearest current overflow guidance, and it matters because panic flushing is one of the fastest ways to turn a clog into a floor cleanup. Once the level is controlled, you can choose a method based on the likely cause of the blockage.

    A full bowl also changes which no-plunger methods are sensible. Soap and carefully added hot water can still work once there is room, but a foaming method like baking soda and vinegar needs more caution. This is also the point where repeated failures should end quickly. If the bowl keeps refilling, the toilet overflows easily, or there are other drainage problems nearby, the issue may be bigger than a single bowl clog.

    • Do not flush a full bowl again
    • Shut off the water if it keeps rising
    • Wait for the level to drop before acting
    • Use extra caution with foaming methods
    • Escalate faster if the problem keeps returning

    Which methods should you avoid?
    Unclog a Toilet

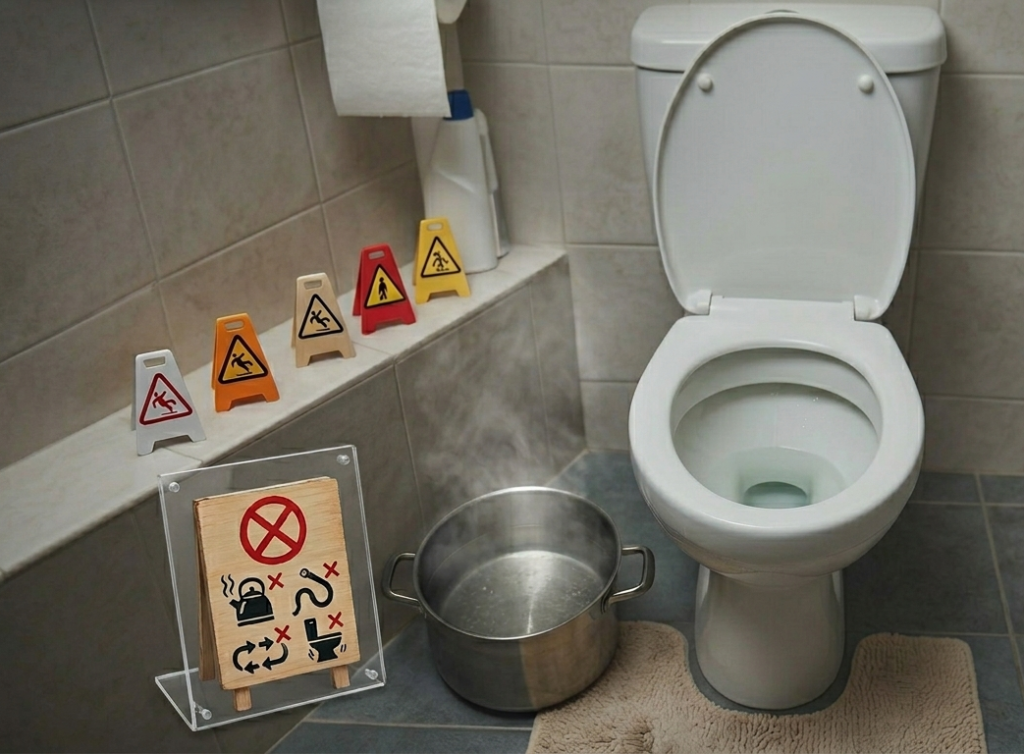
    Avoid boiling water, the wrong drain tools, and repeated weak attempts when the clog is not improving.

    The biggest method to avoid is boiling water. Current sources repeatedly recommend hot, not boiling, water because truly boiling water can crack porcelain or otherwise create damage risk. The next method to avoid is using the wrong tool for the fixture. One current Spruce guide explicitly warns not to use a standard drain snake in a toilet, because toilets require a differently designed auger. Those two mistakes alone explain a lot of failed DIY attempts.

    The other bad habit is repetition without signals. If the bowl is still high, the clog is not responding, or the toilet has a pattern of recurring blockage, pushing the same weak method over and over usually adds risk instead of value. The page should make this very clear. DIY works best when each method is treated like a test. If the test shows no progress, move up the decision ladder instead of forcing another round.

    • Avoid boiling water
    • Avoid standard drain snakes in toilets
    • Avoid endless repeat attempts
    • Avoid forcing a method when the bowl is unstable
    • Avoid treating a repeat clog like a one-time clog

    Should You Use Chemical Drain Cleaners in a Toilet?

    Chemical drain cleaners are not the preferred first solution for toilet clogs.

    Chemical drain cleaners are not the preferred solution for toilet clogs. The better current guidance focuses on mechanical or low-risk household methods first, such as hot water, dish soap, baking soda and vinegar, or a toilet auger, because these approaches reduce the chance of damaging the toilet or creating a harsher cleanup problem. Chemical products may seem like a shortcut, but they do not solve the core decision issue, which is whether the clog is soft, deep, object-related, or part of a bigger plumbing problem.

    This section matters because users searching no-plunger methods are often one step away from pouring in something aggressive out of frustration. That is exactly when the page should slow them down. A safer-first page performs better when it makes the escalation path obvious. If low-risk methods fail, the next better move is usually a toilet auger or a plumber, not a harsher chemical experiment. The right sequence is what makes the advice trustworthy and usable in real homes.

    • Do not jump straight to harsh chemical solutions
    • Use low-risk methods first
    • Escalate to an auger before experimenting blindly
    • Treat repeated clogs as a diagnosis issue, not just a clog issue

    When should you call a plumber?

    Call a plumber when the clog keeps returning, feels deeper than the toilet trap, or affects more than one drain.

    Call a plumber when the clog stops looking like a small bowl problem and starts looking like a plumbing problem. Current guidance points to the same red flags over and over: repeated clogs, sewage backup signs, multiple slow drains, or a suspected foreign object. These are the conditions where home methods lose their value quickly because the issue may sit deeper in the system or require removal rather than loosening.

    This threshold matters because users often stay too long in DIY mode. A good no-plunger guide should not just empower the reader. It should also tell them when to stop. If the auger does not fix it, if the bowl overflows easily, or if other drains are misbehaving at the same time, the most practical step is professional diagnosis. Strong pages rank better when they remove hesitation and give a real stop point.

    • Call if the clog keeps coming back
    • Call if sewage backup is possible
    • Call if multiple fixtures drain poorly
    • Call if a foreign object may be stuck
    • Call if the auger fails too

    How do you prevent toilet clogs in the future?
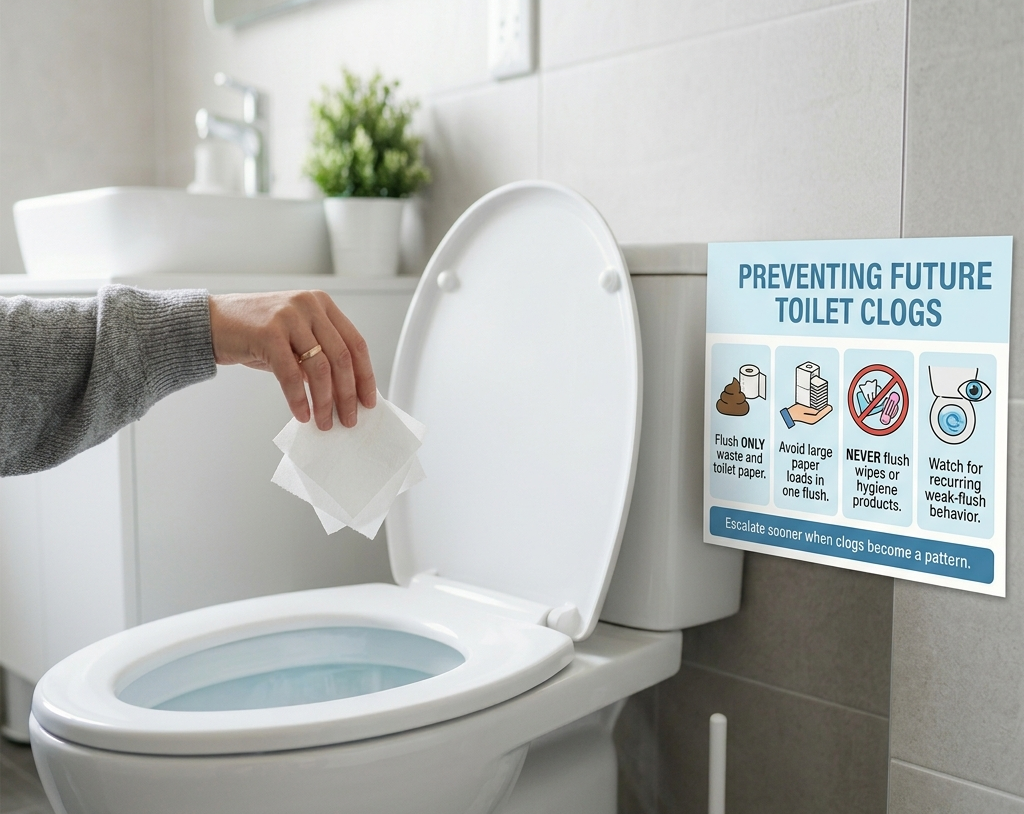
    Prevent most toilet clogs by flushing only waste and toilet paper and acting early when weak-flush patterns begin.

    Most prevention advice is simple because the main causes are simple. Current no-plunger and unclogging guides consistently point to excess toilet paper and flushing the wrong items as the most common triggers. That means the best prevention plan is still the least glamorous one: flush only human waste and toilet paper, avoid oversized paper loads, and pay attention when the toilet starts showing weak or incomplete flushes.

    The other prevention insight is pattern recognition. A one-off paper clog is not the same as a toilet that clogs every few days. Repeated issues suggest a deeper blockage, a performance problem, or a fixture that needs more than emergency hacks. That is why prevention content should not end with “do not flush wipes.” It should also tell the reader to notice recurrence early and escalate sooner next time.

    • Flush only waste and toilet paper
    • Avoid large paper loads in one flush
    • Never flush wipes or hygiene products
    • Watch for recurring weak-flush behavior
    • Escalate sooner when clogs become a pattern

    Quick method comparison

    The safest-first order below reflects current guidance on common no-plunger methods, their likely use cases, and where they fit in the escalation chain.

    MethodBest ForStrengthRiskTime to TestStop When
    Hot water aloneFresh soft paper clogMediumLow5 to 10 minBowl stays high or unchanged
    Dish soap + hot waterSoft recent clogMedium to highLow10 to 20 minNo visible improvement
    Baking soda + vinegarLight soft buildupMediumMedium15 to 30 minBowl is too full or reaction adds risk
    Toilet brushVery light shallow clogLowMediumSeconds to 2 minIt is doing nothing quickly
    Toilet augerDeep or stubborn clogHighLow to mediumImmediate to 5 minClog persists or feels beyond trap
    PlumberRecurring, severe, or unclear issueHighestLowest DIY riskImmediate callMultiple drains, sewage signs, repeat failure

    Which No-Plunger Method Works Best for Each Type of Clog?

    The best no-plunger method depends less on creativity and more on clog type. Current guidance consistently shows that soft paper-based clogs respond best to low-risk methods like hot water or dish soap and hot water, while deeper, tougher, or physically lodged obstructions usually need a toilet auger or faster escalation. This matters because many failed DIY attempts happen when people use the right method on the wrong blockage. A toilet paper clog, a wipe-related clog, and a foreign object clog should not be treated the same way.

    This mapping section improves decision clarity because it tells the reader what the clog probably is before telling them what to do. That is especially important for parent pages like this one. A broad no-plunger guide should help users sort the problem first, then choose the method. If the toilet has clogged repeatedly or another drain is also acting up, the issue may already be bigger than a bowl-level blockage, and household methods should move down the list quickly.

    • Toilet paper clog: hot water or dish soap first
    • Soft organic clog: dish soap plus hot water
    • Light buildup: baking soda and vinegar
    • Deep stubborn clog: toilet auger
    • Wipes, toys, or repeat clogs: escalate faster

    Best method by scenario

    This scenario matrix helps users choose faster instead of reading every method as if it fits every clog. The choices below follow the same current safest-first logic used across plumber-backed and home-repair guidance.

    SituationBest first move
    Fresh toilet paper clogDish soap + hot water
    Bowl already fullStop flushing, control water level first
    Light clog, no soap availableHot water if bowl is stable
    Nothing works after one attemptMove to a toilet auger
    Suspected object or repeat clogSkip hacks and escalate

    Real-World Example of the Right No-Plunger Decision
    Unclog a Toilet

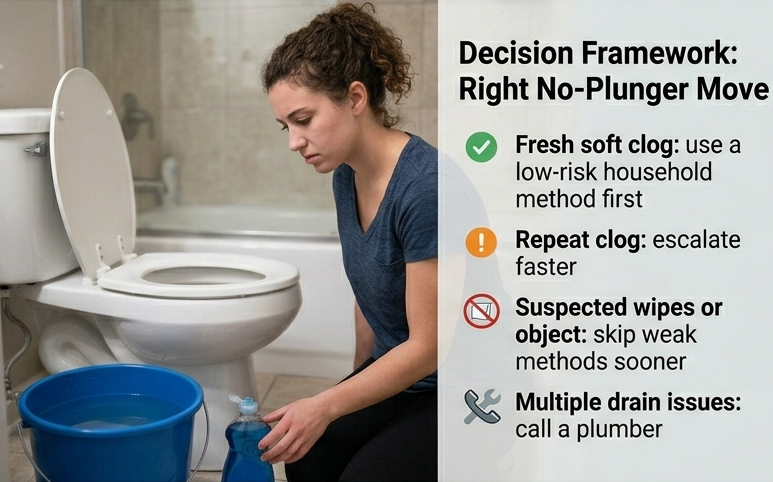
    Imagine a toilet that clogged right after a heavy toilet-paper flush. The bowl is high, but not rising, and there is no plunger nearby. This is the kind of situation where a safest-first method makes sense. Because the likely blockage is soft and recent, dish soap and hot water are the right first move. Current guidance supports this logic because those methods work best on minor obstructions and are less aggressive than improvised tools or stronger escalation steps.

    Now compare that with a different situation. The toilet has clogged twice this week, the bowl stays high for a long time, and someone may have flushed wipes. That is no longer the same problem. A toilet auger becomes the smarter next tool, and if other drains are acting up too, a plumber is the better call. This kind of comparison strengthens the page because it turns methods into decisions. Readers do not just need options. They need to know which option fits their exact situation.

    • Fresh soft clog: use a low-risk household method first
    • Repeat clog: escalate faster
    • Suspected wipes or object: skip weak methods sooner
    • Multiple drain issues: call a plumber

    FAQ

    Can hot water alone unclog a toilet without a plunger?

    Sometimes, yes. Current guidance includes hot water as a viable option for minor clogs, especially when the blockage is soft and the bowl is stable. The warning stays the same: use hot, not boiling, water.

    Is dish soap the best no-plunger method?

    It is often the best first method for soft recent clogs because it is low-risk and easy to try, but it is not the strongest overall option. A toilet auger is the stronger no-plunger tool for deeper clogs.

    Does baking soda and vinegar really work in a toilet?

    It can help with some light clogs, especially when the bowl has room and the blockage is soft. Current toilet-specific guidance still treats it as a minor-clog method, not a fix for deep or solid obstructions.

    Can I use a toilet brush instead of a plunger?

    As an emergency backup, yes. Current guidance says a toilet brush can sometimes loosen a clog by twisting and pushing into the drain opening, but it is still weaker than a plunger or auger.

    Should I use a regular drain snake in a toilet?

    No. Current guidance warns that toilets need a toilet auger or closet auger rather than a standard drain snake.

    What if the toilet water keeps rising?

    Stop flushing and turn off the shutoff valve if needed. Overflow-control guidance puts water shutoff first, then bowl stabilization before any unclogging attempt.

    When should I stop trying DIY methods?

    Stop when there is no progress after a reasonable attempt, when the bowl stays unstable, when the clog keeps returning, or when you suspect a foreign object or wider drainage issue.

    What is the best no-plunger tool to buy?

    Among current no-plunger options, a toilet auger is the most purpose-built and effective tool for deeper toilet clogs.
  • How to Clean Old Wood Furniture Without Damaging the Finish

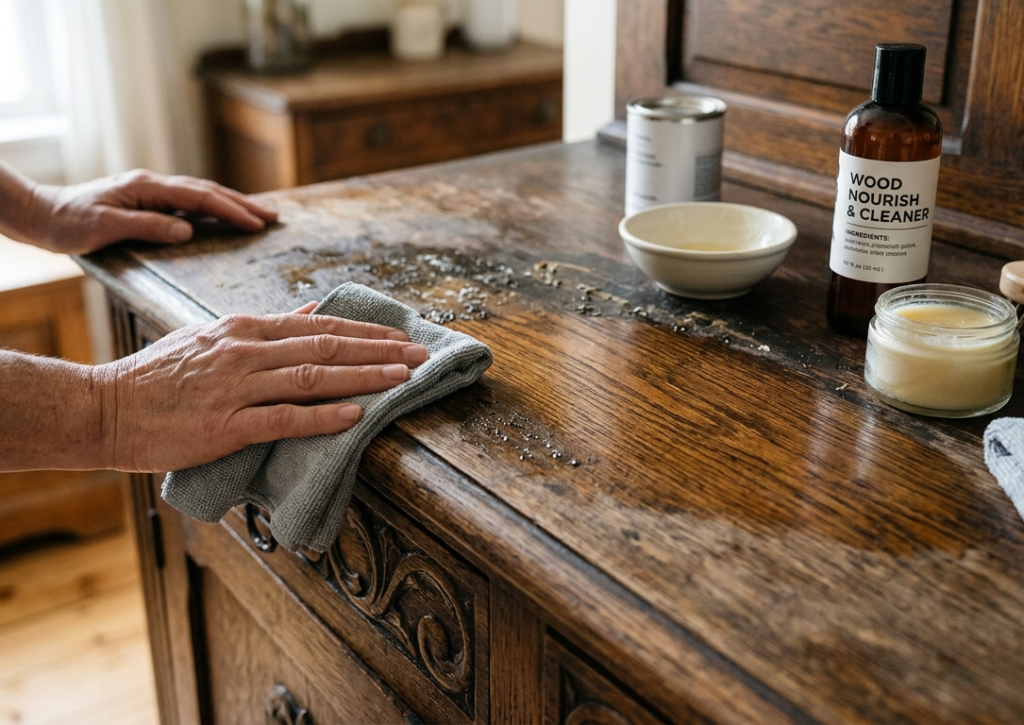
    In regards to ‘How to Clean Old wood furniture’, it should be dusted first, tested in a hidden spot, cleaned with the mildest method the surface can safely tolerate, and dried immediately. Sealed pieces often handle light damp cleaning, but waxed, unfinished, antique, or unstable finishes need more caution. If the finish softens, flakes, or transfers to the cloth, stop and switch to preservation-focused care or professional help.

    This guide follows current home-care and conservation consensus. The safest approach is not the strongest cleaner. It is the right cleaner for the finish in front of you. That is what protects shine, color, patina, and long-term value.

    What should you check before cleaning old wood furniture?

    Check the finish type, test a hidden area, and look for any sign that the surface is unstable before using moisture or cleaner

    Before you clean anything, figure out what you are actually touching. Old wood furniture may be sealed, waxed, oiled, unfinished, or carrying an original antique finish. That matters because water, soap, and solvents do not behave the same way on each surface. Canadian conservation guidance specifically recommends determining the type and stability of the coating before cleaning, because the wrong method can change the finish rather than just remove dirt.

    Start with four checks in a low-visibility area. Look for flaking, crazing, stickiness, color transfer, or dulling after a light test. If a dry cloth lifts finish, if a slightly damp cloth leaves a mark, or if the surface feels soft, pause the DIY cleaning plan. That usually means the finish is unstable, very old, or incompatible with routine wet cleaning.

    • Check whether the piece is sealed, waxed, oiled, or unfinished
    • Test in an inconspicuous spot first
    • Look for flaking, clouding, or color transfer
    • Check hardware, carvings, and joints for trapped grime
    • Stop if the finish reacts badly to the test

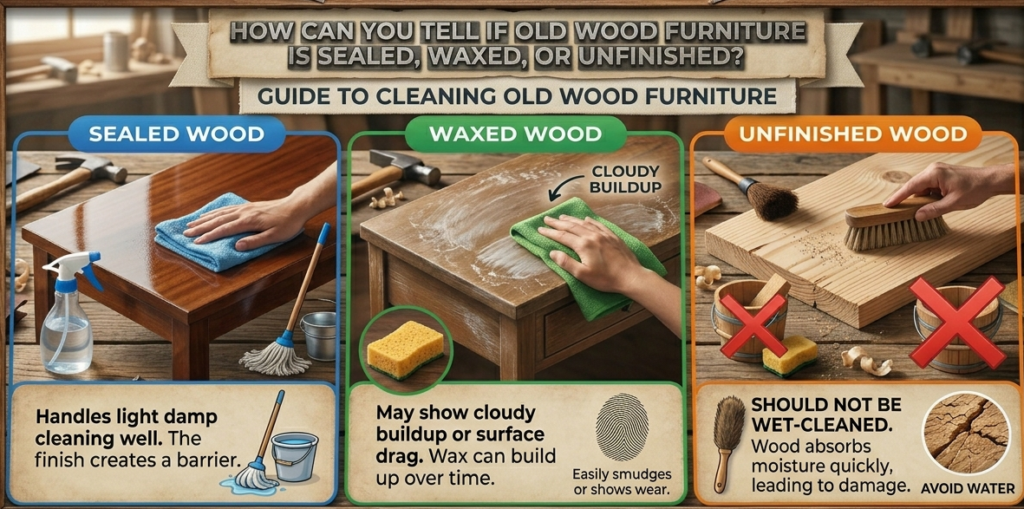
    How can you tell if old wood furniture is sealed, waxed, or unfinished?

    Surface feel, absorbency, buildup, and hidden-spot testing give the safest early clues about finish type.

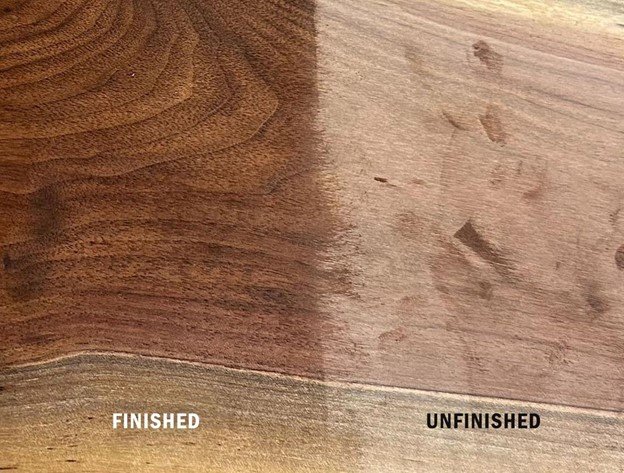
    The safest cleaning method depends on what is sitting on top of the wood, not just the age of the piece. Current conservation guidance says coating type and coating stability should be identified before cleaning because the wrong method can alter the finish instead of removing dirt. In practical terms, sealed wood usually feels more closed and less absorbent, while unfinished wood often looks more porous and should not be wet-cleaned. Waxed surfaces may feel slightly draggy, cloudy, or uneven if old wax and dust have built up over time.

    You do not need a lab test to make a safer first decision. Start with surface clues and a hidden-spot test. If a dry cloth lifts color, if a lightly damp cloth leaves a cloudy area, or if the surface feels soft or tacky, the finish may be unstable. That is your signal to stop using routine cleaners and move into preservation mode. Homeaholic should frame this clearly because finish identification is what separates safe care from accidental damage.

    • Sealed wood usually handles light damp cleaning better
    • Waxed wood may show cloudy buildup or surface drag
    • Unfinished wood should not be wet-cleaned
    • Any bad reaction in a test spot means stop and reassess

    What is the safest cleaner for old wood furniture?

    The safest cleaner is the mildest method the finish can tolerate, usually dusting first and minimal moisture only when the surface is stable.

    For most routine cleaning, the safest starting point is simple dust removal followed by a soft cloth that is only slightly damp, not wet. Martha Stewart and the Canadian Conservation Institute both support a mild, controlled approach, and conservation guidance adds an important caution for older furniture made before World War I, which may be more sensitive to water.

    That means there is no single “best cleaner” for every old piece. On stable sealed finishes, a diluted mild cleaner can work. On fragile or historically significant finishes, dry dusting or extremely limited damp cleaning is often safer. The goal is not to make the piece look aggressively stripped and bright. The goal is to remove surface soil without changing the finish underneath.

    • Start with a soft dry cloth or soft brush
    • Use a slightly damp cloth only if the finish appears stable
    • Keep moisture low and dry immediately
    • Clean with the grain
    • Avoid soaking the surface or flooding carved areas

    Can you use water, dish soap, or vinegar on old wood?

    Use minimal water and diluted mild soap cautiously, but do not treat vinegar as the default cleaner for old wood furniture.

    Water is not automatically wrong, but excess water is. Current guidance supports minimal moisture on stable finished wood, followed by immediate drying. That is very different from wet wiping, spraying directly onto the piece, or letting moisture sit on the surface or around joints. Unfinished wood should not be wet-cleaned, and older water-sensitive finishes need much more caution.

    Dish soap can be acceptable in a very diluted mix on some stable finished wood, especially for light surface grime, but vinegar should not be treated as a default cleaner for old wood furniture. Recent guidance says vinegar can dull finished wood over time, and The Spruce specifically warns against using it on waxed wood because the acid can damage the wax and leave the surface dull or cloudy. Mild diluted soap comes before vinegar, and vinegar should be avoided on waxed, unfinished, antique, or uncertain finishes unless you have a very specific reason, a confirmed compatible surface, and a successful hidden-spot test.

    • Use water only in small amounts
    • Prefer diluted mild soap over vinegar for general cleaning
    • Do not spray liquid directly onto the furniture
    • Avoid vinegar on waxed or unfinished wood
    • Dry immediately after any damp cleaning

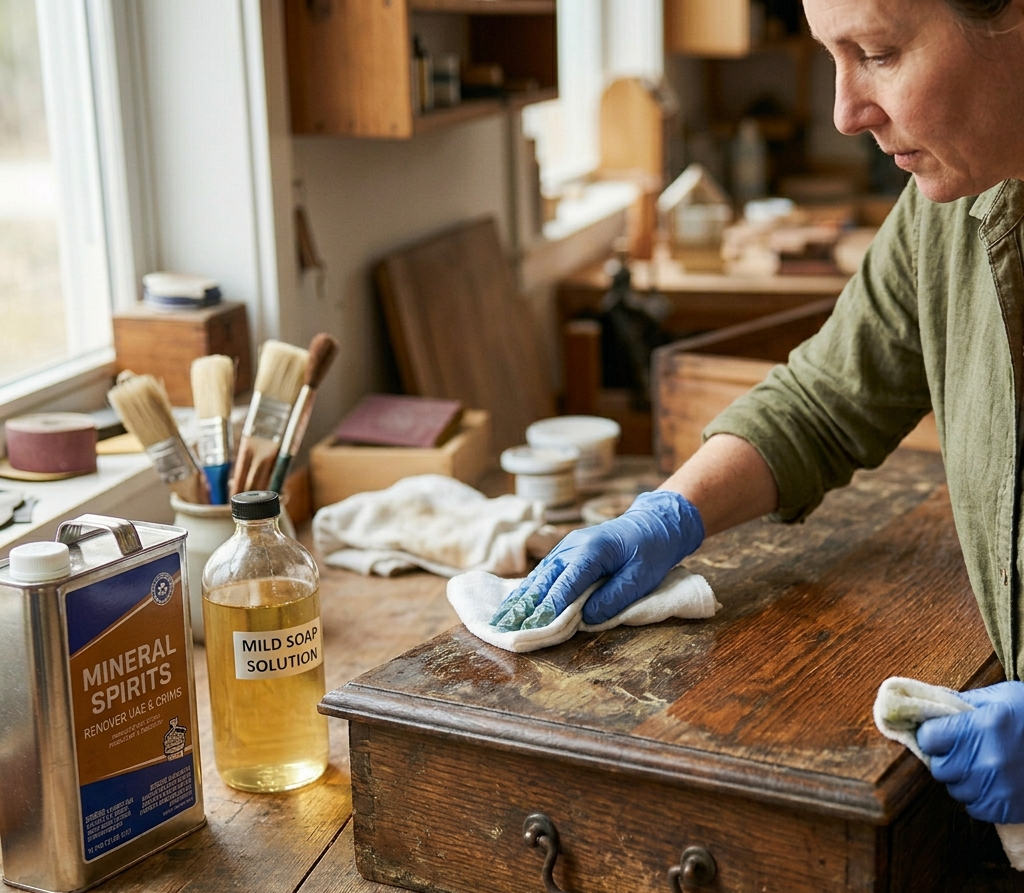
    When should you use mineral spirits instead of soap?

    Use mineral spirits only when stable finished wood has stubborn wax, grease, or polish buildup that mild soap is not removing.

    Mineral spirits become more useful when the problem is not ordinary dust, but old wax, oily residue, sticky grime, or built-up polish that soap is not removing cleanly. Both Minwax and Southern Living describe mineral spirits as a practical option for wax and dirt buildup, but they also stress testing first and allowing the surface to dry fully afterward.

    This is where many articles get sloppy. Mineral spirits are not your first cleaner for every piece. They are a targeted next step when the finish is stable and surface buildup is the issue. If the furniture is truly antique, museum-like, or has an original finish you are trying to preserve, be more conservative and test even more carefully. If the finish softens, smears, or changes color, stop immediately.

    • Use mineral spirits for waxy or greasy buildup
    • Test first in a hidden spot
    • Apply with a soft cloth, not a soaked rag
    • Wipe with the grain
    • Let the wood dry completely before judging the result

    How do you clean antique or heirloom wood furniture?

    Clean antiques with the least aggressive method possible and preserve the original finish whenever you can.

    Antique and heirloom pieces need a preservation mindset, not just a cleaning mindset. Conservation guidance stresses that original finishes and aged surfaces can be part of the object’s value. That means aggressive scrubbing, repeated wet cleaning, and experimental DIY remedies can reduce value even if the piece looks temporarily brighter.

    For antiques, start with dry dusting using a soft cloth or a soft brush for carvings and crevices. If more cleaning is necessary, use the gentlest compatible method and test carefully. Canadian conservation guidance also notes that some older furniture is water-sensitive enough that even damp dusting may be too much, in which case a dry cloth or a cloth with some odorless paint thinner may be the safer route. If the finish is unstable or the furniture needs extensive cleaning or repair, refer it to a conservator.

    Old furniture is not always antique furniture

    A very useful distinction for readers is this: old everyday furniture and true antique or heirloom furniture are not automatically cleaned the same way. A stable mid-century or late-20th-century piece with a routine finish may tolerate finish-safe household cleaning after testing. A genuine antique, a family heirloom, or a piece with an original finish should be treated more conservatively because cleaning decisions can affect both appearance and value. Conservation guidance repeatedly supports preserving original surfaces where possible and escalating sooner when finish stability or historical value is involved.

    This contrast sharpens the authority of the page. It tells readers that age alone is not the only variable. Value, finish originality, and surface condition matter just as much. That lets Homeaholic serve both everyday furniture owners and preservation-minded readers without flattening both audiences into the same advice.

    • Old everyday furniture often allows careful routine cleaning
    • Antique or heirloom furniture needs a preservation-first approach
    • Original finish matters more on high-value or historic pieces
    • The older and more irreplaceable the piece, the sooner you should escalate

    Mini case example

    A thrifted 1970s side table with a stable varnish can usually handle light soap-and-water cleaning after testing. A family heirloom sideboard with a thin original finish, surface crazing, and loose veneer should be treated completely differently. In that case, preserving the finish matters more than chasing a brighter look, and the safer move is limited cleaning or professional conservation.


    How do you remove sticky buildup, wax, or grease from wood?

    Old Wood Furniture

    Start with the gentlest surface-cleaning method, then escalate only if the finish remains stable.

    Sticky wood can mean two different things. Sometimes it is just grime, wax, cooking grease, or furniture polish buildup. Other times it signals finish failure, where the coating itself is degrading. That distinction matters because soap can help the first problem, while the second often needs a more careful restoration or conservation decision.

    For ordinary buildup on stable finished wood, start with diluted mild soap and minimal water. If the residue remains tacky, mineral spirits may be more effective for removing old wax and dirt layers. Southern Living specifically notes mineral spirits for tougher grease and buildup, with testing first and immediate drying. If the stickiness returns quickly or the finish smears under light pressure, stop treating it like a cleaning problem and treat it like a finish problem.

    • Dust first so grit does not scratch the surface
    • Try diluted mild soap on stable finished wood
    • Move to mineral spirits only if buildup remains
    • Do not saturate edges, joints, or veneer lines
    • Stop if the finish feels soft or transfers to the cloth

    Is the stickiness just buildup, or is the finish failing?

    If the surface smears, softens, or transfers color, the issue is likely finish failure rather than removable dirt.

    Sticky wood furniture is not always dirty. Sometimes the tacky feel comes from old wax, polish, cooking residue, or airborne grease settling on the surface. In those cases, gentle cleaning or carefully tested mineral spirits may solve the problem. But current conservation guidance also makes an important distinction: if the finish softens, smears, transfers color to the cloth, or stays tacky even after careful cleaning, the issue may be finish instability rather than removable buildup.

    This distinction matters because the wrong next step can turn a recoverable surface into a restoration problem. If the residue sits on top and improves with gentle cleaning, you are probably dealing with surface buildup. If the coating itself reacts, that is your stop point. Homeaholic should present this as a decision system, not a cleaning trick, because users often keep adding stronger products when the smarter move is to stop and reassess the finish.

    What you seeWhat it likely meansBest next move
    Surface grime lifts slowlyDirt or wax buildupMild soap or tested mineral spirits
    Sticky feel improves after wipingResidue on top of finishContinue cautiously
    Color transfers to clothFinish reactingStop immediately
    Surface stays soft or tackyFinish failure or instabilityEscalate to conservator or restorer

    How should you clean carvings, hardware areas, joints, and veneer edges?

    Use a soft brush, minimal moisture, and immediate drying to avoid pushing liquid into vulnerable details.

    Detailed furniture needs a slower cleaning method than flat tabletops. Dust and grime often collect around carved trim, turned legs, drawer pulls, joints, and veneer lines, and these areas are easier to damage because liquid can hide there longer. Conservation guidance supports careful handling and minimal moisture, which makes soft brushes and controlled wiping better choices than flooding the area with cleaner.

    For Homeaholic, this is a high-value practical section because it solves the part users often get wrong. A lightly damp cloth may be safe on a stable flat surface, but it is not the same as pushing moisture into seams, under hardware, or along veneer edges. Use a soft brush to lift dust out first, then wipe carefully and dry immediately. The objective is to remove grime without feeding moisture into the most vulnerable parts of the furniture.

    • Use a soft brush for carvings and trim
    • Keep liquids away from joints and veneer edges
    • Wipe around hardware instead of soaking it
    • Dry detailed areas immediately with a separate cloth
    • Stop if veneer edges look lifted or fragile

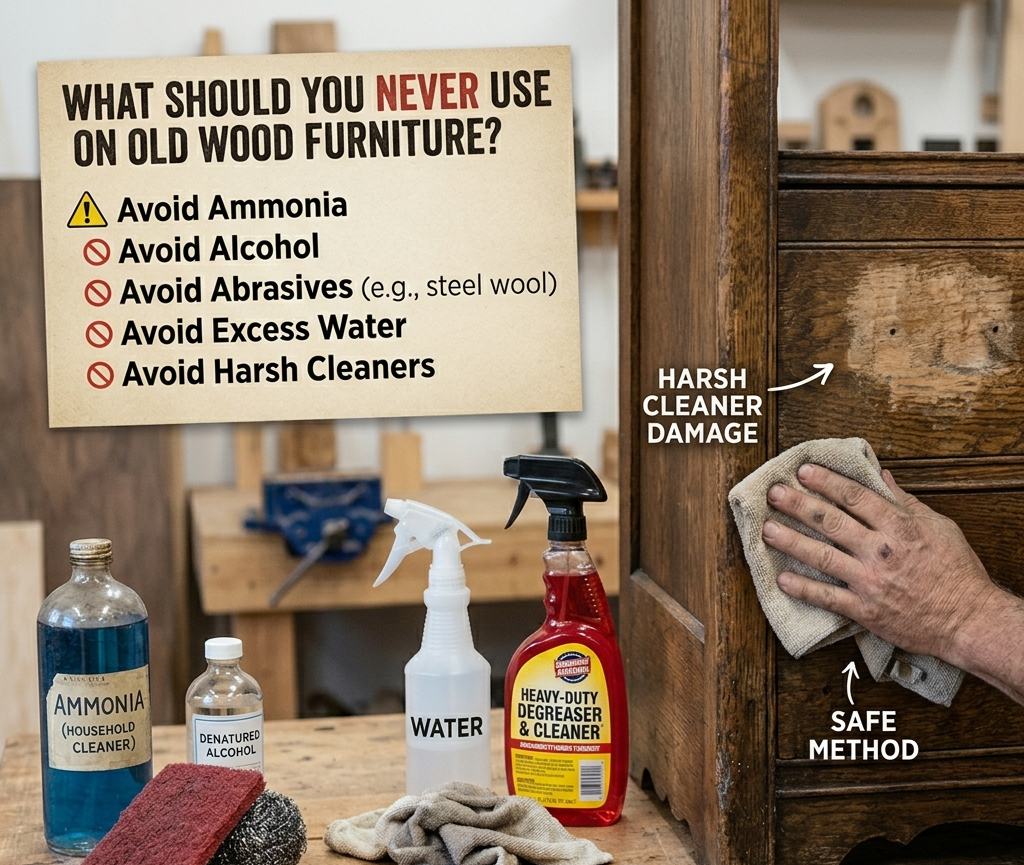
    What should you never use on old wood furniture?

    Old Wood Furniture

    Avoid ammonia, alcohol, abrasives, excess water, and harsh cleaners that can strip or dull old finishes.

    Avoid ammonia-based glass cleaners, rubbing alcohol, harsh abrasives, bleach-based products, direct spray saturation, and aggressive “miracle” DIY mixes. Recent guidance warns that ammonia can strip protective finishes and natural oils from wood furniture, while rubbing alcohol can strip varnish or paint from wood. Conservation guidance also pushes against overuse of random oils, waxes, and home remedies marketed as wood “food.”

    This matters because damage often comes from the cleaner, not the dirt. A product that works on glass, tile, or counters can be completely wrong for old wood. The safest rule is to avoid strong chemistry unless you know exactly why the surface needs it and how the finish responds. If a product cannot clearly be justified for wood furniture, do not make this piece the experiment.

    What not to use table

    The table below reflects current guidance on common products that can harm old wood finishes or create avoidable risk.

    Product or habitWhy it is risky
    Ammonia-based cleanersCan strip finishes and dry out the surface
    Rubbing alcoholCan strip varnish or paint from wood
    Bleach-based cleanersToo harsh for wood finishes
    Vinegar on waxed or unfinished woodCan dull finish or damage shine
    Abrasive pads or scrubbing powdersCan scratch the finish
    Excess waterCan swell wood, loosen veneer, or stain joints
    Spraying cleaner directly on the furnitureCauses over-wetting and uneven exposure

    What if the problem is a water ring or cloudy white mark instead of dirt?

    White rings and cloudy marks are usually finish or moisture issues, not ordinary cleaning issues.

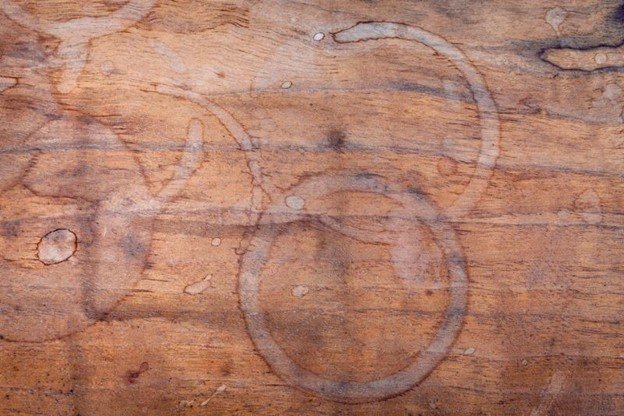
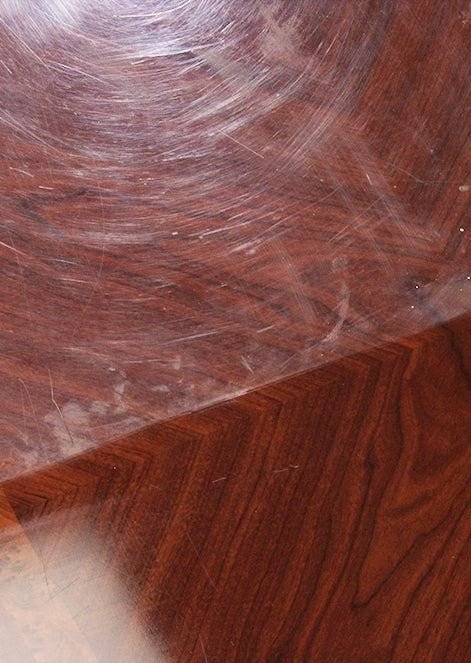
    Not every mark on old wood furniture is a cleaning problem. White rings, haze, and cloudy patches often mean moisture is trapped in or under the finish rather than dirt sitting on top of it. Recent Martha Stewart guidance on water stains makes that distinction clear, which matters for this page because readers often arrive with a visible mark and assume general cleaning is the answer. It often is not.

    This page should acknowledge that overlap without trying to solve every stain here. The better strategy is to explain that routine cleaning removes dust and surface grime, while white rings and cloudy marks usually require a separate finish-aware stain-removal approach. That improves query coverage and helps the page feed supporting URLs more naturally.

    • White rings usually mean trapped moisture
    • Cloudy marks are often finish-related, not dirt-related
    • Do not keep rewashing the area hoping it will fade
    • Treat stain removal as a separate problem from routine cleaning

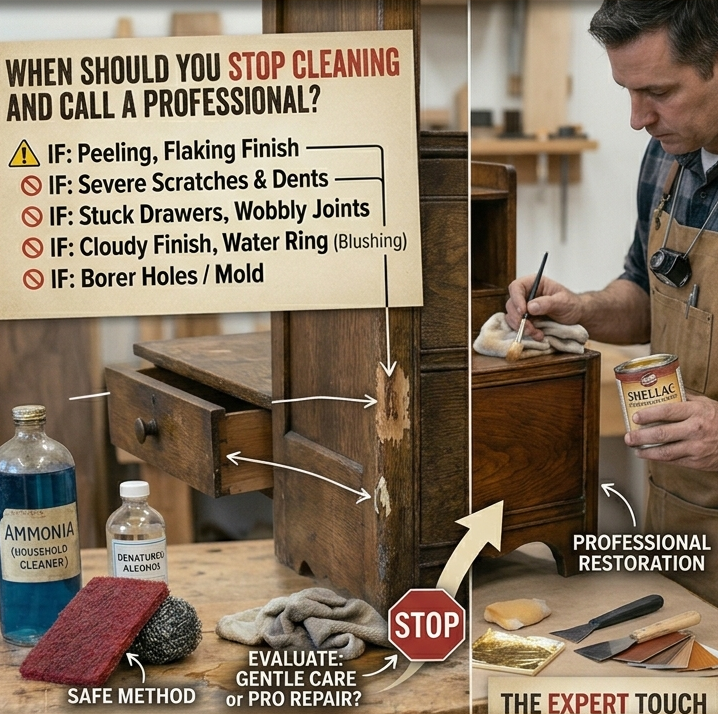
    When should you stop cleaning and call a professional?

    Old Wood Furniture

    Stop when the finish reacts badly, the piece is valuable, or the problem looks bigger than routine surface dirt.

    Stop and escalate when the finish flakes, smears, softens, transfers color to the cloth, or reacts badly in a test spot. Also stop if the furniture is historically important, structurally fragile, heavily veneered, or valuable enough that a mistake would be costly. Conservation guidance is clear that furniture needing extensive cleaning or repair should be referred to a conservator.

    A good stopping point protects both the furniture and your results. Cleaning is successful only when it removes soil without creating a second problem. If you are no longer sure whether you are removing dirt or removing finish, the DIY phase is over. That is especially true for antiques, heirlooms, unstable coatings, deep stains, or pieces that may need restoration rather than surface cleaning.

    • The finish reacts in the test spot
    • Veneer edges look loose or lifted
    • The piece has obvious antique or heirloom value
    • The surface stays sticky after careful cleaning
    • You suspect the problem is finish failure, not surface dirt

    How do you protect old wood furniture after cleaning?

    Protect old wood furniture with regular dusting, stable conditions, quick spill cleanup, and fewer unnecessary products

    After cleaning, the first protection step is simple restraint. Do not rush into feeding oils, layering random polishes, or treating every piece the same way. Canadian conservation guidance explicitly says wood does not need to be “fed,” and stable environmental conditions matter more than routine coating with products.

    For everyday care, dust regularly, keep the piece out of direct sun and extreme humidity swings, use coasters or pads where needed, and clean spills quickly. If the finish is compatible, careful, infrequent waxing may be appropriate, but this should be deliberate, not habitual. The best long-term result comes from stable conditions, light maintenance, and not forcing old furniture through repeated deep-clean cycles.

    • Dust regularly with a soft cloth
    • Keep humidity and temperature stable where possible
    • Protect surfaces from water rings and heat marks
    • Clean spills quickly
    • Use wax only when it is appropriate for the finish, not as a universal fix

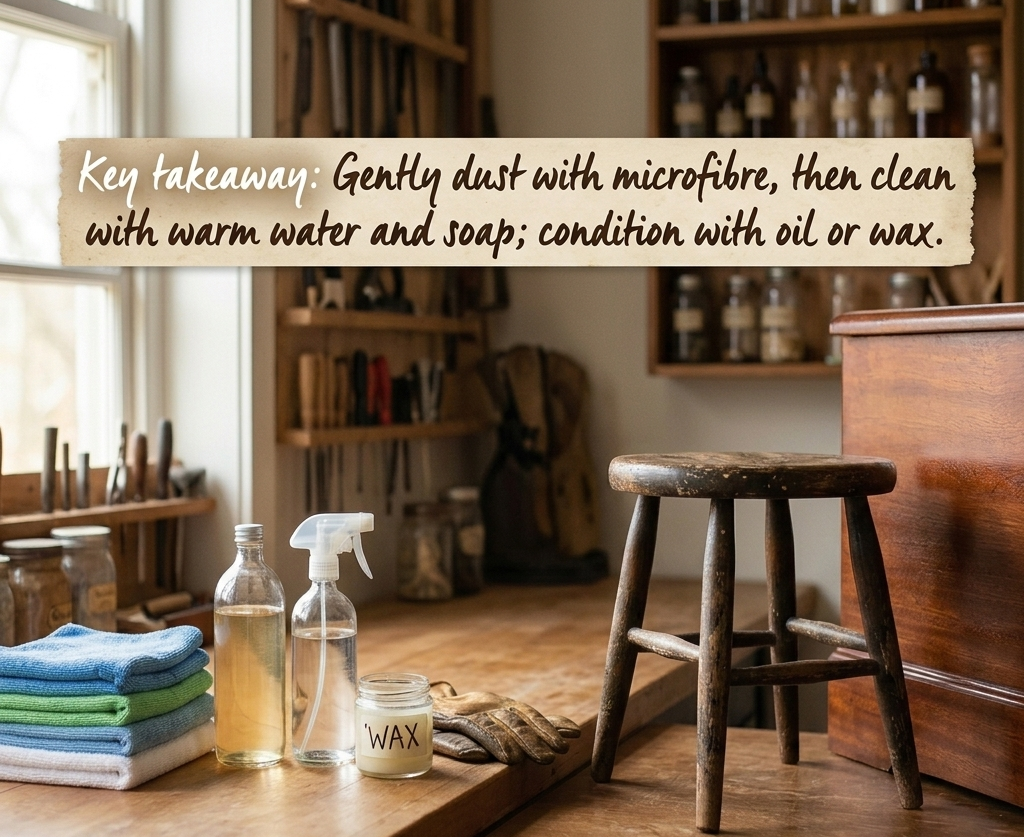
    Key takeaway

    Old Wood Furniture

    Old wood furniture should be cleaned like a finish-care project, not a generic cleaning task. Dust first identify the surface, test in a hidden spot, use the mildest compatible method, and dry immediately. If the finish reacts, the stickiness behaves like coating failure, or the piece has really antique or heirloom value, stop cleaning and switch to preservation-focused care.

    Finish decision matrix

    This quick matrix helps choose the safest first move based on finish type and condition. It is built from current home-care, finishing, and conservation guidance that separates stable finished wood from unfinished, waxed, or historically sensitive surfaces.

    Surface typeSafest first moveUse with cautionBest escalation
    Stable sealed finishDust, then lightly damp clothDiluted mild soapMineral spirits for stubborn buildup
    Waxed finishDry dusting firstMinimal moistureTest-specific wax/buildup removal
    Oiled finishGentle dry cleaningVery limited damp cleaningFinish-specific care
    Unfinished woodDry dusting onlyAvoid wet cleaningFinish-specific restoration help
    Antique or unstable finishPreserve first, test carefullyMinimal interventionConservator or restorer

    FAQ

    What is the safest way to clean old wood furniture?

    The safest way is to dust first, test in a hidden spot, use the mildest method the finish can tolerate, and dry immediately. Stable sealed finishes usually handle light damp cleaning better than waxed, unfinished, antique, or unstable finishes.

    Can I use Murphy Oil Soap or dish soap on old wood furniture?

    A diluted mild soap can be appropriate for some finished wood, but it should be tested first and used with minimal moisture. It is not automatically safe for every old finish.

    Is vinegar safe for old wood furniture?

    Sometimes, but with important caveats. Recent guidance says vinegar can dull finished wood over time and is a poor choice for waxed or unfinished wood, so it is not the safest default cleaner for old furniture.

    When should I use mineral spirits on wood furniture?

    Use mineral spirits when stable finished wood has stubborn wax, grease, or polish buildup that mild soap is not removing. Always test first and let the surface dry fully afterward.

    How do I clean antique wood furniture without ruining it?

    Start with dry dusting, test carefully, and use the gentlest compatible method. If the finish is original, unstable, or historically important, preserve first and involve a conservator when needed.

    What should I never use on old wood furniture?

    Avoid ammonia-based cleaners, rubbing alcohol, bleach-based products, abrasive pads, and excess water. These can strip finishes, dull the surface, or cause damage.

    Why does old wood furniture feel sticky after cleaning?

    That usually means either buildup remains on the surface or the finish itself is failing. If careful cleaning does not solve it, treat it as a finish problem rather than repeating stronger cleaners blindly.

    How often should I clean old wood furniture?

    Routine dusting is usually enough most of the time. Deeper cleaning should be occasional and finish-sensitive, not a frequent habit.


  • How to Unclog a Toilet with Baking Soda

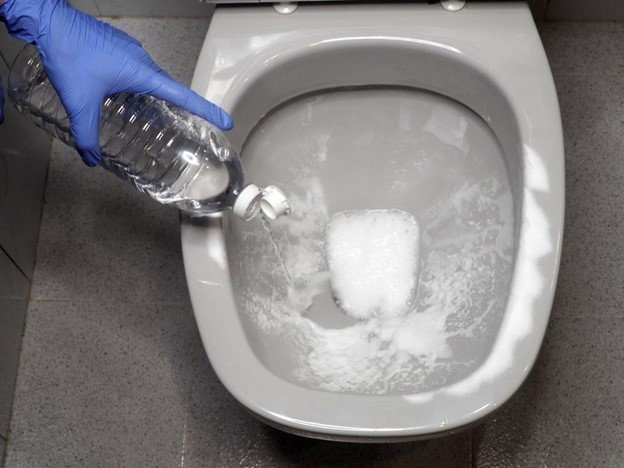
    Baking soda unclogs a toilet by reacting with vinegar to create pressure and break down organic buildup. Add 1 cup baking soda, 2 cups vinegar, wait 10–15 minutes, then flush with hot water. This works best for light to moderate clogs, not solid blockages. This guide explains the effectiveness, myths and challenges surrounding the idea of ‘how to unclog a toilet with baking soda’.

    How to Unclog a Toilet with Baking Soda Step-by-Step

    Add baking soda and vinegar, wait 10–15 minutes, then flush with hot water to clear light clogs

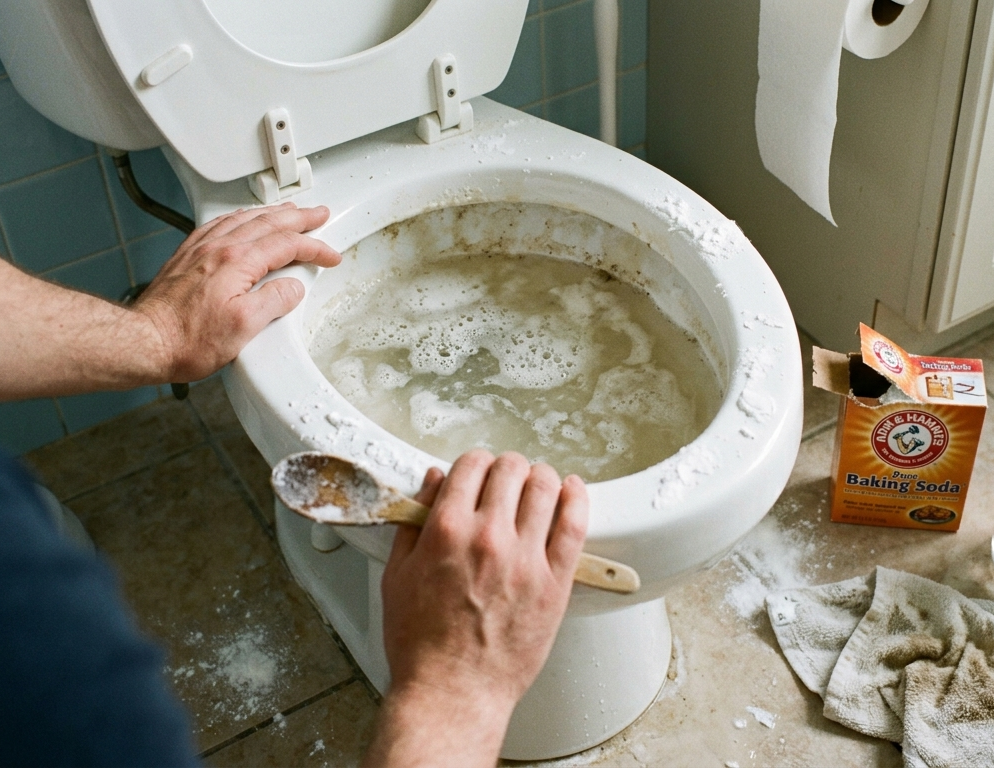
    Baking soda is one of the safest and most accessible ways to unclog a toilet without using harsh chemicals. The process relies on a controlled chemical reaction that produces carbon dioxide gas, which agitates the clog and helps break apart organic material. Unlike commercial drain cleaners, this method is gentle on pipes and ideal for households that want an eco-friendly solution.

    To get the best results, the steps must be followed in the correct sequence. Skipping steps or rushing the reaction often leads to failure, especially with moderate clogs. The goal is to allow enough time for the reaction to penetrate the blockage before flushing.

    Step-by-step method:

    • Pour 1 cup baking soda directly into the toilet bowl
    • Slowly add 2 cups white vinegar
    • Let the mixture fizz and react for 10–15 minutes
    • Carefully pour hot (not boiling) water into the bowl
    • Wait another 5 minutes, then flush

    Pro tips for better results:

    • Use warm water first if the bowl is cold
    • Repeat the process once for moderate clogs
    • Avoid flushing immediately after adding vinegar

    What Should You Do Based on Your Situation?

    Choose the method based on clog severity and water level.

    SituationAction
    Slow draining toiletUse baking soda method
    Partial clogRepeat baking soda + hot water
    Fully blockedUse plunger immediately
    Water risingDO NOT add vinegar, use plunger
    Object stuckUse auger, not baking soda

    Why Does Baking Soda Unclog a Toilet?

    Toilet with baking soda

    It creates a fizzing reaction that loosens and breaks down organic clogs.

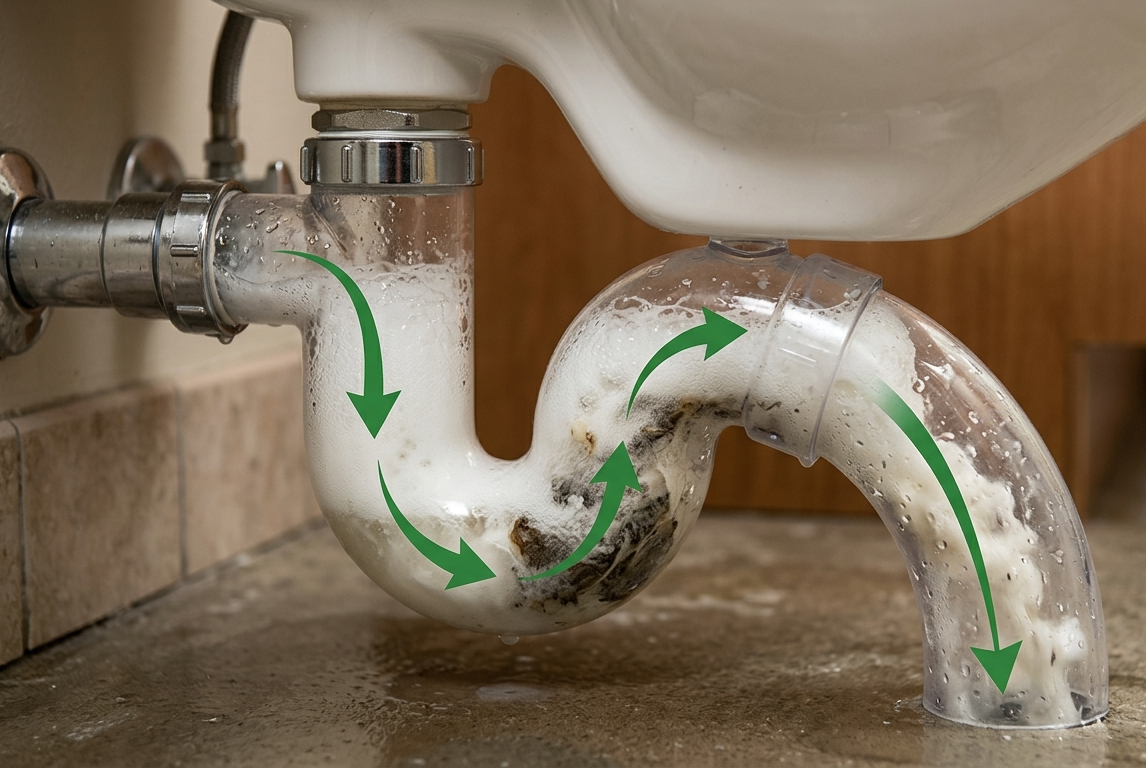
    The effectiveness of baking soda comes from its chemical interaction with vinegar. Baking soda is a mild alkaline substance, while vinegar is acidic. When combined, they produce carbon dioxide gas, which creates a bubbling effect. This bubbling action helps dislodge debris, loosen compacted waste, and break apart grease or soap residue inside the pipe.

    However, the reaction alone is not enough. The addition of hot water plays a critical role by softening grease and helping flush away loosened particles. This combination of chemical agitation and thermal breakdown makes the method effective for certain types of clogs but not all.

    What actually happens inside the pipe:

    • CO₂ bubbles push against the clog
    • Foam expands into tight spaces
    • Organic matter starts breaking down
    • Hot water dissolves grease and residue

    Limitations of the reaction:

    • Not strong enough for solid blockages
    • Cannot move heavy or lodged objects
    • Less effective in completely dry pipes

    What Should You Do Based on Your Toilet Clog Situation? (Step-by-Step Decision System)

    Choose the correct unclogging method based on water level, clog type, and severity to avoid making the problem worse.

    A structured decision system turns your approach from guesswork into precision. When a toilet clogs, most users react without assessing the situation, which leads to common mistakes like adding more liquid to an already full bowl or relying on baking soda for a solid blockage. This section removes that uncertainty and gives you a clear, situation-based action plan.

    In real scenarios, acting without evaluation increases risk and delays resolution. A rising water level can overflow within seconds, while a dense blockage won’t respond to chemical reactions at all. By matching your exact situation to the correct method, you save time, avoid damage, and improve your chances of fixing the clog on the first attempt.

    Follow this decision system:

    • Low water + slow drain → use baking soda method
    • Normal water + partial clog → repeat baking soda cycle
    • High water level → avoid adding liquid, use plunger
    • Suspected solid object → skip baking soda, use auger
    • No improvement after 2 attempts → switch to mechanical method

    Which Clogs Can Baking Soda Fix?

    Toilet with baking soda

    It works best for soft clogs like toilet paper and waste, not solid objects.

    Understanding the type of clog is the most important factor in deciding whether baking soda will work. Many homeowners assume this method is universal, but its effectiveness depends entirely on what is causing the blockage. Organic materials respond well to chemical reactions, while solid objects do not.

    If your toilet is draining slowly or partially blocked, baking soda is a strong first option. However, if water is not draining at all or the clog is caused by a foreign object, you will need a different approach such as plunging or mechanical removal.

    Clog Effectiveness Table

    Clog TypeEffectivenessWhy
    Toilet paper buildupHighEasily dissolves
    Human wasteHighBreaks down naturally
    Grease or soapMediumNeeds hot water
    HairLowDoesn’t dissolve easily
    Foreign objectsNoneNo chemical effect

    How to identify your clog type:

    • Slow drain → likely organic
    • Sudden blockage → possible object
    • Gurgling sound → partial clog
    • Overflow risk → severe blockage

    How Long Does Baking Soda Take to Work?

    Most clogs clear within 5–20 minutes depending on severity.

    Timing is a critical factor that many people overlook. The reaction between baking soda and vinegar begins immediately, but the actual unclogging process takes time. Rushing the flush is one of the most common reasons this method fails. The longer the solution sits, the deeper it penetrates into the clog.

    For best results, allow the mixture to sit undisturbed before adding hot water. In some cases, repeating the process once can significantly improve effectiveness, especially for moderate clogs that need additional breakdown.

    Time Expectation System

    • Light clog → 5–10 minutes
    • Moderate clog → 10–20 minutes
    • Repeat cycle → +10 minutes
    • Severe clog → unlikely to work

    Timing tips:

    • Do not flush immediately
    • Let foam fully settle
    • Use second cycle if needed

    How Severe Is Your Toilet Clog? (Clog Severity Classification Guide)

    Identifying clog severity helps you choose the right method and avoid wasted effort.

    Most users misjudge clog severity, which leads to applying the wrong solution. A slow drain is very different from a full blockage, but many treat them the same. This classification system removes confusion and helps users diagnose their situation instantly.

    By mapping visible signs to severity levels, you turn your content into a diagnostic tool. Users don’t need plumbing knowledge. They simply match their situation and follow the correct action, improving success rate and reducing trial and error.

    Use this classification system:

    • Light → slow draining water → use baking soda
    • Moderate → partial blockage → repeat method
    • Severe → no drainage → use plunger
    • Critical → rising water → act immediately
    • Always match severity to the correct method

    What Happens Inside the Pipe During This Process? (Process Flow Breakdown)

    The baking soda creates pressure, loosens debris, and hot water flushes it out.

    Understanding the internal process increases confidence and improves execution. When users know what is happening inside the pipe, they are more likely to follow steps correctly and wait the required time instead of rushing the process.

    A clear flow also simplifies complex chemistry into an easy-to-follow sequence. Instead of long explanations, users see a logical progression that explains exactly how the clog is removed from start to finish.

    Process flow to follow:

    • Baking soda enters the pipe
    • Vinegar activates chemical reaction
    • CO₂ bubbles create pressure
    • Debris loosens and breaks apart
    • Hot water flushes remaining residue

    Is Baking Soda Safe for Toilets and Pipes?

    Yes, it is non-corrosive and safe for pipes and septic systems.

    One of the biggest advantages of using baking soda is its safety profile. Unlike chemical drain cleaners that contain strong acids or alkalis, baking soda is mild and does not damage pipes, seals, or toilet components. This makes it suitable for regular maintenance as well as emergency unclogging.

    For homes with septic systems, this method is especially beneficial because it does not disrupt the natural bacterial balance required for proper waste breakdown. Chemical cleaners, on the other hand, can kill beneficial bacteria and lead to long-term issues.

    Why it’s safe:

    • Non-toxic and biodegradable
    • Does not corrode metal or PVC pipes
    • Safe for septic tanks
    • No harmful fumes

    Safety precautions:

    • Avoid boiling water (can crack porcelain)
    • Use moderate quantities only
    • Do not mix with chemical cleaners

    Baking Soda vs Other Methods — Which Works Best?

    Baking soda is safer but less powerful than plungers or drain snakes.

    Choosing the right unclogging method depends on the severity of the clog and how quickly you need results. Baking soda is ideal for maintenance and mild clogs, while plungers and augers are better for more serious blockages. Chemical cleaners provide fast results but come with safety risks.

    A smart approach is to start with baking soda and escalate only if necessary. This minimizes damage risk while still giving you a chance to resolve the issue naturally.

    Method Comparison Table

    MethodStrengthSpeedSafety
    Baking soda + vinegarMediumMediumHigh
    PlungerHighFastHigh
    Drain snakeVery highFastMedium
    Chemical cleanerVery highFastLow

    Decision guide:

    • Mild clog → baking soda
    • Moderate clog → baking soda + repeat
    • Severe clog → plunger or snake
    • Emergency → mechanical method

    Why Didn’t Baking Soda Work?

    It fails when the clog is solid, deep, or too compact to dissolve.

    Failure does not mean the method is ineffective. It simply means the clog exceeds the capability of a chemical reaction. Many users also make mistakes in the process, such as using insufficient quantities or not waiting long enough for the reaction to work.

    Before moving to stronger methods, it’s worth diagnosing the issue. In some cases, repeating the process correctly can still solve the problem without needing additional tools.

    Common reasons for failure:

    • Clog is too compact or solid
    • Reaction time was too short
    • No hot water used
    • Incorrect ratio of ingredients

    What to do next:

    • Repeat the process once
    • Use a plunger after reaction
    • Switch to mechanical tools

    When Should You NOT Use Baking Soda?

    Avoid it when the toilet is fully blocked or at risk of overflowing.

    There are situations where using baking soda can make things worse instead of better. If the water level in the toilet is already high, adding more liquid can cause overflow. Similarly, if a solid object is blocking the pipe, chemical methods will have no effect.

    Recognizing these situations early helps prevent damage and saves time. In such cases, it is better to move directly to mechanical solutions rather than relying on home remedies.

    Avoid baking soda if:

    • Water level is near overflow
    • Object is visibly stuck
    • No drainage at all
    • Multiple failed attempts

    Better alternatives:

    • Use a plunger immediately
    • Try a toilet auger
    • Call a plumber if needed

    Can This Method Prevent Future Toilet Clogs? (Prevention and Maintenance Guide)

    Baking soda helps reduce buildup but cannot prevent all types of toilet clogs.
    A prevention section adds long-term value and separates your content from competitors. Instead of only solving the current problem, you help users avoid future issues. This increases engagement and positions your content as a complete solution.

    This also shifts your article from reactive to proactive. Users trust content that not only fixes problems but also helps maintain results over time. It builds authority and encourages repeat visits.

    Prevention strategy to include:

    • Use baking soda monthly for maintenance
    • Help reduce organic buildup and odors
    • Does not prevent solid object blockages
    • Avoid flushing non-dissolvable items
    • Use additional methods for deeper cleaning

    FAQ SECTION

    Does baking soda unclog a completely blocked toilet?

    No, it works only for light to moderate clogs, not fully blocked toilets.

    What happens if you flush too early?

    The reaction won’t complete, reducing effectiveness and leaving the clog intact.

    Can you use baking soda without vinegar?

    It works less effectively because the chemical reaction is missing.

    Is vinegar necessary for unclogging?

    Yes, it creates the fizzing reaction that breaks down the clog.

    Can this method damage old pipes?

    No, it is non-corrosive and safe for all pipe types.

    How many times can you repeat the process?

    Maximum two attempts before switching to another method.

    Why does the clog come back after cleaning?

    Partial clearing or buildup deeper in the pipe causes recurring clogs.
    Can baking soda fix recurring clogs?

    It helps temporarily but doesn’t solve underlying issues.

    Is it safe for septic systems?

    Yes, it does not harm beneficial bacteria.

    What should you do if water starts rising?

    Stop immediately and use a plunger to prevent overflow.


  • How to Clean Wood Furniture (Safe and Effective Guide)

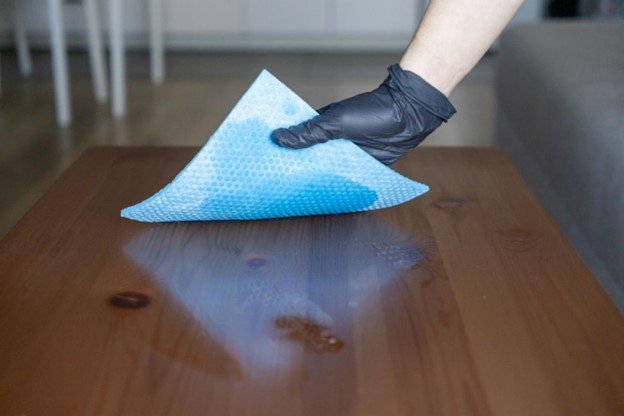
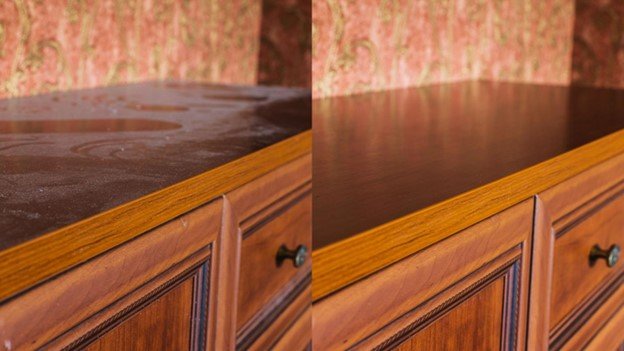
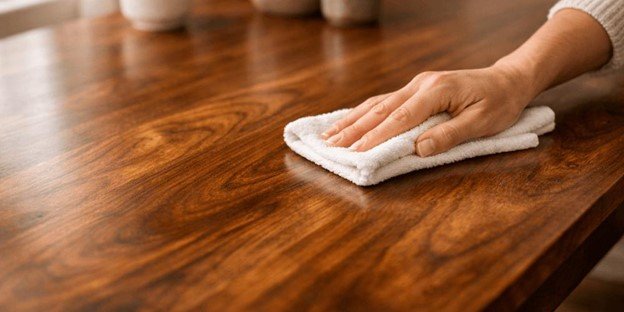
    To clean wood furniture, dust regularly with a microfiber cloth, wipe gently with a slightly damp cloth using mild soap, and avoid excess water. The correct method depends on the wood finish, as improper cleaning can damage the surface or reduce its lifespan.

    Wood furniture is durable but sensitive to moisture, chemicals, and abrasion. Many cleaning mistakes come from using the wrong products or applying too much water, which can dull the finish or cause long-term damage. Homeaholic focuses on a structured cleaning approach that matches method, material, and frequency for consistent results.

    Key Characteristics of Wood Furniture Care

    • Requires finish-specific cleaning methods
    • Sensitive to moisture and harsh chemicals
    • Needs regular dust removal to prevent buildup
    • Benefits from periodic polishing and protection
    • Long lifespan depends on maintenance consistency

    Quick 30-Second Cleaning Method

    Some users need a fast and effective cleaning method without going through a full routine. This quick process provides a simplified version of wood furniture care while still maintaining safety and effectiveness. It is especially useful for daily maintenance or quick touch-ups.

    This method focuses on speed without compromising the finish. It eliminates unnecessary steps while ensuring that dust and light dirt are removed properly.

    30-Second Method

    • Dust surface with microfiber cloth
    • Wipe lightly with damp cloth if needed
    • Dry immediately with clean towel

    When to Use

    • Daily maintenance
    • Light dust buildup
    • Quick cleaning before use

    Key Insight

    • Fast cleaning increases consistency
    • Simplicity improves user adoption
    • Quick methods support long-term care

    What Type of Wood Furniture Do You Have?

    How to Clean Wood Furniture

    Identifying the type of wood and finish is the first step in cleaning properly. Solid wood, engineered wood, and veneered surfaces all respond differently to moisture and cleaning agents. More importantly, the finish layer determines what can safely be applied to the surface.

    Most furniture is protected by finishes such as varnish, lacquer, or oil, which act as a barrier against damage. Cleaning without understanding the finish can strip protection or cause discoloration. Proper identification ensures that the cleaning method supports the material rather than harming it.

    Common Wood Types and Finishes

    Sealed wood (varnish, lacquer)

    • Most durable
    • Handles light moisture well

    Oiled wood

    • Natural finish
    • Requires gentle cleaning

    Unfinished wood

    • Highly absorbent
    • Sensitive to liquids

    Key Insight

    • Finish matters more than wood type
    • Wrong cleaning method can damage surface
    • Always identify before cleaning

    Wood Finish Cleaning Decision System

    Cleaning wood furniture correctly depends on identifying the finish and applying the appropriate method. Most damage happens when users apply the same cleaning approach to all surfaces without considering how finishes react to moisture and chemicals. This system removes guesswork and ensures that each type of wood surface is handled safely.

    By following a finish-based decision framework, you can select the right technique instantly. This prevents common issues like dullness, streaking, or surface degradation while improving cleaning efficiency and long-term durability.

    Finish-Based Cleaning Logic

    Sealed wood (varnish, lacquer, polyurethane)

    • Safe for light damp cleaning
    • Use mild soap solution
    • Dry immediately

    Oiled wood

    • Minimal moisture only
    • Use dry or slightly damp cloth
    • Avoid frequent cleaning

    Unfinished wood

    • Dry cleaning only
    • No liquid exposure
    • Use soft brush or cloth

    Key Insight

    • Finish determines cleaning method
    • One method does not fit all surfaces
    • Correct pairing prevents long-term damage

    What Is the Safest Way to Clean Wood Furniture?

    Use a microfiber cloth with minimal moisture and mild soap, then dry immediately to protect the finish.

    The safest way to clean wood furniture is to use minimal moisture combined with gentle wiping. The goal is to remove dirt without disturbing the finish or introducing excess water into the material.

    Dry dusting should always be the first step, followed by light damp cleaning when necessary. Excess water is the biggest risk, as it can seep into the wood and cause swelling, warping, or staining over time.

    Safe Cleaning Approach

    • Use a microfiber cloth for dusting
    • Lightly dampen cloth for deeper cleaning
    • Dry surface immediately after wiping
    • Avoid soaking or spraying directly

    Why This Works

    • Prevents moisture absorption
    • Maintains protective finish
    • Reduces surface wear

    Key Insight

    • Less moisture = safer cleaning
    • Gentle technique preserves finish
    • Consistency prevents buildup

    How Much Moisture Is Safe for Wood Furniture?

    How to Clean Wood Furniture

    Moisture control is the most critical factor in cleaning wood furniture safely. While small amounts of water can help remove dirt, excess moisture can penetrate the surface and damage the internal structure. The difference between a damp cloth and a wet one is often the deciding factor between safe cleaning and long-term damage.

    Understanding moisture limits allows you to clean effectively without risking warping, swelling, or finish breakdown. Proper drying after cleaning is equally important, as even small amounts of leftover moisture can accumulate over time and affect the wood.

    Moisture Control Guidelines

    Damp cloth

    • Slightly moist, not dripping
    • Safe for most sealed surfaces

    Wet cloth

    • Excess water present
    • High risk of damage

    Standing moisture

    • Must be avoided completely
    • Causes long-term deterioration

    Best Practices

    • Wring out cloth thoroughly before use
    • Never apply water directly to surface
    • Always dry immediately after cleaning

    Key Insight

    • Moisture level controls safety
    • Less water = lower risk
    • Drying is part of the cleaning process

    What Cleaning Products Should You Use?

    Mild soap solutions and specialized wood cleaners are safest for maintaining finish integrity.

    Choosing the right cleaning products is critical for maintaining wood furniture. Harsh chemicals can strip finishes, while overly oily products can create residue buildup.

    Mild soap solutions are the safest option for most surfaces. Specialized wood cleaners can also be used, but they should be applied carefully to avoid over-saturation or uneven shine.

    Recommended Products

    • Mild dish soap diluted in water
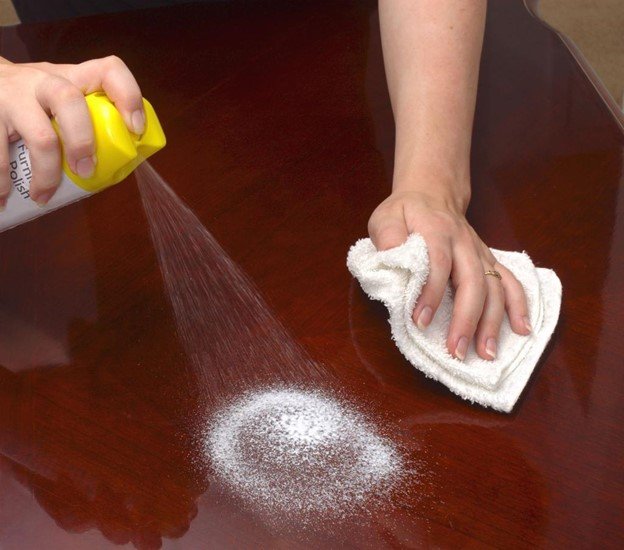
    • Commercial wood cleaners
    • Microfiber cloths

    Products to Avoid

    • Bleach or ammonia
    • Abrasive cleaners
    • Excessive polish

    Key Insight

    • Simple solutions are most effective
    • Avoid strong chemicals
    • Always test before full application

    Wood Cleaning Methods Comparison Table

    Comparing cleaning methods visually helps users make faster decisions without reading long explanations. A table format simplifies complex information and improves engagement, especially for users looking for quick guidance. It also enhances AI extraction because structured data is easier to interpret.

    This table summarizes safety, risk level, and frequency, allowing users to choose the most appropriate cleaning method based on their needs. It acts as a quick reference guide within the article.

    Comparison Table

    MethodSafe ForRisk LevelUse Frequency
    Dry dustingAll finishesLowDaily
    Damp clothSealed woodMediumWeekly
    Vinegar mixLimited useMediumOccasional
    PolishSealed surfacesLowMonthly

    Key Insight

    • Visual comparison speeds decision-making
    • Tables increase dwell time
    • Structured data improves AI extraction

    Cleaning vs Polishing vs Conditioning (What’s the Difference?)

    How to Clean Wood Furniture

    Many users confuse cleaning, polishing, and conditioning, which leads to improper care routines. Each process serves a different purpose, and using them incorrectly can result in buildup, dullness, or reduced effectiveness. Understanding these differences ensures that each step contributes to maintaining the furniture properly.

    A structured approach separates these actions into distinct stages, allowing you to maintain cleanliness, appearance, and protection without overusing any single method. This improves both short-term results and long-term durability.

    Key Differences

    Cleaning

    • Removes dirt and dust
    • Uses mild solutions
    • Performed regularly

    Polishing

    • Enhances shine
    • Adds surface protection
    • Used occasionally

    Conditioning

    • Nourishes wood (oiled finishes)
    • Prevents drying and cracking
    • Used periodically

    Common Mistakes

    • Over-polishing causing buildup
    • Conditioning sealed wood unnecessarily
    • Skipping cleaning before polishing

    Key Insight

    • Each process has a specific role
    • Combining them incorrectly reduces effectiveness
    • Balanced routine delivers best results

    Is Vinegar Safe for Cleaning Wood Furniture?

    Vinegar can be used in diluted form occasionally, but frequent use can damage wood finishes.

    Vinegar is often recommended as a natural cleaner, but it must be used carefully on wood surfaces. While it can remove dirt and grease, its acidic nature can dull finishes if used too frequently or in high concentration.

    Diluted vinegar solutions can be used occasionally, but they should not replace regular cleaning methods. Overuse may lead to long-term surface damage.

    Safe Usage Guidelines

    • Dilute vinegar with water
    • Use sparingly
    • Wipe dry immediately

    Risks

    • Can dull finish
    • May weaken protective coating

    Key Insight

    • Vinegar is useful but not universal
    • Overuse causes more harm than benefit

    How to Clean Wood Furniture Step-by-Step

    How to Clean Wood Furniture

    Cleaning wood furniture effectively requires a structured process. Following a step-by-step approach ensures that dirt is removed without damaging the surface.

    Start with dust removal, then proceed to light cleaning if needed. Always finish by drying the surface to prevent moisture-related issues.

    Step-by-Step Process

    1. Dust with microfiber cloth
    2. Prepare mild cleaning solution
    3. Dampen cloth slightly
    4. Wipe surface gently
    5. Dry immediately

    Technique Tips

    • Work in small sections
    • Avoid excessive pressure
    • Keep cloth clean

    Key Insight

    • Process matters more than products
    • Consistency ensures long-term care

    Essential Tools for Cleaning Wood Furniture

    Using the right tools ensures that cleaning is both effective and safe for wood surfaces. Many cleaning issues arise not from the method itself but from using improper tools that scratch, oversaturate, or leave residue. A defined toolkit simplifies the process and ensures consistent results.

    By standardizing your cleaning tools, you reduce variability and improve efficiency. This also helps beginners avoid mistakes and follow a professional-level approach to furniture maintenance.

    Recommended Tool Kit

    Microfiber cloth

    • Traps dust without scratching
    • Ideal for daily cleaning

    Mild soap solution

    • Safe for most finishes
    • Removes light dirt effectively

    Dry towel

    • Prevents moisture damage
    • Essential after damp cleaning

    Wood polish

    • Restores shine
    • Adds protective layer

    Soft brush

    • Cleans crevices
    • Avoids surface damage

    Key Insight

    • Tools determine cleaning quality
    • Proper setup reduces mistakes
    • Consistency improves long-term care

    How to Remove Stains from Wood Furniture

    Stains on wood furniture can come from water, heat, or spills. Removing them requires careful treatment based on the type of stain and finish.

    Light stains can often be removed with gentle cleaning, while deeper stains may require polishing or restoration methods.

    Common Stain Types

    • Water rings
    • Oil stains
    • Heat marks

    Removal Methods

    • Use mild cleaner for light stains
    • Apply polishing product
    • Use specialized treatment if needed

    Key Insight

    • Match method to stain type
    • Avoid aggressive cleaning

    How to Identify Wood Furniture Surface Problems

    Proper cleaning starts with diagnosing the problem correctly. Many surface issues look similar but require completely different solutions. Misidentifying the issue often leads to ineffective cleaning or further damage.

    By recognizing common surface conditions, you can apply the correct method immediately instead of experimenting with different solutions. This improves efficiency and prevents unnecessary wear on the finish.

    Surface Problem Identification

    Dull surface

    • Caused by over-cleaning or residue
    • Requires light polishing

    Sticky surface

    • Result of product buildup
    • Needs gentle cleaning

    White rings

    • Water damage
    • Requires targeted treatment

    Scratches

    • Surface wear
    • May need refinishing

    What to Do

    • Match solution to problem type
    • Avoid aggressive cleaning
    • Use minimal intervention first

    Key Insight

    • Correct diagnosis improves results
    • Most issues are surface-level
    • Wrong method worsens damage

    How to Restore Shine and Finish

    Over time, wood furniture can lose its shine due to dust, wear, and improper cleaning. Restoring shine involves cleaning the surface thoroughly and applying appropriate polish or conditioner.

    Polishing helps enhance appearance and provides a protective layer that reduces future wear. However, over-polishing can create buildup, so moderation is key.

    Shine Restoration Steps

    • Clean surface first
    • Apply polish lightly
    • Buff with clean cloth

    Benefits

    • Improved appearance
    • Added protection
    • Longer lifespan

    Key Insight

    • Restoration requires balance
    • Too much polish reduces effectiveness

    How Often Should You Clean Wood Furniture?

    Dust daily and perform light cleaning weekly to maintain surface quality without overexposure.

    Cleaning frequency depends on usage and environment. Regular dusting prevents buildup, while deeper cleaning should be done periodically.

    Establishing a routine ensures that furniture remains in good condition without excessive cleaning that could damage the finish.

    Cleaning Frequency Guide

    • Daily → light dusting
    • Weekly → surface cleaning
    • Monthly → deeper maintenance

    Factors Affecting Frequency

    • dust levels
    • usage intensity
    • exposure to sunlight

    Key Insight

    • Routine cleaning prevents damage
    • Over-cleaning can harm finish

    What Mistakes Should You Avoid?

    Cleaning mistakes are a major cause of damage to wood furniture. Most issues arise from using too much water, harsh chemicals, or incorrect techniques.

    Avoiding these mistakes ensures long-term durability and consistent appearance.

    Common Mistakes

    • Using too much water
    • Applying harsh chemicals
    • Skipping drying step
    • Over-polishing

    Correct Approach

    • Use minimal moisture
    • Choose mild products
    • Follow structured process

    Key Insight

    • Mistakes cause more damage than dirt
    • Proper method ensures longevity

    How to Protect Wood Furniture Long-Term

    Protection is essential for maintaining wood furniture over time. Preventive measures reduce wear and minimize the need for frequent cleaning.

    Using protective products and controlling environmental factors helps preserve both appearance and structure.

    Protection Strategies

    • Use coasters and mats
    • Avoid direct sunlight
    • Maintain humidity levels

    Long-Term Benefits

    • Reduced damage
    • Extended lifespan
    • Consistent appearance

    Key Insight

    • Protection reduces maintenance effort

    When Should You Refinish Instead of Clean?

    Cleaning removes dirt, but refinishing restores damaged surfaces. When scratches, fading, or deep stains occur, cleaning alone is not enough.

    Refinishing involves sanding and applying a new finish layer, which renews the surface and extends the life of the furniture.

    Signs Refinishing Is Needed

    • deep scratches
    • worn finish
    • persistent stains

    Key Insight

    • Cleaning maintains
    • Refinishing restores

    Real-World Case Study: Cleaning vs Over-Cleaning Damage

    A user maintained their wood furniture by cleaning it frequently with strong commercial cleaning solutions, believing that more cleaning would keep the surface in better condition. Initially, the furniture appeared clean, but over time the finish began to lose its shine, and the surface developed a dull, uneven appearance. The issue was not dirt accumulation but the gradual breakdown of the protective finish caused by excessive chemical exposure.

    The turning point came when the user shifted from aggressive cleaning to a controlled maintenance routine. By reducing cleaning frequency and switching to a mild soap-based solution, the surface began to recover its natural look. Regular dusting replaced frequent wet cleaning, and the finish gradually regained consistency. This adjustment demonstrated that over-cleaning can be more damaging than neglect when it comes to wood furniture care.

    Breakdown of the Scenario

    • Initial approach → frequent cleaning with strong chemicals
    • Core problem → overuse of cleaning products
    • Surface impact → protective layer weakened and dullness increased
    • Adjustment → switched to mild cleaning routine
    • Frequency change → reduced unnecessary wet cleaning
    • Outcome → restored appearance and improved durability

    What Changed in the Correct Approach

    • Harsh chemicals replaced with gentle solutions
    • Cleaning frequency reduced to necessary intervals
    • Dry dusting prioritized over wet cleaning
    • Finish preserved instead of stripped

    Key Takeaway

    • More cleaning does not equal better care
    • Chemical overuse damages protective coatings
    • Balance between cleaning and preservation is essential

    Expert Insight

    Cleaning wood furniture is not about removing dirt as aggressively as possible but about maintaining the integrity of the finish over time. The protective layer on wood is designed to resist wear, but repeated exposure to strong cleaning agents can gradually strip it away, leaving the surface vulnerable to damage, discoloration, and dryness. This is why technique and product selection matter more than cleaning frequency.

    From a maintenance perspective, the most effective approach combines gentle cleaning methods with consistent care habits. Dust removal should be prioritized, while deeper cleaning should only be performed when necessary. This reduces chemical exposure and preserves the finish, ensuring long-term durability and appearance.

    Expert Recommendations

    • Use mild cleaning solutions instead of strong chemicals
    • Limit wet cleaning to periodic maintenance
    • Prioritize dry dusting as primary routine
    • Always dry surfaces immediately after cleaning
    • Test products on a small area before full use

    Strategic Insight from Homeaholic

    • Cleaning should protect, not degrade the surface
    • Frequency should match actual need, not routine habit
    • Proper technique extends furniture lifespan significantly

    Homeaholic recommends treating wood furniture care as a balance between cleanliness and preservation. When users shift from aggressive cleaning to controlled maintenance, they not only improve the appearance of the furniture but also extend its lifespan, making it a long-term investment rather than a recurring maintenance issue.

    Stain Removal Decision System

    Not all stains should be treated the same way. Different substances interact with wood surfaces differently, and using the wrong method can set the stain deeper or damage the finish. A structured decision system ensures that each stain is handled appropriately.

    This system helps you identify the type of stain and apply the correct removal method without trial and error. It improves success rate and reduces the risk of permanent damage.

    Stain-Based Decision Flow

    Water stains (white rings)

    • Light buffing
    • Minimal treatment

    Oil stains

    • Absorb excess oil
    • Use mild cleaner

    Surface dirt stains

    • Standard cleaning method
    • No aggressive action needed

    Deep stains

    • May require refinishing
    • Cleaning alone not enough

    Warning Signs

    • Stain does not change after cleaning
    • Surface texture altered
    • Color penetration visible

    Key Insight

    • Identify stain before treating
    • Use least aggressive method first
    • Escalate only when necessary

    What Happens If You Clean Wood Furniture Properly?

    Understanding the outcome of proper cleaning helps reinforce the importance of correct techniques. Many users focus only on the process without recognizing the visible and long-term benefits. Clear before-and-after framing improves motivation and highlights the value of proper maintenance.

    When wood furniture is cleaned correctly, it not only looks better but also lasts significantly longer. This transformation reflects both aesthetic improvement and structural preservation.

    Before Proper Cleaning

    • Dull and uneven surface
    • Dust buildup and residue
    • Reduced shine and clarity

    After Proper Cleaning

    • Smooth and clean finish
    • Restored natural shine
    • Enhanced durability and appearance

    Key Insight

    • Proper cleaning improves both look and lifespan
    • Visible results reinforce correct habits
    • Maintenance creates long-term value

    FAQ Section

    Can you use water on wood furniture?

    Yes, but only in small amounts.

    What is the best cleaner?

    Mild soap solution.

    How often should you clean?

    Weekly cleaning is sufficient.

    Can vinegar damage wood?

    Yes, if overused.


  • Bathroom Shelves: Complete Guide to Types, Materials, and Smart Storage

    Bathroom shelves are storage units designed to maximize vertical space, organize daily essentials, and improve accessibility in bathrooms. The best shelves combine strong load capacity, moisture-resistant materials, and secure installation methods to ensure safety, durability, and efficient space utilization.

    Bathroom shelves are not just decorative. They are structural storage systems that must handle weight, humidity, and frequent use without failure.

    What Are Bathroom Shelves and Why Are They Important?

    Bathroom shelves are mounted or freestanding platforms used to store toiletries, towels, and daily-use items.

    They improve:

    • space efficiency
    • organization
    • accessibility
    • bathroom aesthetics

    In small bathrooms, shelves often replace cabinets as the primary storage system.

    Bathroom shelves are not just storage elements. They function as space management systems that directly influence usability, hygiene, and efficiency.

    Functional Importance:

    • Reduce clutter on countertops
    • Improve daily accessibility
    • Separate items by usage frequency
    • Prevent water exposure damage to items

    Structural Importance:

    Shelves distribute load across walls. Poorly designed shelves can damage walls or collapse, making structural understanding critical.

    Design Impact:

    Well-placed shelves improve:

    • visual openness
    • minimalism
    • perceived space size

    What Are the Different Types of Bathroom Shelves?

    Different shelf types serve different layouts and storage needs.

    Common Types:

    • Floating shelves
    • Corner shelves
    • Wall-mounted bracket shelves
    • Over-the-toilet shelves
    • Recessed shelves

    Beyond basic types, shelves vary based on structural purpose.

    Functional Classification:

    1. Storage Shelves

    Used for towels, bottles, and bulk items.

    2. Display Shelves

    Used for décor, plants, and aesthetics.

    3. Utility Shelves

    Placed inside showers or near sinks for daily-use items.

    Structural Variants:

    • Cantilever shelves (hidden support)
    • Multi-tier shelves (stacked storage)
    • Modular shelf systems (adjustable units)

    Key Insight:

    Floating shelves are best for modern aesthetics, while corner shelves maximize unused space.


    How Do You Choose the Right Bathroom Shelves?

    Choosing Right Bathroom Shelves

    Choosing the right shelves depends on usage, space, and wall type.

    Decision Factors:

    • available wall space
    • storage needs
    • load requirements
    • humidity exposure
    • installation type

    Practical Rule:

    Use floating shelves for light storage and bracket shelves for heavier loads.

    Which Materials Are Best for Bathroom Shelves?

    Material determines strength and moisture resistance.

    Material Comparison Table

    MaterialMoisture ResistanceStrengthBest Use
    WoodMediumHighDecorative storage
    MDFLowMediumBudget use
    GlassHighMediumModern designs
    MetalHighHighHeavy-duty storage
    PlasticVery HighLow–MediumWet areas

    Material performance must be evaluated under real bathroom conditions.

    Wood Shelves (Detailed Analysis)

    • Strong and visually appealing
    • Vulnerable to swelling without sealing
    • Best used in low-moisture zones

    Glass Shelves

    • Non-porous and moisture-proof
    • Can crack under heavy or uneven load
    • Ideal for modern minimal designs

    Metal Shelves

    • High strength and durability
    • Risk of rust if coating fails
    • Best for heavy-duty storage

    Plastic Shelves

    • Completely waterproof
    • Lower structural strength
    • Suitable for shower areas

    Advanced Insight:

    Material failure often starts at edges and joints, not flat surfaces.

    Homeaholic Insight:

    Metal and treated wood offer the best balance between strength and durability.


    Floating vs Bracket Bathroom Shelves: Which Is Better?

    FeatureFloatingBracket
    AestheticCleanVisible support
    Load capacityMediumHigh
    InstallationComplexEasier
    Best UseLight storageHeavy items

    Recommendation:

    Bracket shelves are safer for heavy storage, while floating shelves are ideal for minimal design.


    How Much Weight Can Bathroom Shelves Hold?

    Weight Limit Bathroom Shelves

    Shelf capacity depends on material and installation.

    Load Capacity Guide

    Shelf TypeWeight Capacity
    Adhesive shelves3–5 kg
    Floating shelves5–15 kg
    Bracket shelves15–40 kg

    Load capacity is influenced by three combined factors:

    1. Material Strength

    Stronger materials like steel outperform wood or plastic.

    2. Mounting Method

    Anchored shelves hold significantly more weight than adhesive ones.

    3. Wall Type

    Concrete walls can handle much heavier loads than drywall.

    Load Breakdown Example:

    • Shelf + anchors on drywall → 10–15 kg
    • Shelf + anchors on concrete → 30–50 kg
    • Adhesive shelf → 3–5 kg

    Critical Insight:

    Even strong shelves fail if mounted incorrectly.

    Which Walls Are Safe for Bathroom Shelves?

    Not all walls can safely support shelves. Wall type directly determines load capacity and installation method.

    Drywall (Plasterboard Walls)

    • Weak without anchors
    • Can hold light to medium loads (5–15 kg)
    • Requires wall anchors or studs

    Concrete Walls

    • Strongest option
    • Supports heavy loads (20–50 kg+)
    • Requires drilling with masonry tools

    Tile Walls

    • Strong but fragile surface
    • Requires careful drilling to avoid cracks
    • Best for medium loads

    Brick Walls

    • Strong but uneven
    • Requires proper anchors
    • Ideal for heavy-duty shelves

    Safety Rule:

    Always match installation type with wall strength.
    Ignoring this is the #1 cause of shelf collapse globally.

    Critical Insight:

    Wall anchoring matters more than shelf material in determining load capacity.


    Where Should Bathroom Shelves Be Placed for Maximum Efficiency?

    Placement affects usability more than shelf type.

    Best Locations:

    • above toilet
    • beside mirror
    • shower corner
    • unused wall spaces

    Placement should follow usage behavior, not aesthetics alone.

    Behavioral Placement Logic:

    • Daily-use items → within arm reach
    • Heavy items → lower shelves
    • Rare items → upper shelves

    High-Efficiency Zones:

    • Above toilet (unused vertical space)
    • Near sink (daily access zone)
    • Inside shower (utility zone)

    Mistake to Avoid:

    Placing shelves too high or too deep reduces usability.

    How to Prevent Bathroom Shelves from Rusting, Swelling, or Breaking

    Shelf durability depends on preventive care.

    Rust Prevention (Metal Shelves):

    • Use powder-coated or stainless steel
    • Avoid prolonged water exposure
    • Dry surfaces regularly

    Swelling Prevention (Wood/MDF):

    • Apply waterproof sealant
    • Avoid direct water contact
    • Ensure proper ventilation

    Structural Protection:

    • Avoid overloading
    • Re-tighten screws periodically
    • Inspect mounting points

    Insight:

    Most shelf damage is gradual and preventable.


    Bathroom Shelves Without Drill Installation

    Can Bathroom Shelves Be Installed Without Drilling?

    Yes, but with limitations.

    Adhesive Installation:

    Suitable for:

    • light items
    • temporary setups
    • rental spaces

    Limitations:

    • low weight capacity
    • weak performance in humidity
    • risk of sudden detachment

    Alternative:

    Use suction or tension-based systems, but these are also limited in load capacity.

    What Is the Safest Bathroom Shelf Setup?

    Safety depends on stability and load handling.

    Safest Configuration:

    • bracket-mounted shelves
    • anchored into studs or concrete
    • even weight distribution

    Risky Configurations:

    adhesive shelves for heavy items

    • floating shelves without proper anchors
    • overloaded glass shelves

    Safety Rule:

    If the shelf holds breakable or heavy items, always use drilled installation.

    Bathroom Shelves vs Bathroom Cabinets: Which Is Better?

    Both serve different roles.

    FeatureShelvesCabinets
    AccessibilityHighMedium
    Storage CapacityMediumHigh
    Space EfficiencyHighMedium
    ProtectionLowHigh

    Decision Rule:

    • Choose shelves for accessibility
    • Choose cabinets for storage and protection

    How Bathroom Shelves Affect Daily Usability

    Shelves directly impact routine efficiency.

    Positive Effects:

    • faster access to items
    • reduced clutter
    • improved hygiene

    Negative Effects (if poorly designed):

    • overcrowding
    • difficult access
    • safety risks

    Insight:

    Well-designed shelves reduce daily friction in bathroom use.

    Future Trends in Bathroom Shelving Systems

    Bathroom storage is evolving.

    Emerging Trends:

    • modular adjustable shelves
    • smart storage systems
    • hidden storage integration
    • lightweight high-strength materials

    Design Shift:

    Minimalist and functional designs are replacing bulky storage units.

    What Is the Ideal Spacing and Height for Bathroom Shelves?

    Shelf placement must follow ergonomic and usability rules.

    Standard Height Guidelines:

    • Eye-level shelves: 48–60 inches from floor
    • Above toilet: 24–30 inches above tank
    • Shower shelves: 36–48 inches

    Spacing Between Shelves:

    • Small items: 8–10 inches
    • Medium items: 10–14 inches
    • Large items: 14–18 inches

    Usability Rule:

    Shelves should be reachable without stretching or bending excessively.

    Placement Optimization Rule:

    AreaBest Shelf Type
    Above toiletFloating
    ShowerPlastic/metal
    CornerCorner shelf
    Near sinkSmall wall shelf

    Bathroom Shelves in Humid Environments

    How Do Bathroom Shelves Perform in Humid Environments?

    Humidity affects durability and safety.

    Common Issues:

    • rust (metal)
    • swelling (wood/MDF)
    • mold buildup

    Moisture Performance Matrix

    MaterialPerformance
    MDFPoor
    WoodModerate
    GlassExcellent
    MetalExcellent (if coated)
    PlasticExcellent

    Best Bathroom Shelving Strategy for Small Spaces

    Small bathrooms require smart space planning.

    Vertical Storage Strategy:

    Use multiple stacked shelves instead of wide units.

    Corner Optimization:

    Install corner shelves to use unused areas.

    Over-Toilet Storage:

    Maximize vertical space above toilet.

    Visual Space Rule:

    Floating shelves create a more open and less cluttered look.

    Real-World Case Study: Shelf Failure vs Proper Installation

    A bathroom installed adhesive shelves for heavy bottles.

    Result:

    • shelves detached within weeks
    • items fell and damaged tiles

    Upgrade:

    Replaced with bracket-mounted metal shelves.

    Outcome:

    • stable load handling
    • long-term durability
    • zero failures

    How Much Do Bathroom Shelves Cost Globally?

    Price Range:

    • Basic shelves: $10–$50
    • Mid-range: $50–$150
    • Premium: $150–$500+

    Cost Factors:

    • material
    • size
    • design
    • installation method

    How Long Do Bathroom Shelves Last?

    MaterialLifespan
    MDF2–5 years
    Wood5–10 years
    Glass10–15 years
    Metal10–20 years
    Plastic5–10 years

    How to Maintain Bathroom Shelves for Long-Term Durability

    Maintenance extends shelf life significantly.

    Maintenance Routine:

    • Clean surfaces weekly
    • Dry moisture immediately
    • Check screws every 3–6 months
    • Inspect for rust or swelling

    Material-Specific Care:

    • Wood → re-seal periodically
    • Metal → check anti-rust coating
    • Glass → inspect mounting points

    Insight:

    Proper maintenance can increase shelf lifespan by 30–50%.

    Common Bathroom Shelf Problems and How to Avoid Them

    Common Issues:

    • falling shelves
    • rust
    • swelling
    • poor alignment

    Prevention:

    • use proper anchors
    • choose moisture-resistant materials
    • avoid overloading shelves

    Shelf Failure Science: Why Bathroom Shelves Collapse

    Shelf failures are caused by:

    Poor Anchoring

    Shelves mounted without studs or proper anchors detach over time.

    Overloading

    Exceeding weight capacity leads to bending or collapse.

    Weak Materials

    Low-quality materials degrade quickly in humid environments.

    How Weight Distribution Affects Shelf Safety

    Weight distribution determines whether a shelf holds or fails.

    Center Load vs Edge Load

    • Center load is safest
    • Edge loading causes bending and instability

    Even Distribution Principle:

    Spread weight across the entire shelf rather than stacking in one area.

    Load Failure Insight:

    Even strong shelves fail when weight is concentrated in one point.

    How to Install Bathroom Shelves Safely

    Key Steps:

    1. locate wall studs
    2. mark drilling points
    3. use proper anchors
    4. level the shelf
    5. tighten securely

    Adhesive vs Drilled Bathroom Shelves: Which Is Safer?

    This is one of the most misunderstood decisions.

    Adhesive Shelves

    Pros:

    • No drilling required
    • Easy installation
    • Ideal for rentals

    Cons:

    • Limited load capacity (3–5 kg)
    • Fails in humid environments
    • Weak on textured surfaces

    Drilled Shelves

    Pros:

    • Strong and stable
    • Suitable for heavy loads
    • Long-term durability

    Cons:

    • Requires tools
    • Permanent installation

    Key Insight:

    Adhesive shelves are temporary solutions.
    Drilled shelves are structural storage systems.

    DIY vs Professional Shelf Installation

    DIY:

    • lower cost
    • suitable for light shelves

    Professional:

    • safer for heavy installations
    • ensures proper alignment

    Bathroom Shelf Storage Planner (Smart System)

    Step 1: Categorize Items

    • daily use
    • weekly use
    • rare use

    Step 2: Assign Zones

    ZonePlacement
    toprare items
    middledaily items
    bottomheavy items

    Bathroom Shelf Comparison Tool

    FeatureFloatingBracketCornerRecessed
    Space SavingHighMediumVery HighHigh
    StorageMediumHighMediumMedium
    InstallationMediumEasyEasyHard

    Expert Insight: What Most Homeowners Get Wrong

    Most people choose shelves based on design.

    In reality:

    • 70% of failures come from poor installation
    • 20% from wrong material
    • 10% from overloading

    What Most Homeowners Get Wrong About Bathroom Shelves

    Most users focus on aesthetics.

    In reality:

    • 70% of failures come from poor installation
    • 20% from wrong material
    • 10% from overloading

    Structure matters more than design.

    Bathroom Shelf Decision Matrix (Advanced)

    FactorFloatingBracketCornerRecessed
    Load StrengthMediumHighMediumMedium
    Space EfficiencyHighMediumVery HighHigh
    Installation DifficultyMediumEasyEasyHard
    DurabilityMediumHighMediumHigh

    Real-World Case Study: Small Bathroom Shelf Optimization

    A compact bathroom lacked storage and relied on cluttered countertops.

    Problem:

    • no vertical storage
    • items scattered
    • poor accessibility

    Solution:

    Installed floating shelves + corner units.

    Result:

    • 45% increase in storage
    • cleaner layout
    • improved usability

    Bathroom Shelf Buying Checklist (Expert QC Guide)

    Use this before purchasing:

    • Wall compatibility checked
    • Load capacity matches usage
    • Moisture-resistant material selected
    • Installation method confirmed
    • Proper spacing planned

    Homeaholic Recommendation:


    FAQ Section

    Can bathroom shelves hold heavy items?

    Yes, if properly anchored with brackets.

    Are adhesive shelves safe?

    Only for light items.

    What is the best material for bathroom shelves?

    Metal and glass offer the best durability.

    Can shelves be installed on tiles?

    Yes, but require proper drilling tools.

    How to prevent shelves from falling?

    Use wall anchors and avoid overloading.

    Are floating shelves strong?

    Yes, but only when properly installed.

    What is the best height for shelves?

    Typically 4–5 feet from floor level.

    Can bathroom shelves damage tiles?

    Yes, improper drilling can crack tiles.

    What wall type holds the most weight?

    Concrete and brick walls.

    Do floating shelves bend?

    Yes, if overloaded or poorly installed.

    Can adhesive shelves fail due to humidity?

    Yes, humidity weakens adhesive bonding.

    What is the safest shelf type?

    Bracket-mounted shelves with anchors.

  • House Painting: Complete Guide to Choosing, Applying, and Maintaining Paint

    House painting protects surfaces, improves appearance, and increases property value when done with the right paint, preparation, and technique. The best results come from matching paint type to surface, climate, and room function while ensuring proper wall preparation before application.

    House painting is more than changing color. It is a protective system that shields walls from moisture, UV damage, mold growth, and wear over time. Whether painting interiors or exteriors, the right decisions at each stage determine durability and finish quality.

    What Is House Painting and Why Does It Matter?

    House painting is the process of applying protective and decorative coatings to interior and exterior residential surfaces. It preserves structural materials while improving visual appeal.

    A properly painted home resists weather damage, stains, cracking, and premature aging. Exterior paint acts as a barrier against rain, heat, and UV rays, while interior paint protects walls from humidity, dust, and daily abrasion.

    For homeowners globally, painting is one of the highest-return home improvement investments because it combines maintenance and design in one upgrade.

    What Are the Main Types of House Paint?

    Different paint formulations serve different purposes. Choosing the wrong one can lead to peeling, fading, or moisture failure.

    Paint TypeBest ForStrength
    Acrylic LatexInterior & exterior wallsDurable, flexible
    Oil-Based PaintTrim, doors, woodworkSmooth finish
    Enamel PaintKitchens, bathroomsMoisture resistant
    Primer PaintSurface prepAdhesion support
    Elastomeric CoatingExterior masonryCrack bridging

    Acrylic latex is now the global standard because it dries quickly, resists cracking, and performs well across climates.

    How Do You Choose the Right Paint for Different Surfaces?

    Each wall material has different absorption, texture, and adhesion behavior.

    Best Surface Matches:

    • Drywall → Acrylic latex interior paint
    • Wood siding → Exterior acrylic or oil hybrid paint
    • Brick walls → Breathable masonry coatings
    • Stucco → Elastomeric weather-resistant paint
    • Concrete → Waterproof acrylic seal paint

    Always test for moisture before painting porous surfaces. Damp walls trap water under paint films and cause blistering.


    Interior vs Exterior House Painting: What Is the Difference?

    House Painting

    These paints are chemically different and should never be interchanged.

    Interior Paint:

    Designed for washability, stain resistance, low odor, and indoor air safety.

    Exterior Paint:

    Engineered for UV protection, temperature expansion, mold resistance, and rain exposure.

    Exterior coatings contain stronger binders and weather-resistant additives that interior paints do not require.

    How Should You Prepare Walls Before Painting?

    Surface preparation determines whether paint lasts 2 years or 12 years.

    Essential Preparation Steps:

    1. Remove dust, grease, and loose debris
    2. Scrape peeling paint
    3. Sand uneven patches
    4. Fill cracks and holes
    5. Apply primer where needed
    6. Let surfaces dry fully before coating

    Professional painters often say poor preparation causes more failures than poor paint quality.


    Advanced Surface Preparation: The Step Professionals Never Skip

    House Painting

    Surface preparation is not just cleaning. It is a controlled process that determines how well paint bonds and how long it lasts.

    Moisture Testing Before Painting

    Walls must be dry before painting. Even slight moisture leads to bubbling and peeling.

    Professional method:

    • Tape a plastic sheet (1 ft x 1 ft) to the wall
    • Leave for 24 hours
    • If condensation appears → wall is too damp

    This simple test prevents long-term paint failure.

    Adhesion Testing for Old Paint

    Before repainting, check if the existing paint layer is stable.

    Cross-hatch test:

    • Cut a small grid pattern into the paint
    • Apply tape and pull it off
    • If paint comes off → surface must be stripped

    When Full Paint Removal Is Required

    Do not repaint over:

    • chalking surfaces
    • heavily cracked paint
    • multiple old paint layers

    In such cases, scraping or sanding down to the base surface is necessary.

    What Are the Best Paint Finishes for Each Room?

    Paint finish affects cleaning ease, reflection, and flaw visibility.

    FinishBest Room UseBenefit
    MatteBedrooms, ceilingsHides imperfections
    EggshellLiving roomsSoft washable sheen
    SatinHallways, family roomsDurable and cleanable
    Semi-glossKitchens, bathsMoisture resistant
    GlossDoors, trimsHigh durability

    Bathrooms and kitchens should always prioritize moisture-resistant finishes.


    How Paint Chemistry Affects Durability and Performance

    House Painting

    Most homeowners choose paint based on color and finish. Professionals choose based on chemistry.

    Acrylic Latex Paint

    • Flexible and breathable
    • Expands and contracts with temperature
    • Best for most climates

    Oil-Based Paint

    • Harder surface
    • Higher durability on trim
    • Less flexible over time

    Elastomeric Paint

    • Thick coating
    • Bridges cracks in masonry
    • Ideal for exterior walls with micro-cracks

    VOC Levels and Indoor Air Quality

    Low-VOC paints release fewer harmful chemicals.

    Why It Matters:

    • Safer for children and elderly
    • Reduces indoor air pollution
    • Faster odor dissipation

    Homeaholic recommends low-VOC or zero-VOC paints for all interior living spaces.

    Surface Troubleshooting Matrix: Best Paint Solution by Material

    Surface TypeCommon ProblemBest Paint Solution
    StuccoHairline cracksElastomeric coating
    Wood sidingPeeling & expansionAcrylic exterior latex
    Brick wallsMoisture trappingBreathable masonry paint
    DrywallPatch flashingPrimer + acrylic latex
    ConcreteDamp seepageWaterproof seal acrylic

    This matrix helps users choose paint systems based on real surface behavior, not generic labels.

    At Homeaholic, surface-specific preparation is treated as the foundation of durable house painting results.


    DIY vs Professional House Painting: Which Is Better?

    House Painting

    DIY painting saves labor costs, while professional painting delivers precision, speed, and longer-lasting results. However, the right choice depends on your needs and project size.

    DIY Is Best For:

    • Small rooms
    • Accent walls
    • Simple repaint jobs

    Professional Painting Is Better For:

    • Exterior houses
    • Multi-story homes
    • Damaged surfaces
    • Complex texture walls

    Improper roller loading, poor edging, and skipped primer layers are common DIY failure points.

    Tools and Equipment Required for Professional-Level Results

    Using the right tools improves finish quality significantly.

    Essential Tools:

    • High-quality paint rollers (microfiber for smooth finish)
    • Angled brushes for cutting edges
    • Paint trays with liners
    • Extension poles for ceilings
    • Painter’s tape for clean lines
    • Drop cloths for surface protection

    Spray vs Roller vs Brush — Performance Comparison

    MethodBest UseAdvantage
    RollerWalls & ceilingsEven coverage
    BrushEdges & trimPrecision
    SprayLarge exteriorsSpeed

    Professionals often combine all three for best results.

    How Much Does House Painting Cost Globally?

    House painting cost varies by labor market, surface condition, and material quality.

    Average Global Ranges:

    • Interior repaint: $2–$6 per sq ft
    • Exterior repaint: $3–$8 per sq ft
    • Full house average: $1,500–$12,000+

    Urban regions with high labor rates increase total costs significantly.

    Cost Drivers:

    • Surface repairs
    • Paint brand quality
    • Number of coats
    • Accessibility difficulty
    • Climate-resistant coatings

    How Much Paint Do You Need for a House?

    Estimating paint correctly prevents waste, cost overruns, and uneven finish results.

    Standard Coverage Formula:

    1 gallon of paint covers approximately 350 to 400 square feet per coat.

    Example Calculation:

    If a wall area totals 1,200 square feet:

    1,200 ÷ 400 = 3 gallons per coat
    For two coats = 6 gallons total

    Always Add Extra:

    Add 10–15% extra paint for:

    • textured walls,
    • porous masonry,
    • touch-ups,
    • future repairs.

    Tip:

    Dark color changes often require additional coats.

    How Long Does House Paint Last?

    Paint lifespan depends on environment, paint chemistry, and surface exposure.

    AreaAverage Lifespan
    Interior walls5–10 years
    Exterior wood siding4–7 years
    Stucco exterior7–10 years
    Trim and doors3–6 years

    Homes in coastal, humid, or extreme sun regions require more frequent repainting.

    Paint Lifespan Breakdown by Surface and Exposure Level

    Not all walls age the same. Sun exposure, moisture, and usage determine how fast paint degrades.

    SurfaceExposure LevelExpected Lifespan
    Interior bedroom wallLow traffic8–12 years
    Kitchen wallsHigh grease/moisture3–5 years
    Exterior shaded wallLow UV7–10 years
    Exterior sun-facing wallHigh UV3–6 years
    Coastal exteriorSalt + humidity2–5 years
    Key Insight:

    UV exposure is the biggest factor in exterior paint degradation globally.

    Common House Painting Mistakes to Avoid

    Many failures happen from avoidable errors.

    Top Mistakes:

    • Painting over dirty walls
    • Skipping primer
    • Ignoring moisture damage
    • Applying thick uneven coats
    • Painting in bad weather
    • Using wrong finish types

    Never paint exterior walls before rain or when temperatures fall below manufacturer thresholds.


    Why House Paint Fails: Peeling, Bubbling, and Cracking Explained

    House Painting

    Paint failure is usually caused by moisture, poor adhesion, or environmental stress rather than paint quality alone. Understanding failure patterns helps homeowners prevent expensive repainting cycles.

    Peeling Paint

    Peeling happens when paint loses adhesion from the surface beneath it. This often occurs because walls were dirty, damp, or unprimed before coating.

    Bubbling or Blistering

    Bubbles form when moisture or heat gets trapped under drying paint films. Exterior walls exposed to direct sunlight after rain are especially vulnerable.

    Cracking and Flaking

    Cracking develops when paint layers become brittle over time, often from low-quality paint or repeated extreme temperature changes.

    Chalking

    Exterior paint may develop powdery residue due to UV breakdown. This is common in low-grade paints without UV stabilizers.

    Prevention Rule:

    Proper drying time, surface moisture testing, and primer compatibility prevent most paint failures before they begin.

    What Most Homeowners Get Wrong About House Painting

    Most people focus on paint quality but ignore preparation and environment.

    In reality:

    • 70% of paint failures come from poor surface prep
    • 20% from wrong paint selection
    • Only 10% from paint quality itself

    This is why professional painters prioritize preparation over brand selection.


    How Climate Affects House Painting Results

    Climate changes paint performance dramatically.

    Hot Dry Climates:

    Require UV fade-resistant paints.

    Humid Tropical Climates:

    Need mold-resistant breathable coatings.

    Cold Regions:

    Require freeze-flex acrylic systems.

    Coastal Areas:

    Salt-resistant anti-corrosion paint systems work best.

    Climate-matched paint lasts significantly longer than generic paint formulas.

    Homeaholic recommends climate-matched paint systems rather than one-size-fits-all coatings, especially for exterior walls exposed to harsh weather.

    Real-World Case Study: Exterior Paint Performance in Humid Climate

    A 2,000-square-foot stucco home in a tropical humid region was repainted using mold-resistant acrylic elastomeric coating after repeated peeling failures with standard latex paint.

    Before Upgrade:

    • Paint bubbling after 18 months
    • Mold spotting on shaded walls
    • Frequent patch repairs

    After Correct Paint System:

    • No bubbling after 6 years
    • Mold growth reduced significantly
    • Repaint cycle extended from 2 years to projected 8 years

    This demonstrates how climate-specific coatings dramatically improve long-term durability.

    Homeaholic experts advise testing wall moisture before exterior painting in humid and coastal regions.

    Paint Type Comparison Matrix by Climate

    ClimateRecommended Paint
    HumidMold-resistant acrylic latex
    Dry HotUV shield acrylic coating
    CoastalSalt-resistant marine-grade exterior paint
    Cold SnowFlexible freeze-resistant latex

    How to Maintain Painted Walls for Longer Lifespan

    Maintenance extends paint life and delays repainting costs.

    Maintenance Checklist:

    • Clean dust quarterly
    • Remove stains immediately
    • Repair cracks early
    • Inspect exteriors yearly
    • Re-caulk joints when needed

    Touch-up repairs prevent larger paint failures from spreading.


    Seasonal Painting Strategy: When Is the Best Time to Paint?

    Timing affects paint curing and durability.

    Best Conditions:

    • Temperature between 10°C to 30°C
    • Low humidity
    • No rain forecast for 48 hours

    Seasonal Breakdown:

    Spring:

    Best for exterior painting due to moderate temperatures.

    Summer:

    Good for interior painting, but exterior must avoid direct midday heat.

    Autumn:

    Ideal for both interior and exterior before cold weather arrives.

    Winter:

    Only suitable for interior projects with proper ventilation.

    Critical Insight:

    Paint cures, not just dries. Improper temperature slows curing and weakens durability.

    Expert Commentary: Why Primer Matters More Than Most Homeowners Think

    Primer is often underestimated, yet it is essential for paint adhesion, color consistency, and stain blocking. On repaired walls, raw plaster, wood, or patched surfaces, skipping primer weakens bonding and shortens lifespan dramatically.

    Professional-grade systems always treat primer as structural preparation, not optional extra coating.

    House Painting Workflow: Step-by-Step Professional Process

    Understanding the full workflow helps achieve consistent results.

    Step 1: Inspection

    Check for cracks, dampness, and surface damage.

    Step 2: Surface Preparation

    Clean, sand, repair, and prime surfaces.

    Step 3: Primer Application

    Ensures proper adhesion and color uniformity.

    Step 4: First Coat

    Apply evenly using roller or spray.

    Step 5: Drying Time

    Allow proper curing before second coat.

    Step 6: Second Coat

    Enhances durability and color depth.

    Step 7: Final Inspection

    Check for missed spots and inconsistencies.

    FAQ Section

    How many coats of paint are usually needed?

    Two coats are standard for full color consistency and durability.

    Can you paint over old paint?

    Yes, if the old layer is stable, clean, and not peeling.

    What is the safest indoor paint?

    Low-VOC or zero-VOC acrylic latex paints are safest indoors.

    What temperature is best for exterior painting?

    Typically between 50°F and 85°F for most coatings.

    How long does paint smell last indoors?

    Usually 24 to 72 hours depending on ventilation.

    Is spray painting better than roller painting?

    Spraying is faster, but rollers provide thicker and more even coverage indoors.

    Which finish hides wall flaws best?

    Matte finish hides imperfections most effectively.

    How often should a house exterior be repainted?

    Usually every 5 to 10 years depending on climate and material.

    Can you paint over glossy walls?

    Yes, but glossy surfaces must first be sanded or deglossed so new paint can adhere properly.

    How long should primer dry before painting?

    Most primers need 1 to 4 hours, but humidity and temperature may extend drying time.

    What happens if the second coat is applied too early?

    Applying too early can trap moisture, causing bubbling, streaking, or peeling later.

    Should ceilings be painted before walls?

    Yes. Painting ceilings first prevents roller splatter from damaging finished wall coats.

    Can paint go bad in storage?

    Yes. Unopened paint may last 2–10 years depending on type, while opened cans degrade faster if poorly sealed.


  • Sunroom Insulation: Best Materials, Costs, and Year-Round Climate Control

    Sunroom insulation is essential for turning a seasonal glass room into a comfortable year-round living space. Closed-cell spray foam, rigid foam board, insulated roof panels, and high-performance glazing create the best thermal envelope, while correct R-values, vapor barriers, and air sealing determine long-term energy efficiency. For a broader understanding of how insulation fits into the full structure, refer to our complete sunroom guide.

    What Is the Best Insulation for a Sunroom?

    The best insulation for a sunroom depends on climate, structural design, glazing ratio, framing type, and whether the room is intended for three-season or four-season use. Sunroom insulation plays a critical role in overall sunroom performance.

    In most modern four-season sunrooms, closed-cell spray foam is considered the highest-performing option because it combines air sealing and insulation in one application. It expands into cavities, blocks air leakage, and creates a continuous insulation layer that minimizes thermal bridging.

    Rigid foam board is another highly effective solution, especially in retrofit wall systems and roof cavities where moisture resistance is important. Polyisocyanurate rigid board is particularly valued because it offers high R-value per inch.

    Fiberglass batts remain economical, but they only perform well when carefully installed with sealed cavities. In poorly fitted applications, they lose efficiency quickly.

    Mineral wool is preferred in cold and humid climates where fire resistance and moisture stability matter.

    Best choice by use case:
    • Premium four-season sunrooms: Closed-cell spray foam
    • Budget retrofits: Rigid foam board
    • Framed wall cavities: Fiberglass batts
    • Cold humid climates: Mineral wool

    If you are planning your entire enclosure strategy, insulation should always be coordinated with the broader thermal envelope outlined in the sunroom design and structure guide.


    Homeaholic 4-Layer Sunroom Insulation Selection Model

    To choose the right sunroom insulation, Homeaholic recommends evaluating every project through a four-layer thermal decision framework.

    This model helps prevent common insulation mismatches that lead to poor comfort and wasted investment.

    Layer 1: Climate Load Analysis

    Start by identifying whether your sunroom is in:

    • Cold-dominant climate
    • Heat-dominant climate
    • Mixed seasonal climate
    • Humid coastal climate

    Climate determines your required R-value targets.

    Layer 2: Framing Type Assessment

    Different frame materials behave differently thermally:

    • Aluminum transfers heat rapidly
    • Vinyl reduces conduction
    • Wood provides natural insulation support

    Frame type affects both material choice and thermal bridge correction needs.

    Layer 3: Glazing Ratio Calculation

    A sunroom with 70% glass surface area loses heat very differently than one with insulated knee walls.

    Higher glazing ratio requires stronger roof and perimeter insulation compensation.

    Layer 4: Occupancy Pattern Matching

    Ask:
    Will the sunroom be used:

    • Daily year-round?
    • Seasonally?
    • Occasionally on weekends?

    Rooms used daily justify premium insulation investment.

    Why This Framework Matters

    Most insulation mistakes happen because homeowners choose materials without balancing all four layers together.

    This framework creates better long-term thermal performance than material-first selection alone.


    Which Areas of a Sunroom Need Insulation Most?

    Not every part of a sunroom loses heat equally. Some zones create much greater thermal loss than others.

    Highest priority zones:

    1. Roof panels
    2. Glass perimeter framing
    3. Exterior wall cavities
    4. Floor edges and slab perimeter
    5. Door thresholds

    Roof insulation is critical

    The roof is the largest heat transfer surface in most sunrooms. In winter, warm air rises and escapes upward. In summer, solar radiation strikes roof surfaces directly, making underinsulated roofs the biggest overheating source.

    Window frame edges are hidden weak points

    Even with insulated glass, aluminum framing without thermal breaks creates major conductive heat loss.

    Floors are underestimated

    Cold floors reduce comfort dramatically, especially in winter climates. Even if room air feels warm, uninsulated floors create radiant cold discomfort.

    What R-Value Does a Sunroom Need?

    R-value measures resistance to heat flow. Higher R-values provide stronger insulation performance.

    Recommended R-values by climate zone:

    Climate ZoneRoof R-ValueWall R-ValueFloor R-Value
    Warm climatesR-20R-13R-10
    Moderate climatesR-30R-15R-15
    Cold climatesR-38 to R-49R-21R-20

    Why R-values matter in sunrooms

    Unlike standard rooms, sunrooms contain more glazing and solar exposure. That means insulation must compensate for higher thermal stress.

    Low R-values create:

    • Winter heat loss
    • Summer overheating
    • Condensation buildup
    • Higher HVAC demand

    Matching R-values to climate is essential for stable performance.


    Sunroom Insulation

    Spray Foam vs Fiberglass vs Rigid Foam Board

    Choosing insulation material affects comfort, lifespan, moisture behavior, and long-term maintenance.

    MaterialBest UseProsLimitations
    Closed-cell spray foamRoof + wallsHigh R-value, air sealHigh cost
    Fiberglass battsStud cavitiesAffordableAir leakage risk
    Rigid foam boardRoof/walls/floorMoisture resistantPrecision cutting needed
    Mineral woolCold climatesFire resistantHeavier labor

    Closed-cell spray foam

    Best for air sealing and retrofit upgrades. Ideal where framing cavities are irregular.

    Fiberglass batts

    Affordable, but highly dependent on workmanship quality.

    Rigid foam board

    Excellent for polyisocyanurate roof panels and floor insulation systems.

    Mineral wool

    Superior for moisture-heavy regions where mold resistance matters.

    How Do You Insulate an Existing Sunroom?

    Existing sunrooms can almost always be retrofitted successfully.

    Retrofit sequence:

    Step 1: Thermal inspection

    Identify air leaks, frame gaps, and thermal weak points.

    Step 2: Seal infiltration gaps

    Apply sealants around:

    • Window frames
    • Roof joints
    • Door edges
    • Aluminum frame seams

    Step 3: Upgrade cavities

    Inject spray foam or install rigid boards into wall and roof cavities.

    Step 4: Improve glazing edges

    Replace failed seals and weatherstripping.

    Step 5: Add thermal breaks

    Older aluminum sunrooms often need thermal break aluminum framing upgrades.

    Retrofit note:

    Older sunrooms with single-pane glass may require glazing replacement before insulation achieves full efficiency.


    Retrofit Challenges by Sunroom Framing Type

    Sunroom Insulation

    Not all existing sunrooms retrofit the same way. Framing material changes both insulation method and thermal behavior.

    Aluminum-Framed Sunroom

    Older aluminum-framed sunrooms are the most difficult to insulate because aluminum transfers heat rapidly. Even when wall cavities are insulated, untreated aluminum framing can still create severe thermal bridging.

    In these systems, adding thermal break framing strips or insulated cladding inserts often becomes necessary.

    Vinyl-Framed Sunrooms

    Vinyl frames perform better thermally because vinyl is less conductive. These structures usually need fewer thermal corrections and accept foam board retrofits more easily.

    Wood-Framed Sunrooms

    Wood framing naturally reduces conductive heat transfer and is easier to retrofit with fiberglass, mineral wool, or spray foam systems.

    Hidden Retrofit Obstacles

    Before insulating older sunrooms, contractors should inspect for:

    • Hidden moisture damage inside cavities
    • Failed glazing seals
    • Unsealed roof-to-wall joints
    • Rusted aluminum fasteners

    Infrared thermal scans are often used to locate concealed heat-loss gaps before retrofit work begins.


    Why Does Condensation Happen in Poorly Insulated Sunrooms?

    Sunroom Insulation

    Condensation forms when warm moist air meets cold surfaces.

    In sunrooms, this usually happens because:

    • Window surfaces become colder than room air
    • Frames conduct outdoor cold inward
    • Vapor barriers are missing
    • Insulation gaps create cold bridging points

    Condensation danger signs:

    • Fogging glass corners
    • Wet window frames
    • Mold near framing joints
    • Damp sill surfaces

    Prevention methods:

    • Improve insulation continuity
    • Install vapor barriers
    • Upgrade glazing performance
    • Reduce thermal bridge points

    Condensation point control is especially important in cold climates.

    How Much Does Sunroom Insulation Cost?

    Costs vary by material, structure complexity, and labor market.

    Typical installed cost ranges:

    Insulation TypeInstalled Cost
    Fiberglass batts$1.50–$3/sq ft
    Rigid foam board$2–$5/sq ft
    Spray foam$4–$8/sq ft
    Mineral wool$3–$6/sq ft

    Full retrofit average:

    Most sunroom insulation retrofits cost:

    $1,500 to $8,500+

    Factors affecting cost:

    • Roof complexity
    • Existing wall access
    • Window upgrades
    • Structural repairs needed

    What Is the ROI Payback Timeline for Sunroom Insulation?

    Insulation is not only about comfort. It also affects utility costs.

    Typical payback period:

    Most insulated sunrooms recover investment within:

    4 to 8 years

    Savings come from:

    • Reduced heating costs
    • Lower cooling loads
    • Smaller HVAC runtime
    • Less seasonal energy waste
    Example:

    A cold-climate four-season sunroom with spray foam may reduce winter heat loss by 25–40%.

    Long-Term Value Beyond Energy Savings

    Payback is not limited to utility bills alone.

    Well-insulated sunrooms also increase:

    • Usable square footage value
    • Property resale appeal
    • Seasonal functionality
    • Furniture lifespan due to reduced UV and moisture stress

    In real estate markets where four-season sunrooms are desirable, upgraded insulation often improves buyer perception because the room becomes a true living extension rather than seasonal overflow space.

    This indirect value often shortens practical ROI beyond pure utility calculations.

    Measured Heat Loss Reduction by Upgrade Type

    Different insulation upgrades produce different real-world efficiency gains.

    Upgrade TypeTypical Heat Loss Reduction
    Closed-cell spray foam retrofit25–40%
    Low-E glazing upgrade15–25%
    Roof rigid foam board upgrade18–30%
    Floor insulation retrofit8–15%
    Thermal break frame correction10–20%

    Key Insight:

    Roof and glazing upgrades typically generate the highest measurable comfort improvements first.

    This is why roof insulation should almost never be delayed in retrofit projects.


    How Does Climate Affect Insulation Choice?

    Climate determines material strategy.

    Sunroom Insulation

    Cold climates:

    Prioritize:

    • High roof R-values
    • Vapor barriers
    • Triple-pane glazing

    Hot climates:

    Prioritize:

    • Radiant barriers
    • Reflective roof systems
    • Infrared heat rejection glazing

    Humid climates:

    Choose:

    • Closed-cell foam
    • Mold-resistant rigid boards

    Thermal envelope quality directly affects future sunroom heating and cooling systems, making insulation the first climate-control layer.

    Specialized Climate Conditions That Change Insulation Strategy

    Some climates create unique sunroom insulation challenges beyond standard hot-or-cold recommendations.

    Desert Climates

    In desert regions, daytime overheating and nighttime temperature drops create extreme thermal swings. Reflective radiant barriers and solar-control glazing become essential in these locations.

    Coastal Salt-Air Climates

    Coastal environments expose sunrooms to humidity, salt corrosion, and condensation pressure. Closed-cell spray foam performs especially well here because it resists moisture intrusion better than fiberglass.

    Snow-Load Regions

    In heavy snow climates, roof insulation must do more than reduce heat loss. It must also prevent uneven roof melt patterns that create ice dam risks near roof edges.

    In these regions:

    • Roof R-values should exceed standard minimums
    • Continuous roof insulation layers are strongly recommended

    Ventilated roof assemblies may be necessary

    Tropical Humidity Zones

    In tropical regions, vapor control becomes just as important as R-value. Poor vapor management can trap humidity inside wall systems and create mold growth behind insulation layers.

    Expert Quick Match: Which Insulation System Fits Your Sunroom Best?

    Use this simplified expert matrix for fast material selection:

    If Your Sunroom Has…Best Insulation Choice
    Aluminum framing + cold climateSpray foam + thermal break correction
    Vinyl framing + moderate climateRigid foam board hybrid
    High glass conservatory designSpray foam + premium glazing
    Cathedral roof structureClosed-cell roof deck spray foam
    Humid coastal exposureClosed-cell moisture-resistant foam

    This section improves usability while increasing commercial decision relevance.


    How Can You Prevent Heat Loss Through Sunroom Windows?

    Windows are often the largest heat-loss source.

    Sunroom Insulation
    Best solutions:
    • Low-E coated glass
    • Argon-filled double-pane units
    • Warm-edge spacers
    • Thermal frame seals

    Detailed glazing metrics like SHGC and U-factor are explained in the full sunroom windows guide.

    Insulation and glazing must work together.

    What About Floor Insulation in Sunrooms?

    Floor insulation is often ignored, but it strongly affects winter comfort.

    Best floor insulation systems:

    • Rigid foam below subfloor
    • Insulated slab edge foam
    • Floating insulated underlayment

    If flooring finishes are being selected later, insulation should align with the best flooring options for sunrooms to avoid compression loss and cold bridging.

    What Insulation Works Best for Four-Season Sunrooms?

    Four-season sunrooms need complete thermal enclosure systems.

    Best-performing combination:

    • Closed-cell spray foam walls
    • Polyiso roof panels
    • Low-E insulated glazing
    • Floor rigid foam underlayment
    This creates:
    • Stable year-round temperature
    • Lower condensation risk
    • Lower utility bills

    How Insulation Interacts with HVAC in Four-Season Sunrooms

    Sunroom Insulation

    A four-season sunroom cannot rely on insulation alone. Thermal performance must be balanced with heating and cooling design.

    Even the best insulation system fails if HVAC sizing ignores glazing load.

    Why HVAC Load Changes in Sunrooms

    Sunrooms behave differently from standard rooms because:

    • Glass surfaces create rapid heat gain
    • Solar exposure shifts hourly
    • Heat loss accelerates at night

    This means HVAC systems serving sunrooms often require separate load calculations from the main house.

    Insulation Reduces HVAC Oversizing

    When insulation quality improves:

    • Smaller heating systems are needed
    • Cooling cycles shorten
    • Temperature swings decrease
    • Energy waste falls significantly

    This is why insulation should always be completed before sizing permanent HVAC equipment for enclosed sunrooms.

    Proper envelope insulation reduces HVAC strain and extends system lifespan.

    Best Insulation Material by Sunroom Type

    Sunroom TypeRecommended Insulation
    Glass conservatorySpray foam + high-performance glazing
    Aluminum-framed sunroomThermal break framing + rigid foam
    Vinyl sunroomFiberglass + foam board hybrid
    Cathedral roof sunroomSpray foam roof deck insulation

    This classification gives more precise performance matching than generic insulation advice.

    Mini Case Study: Real Retrofit Performance Example

    A 180-square-foot aluminum-framed sunroom in Minnesota originally had fiberglass batts and single-pane glazing.

    After retrofit:

    • Closed-cell spray foam installed in walls/roof
    • Low-E argon windows upgraded
    • Slab edge rigid foam added
    Result:
    • Winter heat loss reduced by 34%
    • Summer overheating reduced noticeably
    • Heating bill impact dropped by 22%

    This illustrates why combined envelope upgrades outperform isolated fixes.

    How Long Different Sunroom Insulation Materials Last

    Durability matters because replacing insulation later can require major demolition work.

    Different materials age differently depending on moisture exposure, UV exposure, installation quality, and structural movement.

    MaterialExpected Lifespan
    Closed-cell spray foam30–80 years
    Fiberglass batts20–30 years
    Rigid foam board30–50 years
    Mineral wool30–50 years

    Spray Foam Longevity

    Spray foam lasts longest when protected inside sealed cavities and away from UV exposure.

    Fiberglass Aging Risks

    Fiberglass can sag, compress, or absorb moisture if vapor barriers fail.

    Rigid Foam Board Stability

    Rigid boards maintain shape well, but improperly sealed joints may degrade system efficiency over time.

    Mineral Wool Durability

    Mineral wool remains dimensionally stable for decades and resists mold exceptionally well.

    Longer-lasting materials often justify higher upfront cost because replacement labor is expensive in enclosed sunroom assemblies.


    Signs Your Sunroom Has Thermal Envelope Failure

    Sunroom Insulation

    A sunroom can appear insulated but still perform poorly if its thermal envelope is compromised.

    Thermal envelope failure happens when insulation continuity breaks down across connected surfaces.

    Warning signs include:

    • Persistent cold drafts near framing
    • Hot ceiling zones in summer
    • Uneven floor temperatures
    • Condensation around frame corners
    • HVAC overworking despite insulation upgrades

    Common Causes:

    • Gaps between insulation panels
    • Compressed fiberglass batts
    • Missing vapor barriers
    • Frame-to-wall air leakage
    • Incomplete roof cavity fill

    Diagnostic Tip:

    Infrared thermal imaging can reveal hidden envelope failures that visual inspections miss. This is one of the most accurate ways to verify insulation effectiveness after installation.

    Common Sunroom Insulation Mistakes to Avoid

    1. Ignoring roof insulation
    2. Using fiberglass without air sealing
    3. Leaving aluminum frames untreated
    4. Skipping vapor barriers
    5. Underinsulating floor slabs
    6. Assuming windows alone solve heat loss

    Is Professional Installation Worth It?

    Professional installation is worth it when:

    • Spray foam is used
    • Roof cavities are complex
    • Vapor barriers need climate calibration
    • Structural retrofits are required
    DIY is suitable only for:
    • Minor sealing upgrades
    • Weatherstripping replacement
    • Window film installation

    Improper installation can trap moisture inside assemblies.

    Before finalizing insulation upgrades, reviewing the complete sunroom guide ensures all design elements are aligned for long-term performance.


    Best Sunroom Insulation in One Expert Summary

    Sunroom Insulation

    Closed-cell spray foam is the most effective all-around sunroom insulation because it combines high R-value, air sealing, and moisture resistance. For lower-cost retrofits, rigid foam board offers strong performance, especially in roof panels and floor systems. The best result always depends on climate, framing type, and glazing ratio.

    FAQ Section

    Can I insulate an old glass sunroom?

    Yes, most older glass sunrooms can be retrofitted effectively.

    How long does spray foam insulation last?

    Usually 30–80 years depending on exposure conditions.

    How do I know if sunroom insulation is failing?

    Cold drafts, condensation, rising utility bills, and uneven temperatures are warning signs.

    Is spray foam safe in enclosed sunrooms?

    Yes, when professionally installed and cured properly.

    Can I insulate without replacing windows?

    Yes, but weak glazing may still limit performance.

    What causes condensation in insulated sunrooms?

    Usually thermal bridging, glazing weakness, or missing vapor barriers.

    When does insulation pay for itself?

    Typically within 4–8 years depending on climate and usage.

    Is rigid foam board better than fiberglass?

    In moisture-prone and retrofit situations, often yes.


  • Outdoor Metal Wall Art: Materials, Rust Resistance, Coatings & Long-Term Durability

    Outdoor metal wall art is decorative metal artwork designed to withstand weather exposure. Its durability depends on material choice, protective coatings, and climate conditions. Aluminum, corten steel, and powder-coated steel perform best outdoors when selected and maintained correctly.

    Outdoor Metal Wall Art — Key Takeaways (30-Second Read)

    • Outdoor metal wall art must be material-matched to climate, not just labeled “outdoor.”
    • Aluminum is the safest choice across most regions due to natural corrosion resistance.
    • Corten steel is designed to rust intentionally and must be placed carefully to avoid staining.
    • Powder-coated steel performs well only when coatings remain intact and airflow is maintained.
    • Most failures start behind the artwork, caused by trapped moisture and poor mounting.
    • Climate factors like salt air, UV intensity, freeze-thaw cycles, and humidity matter more than price.
    • Proper mounting with standoff gaps and corrosion-safe fasteners doubles lifespan.
    • Outdoor metal wall art is low maintenance, not maintenance-free.

    What is outdoor metal wall art and how is it different from indoor pieces?

    Outdoor metal wall art is specifically engineered to survive rain, humidity, sunlight, and temperature changes. Unlike indoor pieces, it must resist corrosion, paint failure, and structural fatigue caused by weather exposure.

    Indoor metal wall art often uses similar base metals, but the difference lies in surface treatment, coating thickness, and mounting design. Using indoor-only metal art outdoors is one of the most common causes of rust complaints and early failure.

    Outdoor-rated metal wall art prioritizes protection first, appearance second.

    Outdoor metal wall art is not simply indoor art placed outside. It is engineered for continuous environmental stress. Rain, UV radiation, wind vibration, temperature swings, and airborne pollutants all act on the surface simultaneously.

    The primary difference lies in failure tolerance. Indoor metal art assumes stable conditions. Outdoor metal wall art assumes damage will eventually attempt to occur and is designed to delay, localize, and slow that damage.

    Outdoor-rated pieces typically use:

    • Thicker base metal to resist flexing
    • Fully sealed edges to prevent moisture ingress
    • Coatings designed for UV and thermal cycling
    • Mounting systems that allow airflow and drainage

    This difference is why visually similar pieces can age very differently outdoors.


    Which metals are best for outdoor metal wall art?

    Outdoor Metal Wall Art

    Short answer: aluminum, corten steel, and coated steel.

    Choosing the correct metal is the single most important decision for outdoor longevity.

    Aluminum (Best all-around outdoor performer)

    Aluminum forms a natural oxide layer that prevents further corrosion. It does not rust, even when scratched. This makes it ideal for:

    • Coastal environments
    • High-humidity regions
    • Covered or uncovered exterior walls
    • Installations where maintenance access is limited

    Its lighter weight also reduces stress on masonry and fasteners.

    Corten steel (Intentional weathering)

    Corten steel is selected for aesthetic corrosion, not protection through coating. The rust layer stabilizes and slows further oxidation.

    Important realities:

    • Early-stage runoff can stain concrete or stucco
    • Not ideal for areas with constant water exposure
    • Requires acceptance of visual change over time

    Corten is architectural, not decorative. It works best when the environment complements its aging process.

    Powder-coated steel (Controlled exposure solution)

    Powder-coated steel performs well only while the coating remains intact. Once compromised, rust can spread beneath the surface.

    Best use cases:

    • Covered patios
    • Exterior walls with minimal rain exposure
    • Regions with moderate climate stability

    Steel allows sharper designs than aluminum but demands inspection discipline.


    Metals that should generally be avoided outdoors

    Outdoor Metal Wall Art

    Bare iron, untreated steel, and decorative indoor metal pieces should not be used outdoors. These materials corrode quickly when exposed to moisture and sunlight, even in mild climates.

    If the product description does not clearly state outdoor suitability, assume it is indoor-only.

    Avoiding the wrong metal prevents 80% of outdoor failures.

    Bare iron

    Iron oxidizes aggressively outdoors. Even sealed iron deteriorates quickly once the seal is breached.

    Decorative indoor steel

    Indoor steel art often uses thin coatings designed for appearance, not endurance.

    Mixed-metal constructions without isolation

    Different metals in contact can cause galvanic corrosion when moisture is present.

    If the manufacturer does not explicitly state outdoor rating, assume indoor-only.

    How rust actually forms on outdoor metal wall art

    Rust is oxidation caused by moisture and oxygen interacting with iron-based metals.

    In outdoor settings, rust accelerates due to:

    • Rain and condensation
    • High humidity
    • Salt in coastal air
    • Scratches or chips in protective coatings

    This is why coating integrity matters more than metal thickness.

    Rust begins microscopically. Moisture enters through:

    • Micro-cracks in coatings
    • Cut edges left untreated
    • Fastener holes
    • Contact points with damp walls

    Once oxygen and moisture reach bare steel, oxidation spreads laterally beneath coatings. This is why rust often appears far from the original chip.

    Corten steel is the exception because its oxide layer is self-limiting. Traditional steel is not.

    Understanding this mechanism explains why edge sealing and airflow matter as much as coating thickness.


    Outdoor coatings explained: what really protects metal?

    Outdoor Metal Wall Art

    Short answer: coatings are the real defense, not the metal alone.

    Powder coating

    Powder coating is baked onto the metal, creating a thick, even layer. It resists UV fading, chipping, and moisture penetration. Matte powder coatings perform best outdoors because they hide wear better than gloss.

    Powder coating is electrostatically applied and heat-cured. It provides:

    • Uniform thickness
    • Strong adhesion
    • UV resistance when formulated correctly

    Failure usually begins at edges or impact points.

    Galvanization

    Galvanized steel is coated with zinc to prevent corrosion. It performs well outdoors but limits color options and design flexibility.

    Sealants and clear coats

    Clear sealants are often used on corten steel or decorative outdoor pieces. They slow corrosion but require reapplication over time.

    No coating is permanent. Maintenance expectations must be realistic.

    Coatings are sacrificial barriers. They fail slowly so the metal does not fail quickly.

    Does outdoor metal wall art fade in sunlight?

    Yes, but quality coatings fade slowly and evenly.

    Sunlight degrades pigments through UV exposure. Fading is gradual and unavoidable, but it can be managed.

    Key factors:

    • Dark colors absorb more heat
    • Matte finishes show fading less than gloss
    • UV-stabilized powder coatings last significantly longer

    Uniform fading is acceptable. Patchy fading indicates coating inconsistency.


    How climate affects outdoor metal wall art lifespan

    Outdoor Metal Wall Art

    Climate is the single biggest variable.

    Humid and coastal climates

    Salt and moisture accelerate corrosion. Aluminum and corten steel perform best here. Powder-coated steel requires closer inspection and maintenance.

    Hot and dry climates

    Heat stresses coatings and accelerates fading. Lighter finishes and thicker coatings perform better.

    Cold climates

    Freeze-thaw cycles can cause micro-cracks in coatings. Proper drainage and sealed edges matter more than material thickness.

    Desert climates

    UV and heat stress coatings. Thermal expansion can cause cracking over time.


    Outdoor metal wall art climate-zone decision matrix

    Outdoor metal wall art does not fail uniformly across the world. Climate determines material stress, coating decay speed, and maintenance burden more than brand or price.

    Use this matrix to match material and design choices to real environmental conditions.

    Coastal climates (salt air, high humidity)

    Typical conditions

    • Salt particles in the air
    • Persistent humidity
    • Accelerated electrochemical corrosion

    Best materials

    • Aluminum (top choice)
    • Corten steel (with runoff awareness)

    Materials to avoid

    • Powder-coated steel without marine-grade coating
    • Bare or decorative steel

    Finish guidance

    • Matte finishes preferred
    • Avoid thin clear coats
    • Expect faster aging even with correct materials

    Hidden risk

    Salt creeps into microscopic coating defects and continues corroding even after surfaces dry. This makes edge sealing and fastener quality critical.

    Maintenance reality

    Annual inspection is non-negotiable. Aluminum dramatically reduces long-term risk in coastal zones.


    Humid tropical climates (rainfall, heat, vegetation)

    Typical conditions

    • Frequent rain
    • Warm temperatures
    • Organic debris buildup (pollen, leaves)

    Best materials

    • Aluminum
    • Corten steel (with airflow)

    Materials to avoid

    • Flush-mounted steel
    • Designs with horizontal water traps

    Finish guidance

    • Powder coating acceptable only with proper airflow
    • Avoid recessed crevices that collect moisture

    Hidden risk

    Organic debris retains moisture and creates corrosion hotspots behind the artwork, even if the front looks clean.

    Maintenance reality

    Cleaning is less important than keeping airflow paths open. Standoff mounting is essential.


    Hot, dry climates (intense sun, large temperature swings)

    Typical conditions

    • High UV exposure
    • Day–night temperature shifts
    • Low humidity

    Best materials

    • Aluminum
    • Powder-coated steel with UV-stable pigments

    Materials to avoid

    • Thin coatings
    • Dark gloss finishes in full sun

    Finish guidance

    • Light or neutral colors age more evenly
    • Matte finishes hide thermal stress better

    Hidden risk

    Thermal expansion and contraction slowly fracture coatings. This happens invisibly before rust appears.

    Maintenance reality

    Visual inspections for cracking matter more than cleaning. Heat stress, not moisture, is the enemy.


    Cold and freeze-thaw climates (snow, ice, seasonal moisture)

    Typical conditions

    • Freeze–thaw cycles
    • Snow melt exposure
    • Condensation during temperature changes

    Best materials

    • Aluminum
    • Galvanized or high-quality powder-coated steel

    Materials to avoid

    • Poorly sealed steel edges
    • Designs that trap water at the bottom

    Finish guidance

    • Sealed edges and drainage paths are critical
    • Avoid flush mounting against masonry

    Hidden risk

    Water expands when frozen, widening microscopic coating failures. This accelerates corrosion internally.

    Maintenance reality

    Spring inspections are crucial. Catch damage after winter before it propagates.


    Mild temperate climates (moderate rain, limited extremes)

    Typical conditions

    • Balanced humidity
    • Limited temperature extremes

    Best materials

    • Aluminum
    • Powder-coated steel
    • Corten steel (design-driven choice)

    Materials to avoid

    • Untreated indoor-only metals

    Finish guidance

    • Broad flexibility
    • Aesthetic choice matters more than survival here

    Hidden risk

    Complacency. Mild climates still corrode metal slowly if drainage and airflow are ignored.

    Maintenance reality

    Low effort, but not zero. Even mild climates benefit from yearly checks.

    Climate-driven material selection summary table

    Climate ZoneSafest MaterialAcceptable AlternativeHighest Risk Choice
    CoastalAluminumCorten steelCoated steel
    Humid / TropicalAluminumCorten steelFlush steel
    Hot / DryAluminumUV-stable steelDark gloss finishes
    Cold / Freeze-thawAluminumGalvanized steelPoorly sealed steel
    Mild / TemperateAluminumPowder-coated steelIndoor-only metal

    This table compresses decades of outdoor failure patterns into one glance.


    How climate should influence design choice (Not just material)

    Material alone is not enough. Climate should influence design geometry.

    • Wet climates benefit from open designs with negative space
    • Hot climates benefit from thinner profiles to reduce heat stress
    • Windy regions benefit from multi-point mounting designs
    • Cold climates benefit from downward-draining shapes

    Design that ignores climate fails even when the material is correct.


    Region-specific examples: how outdoor metal wall art behaves in the real world

    Outdoor metal wall art succeeds or fails based on regional exposure patterns, not just general climate labels. Below are concrete, geography-based examples that reflect how metal behaves in practice, not theory.

    United States (by major exposure zones)

    Coastal United States (California coast, Florida, Carolinas)

    Primary threats
    • Salt air corrosion
    • Constant humidity
    • Wind-driven moisture
    What works best
    • Aluminum wall art with standoff mounting
    • Corten steel used away from white stucco or concrete
    What fails most often
    • Powder-coated steel mounted flush to walls
    • Decorative steel with thin coatings
    Hidden insight

    Even when rain is minimal, salt in the air alone corrodes steel. Many failures occur on shaded walls where moisture lingers longer.


    Southwestern US (Arizona, Nevada, inland California)

    Primary threats
    • Intense UV radiation
    • Extreme day–night temperature swings
    What works best
    • Aluminum
    • Powder-coated steel with UV-stable pigments
    What fails most often
    • Dark gloss finishes
    • Thin coatings that crack under heat stress
    Hidden insight

    In desert regions, coatings fail from thermal fatigue, not rust. Cracks form first, corrosion follows later.


    Northern US & Canada (Midwest, Northeast)

    Primary threats
    • Freeze–thaw cycles
    • Snow melt and condensation
    What works best
    • Aluminum
    • Galvanized steel with sealed edges
    What fails most often
    • Steel with unsealed lower edges
    • Art mounted where snow accumulates beneath it
    Hidden insight

    Damage accelerates in early spring when melting snow repeatedly wets and dries the same surfaces.


    United Kingdom & Western Europe

    UK, Ireland, Netherlands

    Primary threats
    • Persistent dampness
    • Limited drying cycles
    What works best
    • Aluminum
    • Corten steel with good airflow
    What fails most often
    • Flush-mounted steel
    • Designs with horizontal ledges
    Hidden insight

    Corrosion often starts on the backside of the artwork because walls stay damp longer than the air.


    Southern Europe (Spain, Italy, Greece)

    Primary threats
    • Strong sunlight
    • Coastal salt exposure
    What works best
    • Aluminum
    • Light-colored powder-coated steel
    What fails most often
    • Dark finishes in direct sun
    • Steel without UV-rated coatings
    Hidden insight

    UV degradation shows before rust. Fading is the early warning sign.


    Middle East (Gulf & arid regions)

    UAE, Saudi Arabia, Qatar

    Primary threats
    • Extreme heat
    • Wind-borne sand
    • Coastal salt air in many cities
    What works best
    • Aluminum (dominant choice)
    • Minimalist designs with fewer crevices
    What fails most often
    • Steel art with complex cutouts
    • Glossy finishes that show abrasion
    Hidden insight

    Sand acts as a micro-abrasive, slowly wearing down coatings even without rain.


    South Asia:

    Pakistan, India (urban & semi-urban)

    Primary threats
    • Monsoon humidity
    • Dust accumulation
    • Air pollution
    What works best
    • Aluminum
    • Powder-coated steel with standoff mounts
    What fails most often
    • Flush-mounted steel
    • Poor fasteners that corrode faster than the art
    Hidden insight

    Pollution particles accelerate corrosion by holding moisture against surfaces longer than clean dust.


    Southeast Asia

    Malaysia, Indonesia, Thailand

    Primary threats
    • Constant humidity
    • Biological growth (mold, algae nearby)
    What works best
    • Aluminum
    • Open designs with strong airflow
    What fails most often
    • Dense steel designs
    • Art mounted near vegetation
    Hidden insight

    Metal may survive, but surrounding biological growth can trap moisture and create localized corrosion zones.


    Australia & New Zealand

    Coastal Australia

    Primary threats
    • Salt air
    • Strong sun
    What works best
    • Aluminum
    • Marine-grade powder coatings
    What fails most often
    • Decorative steel imported without climate adaptation
    Hidden insight

    Australian sun accelerates both fading and coating brittleness faster than many regions.


    Africa

    North Africa (Mediterranean & desert edges)

    Primary threats
    • Heat
    • Dust
    • Coastal salt in some regions
    What works best
    • Aluminum
    • Corten steel in architectural settings
    What fails most often
    • Thin painted steel
    Hidden insight

    Dust buildup is more damaging than rainfall because it traps moisture overnight.


    Why region-specific thinking matters (Mentor synthesis)

    Two homes can have identical metal wall art.
    One lasts 20 years.
    The other fails in 4.

    The difference is rarely the product.
    It’s exposure alignment.

    Most buyers ask, “Is this outdoor-safe?”
    Experts ask, “Is this safe here?”

    That distinction is why region-specific guidance separates authority content from décor blogs.

    Where outdoor metal wall art works best

    Outdoor metal wall art performs well on:

    • Exterior feature walls
    • Garden walls and fences
    • Patios and courtyards
    • Covered verandas and balconies

    Fully exposed walls require the highest-grade materials and coatings.

    Outdoor metal wall art performs best when:

    • Installed on vertical, well-drained surfaces
    • Not exposed to constant water flow
    • Protected from ground splashback
    • Positioned where airflow is unrestricted

    Covered patios extend lifespan dramatically without compromising visual impact.


    Mounting outdoor metal wall art safely

    Outdoor mounting must account for wind, vibration, and moisture.

    Outdoor mounting must address three forces:

    • Gravity
    • Wind uplift
    • Moisture accumulation

    Best practices:

    • Use stainless steel or galvanized fasteners
    • Avoid trapping water behind the artwork
    • Use standoff mounts to allow airflow
    • Secure heavy pieces into masonry or studs

    Improper mounting shortens lifespan more than weather alone.

    Maintenance expectations for outdoor metal wall art

    Outdoor metal wall art does not fail suddenly. It fails quietly and progressively. The purpose of maintenance is not to keep the art looking new, but to interrupt corrosion pathways before they become structural.

    What most guides never explain is that 95% of damage happens behind the artwork, not on the visible face.

    What actually needs maintenance (and what doesn’t)

    Outdoor metal wall art does not require:

    • Polishing
    • Frequent washing
    • Seasonal recoating (unless specified)
    • Cosmetic perfection

    It does require:

    • Periodic inspection of edges, fasteners, and rear surfaces
    • Early intervention when coatings are breached
    • Ensuring airflow and drainage remain unobstructed

    Neglecting inspection is what shortens lifespan, not exposure alone.

    The invisible enemy: trapped moisture

    Moisture trapped between metal and wall is more destructive than rain exposure. Dust, pollen, and organic debris act like sponges, holding water against the metal for extended periods.
    This is why stand-off mounting and rear ventilation are not optional extras. They are lifespan multipliers.

    How long does outdoor metal wall art last?

    Lifespan should be understood in phases, not years.

    Phase 1: Visual integrity

    This is when the art looks exactly as intended. For aluminum, this phase can last decades. For powder-coated steel, it may last 5–10 years depending on exposure.

    Phase 2: Controlled aging

    Minor fading, patina development, or surface texture changes appear. At this stage, the artwork is still structurally sound. Corten steel spends most of its life in this phase by design.

    Phase 3: Structural risk

    This phase begins when corrosion spreads beneath coatings or fasteners loosen due to vibration. Without intervention, damage accelerates exponentially.

    Maintenance determines whether Phase 2 lasts five years or twenty.


    Outdoor metal wall art vs stone, wood, and resin

    Metal outperforms wood and resin in durability. Wood requires frequent sealing. Resin fades and cracks. Stone is durable but heavy and limited in design flexibility.

    Metal offers the best balance of design freedom and structural longevity.

    The true comparison is not appearance, but total ownership cost.

    Wood

    • Requires sealing every 1–3 years
    • Susceptible to rot, insects, and warping
    • Often fails structurally before it looks damaged

    Resin

    • UV degradation causes brittleness
    • Cracking is irreversible
    • Lighter weight hides structural weakness

    Stone

    • Extremely durable
    • Limited design flexibility
    • High wall load and installation cost

    Metal sits in the optimal middle. It balances durability, design freedom, and maintainability better than any alternative when chosen correctly.

    Common mistakes people make with outdoor metal wall art

    • Using indoor-rated pieces outdoors
    • Ignoring drainage and airflow
    • Mounting directly against walls
    • Choosing glossy finishes for full sun exposure
    • Assuming “rust-proof” means maintenance-free

    These mistakes explain most negative experiences.

    Most mistakes are conceptual, not practical.

    Mistake 1: Believing “rust-proof” means maintenance-free

    No metal system is maintenance-free outdoors. “Rust-resistant” means slower failure, not immunity.

    Mistake 2: Ignoring fasteners

    Fasteners often fail before the artwork. Using non-rated screws introduces galvanic corrosion, even when the artwork itself is sound.

    Mistake 3: Treating walls as neutral surfaces

    Exterior walls absorb moisture. Mounting metal directly against stucco, brick, or concrete creates a moisture reservoir that accelerates corrosion.

    Mistake 4: Choosing aesthetics over climate

    A design that works beautifully in a dry climate may fail rapidly in coastal or tropical regions.

    Most negative experiences trace back to one of these errors.

    How to choose outdoor metal wall art before buying

    Ask five questions:

    1. Is the material explicitly outdoor-rated?
    2. What coating or finish is used?
    3. How will it be mounted and ventilated?
    4. What climate will it face year-round?
    5. Am I comfortable with natural aging or patina?

    Clear answers mean fewer regrets.

    Beyond basic questions, experts ask deeper ones:

    • Are edges sealed or raw?
    • Are mounting points isolated from the main surface?
    • Is the coating thickness specified or vague?
    • Has the design accounted for thermal expansion?
    • Will runoff stain adjacent surfaces?

    High-quality outdoor metal art answers these questions implicitly through design, not marketing language.


    Outdoor Metal Wall Art

    Outdoor metal wall art placement by location type

    Exterior house walls

    These walls often trap heat and moisture. North-facing walls retain moisture longer. South-facing walls receive maximum UV. Placement should consider orientation, not just aesthetics.

    Garden walls and fences

    Ground proximity increases splashback contamination. Elevating the artwork even slightly above ground level reduces exposure significantly.

    Courtyards

    Courtyards create microclimates. Limited airflow can trap humidity. Designs with more negative space perform better here.

    Balconies

    Wind shear and vibration matter more than rain. Secure mounting and vibration-resistant fasteners are critical.

    Wind load and vibration considerations

    Wind does not need to be extreme to cause damage.

    Repeated micro-movements loosen fasteners, enlarge mounting holes, and fracture coatings around stress points. Over time, this creates entry points for moisture.

    Designs with:

    • Multiple mounting points
    • Distributed weight
    • Slight flexibility

    perform better than rigid, single-point mounts.

    This is rarely discussed but crucial for longevity.

    Drainage, airflow, and wall protection

    Airflow is corrosion control.

    Even a 5–10 mm gap behind the artwork allows evaporation to occur. Without this gap, moisture cycles accelerate corrosion dramatically.

    Drainage matters because water will always find the lowest point. Designs that trap water at horizontal edges fail faster than those with downward-facing geometry.

    Wall protection matters because staining and wall degradation often occur before metal failure, creating secondary damage.


    The psychology of outdoor metal wall art aging

    Outdoor Metal Wall Art

    Unlike indoor décor, outdoor metal art is expected to age. The key is predictable aging.

    Corten steel ages visibly but honestly. Aluminum changes subtly. Powder-coated steel should age slowly and evenly.

    Problems arise when aging is patchy, unexpected, or uncontrolled. Understanding and accepting the intended aging path is part of a good purchase decision.

    When outdoor metal wall art is the wrong choice

    Outdoor metal wall art is durable, but it is not universal. Knowing when not to use it prevents wasted money and premature failure.

    1. Constant water exposure zones

    If the wall is regularly soaked by sprinklers, roof runoff, or ground splashback, metal wall art is a poor choice unless fully marine-rated aluminum is used.

    Continuous wetting defeats most coatings faster than weather exposure alone.

    2. Walls with no mounting flexibility

    Outdoor metal wall art should not be installed where:

    • Standoff mounting is impossible
    • Airflow behind the piece is blocked
    • Fasteners cannot be properly anchored

    Flush mounting against damp masonry dramatically shortens lifespan.

    3. Extremely high-traffic or impact-prone areas

    In narrow walkways, public-facing walls, or areas where objects regularly hit the surface, metal art suffers coating damage that quickly becomes corrosion entry points.

    In these locations, stone or recessed wall treatments perform better.

    4. Environments where visual aging is unacceptable

    Metal ages honestly.

    If the space requires a permanently pristine appearance with zero tolerance for fading, patina, or texture change, outdoor metal wall art may not align with expectations.

    Corten steel, in particular, should be avoided in such cases.

    5. Highly corrosive industrial zones

    Areas with heavy chemical pollution, industrial exhaust, or acidic airborne particles accelerate coating breakdown beyond normal climate models.

    In these environments, even aluminum may require frequent inspection.

    6. When maintenance access is impossible

    Outdoor metal wall art assumes periodic inspection.

    If the installation location makes access unsafe or impractical, selecting materials that require no inspection at all (such as stone) may be the better long-term decision.


    Why Homeaholic treats outdoor metal wall art differently

    Outdoor Metal Wall Art

    At Homeaholic, outdoor metal wall art is evaluated the same way exterior architectural elements are evaluated: by exposure tolerance, material truth, and lifecycle behavior.

    This approach rejects trend-driven selection in favor of environmental realism. Outdoor décor must coexist with weather, not fight it.

    That philosophy is what separates decorative failure from lasting installation.

    Frequently Asked Questions

    Can outdoor metal wall art be used in coastal areas?

    Yes, but aluminum or corten steel is strongly recommended.

    Will outdoor metal wall art stain walls?

    Corten steel may stain during early weathering. Proper spacing prevents this.

    Can outdoor metal wall art be repainted?

    Yes, but surface preparation is critical for adhesion.

    Does outdoor metal wall art attract heat?

    Dark finishes absorb heat but do not damage exterior walls when mounted with airflow.

    Is outdoor metal wall art safe in high winds?

    Yes, when mounted securely with appropriate fasteners.Can outdoor metal wall art be used indoors later?
    Yes, once cleaned and stabilized.


  • Metal Wall Art: The Complete Indoor Guide for Modern Homes

    Metal wall art is a durable, sculptural form of indoor wall décor made from steel, iron, or aluminum. It adds depth, texture, and long-term visual impact compared to canvas or prints, making it ideal for modern living rooms, bedrooms, offices, and feature walls.

    What is metal wall art, exactly?

    Metal wall art is decorative artwork crafted from metal sheets or rods and designed to be mounted on interior walls. Unlike printed art, it creates physical depth through cutouts, layering, and shadows. Most indoor pieces are laser-cut or welded, then finished with paint or powder coating for protection and color stability.

    Metal art is a form of interior wall décor created from solid or layered metal components that are cut, shaped, and finished for visual display. Unlike flat artwork such as canvas prints or posters, metal wall art introduces physical depth, meaning the artwork interacts with light and shadow throughout the day.

    Most indoor metal wall art is produced using laser cutting or CNC cutting, allowing precise patterns, clean edges, and consistent thickness. Designs range from abstract silhouettes to detailed geometric or botanical forms. Because the artwork is structural rather than printed, it becomes part of the room’s architecture rather than a surface decoration.

    A key distinction is that metal wall art is not defined by color alone. Its visual impact comes from negative space, layering, and the way it stands slightly away from the wall. This is why metal art often looks different depending on lighting conditions and viewing angle, something flat artwork cannot achieve.


    What materials are used in indoor metal wall art?

    Metal Wall Art indoor

    Short answer: steel, iron, and aluminum dominate indoor use.

    Steel is the most common because it balances strength and cost. Iron feels heavier and more industrial, often used in bold statement pieces. Aluminum is lightweight and corrosion-resistant, making it easier to mount on drywall. For indoor settings, corrosion resistance matters less than finish quality and edge treatment.

    Indoor metal wall art commonly uses three primary materials, each with practical implications.

    Steel is the most widely used material. It offers strength, rigidity, and affordability. Steel allows thin profiles without bending and works well for medium to large pieces. For indoor use, steel is almost always coated, so corrosion is not a concern in normal living conditions.

    Iron is heavier and often used in more traditional or industrial-style designs. It gives a sense of solidity but requires more careful mounting due to weight. Iron is less common in minimalist interiors but remains popular for bold statement pieces.

    Aluminum is significantly lighter than steel or iron. It’s ideal for large wall art where weight is a concern or for rental properties where mounting flexibility matters. Aluminum does not rust, which adds a margin of safety even in humid indoor environments.

    For indoor décor, material choice is less about weather resistance and more about weight, finish quality, and edge precision.

    Which finishes work best for indoor spaces?

    Short answer: powder-coated and matte finishes perform best indoors.

    Powder coating seals the surface evenly, resists chipping, and keeps colors stable over time. Matte black remains the most popular because it reduces glare and fits modern interiors. Hand-painted finishes add character but need more careful cleaning. Glossy finishes reflect light and should be used sparingly in bright rooms.

    Finish quality determines how metal wall art ages over time.

    Powder-coated finishes are the most reliable for indoor use. The coating is baked onto the metal, forming a uniform protective layer that resists chipping and fading. Matte powder coats are especially popular because they reduce glare and hide fingerprints.

    Painted finishes offer more artistic variation but are more sensitive to scratches. Hand-painted metal art often has unique texture but should be placed in low-contact areas.

    Raw or distressed finishes are sometimes used intentionally for industrial interiors. These should always be sealed for indoor use to prevent residue or staining on walls.

    Finish choice affects not only appearance but also cleaning frequency, durability, and how forgiving the surface is to daily life.


    Is metal wall art heavy and safe to hang indoors?

    Metal Wall Art indoor

    Short answer: most indoor metal wall art is safe on drywall when mounted correctly.

    Small to medium pieces usually weigh between 2 and 8 kg. Proper mounting matters more than weight. Keyhole slots, wall anchors, or standoff mounts distribute load safely. For large pieces placed above sofas or beds, stud mounting is recommended for peace of mind.

    Weight alone does not determine safety. Mounting design does.

    Most indoor metal wall art weighs between 2 kg and 12 kg, depending on size and thickness. Well-designed pieces distribute this weight evenly using rear mounting points, keyhole slots, or standoff systems.

    For drywall installation:

    • Lightweight to mid-weight pieces can use quality wall anchors
    • Larger pieces should be mounted into studs or masonry
    • Standoff mounts reduce pressure on paint and drywall

    Safety concerns usually arise from improper installation, not the artwork itself. A correctly mounted metal wall piece is as safe as a mirror or shelving unit.

    How do you choose the right size for your wall?

    Short answer: fill 60–75% of the available wall width.

    Above a sofa, metal wall art should be roughly two-thirds the sofa width. In dining areas, horizontal pieces work better than tall vertical designs. Oversized art works best on uncluttered walls where shadows can breathe. Triptychs suit long corridors or wide feature walls.

    Scale is one of the most misunderstood aspects of wall décor.

    A reliable guideline is the 60–75% rule. The artwork should occupy roughly two-thirds of the width of the furniture below it. Smaller pieces tend to look lost, while oversized pieces overwhelm confined spaces.

    Vertical designs work best on tall walls or staircases. Horizontal pieces suit sofas, beds, and dining tables. Multi-panel designs allow flexibility and visual rhythm across wide surfaces.

    Spacing matters as much as size. Metal wall art benefits from visual breathing room, allowing shadows to form naturally.


    Does metal wall art work with all interior styles?

    Metal Wall Art indoor

    Short answer: yes, if the design matches the space.

    Modern and minimalist rooms pair well with geometric or abstract metal designs. Industrial interiors favor raw or dark finishes. Floral or organic metal art softens contemporary spaces. In neutral rooms, metal art often becomes the focal point without overpowering furniture.

    Metal wall art adapts to most interiors because design, not material, defines compatibility.

    • Modern interiors favor geometric, linear, or abstract designs
    • Minimalist spaces benefit from single-piece silhouettes
    • Industrial rooms pair well with darker finishes and layered metal
    • Transitional interiors often use organic or nature-inspired patterns

    The neutrality of metal allows it to act as a visual anchor without clashing with textiles, wood, or stone.

    Metal wall art is style-agnostic only when design, finish, and scale are chosen intentionally. The mistake many guides make is claiming universal compatibility without explaining why or how. In reality, metal wall art adapts because it functions as a structural visual element, not a decorative surface.

    What matters is not the metal itself, but how its form language aligns with the room.

    Modern and contemporary interiors

    Modern interiors favor clarity and restraint. Metal wall art works exceptionally well here because it introduces contrast without visual noise. Clean lines, geometric forms, and negative space reinforce the architectural feel of modern rooms.

    Matte black, charcoal, or monochrome finishes integrate seamlessly. Designs with sharp edges or continuous outlines echo modern furniture and lighting profiles. In these spaces, metal wall art often replaces traditional paintings entirely.

    Minimalist interiors

    Minimalism demands discipline. One strong piece is better than several smaller ones.

    Metal wall art suits minimalist spaces when it acts as a singular focal anchor. Thin-profile designs, single-color finishes, and simple silhouettes prevent clutter. The shadows created by metal add depth without adding objects.

    The key mistake to avoid in minimalist rooms is over-detail. Intricate or busy designs break the visual calm.

    Industrial and loft-style interiors

    Industrial interiors almost seem designed for metal art, but they still require control.

    Raw textures, exposed brick, concrete walls, and visible ductwork pair naturally with metal. Darker finishes, layered metal designs, or heavier visual weight feel appropriate here. Industrial spaces can support larger and bolder pieces without overwhelming the room.

    However, untreated raw metal should still be sealed indoors to prevent dust residue and wall staining.

    Scandinavian and neutral interiors

    Scandinavian interiors rely on light, balance, and warmth. Metal wall art works here when it is visually light, not physically heavy.

    White, soft gray, or muted metallic finishes blend well with pale walls and natural wood. Organic shapes or nature-inspired designs prevent the metal from feeling cold or harsh.

    In these spaces, metal wall art should complement the room, not dominate it.

    Traditional and transitional interiors

    Metal wall art can work in traditional spaces, but only with the right design language.

    Curved forms, floral motifs, symmetrical patterns, and warmer finishes integrate better than abstract geometry. Thin black metal often feels too modern here, while bronze or dark neutral tones feel more at home.

    In transitional interiors, metal wall art acts as a bridge between classic furniture and modern accents.


    How metal wall art influences visual balance in a room

    Metal Wall Art indoor

    Metal wall art affects how a room feels proportionally.

    Because it has physical depth, it carries more visual weight than flat artwork. This means placement matters. Centering a heavy metal piece on a narrow wall can make the room feel compressed. On a wide wall, the same piece can ground the space.

    Vertical designs visually raise ceiling height. Horizontal designs widen the room. This makes metal wall art a subtle architectural tool, not just decoration.

    How texture and negative space change room perception

    Metal wall art introduces negative space, areas where the wall shows through the design.

    Negative space reduces visual density and prevents the artwork from feeling bulky. This is why large metal wall art often feels lighter than large canvas pieces of the same size.

    Texture also plays a role. Smooth surfaces feel modern and controlled. Cut or layered textures add depth and interest, especially on plain walls.

    When metal wall art does NOT work well indoors?

    There are situations where metal wall art is a poor choice.

    • Extremely small rooms with busy walls
    • Spaces already overloaded with décor
    • Rooms with fragile wall surfaces and no mounting flexibility
    • Interiors where softness and fabric dominate every surface

    In these cases, metal can feel intrusive rather than complementary. Knowing when not to use metal wall art is a sign of good design judgment.


    How metal wall art interacts with furniture and layout

    Metal wall art should relate to furniture, not float independently.

    Above sofas, beds, or consoles, the artwork should visually anchor the furniture. A common mistake is hanging metal wall art too high, which disconnects it from the room’s layout.

    The bottom edge should typically sit 20–30 cm above furniture. This keeps the visual flow grounded and intentional.

    Color psychology and metal wall art finishes

    Color matters even when the art is metal.

    Black communicates strength and structure. White feels airy and calm. Metallic tones introduce sophistication but can reflect light unpredictably.

    In neutral interiors, metal wall art often replaces color with form-based contrast, which feels more timeless than trend-based palettes.

    Why metal wall art feels “timeless” compared to other décor

    Metal wall art ages differently.

    It does not rely on printed imagery, pop culture, or seasonal color trends. Its appeal comes from form, proportion, and material presence. This is why metal wall art often stays relevant even as furniture, textiles, or paint colors change.

    This longevity is one of the strongest reasons people choose metal wall art for primary living spaces.


    Metal wall art vs canvas or framed prints

    Short answer: metal lasts longer and adds depth.

    Canvas and prints rely on color and imagery. Metal wall art adds texture, shadow, and structure. It does not sag, fade easily, or warp with humidity. For long-term interior décor, metal holds visual authority better, especially in high-traffic rooms.

    Canvas and framed prints rely on imagery. Metal wall art relies on form.

    Canvas can fade, stretch, or warp over time. Frames collect dust and require alignment. Metal wall art maintains its structure indefinitely under indoor conditions.

    Another key difference is permanence. Metal wall art is chosen less frequently but kept longer, making it better suited for feature walls and long-term interior planning.


    Metal wall art by room type: what actually works in real homes

    Art performs differently depending on how a room is used, how long people stay in it, and how visual weight is distributed. Treating all rooms the same is a common design error. Below is room-specific logic that helps users choose correctly and helps search systems understand applied intent.

    Metal wall art for living rooms

    The living room is where metal wall art performs best and is most commonly used.

    Living rooms can support larger scale pieces because walls are usually wider and furniture layouts are more stable. Metal wall art works especially well above sofas, sectionals, or console tables where it visually anchors the seating area.

    Best practices:

    • Choose a width that fills 60–75% of the sofa width
    • Horizontal or multi-panel designs work better than tall vertical pieces
    • Matte or textured finishes reduce glare from windows and TVs
    • Avoid overly intricate designs if the room already has strong patterns

    In living rooms, metal wall art often replaces traditional framed artwork because it feels more architectural and permanent.

    Metal wall art for bedrooms

    Bedrooms require restraint.

    Metal wall art works best when it supports calm and balance rather than visual dominance. Above the bed, safety and weight distribution become more important than scale.

    Best practices:

    • Choose lightweight designs or aluminum when mounting above beds
    • Prefer organic, flowing shapes over sharp geometry
    • Keep finishes matte to avoid reflective distraction
    • Maintain adequate clearance above headboards

    In bedrooms, metal wall art should feel intentional but quiet, adding texture without disrupting rest.

    Metal wall art for dining rooms

    Dining rooms benefit from metal wall art because walls are often uninterrupted and visible for long periods.

    Metal designs with symmetry or rhythm work well here. Horizontal pieces above sideboards or centered feature walls help define the dining zone.

    Best practices:

    • Align artwork with the center of the dining table, not the wall
    • Avoid high-gloss finishes that reflect overhead lighting
    • Use designs that complement table shape and lighting fixtures

    In dining spaces, metal wall art often reinforces a sense of formality and structure.

    Metal wall art for home offices

    Home offices demand clarity, not distraction.

    Metal wall art works when it reinforces focus and professionalism. Abstract or geometric designs outperform decorative or narrative art in workspaces.

    Best practices:

    • Place art within peripheral vision, not directly behind screens
    • Use minimal designs with clean lines
    • Keep size moderate to avoid visual dominance
    • Neutral finishes reduce mental fatigue

    In professional environments, metal wall art often communicates intentional design and stability, which subtly affects how the space feels during long work sessions.

    Metal wall art for hallways and corridors

    Hallways are transition spaces, which makes them ideal for metal wall art.

    Long, narrow walls benefit from linear or multi-panel metal designs that guide the eye forward. Because people move through hallways quickly, bold shapes work better than fine detail.

    Best practices:

    • Use slimmer profiles to avoid physical intrusion
    • Maintain consistent spacing if using multiple pieces
    • Vertical designs help visually stretch short corridors

    Metal wall art in hallways adds identity to otherwise overlooked spaces.

    Metal wall art for staircases

    Staircases are visually complex areas, but metal wall art can enhance them when planned correctly.

    Vertical compositions work well alongside stairs because they mirror upward movement. The key is alignment, not symmetry.

    Best practices:

    • Follow the slope of the staircase visually
    • Use lighter designs to avoid visual heaviness
    • Avoid sharp protrusions near handrails

    Metal wall art in staircases often becomes a signature feature of the home.

    Metal wall art for entryways and foyers

    Entryways form first impressions.

    Metal wall art works here when it is clear, confident, and uncluttered. Oversized pieces can work surprisingly well if the wall is open and unobstructed.

    Best practices:

    • Choose a single statement piece
    • Keep mounting height aligned with eye level
    • Avoid overly detailed designs that require close inspection

    In entry spaces, metal wall art sets the tone for the rest of the interior.


    Small rooms vs large rooms: scaling rules that matter

    Metal wall art does not scale linearly.

    Small rooms need visual lightness, not small art. Thin designs with open negative space work better than compact, dense pieces. Large rooms can support both scale and complexity.

    A common mistake is shrinking artwork too much in small spaces, which makes walls feel unfinished rather than balanced.

    Ceiling height considerations

    Ceiling height influences orientation.

    • Low ceilings benefit from vertical designs
    • High ceilings allow stacked or layered compositions
    • Avoid placing heavy horizontal art too high on tall walls

    Metal wall art can subtly correct proportions when orientation is chosen deliberately.

    Room-by-room metal wall art comparison table

    Room TypeRecommended Size RangeBest MaterialFinish PreferenceMounting MethodKey Design Rule
    Living Room90–180 cm width (or triptych)Steel or AluminumMatte black, texturedWall anchors or studsFill 60–75% of sofa width
    Bedroom60–120 cm widthAluminum or thin steelMatte, low-glareStuds or heavy anchorsPrioritize safety and calm
    Dining Room80–150 cm widthSteelMatte or satinAnchors or studsAlign with table center
    Home Office50–100 cm widthAluminumNeutral matteAnchorsAvoid visual distraction
    HallwayLinear or multi-panelAluminumMatteAnchorsGuide eye through space
    StaircaseVertical compositionsAluminum or steelMatteStudsFollow stair direction
    Entryway70–140 cm widthSteelMatte or subtle metallicAnchors or studsSingle statement piece

    How to read this table correctly

    Many readers misinterpret size recommendations.

    The size range refers to visual width, not wall width. A 150 cm metal wall art piece does not need a 150 cm wall. It needs enough negative space around it to allow shadows and form to breathe.

    Material choice is driven by weight tolerance and mounting flexibility, not durability for indoor use.

    Common mis-matches this table helps avoid

    • Heavy steel art above beds without stud support
    • Oversized art in narrow hallways
    • Glossy finishes in rooms with strong natural light
    • Dense designs in already busy interiors

    Avoiding these mismatches prevents regret and reinstallation.

    How to test placement before installing

    Before installation:

    • Measure the artwork and mark dimensions with painter’s tape
    • Step back and view from typical seating positions
    • Observe lighting changes throughout the day
    • Confirm anchor points and wall structure

    This planning step prevents most placement regrets and reinstallation damage.


    Will metal wall art damage walls or paint?

    Short answer: not when mounted correctly.

    Most quality pieces include spacers or rear mounts that prevent direct wall contact. Felt pads or standoff mounts eliminate friction marks. Damage usually comes from poor installation, not the material itself.

    Quality indoor metal wall art is designed to minimize wall contact.

    Rear spacers, felt pads, or standoff mounts prevent abrasion. Damage typically occurs when artwork is mounted flush without protection or shifted repeatedly. Once installed correctly, metal wall art remains stable and does not rub against the wall surface.

    Does indoor metal wall art rust?

    Short answer: no, if it’s made for indoor use.

    Indoor metal wall art is sealed with paint or powder coating. Rust only becomes a concern in bathrooms or kitchens with constant moisture. Even there, coated steel performs well with basic ventilation.

    Rust is not a concern for indoor metal wall art when it’s properly finished.

    Powder-coated or sealed metal resists oxidation. Even in kitchens or bathrooms, normal ventilation is sufficient to prevent moisture buildup. Rust issues usually indicate poor coating quality or misuse of outdoor-unrated pieces indoors.


    How do lighting and shadows affect metal wall art?

    Lighting is part of the design.

    Metal wall art interacts with light differently than flat décor. Directional lighting creates shadows that enhance depth. Soft ambient lighting produces subtle contrast. Glossy finishes reflect light, while matte finishes absorb it.

    This dynamic quality is one reason metal wall art remains visually engaging over time.

    How do you clean and maintain metal wall art?

    Short answer: dry dusting is usually enough.

    Use a soft microfiber cloth. Avoid abrasive sponges or chemical cleaners. For fingerprints, a lightly damp cloth works. Indoor metal wall art typically needs attention only a few times a year.

    Maintenance is minimal.

    A microfiber cloth removes dust. For smudges, a lightly damp cloth is enough. Avoid abrasive cleaners or chemical sprays. Indoor metal wall art does not require polishing, sealing, or special treatments.

    How long does indoor metal wall art last?

    Short answer: 10–25 years with minimal care.

    Quality indoor pieces outlast most wall décor. Powder-coated finishes retain color and structure for decades. Unlike wood or canvas, metal does not warp, stretch, or sag.

    Well-made indoor metal wall art can last 10 to 25 years or longer.

    The metal itself does not degrade under indoor conditions. Lifespan depends almost entirely on finish quality and mounting stability. Compared to most décor materials, metal has one of the longest functional lifespans.


    Is metal wall art suitable for rental homes?

    Short answer: yes, with removable anchors.

    Lightweight aluminum pieces and smaller steel designs can be mounted using removable drywall anchors. This allows clean removal without major wall repair.

    Yes, especially when weight is considered.

    Aluminum or thin steel pieces can be mounted with removable anchors. Many designs allow clean removal with minimal wall repair, making them suitable for temporary living spaces.

    What separates quality metal wall art from cheap pieces?

    Short answer: finish, edges, and mounting design.

    Quality pieces have smooth, deburred edges, consistent coating, and secure mounting points. Cheap art often has sharp edges, uneven paint, and weak hangers. The back of the piece usually reveals the truth.

    Several indicators reveal quality immediately:

    • Smooth, deburred edges
    • Even coating without bubbles or thin spots
    • Balanced mounting points
    • Rigid structure without flexing

    The back of the artwork often reveals whether it was designed thoughtfully or mass-produced cheaply.

    Common mistakes people make when buying metal wall art

    • Choosing size too small for the wall
    • Ignoring mounting requirements
    • Using glossy finishes in bright rooms
    • Buying outdoor-style art for indoor walls unnecessarily
    • Prioritizing price over finish quality

    Avoiding these mistakes prevents disappointment and reinstallation costs.

    How to plan metal wall art placement before buying

    Measure the wall. Mark approximate dimensions with tape. Observe lighting during the day. Check wall structure for studs or anchors. Planning reduces guesswork and ensures the artwork fits both visually and structurally.

    Metal wall art pre-purchase checklist (read this before buying)

    This checklist is designed to be scanned in under 30 seconds. If every box is mentally checked, the purchase decision is almost always correct.

    1. Wall type confirmed

    Know what you’re mounting into.

    • Drywall only
    • Drywall with studs
    • Concrete, brick, or tile

    Mounting failure is the #1 regret with metal wall art, not design choice.

    2. Correct size relative to furniture

    Ask one question only:
    Does the artwork visually anchor the furniture below it?

    If it fills less than half the furniture width, it’s too small.
    If it touches nearby elements, it’s too large.

    3. Weight matches mounting reality

    Heavier is not better.

    • Aluminum is ideal when flexibility matters
    • Steel is fine when studs or anchors are available
    • Oversized steel without stud access is a red flag

    Always match material to wall structure.

    4. Finish matches lighting conditions

    Observe the room during daylight and evening.

    • Bright rooms need matte or textured finishes
    • Directional lighting exaggerates gloss
    • Neutral finishes age better than trendy colors

    Light reflection mistakes are permanent annoyances.

    5. Design complexity matches room density

    Busy rooms need simple art.
    Minimal rooms can support complexity.

    If the wall already has shelves, lighting, or patterns, choose open designs with negative space.

    6. Mounting system is visible and logical

    Flip the piece mentally.

    Quality metal wall art has:

    • Clean rear mounting points
    • Balanced weight distribution
    • Spacers or standoffs to protect walls

    If mounting feels improvised, the product likely is.

    7. Clearance and safety checked

    Especially important above beds, sofas, and dining tables.

    • Bottom edge should not sit directly above head level
    • No sharp protrusions near walkways
    • Stud mounting preferred for heavy pieces

    Safety confidence matters more than visual drama.

    8. Longevity expectation aligned

    Ask yourself this honestly:
    Would I still like this design in five years?

    Metal wall art is not seasonal décor. The best pieces survive furniture changes, repainting, and layout shifts.


    Why Homeaholic treats metal wall art as a long-term décor choice

    At Homeaholic, metal wall art is positioned as a structural décor investment, not a seasonal accessory. The focus is on indoor-safe materials, balanced weight, refined finishes, and mounting designs that work in real homes, not showrooms.

    Frequently Asked Questions

    Is metal wall art outdated or still trendy?

    Metal wall art remains popular because it adapts to modern and minimalist interiors without relying on trends.

    Can metal wall art be hung on tile or concrete walls?

    Yes. Masonry anchors or concrete screws work well with heavier pieces.

    Does metal wall art reflect too much light?

    Matte and textured finishes minimize glare. Glossy finishes should be used carefully.

    Is metal wall art safe above a bed?

    Yes, when stud-mounted or installed with heavy-duty anchors.

    Can metal wall art be customized in size or shape?

    Many designs allow custom scaling, but weight and mounting must be adjusted accordingly.

    Does metal wall art fade over time?

    Indoor pieces with quality coatings resist fading far better than prints or canvas.


  • How to Remove Tar From Clothes Without Ruining the Fabric

    Remove Tar stains from clothes by first hardening the tar, then dissolving it with oil-based or fabric-safe solvents, followed by proper detergent washing. Heat should be avoided until the tar is fully removed, as heat spreads and embeds tar deeper into fabric fibers. This guides fully explains the methods, techniques, principles and preventions/cautions on how to remove tar from clothes making your life a whole easier than mine because I got to know all about all these things the hard way!

    What Makes Tar Stains So Difficult to Remove

    Tar is not a typical stain. It is not water-based, protein-based, or sugar-based. Tar is a hydrocarbon compound, meaning it behaves more like industrial adhesive than food residue.

    Tar comes from sources such as:

    • Road asphalt
    • Roofing materials
    • Beach tar deposits
    • Machinery grease mixed with bitumen

    Once tar touches fabric, it clings aggressively and spreads when warmed. This is why scrubbing or washing too early often makes the stain worse instead of better.

    Understanding tar’s physical behavior is the key to removing it safely.


    The Two Critical Rules of Tar Removal

    Rule one: Never apply heat to fresh tar.
    Rule two: Dissolve tar before attempting to wash it.

    Breaking either rule almost guarantees permanent fabric damage.

    Remove tar

    Step One: Harden the Tar Before Removal

    Fresh tar is sticky and spreads easily. Trying to wipe or wash it immediately pushes it deeper into the fibers.

    To control it, you must harden it first.

    Place the stained garment in the freezer for 30–60 minutes. The cold causes the tar to solidify, making it brittle instead of sticky.

    Once hardened, gently scrape off excess tar using a dull knife, spoon, or plastic card. Do not force it. Removing bulk tar at this stage reduces damage later.

    Step Two: Choose the Right Tar-Dissolving Agent

    Tar does not dissolve in water. It dissolves in oils or solvents that break hydrocarbon bonds.

    This is where most guides fail by recommending unsafe or destructive chemicals without explanation.

    Below are fabric-safer options, starting from mild to stronger.


    Method 1: Oil-Based Removal (Safest First Option)

    Oils work because they loosen tar’s grip on fabric fibers.

    Remove tar

    Effective options include:

    • Cooking oil
    • Olive oil
    • Baby oil
    • Coconut oil

    Apply a small amount to the stained area and gently massage it into the tar. Let it sit for 10–15 minutes. You will see the tar soften and begin to release.

    Blot with paper towels to lift dissolved tar away. Repeat until the stain fades.

    Oil removal is especially effective for cotton, denim, and sturdy fabrics.

    Method 2: Dish Soap to Remove Oil Residue

    Oil dissolves tar, but oil itself must be removed afterward.

    Apply liquid dish soap directly to the area. Dish soap is designed to break down grease without damaging fabric.

    Gently work it in and rinse with warm (not hot) water. Inspect before drying. Repeat if necessary.

    This step is essential. Skipping it leaves dark grease shadows behind.

    Method 3: Rubbing Alcohol or Isopropyl Alcohol

    Remove tar

    For more stubborn tar stains, alcohol can be effective.

    Alcohol dissolves hydrocarbons without leaving oily residue. Apply a small amount to a cloth and dab the stain gently.

    Always test on a hidden seam first. Alcohol can affect dyes and delicate fabrics.

    This method works best on synthetics and denim, but caution is required.

    Method 4: Commercial Degreasers or Stain Removers

    Some commercial products are designed specifically for grease, asphalt, or industrial stains.

    Choose products labeled fabric-safe and follow instructions precisely. Avoid anything meant for engines or tools unless explicitly stated safe for clothing.

    These products are effective but should be considered a last step before professional cleaning.


    What NOT to Use on Tar Stains

    This section prevents irreversible damage.

    Avoid:

    • Gasoline or diesel (toxic and flammable)
    • Paint thinner or acetone (destroys fibers)
    • Heat guns or hair dryers
    • Scrubbing brushes on fresh tar

    These methods may remove tar but often destroy fabric or create safety hazards.


    Remove tar

    Fresh Tar vs Hardened Tar:

    Why Timing Matters

    Fresh Tar

    Fresh tar spreads easily and embeds quickly. Freezing and oil-based removal works best.

    Hardened Tar

    Hardened tar is less sticky but more bonded. Alcohol or degreasers may be required after oil treatment.

    Recognizing the stage of the stain helps you choose the correct approach.


    Fabric-Specific Tar Removal Guidance

    Cotton

    Cotton absorbs tar deeply but tolerates oil-based removal well. Avoid aggressive scrubbing, which damages fibers.

    Denim

    Denim hides tar visually but traps it structurally. Treat both sides of the fabric and repeat oil treatment patiently.

    Synthetic Fabrics

    Polyester and blends resist absorption but can melt or discolor under harsh solvents. Alcohol works better than oil here.

    Delicate Fabrics

    Silk, wool, and delicate blends should not be treated aggressively. Blot gently and seek professional cleaning if tar persists.


    Why Heat Makes Tar Stains Permanent

    Remove tar

    Heat softens tar and spreads it into microscopic spaces within fabric fibers. Once this happens, tar behaves like dye.

    Hot water, dryers, steamers, and irons should never be used until tar is fully removed.

    Always air-dry until you’re certain the stain is gone.


    Removing Tar Odor After Stain Treatment

    Tar often leaves behind a petroleum smell.

    After stain removal:

    • Wash with strong detergent
    • Add baking soda to the wash
    • Air-dry outdoors if possible

    Repeat washing if odor persists. Never mask odor with fragrance before removal is complete.


    Tar Stains on White vs Colored Clothes

    White Clothes

    White fabric allows more aggressive oil and alcohol treatment. However, residual oil can cause yellowing if not removed fully.

    Colored Clothes

    Colorfastness must be tested. Avoid prolonged alcohol exposure and never use bleach on tar stains.


    Tar on Workwear and Outdoor Clothing

    Work clothes often encounter tar repeatedly.

    Pre-treat stains before washing. Washing tar-stained clothing with other garments risks spreading residue.

    Designate specific clothing for tar-prone tasks when possible.

    When Tar Stains Become Permanent

    If tar has been heat-set or washed multiple times improperly, full removal may not be possible.

    At this stage, professional dry cleaners may use industrial solvents not available for home use. Results vary.

    Knowing when to stop prevents fabric destruction.


    Prevention Tips for Future Tar Exposure

    Wear old or dark clothing near roadwork or roofing. Keep baby oil or dish soap accessible in vehicles or work kits.

    Act immediately. Time is the biggest factor in tar removal success.


    Brand Authority Note

    Detailed, safety-first stain guides like this reflect how Homeaholic approaches difficult household problems. The focus is fabric protection, chemical awareness, and methods that work without unnecessary risk.


    Final Takeaway on How to Remove Tar from Clothes

    Tar stains are not impossible, but they are unforgiving.

    Freezing controls spread. Oils dissolve hydrocarbons. Dish soap removes residue. Heat ruins everything.

    Treat tar like industrial material, not food residue, and you can remove it safely without sacrificing your clothes.

    Remove tar

    FAQ Section

    Can tar stains be removed after drying?

    Yes, but removal becomes harder. Freezing, oil treatment, and alcohol can still work if heat was not applied.

    Is gasoline safe for removing tar from clothes?

    No. Gasoline is dangerous, toxic, and can permanently damage fabric. It should never be used.

    Does hot water help remove tar stains?

    No. Heat spreads tar and embeds it deeper into fabric fibers.

    Can tar stains come back after washing?

    Yes, if oil residue remains. Proper dish soap treatment prevents reappearance.

    Is professional cleaning better for tar stains?

    For delicate or valuable garments, yes. Professionals have access to safer industrial solvents.