Category: Bathroom

  • Home Remedies for Unclogging Drains (Safe DIY Guide)

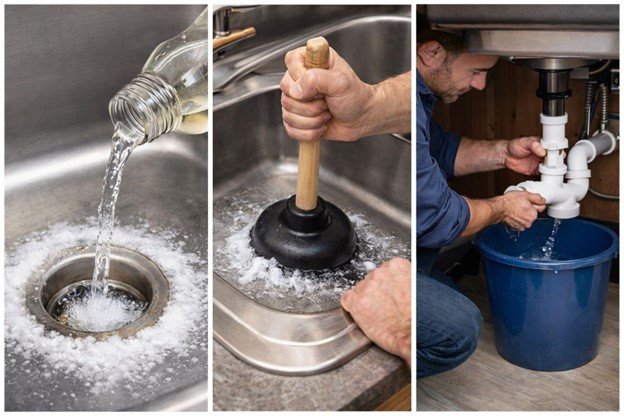
    To unclog a drain using home remedies, pour baking soda followed by vinegar, let the reaction sit for 10–15 minutes, then flush with hot water. This method works best for light clogs caused by grease, soap, or debris and is a safe alternative to chemical cleaners. This page explores the vast DIY and Safe/Natural home remedies for unclogging drains at home without the help of a Plumber or any kind of expertise in this field whatsoever.

    Home remedies for unclogging drains are widely used because they are affordable, accessible, and safe for most plumbing systems. However, their effectiveness depends on the type of clog and proper application. Homeaholic focuses on a structured approach that matches each remedy to the clog type for better results.

    Key Characteristics of Home Remedies

    • Use natural or household ingredients
    • Safe for most pipes when used correctly
    • Effective for light to moderate clogs
    • Require proper timing and sequence
    • Limited effectiveness for deep or solid blockages

    Quick 60-Second Drain Fix

    For users who need a fast solution, a simplified method can provide quick results for light clogs. This approach focuses on speed while still using effective ingredients that can loosen minor buildup.

    This method is ideal for early-stage clogs or routine maintenance. While it may not work for severe blockages, it provides a quick and easy first attempt before moving to more detailed solutions.

    Quick Fix Steps

    • Add baking soda into drain
    • Pour vinegar immediately
    • Wait briefly for reaction
    • Flush with hot water

    When to Use

    • Light clog
    • Slow drainage
    • Preventive cleaning

    Key Insight

    • Quick methods improve engagement
    • Ideal for minor issues
    • First step before deeper solutions

    What Causes Drains to Get Clogged?

    Drains become clogged when materials accumulate inside the pipe and restrict water flow. Over time, substances like grease, hair, soap residue, and food particles build up and form blockages. These clogs can vary in density and location, which directly affects how easily they can be removed.

    Understanding the cause of the clog is essential before applying any remedy. Using the wrong method can either have no effect or push the blockage deeper into the pipe. Identifying the clog type helps choose the correct solution for faster and safer results.

    Common Causes of Drain Clogs

    • Grease buildup in kitchen drains
    • Hair accumulation in bathroom drains
    • Soap scum forming sticky residue
    • Food debris blocking pipes

    Key Insight

    • Cause determines solution
    • Different clogs require different remedies
    • Misidentification leads to failure

    Why Do Home Remedies Work for Unclogging Drains?

    Home remedies work by loosening, dissolving, or flushing clogs depending on the ingredient used.

    Home remedies work by either dissolving, loosening, or flushing the clog out of the pipe. Some methods rely on chemical reactions, while others use heat or lubrication to break down the blockage.

    The most common method, baking soda and vinegar, creates a fizzing reaction that helps loosen debris. Hot water helps melt grease, while dish soap reduces friction and allows buildup to move through the pipe.

    How Remedies Work

    • Chemical reaction → loosens clog
    • Heat → melts grease
    • Lubrication → improves flow

    Key Insight

    • Each remedy has a specific function
    • Effectiveness depends on clog type
    • Combining methods improves results

    What Are the Best Home Remedies for Unclogging Drains?
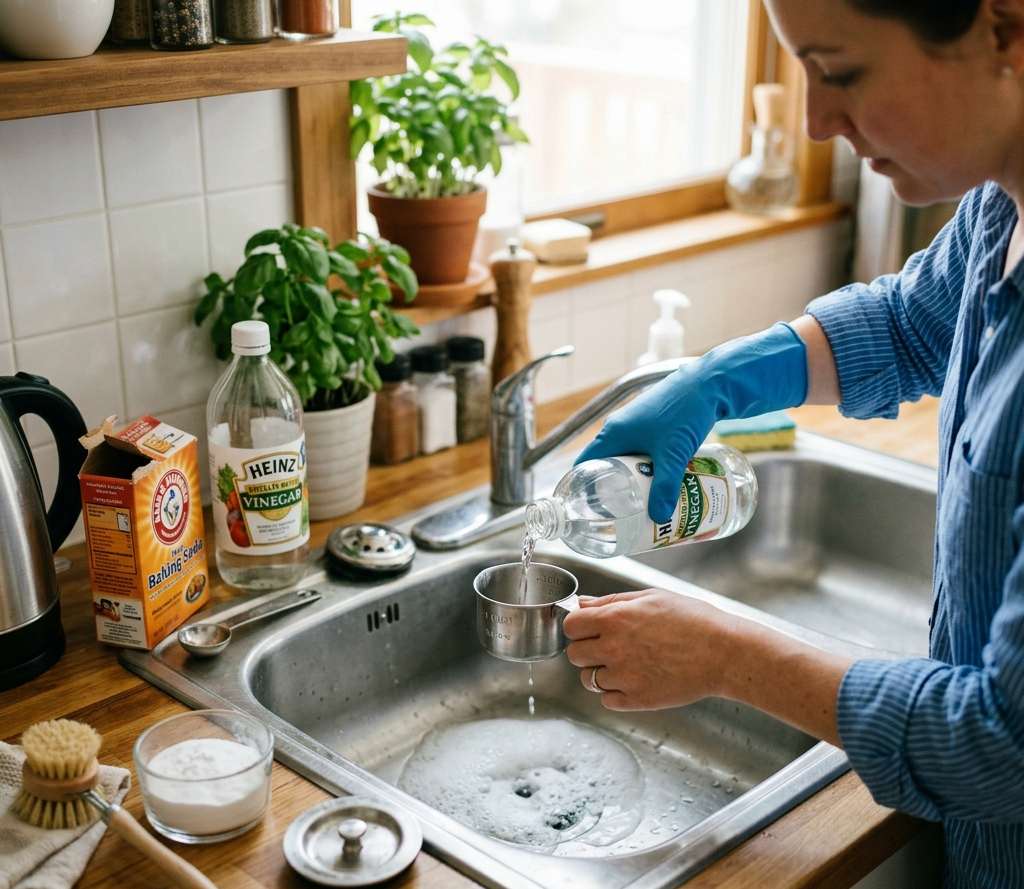
    Home Remedies for Unclogging Drains

    Several home remedies are commonly used, but their effectiveness varies depending on the situation. Choosing the right one ensures better results and prevents unnecessary repetition.

    Each remedy should be applied with the correct timing and sequence. Improper use reduces effectiveness and may delay the unclogging process.

    Common Home Remedies

    • Baking soda and vinegar
    • Hot water flush
    • Dish soap and warm water
    • Salt and hot water

    Key Insight

    • No single remedy works for all clogs
    • Selection should match clog type
    • Proper sequence is essential

    How to Use Baking Soda and Vinegar Step-by-Step

    Baking soda and vinegar is the most popular home remedy due to its simplicity and effectiveness for light clogs. The reaction between the two creates gas bubbles that help loosen debris.

    This method is most effective when followed by hot water, which flushes out the loosened material.

    Step-by-Step Process

    1. Pour baking soda into drain
    2. Add vinegar immediately
    3. Allow reaction for 10–15 minutes
    4. Flush with hot water

    Tips for Best Results

    • Use correct proportions
    • Do not interrupt reaction
    • Repeat if necessary

    Key Insight

    • Reaction loosens clog, not removes it
    • Hot water completes the process

    How to Use Hot Water and Dish Soap for Grease Clogs

    Grease clogs are common in kitchen drains and require a different approach. Dish soap helps break down grease while hot water melts it, allowing it to move through the pipe.

    This method is simple but highly effective when applied correctly. It works best when the clog is caused by oil or fat buildup.

    Step-by-Step Process

    1. Add dish soap to drain
    2. Pour hot water slowly
    3. Repeat if needed

    Why It Works

    • Soap breaks grease
    • Heat melts buildup

    Key Insight

    • Ideal for kitchen drains
    • Ineffective for hair clogs

    How to Remove Hair Clogs Naturally

    Hair clogs are common in bathroom drains and cannot be dissolved easily by chemical reactions. Instead, they require loosening and flushing methods.

    Natural remedies can help reduce the buildup, but mechanical removal may still be necessary for complete clearing.

    Methods for Hair Clogs

    • Baking soda + vinegar (light buildup)
    • Hot water flushing
    • Manual removal if needed

    Key Insight

    • Hair is resistant to chemical breakdown
    • Combination methods work best

    Which Remedy Works Best for Each Type of Clog?
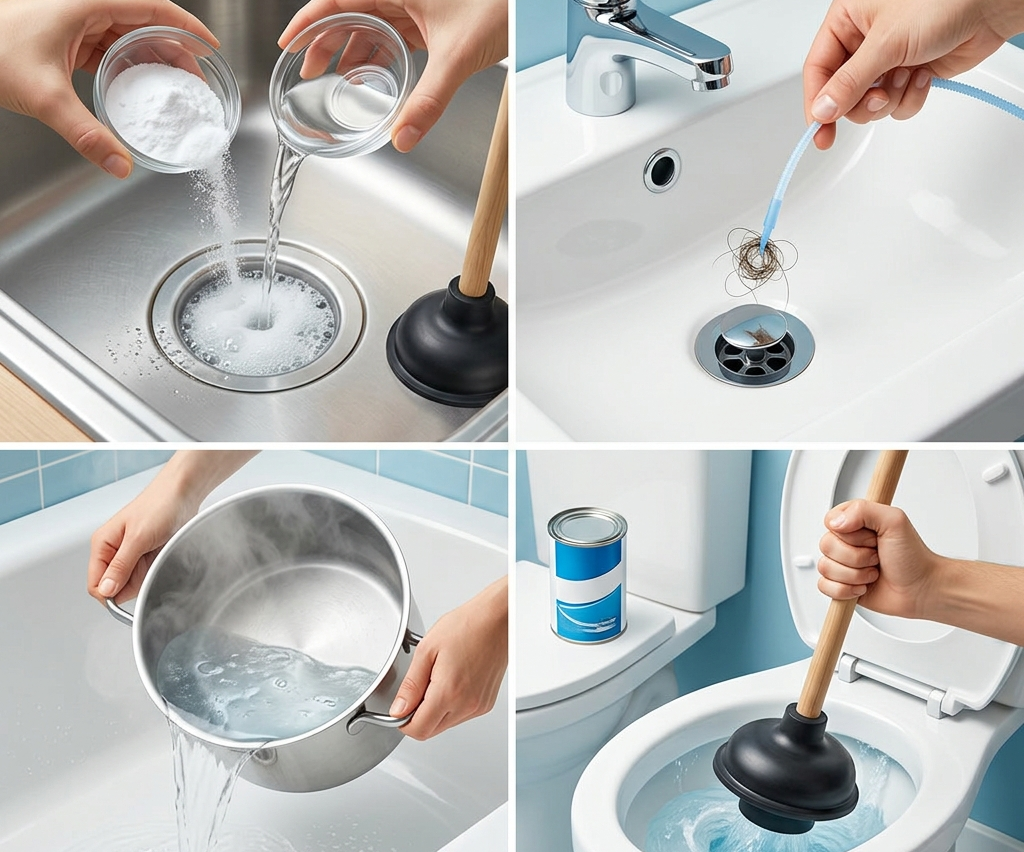
    Home Remedies for Unclogging Drains

    The best remedy depends on the clog type, with grease responding to hot water and soap, and debris responding to baking soda and vinegar.

    Different clogs require different remedies. Matching the method to the clog type improves efficiency and reduces effort.

    Using the wrong remedy wastes time and may worsen the blockage.

    Remedy Matching Guide

    • Grease → hot water + soap
    • Soap scum → baking soda + vinegar
    • Hair → combination + removal
    • Food debris → flushing methods

    Key Insight

    • Correct match improves success rate
    • One-size approach does not work

    Why Your Home Remedy Is Not Working

    If a home remedy fails, it is usually due to incorrect application or an unsuitable clog type. Understanding the reason helps adjust the approach.

    Most failures occur when the clog is too dense or located too deep for home remedies to reach.

    Common Reasons for Failure

    • Wrong remedy used
    • Insufficient time
    • Deep blockage
    • Repeated buildup

    How to Fix It

    • Try alternative remedy
    • Repeat with correct timing
    • Escalate if needed

    Key Insight

    • Failure is often method-related
    • Adjusting approach improves results

    How Long Do Home Remedies Take to Work?

    Time expectations are critical for understanding whether a remedy is working or failing. Many users either stop too early or continue repeating ineffective methods without realizing that the clog requires a different approach. Clear timing benchmarks help users make better decisions.

    Different clog types respond at different speeds. Light clogs clear quickly, while more complex blockages may take longer or require escalation. Using time as a diagnostic tool improves efficiency and reduces frustration.

    Time Expectations

    • Light clog
      • 5–10 minutes
      • clears quickly with correct method
    • Moderate clog
      • 10–20 minutes
      • may require repeated cycles
    • Heavy clog
      • may not respond
      • requires tool-based solution

    Key Insight

    • Time indicates effectiveness
    • Longer duration = deeper problem
    • Use time to decide next step

    When Should You Stop Using Home Remedies?
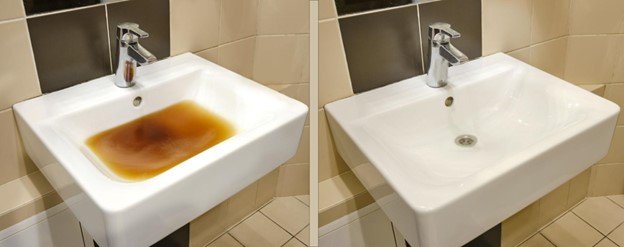
    Home Remedies for Unclogging Drains

    Home remedies are effective only up to a certain point. Continuing beyond that point wastes time and may worsen the clog.

    Recognizing when to stop ensures that you switch to more effective methods quickly.

    Signs to Stop

    • No improvement after multiple attempts
    • Water not draining at all
    • Recurring clog

    Next Steps

    • Use plunger
    • Use drain snake
    • Call plumber

    Key Insight

    • Home remedies have limits
    • Escalation is part of the process

    When to Switch from Home Remedies to Tools

    Home remedies are effective for light and moderate clogs, but they have clear limitations. Continuing to rely on them beyond their effectiveness wastes time and may worsen the blockage. Knowing when to switch ensures faster resolution and prevents unnecessary effort.

    This boundary acts as a transition point between DIY solutions and more advanced tools like plungers or drain snakes. Recognizing these signals helps users move from simple fixes to more effective methods without delay.

    Switch to Tools When

    • No result after 2–3 attempts
    • Water not draining at all
    • Clog returns repeatedly
    • Drain flow worsens over time

    Recommended Next Steps

    • Use a plunger for pressure-based clearing
    • Use a drain snake for deeper clogs
    • Seek professional help if needed

    Key Insight

    • DIY methods have limits
    • Escalation improves success rate
    • Faster switching saves time

    Are Home Remedies Safe for All Pipes?

    Home remedies are generally safe when used correctly, but excessive heat or repeated use can damage certain pipe materials.

    Home remedies are generally safe, but improper use can still cause issues. Hot water and chemical reactions should be used carefully to avoid damaging pipes.

    Understanding pipe material helps determine safe usage.

    Safety Considerations

    • Avoid boiling water in PVC pipes
    • Do not mix chemicals
    • Use moderate quantities

    Key Insight

    • Safe when used correctly
    • Misuse can cause damage

    Home Remedy Comparison Table

    A comparison table helps users quickly understand which remedy to use without reading long explanations. It simplifies decision-making and improves engagement by presenting key information in a structured format that is easy to scan.

    This table also strengthens AI extraction because structured data is easier to interpret. It allows search engines to connect remedy types with their effectiveness and use cases more clearly.

    Comparison Table

    RemedyBest ForEffectivenessTime
    Baking soda + vinegarSoap/debrisMedium10–15 min
    Hot water + soapGreaseHigh5–10 min
    Salt + hot waterMild buildupLow10 min

    How to Prevent Future Drain Clogs

    Prevention reduces the need for repeated unclogging. Simple habits can keep drains clear and functioning properly.

    Consistent maintenance is the most effective way to avoid blockages.

    Prevention Tips

    • Avoid pouring grease down drains
    • Use drain covers
    • Flush regularly with hot water

    Key Insight

    • Prevention is easier than fixing clogs

    Real-World Case Study: DIY Remedy Success vs Failure
    Home Remedies for Unclogging Drains

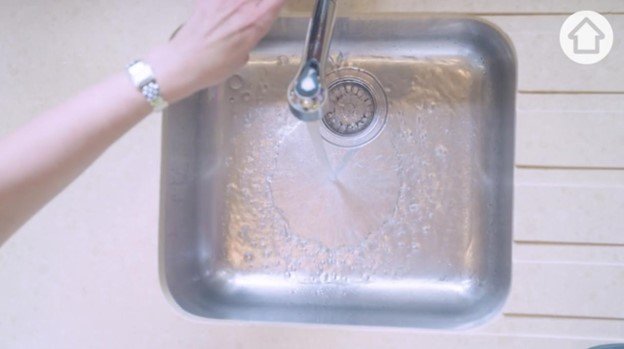
    A user attempted to unclog a slow-draining kitchen sink using the popular baking soda and vinegar method. Despite repeating the process multiple times, there was no visible improvement in drainage. The reaction produced fizzing, but the clog remained intact because the blockage was caused by hardened grease buildup rather than loose debris. This highlights a common mistake where users rely on a single remedy without considering the underlying cause of the clog.

    The solution came when the user switched to a method better suited for grease-based blockages. By applying dish soap followed by hot water, the grease began to break down and loosen. The heat softened the buildup while the soap reduced its adhesion to the pipe walls. Within a short period, the clog dissolved and normal water flow was restored. This case demonstrates that success depends on selecting the right method for the specific clog type rather than repeating ineffective solutions.

    Breakdown of the Scenario

    • Initial approach → baking soda + vinegar
    • Core problem → grease-based clog
    • Limitation → reaction ineffective for grease
    • Adjustment → switched to hot water + dish soap
    • Method change → targeted grease dissolution
    • Outcome → clog cleared successfully

    What Changed in the Successful Attempt

    • Correct remedy matched to clog type
    • Heat applied to soften grease
    • Soap used to break down residue
    • Flushing removed loosened buildup

    Key Takeaway

    • Not all clogs respond to chemical reactions
    • Grease requires heat + lubrication
    • Correct method selection ensures faster results

    Expert Insight

    Home remedies are effective only when they are matched correctly to the type of clog present in the drain. Each method works through a different mechanism, whether it is chemical reaction, heat-based dissolution, or lubrication. Applying the wrong remedy may produce visible activity, such as fizzing, but fail to address the actual blockage. This leads to repeated attempts with no improvement.

    From a practical perspective, unclogging drains should be approached as a decision-based process rather than a trial-and-error method. Identifying the clog type first allows you to select the most effective remedy immediately. This not only improves efficiency but also reduces the risk of pushing the clog deeper or wasting time on ineffective solutions.

    Expert Recommendations

    • Identify clog type before applying remedy
    • Use baking soda + vinegar for light debris
    • Use hot water + soap for grease buildup
    • Avoid repeating ineffective methods
    • Escalate if no improvement is seen

    Strategic Insight from Homeaholic

    • Method selection is more important than repetition
    • Understanding how remedies work improves success rate
    • Structured approach prevents trial-and-error mistakes

    Homeaholic recommends treating home remedies as part of a step-by-step system rather than isolated fixes. When users combine proper diagnosis with the correct method, they achieve faster, safer, and more reliable results, turning simple household solutions into an effective drain maintenance strategy.

    FAQ Section

    Do home remedies really work?

    Yes, for light clogs.

    Is baking soda and vinegar effective?

    Yes, for certain types of buildup.

    Can hot water damage pipes?

    Yes, if too hot for PVC.

    When should I call a plumber?

    When remedies fail repeatedly.

  • How to Unclog a Toilet with a Snake (Toilet Auger Guide)

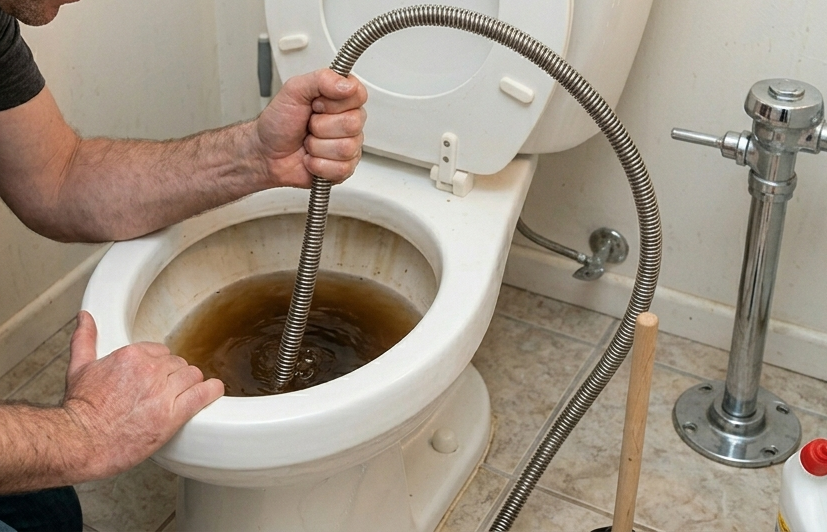
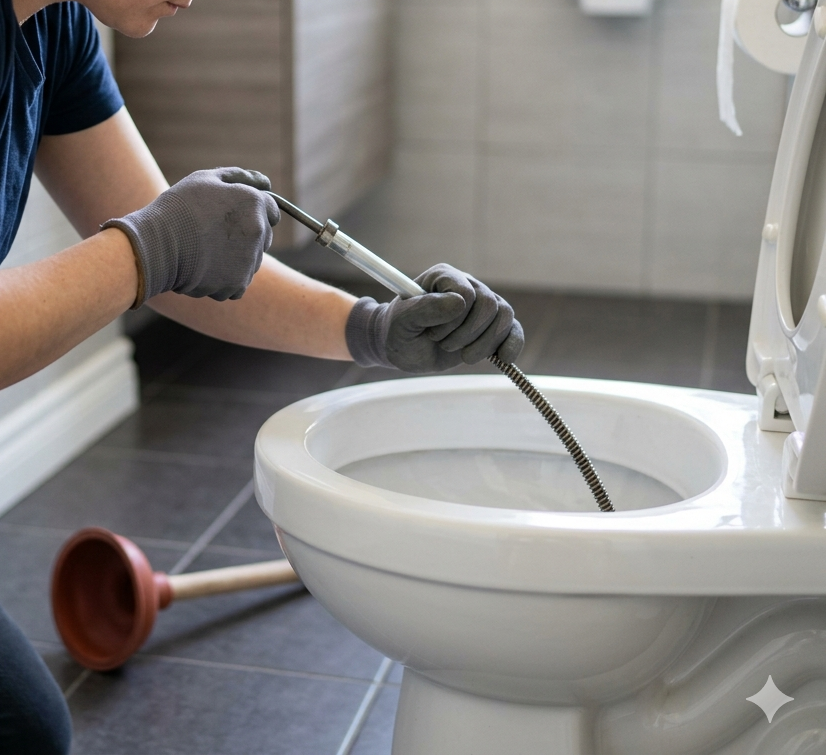
    To unclog a toilet with a snake, insert the auger cable into the drain, rotate the handle to break or hook the clog, and slowly pull it back out. Correct insertion depth, controlled rotation, and understanding resistance are key to clearing deep blockages safely.

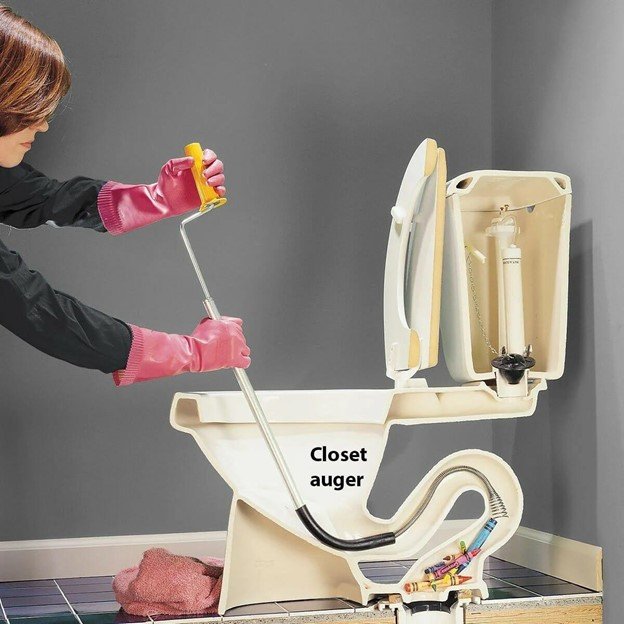
    A toilet snake, also called a toilet auger, is the most effective tool for removing clogs that a plunger cannot fix. Unlike plungers that rely on pressure, a snake physically reaches into the drain to break apart or retrieve the obstruction. This makes it essential for dealing with deep or stubborn clogs.

    Key characteristics of toilet snakes:

    • Designed for deep or solid clogs
    • Uses mechanical rotation instead of pressure
    • Reaches beyond the toilet trap
    • Can break or extract blockages
    • Requires controlled handling for safe use

    What Is a Toilet Snake (Auger) and How Does It Work?

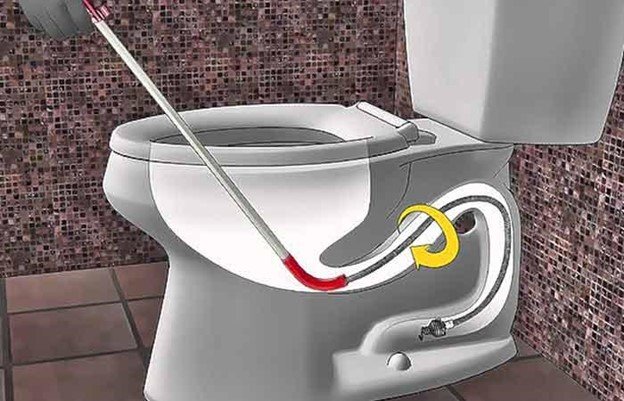
    A toilet snake is a flexible cable tool designed to navigate through the curved trap of a toilet and reach deeper into the drain pipe. It includes a coiled metal cable with a hooked or corkscrew tip that can either break apart or grab onto the clog.

    Unlike a plunger, which uses pressure, the snake works mechanically by drilling into or hooking the obstruction. As you rotate the handle, the cable moves forward, allowing the tip to interact directly with the clog. This makes it far more effective for dense or lodged blockages.

    Key Components

    • Flexible metal cable
    • Rotating handle
    • Hooked or spiral tip
    • Protective sleeve to prevent scratching

    How It Works

    • Cable enters the drain
    • Rotation advances the tip
    • Tip interacts with blockage
    • Clog is broken or retrieved

    Key Insight

    • Snake = mechanical removal tool
    • Works where pressure tools fail
    • Requires precision, not force

    When Should You Use a Snake Instead of a Plunger?

    How to Unclog a Toilet with a Snake

    A plunger is ideal for soft, shallow clogs, but it becomes ineffective when the blockage is deeper or more compact. In these situations, a toilet snake is the correct tool because it can reach and physically interact with the obstruction.

    Knowing when to switch tools is critical for efficiency. Continuing to plunge a deep clog wastes time and may compact the blockage further, making it harder to remove.

    Use a Snake When

    • Plunger fails after multiple attempts
    • Water drains slowly but not completely
    • Clog is deep in the pipe
    • Hard object is suspected

    Do Not Rely on Plunger When

    • No pressure response
    • Repeated clogging occurs
    • Blockage does not shift

    Key Insight

    • Plunger = pressure-based
    • Snake = contact-based
    • Correct tool saves time and effort

    How Does a Toilet Snake Remove Clogs?

    A toilet snake removes clogs by either breaking them apart or hooking them for extraction. The rotating cable tip applies mechanical force directly to the blockage, which allows it to penetrate materials that cannot be moved by pressure alone.

    The key is understanding how the cable behaves during rotation. Resistance indicates contact with the clog, and controlled movement determines whether the blockage is loosened or retrieved.

    Removal Methods

    • Break-up method
      • Rotating tip fragments clog
      • Clears path gradually
    • Hook method
      • Tip grabs object
      • Pulls it back out

    Cable Behavior

    • Smooth movement → no obstruction
    • Resistance → clog detected
    • Sudden release → blockage cleared

    Key Insight

    • Rotation = control mechanism
    • Resistance = feedback signal
    • Technique determines success

    Push vs Pull Technique When Using a Toilet Snake

    A toilet snake is not just about inserting and rotating; it requires precise control over when to push deeper and when to pull back. Most users fail because they push continuously, which can compact the clog or push it further into the pipe. Understanding the push-pull sequence ensures that the clog is either broken down or removed instead of relocated.

    The correct method involves advancing the cable carefully, engaging the clog through rotation, and then pulling back strategically. This sequence creates a controlled interaction with the blockage, allowing you to either extract it or fragment it effectively without worsening the situation.

    Push vs Pull Strategy

    • Push phase
      • Used to reach clog location
      • Apply gentle forward pressure
      • Stop when resistance increases
    • Rotate phase
      • Engage clog with tip
      • Maintain steady rotation
      • Avoid sudden force
    • Pull phase
      • Extract or loosen blockage
      • Withdraw slowly
      • Check for debris removal

    Common Errors

    • Continuous pushing without rotation
    • Pulling too quickly
    • Ignoring resistance signals

    Key Insight

    • Push to locate
    • Rotate to engage
    • Pull to remove
    • Sequence determines success

    How to Unclog a Toilet with a Snake (Step-by-Step)

    How to Unclog a Toilet with a Snake

    Using a toilet snake correctly requires controlled insertion and rotation. Rushing or forcing the cable can reduce effectiveness or damage the toilet.

    Start by inserting the cable slowly into the drain opening while keeping it aligned with the toilet’s trap. Once resistance is felt, begin rotating the handle to engage the clog.

    Step-by-Step Process

    1. Insert snake into toilet drain
    2. Feed cable slowly into pipe
    3. Rotate handle when resistance is felt
    4. Continue pushing gently
    5. Break or hook the clog
    6. Pull cable back slowly
    7. Test flush

    Technique Tips

    • Do not force cable
    • Maintain steady rotation
    • Pull back carefully

    Key Insight

    • Controlled movement = effective unclogging
    • Force without control can worsen blockage

    Toilet Snake Decision System (Resistance-Based Guide)

    Using a toilet snake effectively depends on interpreting feedback from the cable rather than forcing it blindly. The most important signal you receive is resistance, which tells you whether the cable has reached the clog, missed it, or is pushing against the pipe. Without understanding this feedback, users often apply incorrect force and either fail to clear the blockage or make it worse.

    This decision system allows you to respond correctly based on what the snake is telling you. Instead of guessing, you follow a logical sequence that adjusts technique in real time. This improves success rate, reduces effort, and prevents damage to the toilet or plumbing system.

    Resistance-Based Decision Flow

    • Light resistance
      • Likely soft clog
      • Continue slow rotation
      • Allow cable to break through
    • Hard stop
      • Possible solid obstruction
      • Stop pushing immediately
      • Rotate gently to engage or hook
    • Cable spins freely
      • Missed clog
      • Pull back slightly
      • Reinsert at different angle
    • Cable gets stuck
      • Do not force
      • Rotate in reverse slowly
      • Pull back carefully

    Key Insight

    • Resistance = real-time diagnostic tool
    • Correct response prevents failure
    • Control matters more than force

    How Far Should You Insert the Snake?

    Insertion depth is important for reaching the clog without damaging the plumbing. Most toilet augers are designed to reach through the trap and into the initial section of the drain pipe.

    Pushing too little may not reach the clog, while pushing too far can reduce control or risk pushing the blockage deeper.

    Insertion Guidelines

    • Insert until resistance is felt
    • Do not force past obstruction
    • Use rotation to advance

    Signs You’ve Reached the Clog

    • Increased resistance
    • Slower cable movement
    • Feedback during rotation

    Key Insight

    • Depth is determined by resistance
    • Control matters more than reach

    How to Unclog a Toilet with a Snake

    Why Your Toilet Snake Is Not Working

    If a toilet snake fails, the issue is usually related to technique or clog type. Understanding why it is not working helps adjust the approach.

    Common problems include incorrect angle, lack of rotation, or encountering a blockage that requires different handling.

    Common Issues

    • Not rotating cable properly
    • Missing clog location
    • Using too much force
    • Blockage too deep

    How to Fix

    • Reposition snake
    • Adjust rotation speed
    • Apply consistent pressure

    Key Insight

    • Snake failure = technique issue in most cases

    What Resistance Means When Using a Toilet Snake

    Resistance is the most important feedback signal when using a toilet snake, and understanding it allows you to identify the type of clog and adjust your approach. Many users ignore these signals and continue applying force, which often leads to ineffective results or pushing the blockage deeper.

    Different types of resistance indicate different conditions inside the pipe. Recognizing these patterns transforms the process from guesswork into a controlled mechanical operation, improving both efficiency and safety.

    Resistance Interpretation

    • Smooth movement
      • No obstruction present
      • Continue advancing cable
    • Soft resistance
      • Paper or waste clog
      • Use rotation to break apart
    • Firm resistance
      • Dense or compact clog
      • Apply steady rotation
      • Avoid pushing forcefully
    • Sharp stop
      • Possible foreign object
      • Switch to hook method

    What to Do Based on Feedback

    • Adjust speed of rotation
    • Change insertion angle
    • Switch between break and retrieve method

    Key Insight

    • Resistance reveals clog type
    • Interpretation improves accuracy
    • Proper response prevents deeper blockage

    How to Handle Different Types of Clogs with a Snake

    Different clogs respond differently to mechanical removal. Adjusting technique based on clog type improves effectiveness.

    Soft clogs break easily, while solid objects require hooking and removal.

    Clog Types

    • Soft clog
      • Break apart easily
      • Requires light rotation
    • Solid clog
      • Needs hooking
      • Pull out carefully
    • Deep clog
      • Requires patience
      • Multiple attempts needed

    Key Insight

    • Match method to clog type
    • Avoid pushing blockage deeper

    What Mistakes Should You Avoid When Using a Snake?

    Mistakes reduce efficiency and can damage the toilet. Avoiding these errors ensures safe and effective use.

    Many users apply excessive force instead of focusing on technique.

    Common Mistakes

    • Forcing cable aggressively
    • Skipping rotation
    • Inserting too quickly
    • Ignoring resistance

    Correct Approach

    • Use controlled motion
    • Pay attention to feedback
    • Maintain steady rotation

    Key Insight

    • Precision > force

    Can a Toilet Snake Damage Your Toilet?

    Toilet snakes are safe when used properly, but incorrect handling can cause damage, especially to porcelain surfaces.

    Using excessive force or incorrect angles may scratch the bowl or damage internal components.

    Risks

    • Scratching porcelain
    • Damaging trap
    • Pushing clog deeper

    Safety Tips

    • Use protective sleeve
    • Avoid excessive force
    • Keep cable aligned

    Key Insight

    • Proper handling eliminates most risks

    What to Do After Removing the Clog

    How to Unclog a Toilet with a Snake

    After removing the clog, ensure the toilet is functioning normally and clean the tool properly.

    Flushing multiple times confirms that the blockage is fully cleared.

    Post-Unclog Steps

    • Flush toilet multiple times
    • Clean snake thoroughly
    • Check for recurring issues

    Prevention

    • Avoid flushing solid objects
    • Use proper amount of paper
    • Monitor drainage

    Key Insight

    • Proper follow-up prevents repeat issues

    Real-World Case Study: Snake vs Plunger Failure Recovery

    A user experienced a persistent toilet clog and initially attempted to resolve it using a standard plunger. Despite multiple plunging cycles with increased force, there was no noticeable improvement. The water level fluctuated slightly, but the blockage remained intact because the clog was located deeper within the pipe, beyond the reach of pressure-based tools. This is a common scenario where users misjudge the type and location of the clog, leading to ineffective efforts.

    The turning point came when the user switched to a toilet snake (auger), recognizing that the issue required direct mechanical interaction rather than pressure. By inserting the cable slowly and using controlled rotation, the snake was able to reach the obstruction and either break it apart or hook onto it. Within a few careful movements, the blockage was cleared and normal water flow was restored. This shift demonstrated that tool selection, combined with proper technique, is critical for solving deeper plumbing issues.

    Breakdown of the Scenario

    • Initial attempt → plunger with repeated force
    • Core problem → clog positioned deep in drain
    • Limitation → plunger unable to transfer pressure effectively
    • Adjustment → switched to toilet snake
    • Technique → controlled insertion + steady rotation
    • Outcome → clog removed, flow restored

    What Changed in the Successful Attempt

    • Tool changed from pressure-based to mechanical
    • Cable reached exact clog location
    • Rotation applied targeted force
    • Removal replaced guesswork

    Key Takeaway

    • Plunger works only for surface or soft clogs
    • Snake is required for deep or solid blockages
    • Correct tool + correct method = immediate results

    Expert Insight

    Toilet snakes are considered the most reliable solution for deep or stubborn clogs because they physically interact with the obstruction rather than relying on pressure transfer. While plungers are effective for breaking up soft blockages near the surface, they lose effectiveness when the clog is located further down the pipe or is too dense to be moved by pressure alone. Understanding this distinction is essential for choosing the right approach.

    From a technical perspective, the auger provides controlled penetration into the blockage, allowing users to either fragment or retrieve the clog with precision. This eliminates the uncertainty associated with plunging and reduces the risk of compacting the blockage further. Experts emphasize that the success of unclogging depends more on correct tool selection and technique than on the amount of force applied.

    Expert Recommendations

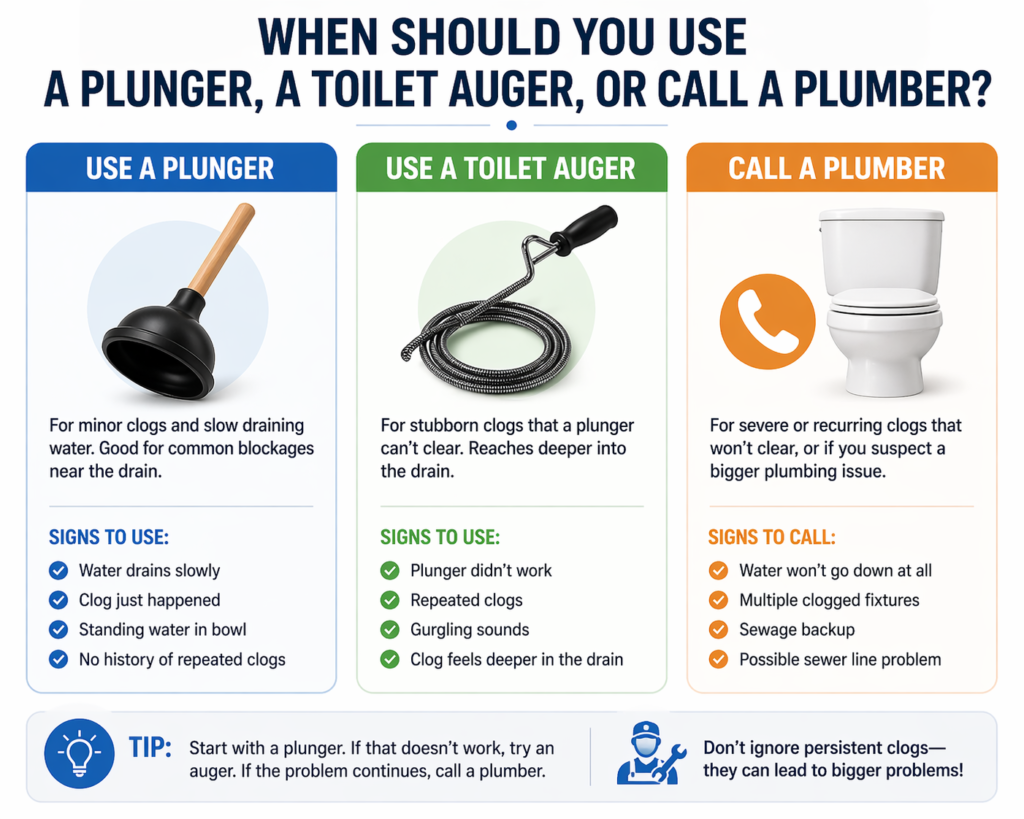
    • Start with a plunger for simple clogs
    • Switch to a snake if no progress is made
    • Use slow, controlled rotation instead of force
    • Pay attention to resistance as feedback
    • Avoid pushing clog deeper into the pipe

    Strategic Insight from Homeaholic

    • Pressure tools = quick fixes for shallow clogs
    • Mechanical tools = reliable solution for deep clogs
    • Decision-making is more important than effort

    Homeaholic recommends treating unclogging as a two-step system: begin with pressure-based methods for quick results, and transition to mechanical tools when depth or resistance indicates a more complex blockage. This approach minimizes effort, reduces risk, and ensures consistent success across different clog types.


    What to Do If a Toilet Snake Does Not Work (Escalation System)

    Although a toilet snake is highly effective, there are situations where it may not fully resolve the clog. Instead of repeating the same process, it is important to follow a structured escalation system that introduces new approaches based on the severity of the blockage.

    This system ensures that you move from simple fixes to more advanced solutions in a logical sequence. It prevents wasted effort and reduces the risk of damaging the plumbing system by overusing a single method.

    Escalation Steps on How to unclog a toilet with a snake

    • Step 1: Reattempt with adjusted angle
      • Reinsert snake
      • Target different position
    • Step 2: Repeat insertion cycles
      • Multiple controlled attempts
      • Break or loosen clog gradually
    • Step 3: Use extended auger or stronger tool
      • Reach deeper blockages
      • Apply more controlled force
    • Step 4: Switch to alternative methods
      • Hot water + soap
      • Professional-grade tools
    • Step 5: Call a plumber
      • For severe or recurring clogs

    Warning Signs

    • No change after repeated attempts
    • Recurring blockage
    • Strong resistance with no progress

    Key Insight

    • Escalation prevents frustration
    • Not all clogs are DIY-fixable
    • Knowing when to stop is part of expertise

    FAQ Section

    What is a toilet snake used for?

    To remove deep or stubborn clogs.

    Can a snake push clog deeper?

    Yes, if used incorrectly.

    Is a snake better than a plunger?

    For deep clogs, yes.

    How long does it take?

    Usually 5–10 minutes.


  • How to Unclog a Toilet with a Plunger (Step-by-Step Guide)

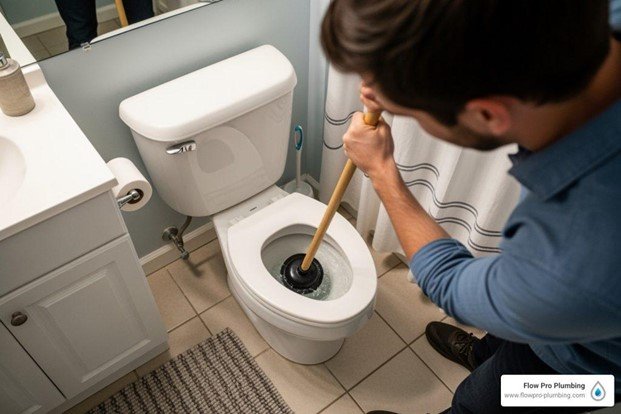
    To unclog a toilet with a plunger, use a flange plunger to create a tight seal over the drain, then apply steady push-pull pressure to dislodge the blockage. Correct technique, proper water level, and consistent force are essential for clearing the clog quickly and effectively.

    Toilet clogs are one of the most common household problems, and using a plunger is the fastest and most effective solution when done correctly. However, many people fail because they use the wrong plunger, apply incorrect pressure, or misunderstand how the mechanism works. This guide from Homeaholic explains the complete system so you can fix the issue properly on the first attempt.

    What Causes a Toilet to Clog?

    Toilet clogs occur when waste material, paper, or foreign objects block the flow of water through the drain pipe. The toilet system relies on gravity and water pressure to move waste through the trap, and any obstruction disrupts this process, leading to backup or slow drainage.

    Clogs are not all the same, and understanding the cause helps determine how easily they can be fixed. Some clogs are soft and easy to break apart, while others are dense or lodged deeper in the pipe, requiring more effort or different tools.

    Common Causes of Toilet Clogs

    • Excessive toilet paper buildup
    • Non-flushable items (wipes, tissues, hygiene products)
    • Low water flow or weak flush pressure
    • Hard waste accumulation
    • Foreign objects blocking the trap

    Key Insight

    • Soft clogs → easy to remove with plunger
    • Dense clogs → require stronger pressure
    • Deep clogs → may need alternative methods

    Understanding the type of clog allows you to apply the correct solution instead of using random force that may worsen the blockage.


    What Type of Plunger Should You Use?

    How to Unclog a Toilet with a Plunger

    Not all plungers are designed for toilets. Using the wrong type significantly reduces effectiveness and often leads to failure, even if the technique is correct.

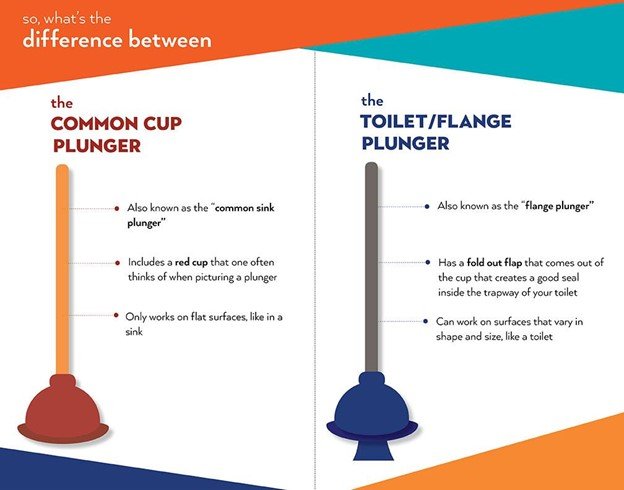
    The best tool for unclogging a toilet is a flange plunger, which includes an extended rubber flap that fits into the toilet drain opening. This design creates a stronger seal and allows better pressure transfer compared to flat cup plungers.

    Types of Plungers

    • Flange plunger
      • Designed specifically for toilets
      • Creates tight seal
      • Most effective for clogs
    • Cup plunger
      • Flat bottom design
      • Works better for sinks
      • Poor seal on toilets

    Why the Right Plunger Matters

    • Better seal = stronger pressure
    • Stronger pressure = faster unclogging
    • Poor seal = wasted effort

    Using a flange plunger ensures that all applied force is directed into the blockage rather than escaping around the edges.

    How Does a Plunger Actually Work?

    A plunger works by creating pressure changes inside the drain system. When you push down, it forces water into the pipe, and when you pull back, it creates suction. This alternating pressure loosens and dislodges the clog.

    The effectiveness of a plunger depends on maintaining a proper seal and using controlled force. Without a seal, pressure escapes, making plunging ineffective regardless of effort.

    Pressure Mechanism

    • Downward push → compresses water into pipe
    • Upward pull → creates suction
    • Repeated motion → loosens blockage

    Why Water Matters

    • Water transfers pressure better than air
    • Low water level reduces effectiveness
    • Proper water level improves force delivery

    Key Insight

    Plunging is not about force alone. It is about controlled pressure cycles that gradually break apart or shift the clog until water flow is restored.


    Ideal Water Level for Effective Plunging

    How to Unclog a Toilet with a Plunger

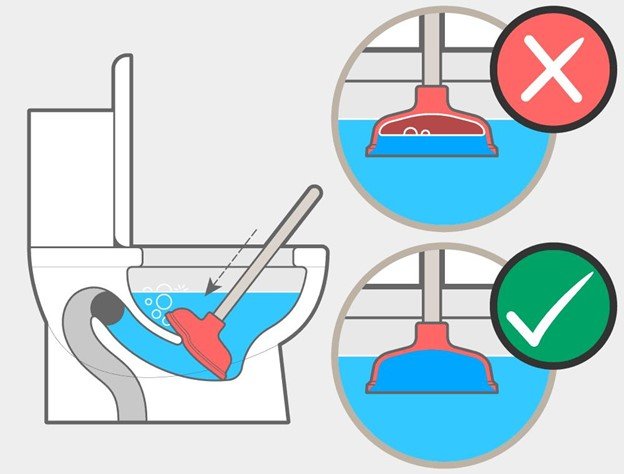
    Water level plays a critical role in how effectively a plunger works. Since plunging relies on pressure transfer, the presence of sufficient water ensures that force is directed into the clog rather than dissipating through air gaps. Without proper water coverage, even perfect technique becomes ineffective.

    Maintaining the correct water level ensures consistent pressure cycles and prevents unnecessary splashing or overflow. Adjusting water before plunging is a simple step that dramatically improves results and reduces effort required to clear the blockage.

    Water Level Guidelines

    • Too low
      • Plunger not fully submerged
      • Weak pressure transfer
    • Ideal level
      • Covers entire plunger head
      • Maximizes pressure efficiency
    • Too high
      • Risk of overflow
      • Reduce level before plunging

    Practical Adjustments

    • Add water if level is too low
    • Remove excess water if near overflow
    • Always ensure full rubber seal coverage

    Key Insight

    • Water = pressure medium
    • Correct level = stronger unclogging force
    • Small adjustment → major performance gain

    How to Unclog a Toilet with a Plunger (Step-by-Step)

    Using a plunger correctly requires following a specific sequence to maximize effectiveness. Skipping steps or rushing the process often leads to failure.

    Start by positioning the plunger correctly and ensuring there is enough water in the bowl to cover the rubber head. This allows proper pressure transfer during plunging.

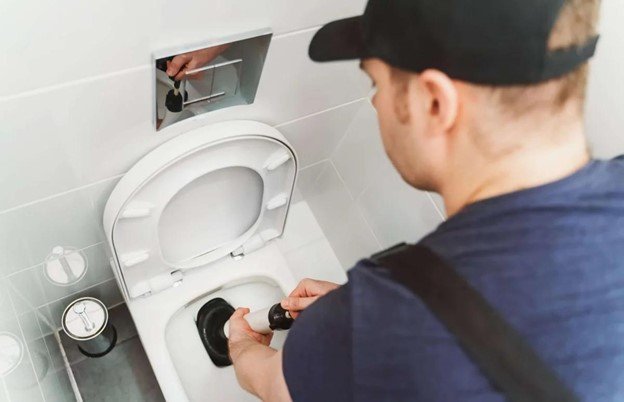
    Step-by-Step Process

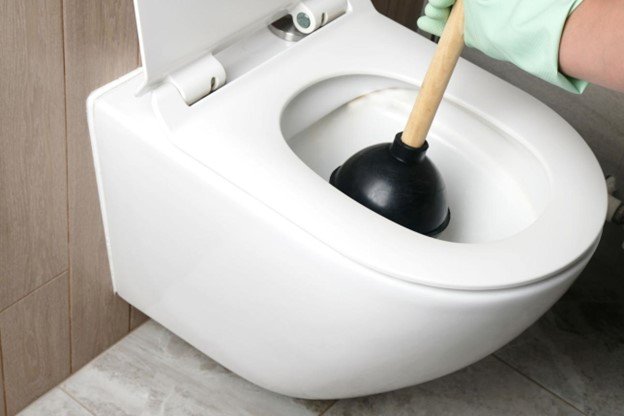
    1. Place plunger over drain opening
    2. Ensure full seal with no air gaps
    3. Push down slowly to remove trapped air
    4. Begin firm push-pull motion
    5. Repeat 10–15 times consistently
    6. Test flush to check clearance

    Technique Tips

    • Start gently to avoid splashing
    • Maintain vertical alignment
    • Use steady rhythm, not random force

    Key Insight

    Consistency matters more than strength. Proper technique ensures that each movement contributes to clearing the clog instead of wasting effort.


    Toilet Unclogging Decision System (Fast Diagnosis Flow)

    How to Unclog a Toilet with a Plunger

    Unclogging success depends on making the right decision at the right moment rather than repeating the same action blindly. Most users continue plunging without diagnosing what is actually happening inside the drain system. A simple decision flow helps identify whether to continue, adjust technique, or switch methods, saving time and preventing overflow or further blockage.

    This system works by observing water behavior, resistance, and response to pressure. Each outcome signals a different action, allowing you to move forward logically instead of guessing. Following a structured approach increases success rate and avoids unnecessary effort or damage.

    Fast Decision Flow

    • If water level is rising
      • Stop immediately
      • Wait for level to stabilize before continuing
    • If no movement occurs
      • Check plunger seal
      • Reposition and restart
    • If water drains slowly
      • Continue plunging in cycles
      • Clog is loosening
    • If no success after multiple attempts
      • Switch to auger or alternative method

    Key Insight

    • Observation → decision → action
    • Random plunging reduces effectiveness
    • A clear system improves success speed

    Why Your Plunger Is Not Working

    If a plunger fails, the issue is usually related to technique, tool selection, or clog type. Identifying the problem helps correct the approach.

    Most failures occur due to poor sealing, insufficient pressure, or attempting to clear a clog that is too deep for a plunger to reach.

    Common Reasons for Failure

    • Using wrong plunger type
    • Incomplete seal around drain
    • Not enough water in bowl
    • Weak or inconsistent plunging
    • Deep or solid blockage

    How to Fix It

    • Switch to flange plunger
    • Adjust water level
    • Improve sealing position
    • Apply steady pressure cycles

    Key Insight

    Plunger failure is rarely due to the tool itself. It is usually a result of incorrect usage or unsuitable conditions.

    How to Fix Different Types of Toilet Clogs

    Different clogs require different approaches. Understanding the type of blockage helps you adjust technique for better results.

    Soft clogs respond quickly to plunging, while dense or deep clogs require more time and stronger pressure.

    Clog Types and Solutions

    • Soft clog
      • Caused by paper or waste
      • Easy to break apart
      • Requires light plunging
    • Dense clog
      • Thick buildup
      • Requires stronger pressure
      • Multiple cycles needed
    • Deep clog
      • Located beyond trap
      • Plunger less effective
      • May need auger

    Key Insight

    Matching the technique to the clog type improves efficiency and prevents unnecessary effort.


    What Mistakes Should You Avoid When Plunging?

    Common mistakes reduce effectiveness and can make the clog worse. Avoiding these errors ensures faster results.

    Many users focus on force instead of technique, leading to splashing, poor sealing, and ineffective pressure application.

    Common Mistakes

    • Using cup plunger instead of flange
    • Applying random force
    • Not maintaining seal
    • Plunging too aggressively
    • Ignoring water level

    Correct Approach

    • Focus on seal first
    • Use controlled motion
    • Maintain consistency

    Key Insight

    Precision is more important than strength when using a plunger.

    When Should You Stop and Try Another Method?

    Plunging is effective for most clogs, but not all. Knowing when to stop prevents damage and saves time.

    If multiple attempts fail, the blockage may be too deep or solid for a plunger to handle.

    Signs to Stop

    • No improvement after several cycles
    • Water level remains unchanged
    • Repeated clogging

    Alternative Methods

    • Toilet auger
    • Hot water and soap
    • Professional plumbing

    Key Insight

    Continuing ineffective plunging wastes effort and may worsen the blockage.

    When a Plunger Will Not Work (Know the Limit)

    A plunger is highly effective for most soft clogs, but it has clear limitations. Continuing to plunge when the blockage cannot be moved wastes time and may worsen the situation by compacting the clog further into the pipe. Recognizing these limits helps you switch to the correct tool at the right time.

    Understanding when a plunger will fail is just as important as knowing how to use it. Some blockages require mechanical removal or professional intervention, and identifying them early prevents unnecessary effort and potential plumbing damage.

    Situations Where Plungers Fail

    • Hard objects lodged in trap
    • Deep clogs beyond reach
    • Grease or solid buildup
    • Repeated clogging without change

    What to Do Instead

    • Use a toilet auger for deeper reach
    • Apply alternative methods (soap + hot water)
    • Call a plumber for severe blockage

    Key Insight

    • Plunger = pressure tool, not removal tool
    • Some clogs require mechanical extraction
    • Knowing limits saves time and prevents damage

    Can Plunging Damage Your Toilet?

    Plunging is generally safe, but excessive force or incorrect technique can cause issues.

    Applying too much pressure or using improper tools may damage seals or create splashes.

    Potential Risks

    • Splashing contaminated water
    • Damaging toilet seal
    • Cracking porcelain (rare)

    Safe Practices

    • Use moderate force
    • Maintain proper alignment
    • Avoid sudden aggressive pushes

    Key Insight

    Controlled technique ensures safety and effectiveness.


    What to Do After Successfully Unclogging

    Once the clog is cleared, proper follow-up ensures that the problem does not return.

    Flush the toilet to confirm normal flow and check for any remaining resistance.

    Post-Unclog Steps

    • Flush multiple times
    • Clean plunger properly
    • Monitor drainage
    • Avoid excessive paper use

    Prevention Tips

    • Use less toilet paper
    • Avoid flushing non-flushable items
    • Maintain regular cleaning

    Key Insight

    Prevention is easier than fixing repeated clogs.

    Toilet Clog Prevention System (Simple Daily Routine)

    Preventing clogs is far easier than fixing them repeatedly. Most toilet blockages are caused by improper usage habits rather than system failure. A structured prevention routine reduces clog frequency and keeps the plumbing system functioning smoothly.
    By following a few consistent habits, you can significantly reduce the chances of future clogs. Prevention focuses on controlling what enters the system and maintaining proper flushing behavior over time.

    Daily Prevention Rules

    • Use moderate amounts of toilet paper
    • Avoid flushing non-flushable items
    • Flush immediately after use

    Weekly Maintenance

    • Flush with hot water occasionally
    • Use mild cleaning agents
    • Monitor drainage speed

    Long-Term Habits

    • Educate household members
    • Avoid overloading the toilet
    • Address slow drainage early

    Key Insight

    • Most clogs are preventable
    • Consistency reduces long-term issues
    • Prevention = less effort + lower risk

    Real-World Case Study: Failed vs Correct Plunging

    A user attempted to unclog a toilet using a standard cup plunger and applied aggressive force repeatedly, expecting the blockage to clear quickly. Despite multiple attempts, the clog remained unchanged, and water levels fluctuated without any real progress. The issue was not the severity of the clog but the incorrect approach, specifically the inability to create a proper seal and generate effective pressure inside the drain system.

    The user initially relied on strength rather than technique, which caused pressure to escape around the edges of the plunger. After switching to a flange plunger and applying controlled push-pull motion, the situation changed immediately. Within a few consistent cycles, the clog loosened and cleared, restoring normal water flow. This shift demonstrated that proper sealing and pressure control are far more important than force when using a plunger.

    Breakdown of the Scenario

    • Initial attempt → cup plunger + aggressive force
    • Core problem → poor seal, pressure leakage
    • Technical failure → ineffective push-pull cycle
    • Adjustment → switched to flange plunger
    • Technique change → controlled, rhythmic pressure
    • Outcome → clog cleared within minutes

    What Changed in the Successful Attempt

    • Seal was fully secured over drain opening
    • Air was eliminated before pressure cycles began
    • Push-pull motion created alternating pressure
    • Consistency replaced random force

    Key Takeaway

    • Force without seal = no pressure
    • Pressure without consistency = no results
    • Technique is the primary success factor

    Expert Insight

    Most toilet unclogging failures are not caused by difficult clogs but by incorrect technique and misunderstanding of how plunging works. The plunger is a pressure-based tool, not a force-based one. Without a proper seal, even the strongest effort becomes ineffective because the pressure escapes instead of being directed into the blockage.

    From a practical standpoint, the success of plunging depends on three critical variables: seal quality, pressure control, and repetition. When these elements are aligned, even stubborn clogs can be cleared efficiently. When they are not, even simple clogs may persist despite repeated attempts.

    Expert Recommendations

    • Always use a flange plunger for toilets
    • Ensure full seal before applying force
    • Start slowly to remove trapped air
    • Use steady push-pull cycles instead of random force
    • Maintain consistent rhythm for maximum pressure effect

    Strategic Insight from Homeaholic

    • Technique determines outcome more than tool strength
    • Proper method reduces time and effort significantly
    • Understanding pressure mechanics improves success rate

    Homeaholic recommends treating plunging as a controlled mechanical process rather than a physical effort. When users shift from force to technique, they not only solve the immediate problem but also gain a repeatable system for handling future clogs efficiently and confidently.

    How Long Should It Take to Unclog a Toilet?

    Time expectations help determine whether your method is working or if adjustments are needed. Many users either give up too early or continue plunging for too long without results. Understanding typical timeframes provides a benchmark for evaluating progress.

    Most toilet clogs can be cleared within minutes when the correct technique is applied. If the process takes significantly longer, it usually indicates either incorrect technique or a more complex blockage that requires a different approach.

    Time Expectations

    • Simple clog
      • 1–2 minutes
      • clears quickly with proper technique
    • Moderate clog
      • 3–5 minutes
      • requires repeated cycles
    • Difficult clog
      • 5–10+ minutes
      • may need alternative method

    Warning Signs

    • no change after 10 minutes
    • repeated water backup
    • clog returns quickly

    Key Insight

    • Time = diagnostic tool
    • Longer time = deeper problem
    • Use time to decide next step

    FAQ Section

    Why won’t my toilet unclog with a plunger?

    Usually due to poor seal or incorrect technique.

    What is the best plunger for toilets?

    Flange plunger.

    How long should I plunge?

    10–20 seconds per cycle.

    Can plunging damage pipes?

    Not if done correctly.


  • How to Fix a Clogged Garbage Disposal (Step-by-Step Guide)

    A clogged garbage disposal can be fixed by turning off power, identifying whether the issue is a clog, jam, or electrical fault, clearing blockages, manually rotating the motor using an Allen wrench, and resetting the unit. The correct fix depends on accurate diagnosis, not guesswork. This article provides an in-depth guide on how to fix a clogged garbage disposal, with all its various ways, techniques and technical know-how on how to execute them effortlessly.

    Garbage disposal issues often appear similar but have different causes. Many homeowners assume a clog when the real issue is a jammed impeller or a tripped safety reset. This guide from Homeaholic explains each scenario in detail so you can fix the problem safely, quickly, and correctly without damaging the unit.

    How Garbage Disposal Works (And Why It Gets Clogged)

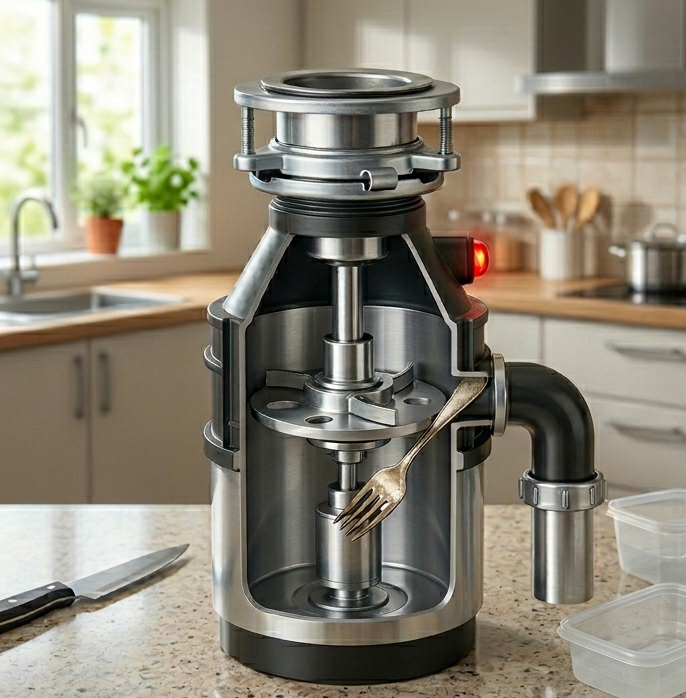
    Garbage disposal is not a blender. It does not use sharp blades. Instead, it uses rotating impellers mounted on a spinning plate to push food waste against a grinding ring.

    Internal Components Explained:

    Impellers: Push waste outward using centrifugal force
    Grinding Ring: Breaks food into small particles
    Motor: Powers rotation
    Drain Outlet: Flushes waste into pipes

    Why Clogs Happen Internally:

    Clogs occur when:

    • food is not broken down completely
    • grease coats internal surfaces
    • waste accumulates faster than water can flush

    Mechanical Insight:

    If waste cannot exit quickly, it builds up inside the chamber or pipe, creating resistance that leads to clogs or jams.


    What Causes a Garbage Disposal to Clog?

    Garbage disposals clog when waste accumulates faster than it can be broken down and flushed through the drain system. The grinding mechanism is designed for soft food particles, not heavy or sticky materials that restrict flow.

    Common Causes:

    • Grease and oil buildup that solidifies inside pipes
    • Fibrous foods such as celery and corn husks that wrap around components
    • Starchy foods like rice and pasta that expand with water
    • Large food chunks that overload the grinding chamber
    • Foreign objects such as utensils or bones

    Deeper Insight:

    Grease is the leading cause globally because it sticks to pipe walls and traps other debris. Over time, this forms a thick blockage that restricts water flow and leads to repeated clogs. Understanding the cause helps prevent recurrence rather than just treating symptoms.

    Types of Garbage Disposal Clogs (Light, Moderate, Severe)

    Not all clogs are the same. Understanding severity helps choose the correct solution.

    Light Clogs:

    • slow draining
    • minor food buildup
    • easy to fix with flushing or plunging

    Moderate Clogs:

    • water backup
    • partial blockage
    • requires P-trap cleaning or manual removal

    Severe Clogs:

    • complete blockage
    • disposal not functioning
    • may require disassembly or professional help

    Key Insight:

    Using a light fix on a severe clog often makes the problem worse by pushing debris deeper into pipes.


    How Do You Identify a Clog vs a Jam?

    Correct diagnosis is the most important step in fixing a garbage disposal. A clog and a jam require completely different approaches, and using the wrong method can worsen the problem.

    Clog (Drain Issue):

    • Water drains slowly or backs up
    • Disposal may still run normally
    • No unusual mechanical noise

    Jam (Motor Issue):

    • Disposal hums but does not spin
    • Grinding sound is absent
    • Motor struggles or stops

    Advanced Diagnosis Tip:

    If water stands in the sink, the issue is usually in the drain system. If the disposal hums without movement, the impeller is stuck. Identifying this difference ensures you apply the correct fix immediately.

    Garbage Disposal Troubleshooting Flow (Decision Tree)

    Use this system to diagnose issues quickly.

    Step 1: Turn On Disposal

    • No sound → electrical issue
    • Humming → jam
    • Normal sound but water backup → clog

    Step 2: Check Water Flow

    • Slow drain → partial clog
    • No drain → full blockage

    Step 3: Apply Correct Fix

    SymptomCauseAction
    No powerElectricalReset
    HummingJamAllen wrench
    Slow drainClogPlunger
    Full blockagePipe clogClean P-trap

    Insight:

    This structured approach prevents unnecessary repairs and reduces risk of damage.

    What Safety Steps Should You Take First?

    Safety is critical when working with garbage disposals because they involve electrical components and sharp internal parts.

    Essential Safety Steps:

    1. Turn off the power from the wall switch
    2. Unplug the unit or switch off the circuit breaker
    3. Never insert your hand into the disposal
    4. Use tools like pliers or tongs only

    Safety Insight:

    Even when switched off, disposals can accidentally activate if power is restored. Treat every repair as a live hazard until fully disconnected. This prevents serious injuries and ensures safe troubleshooting.


    How to Fix a Clogged Garbage Disposal Step-by-Step

    How to Fix a Clogged Garbage Disposal

    Fixing a clog requires a systematic approach to avoid pushing debris deeper into the system.

    Step 1: Turn Off Power

    Always disconnect electricity before starting any repair.

    Step 2: Inspect the Disposal

    Use a flashlight to check for visible obstructions such as food buildup or foreign objects.

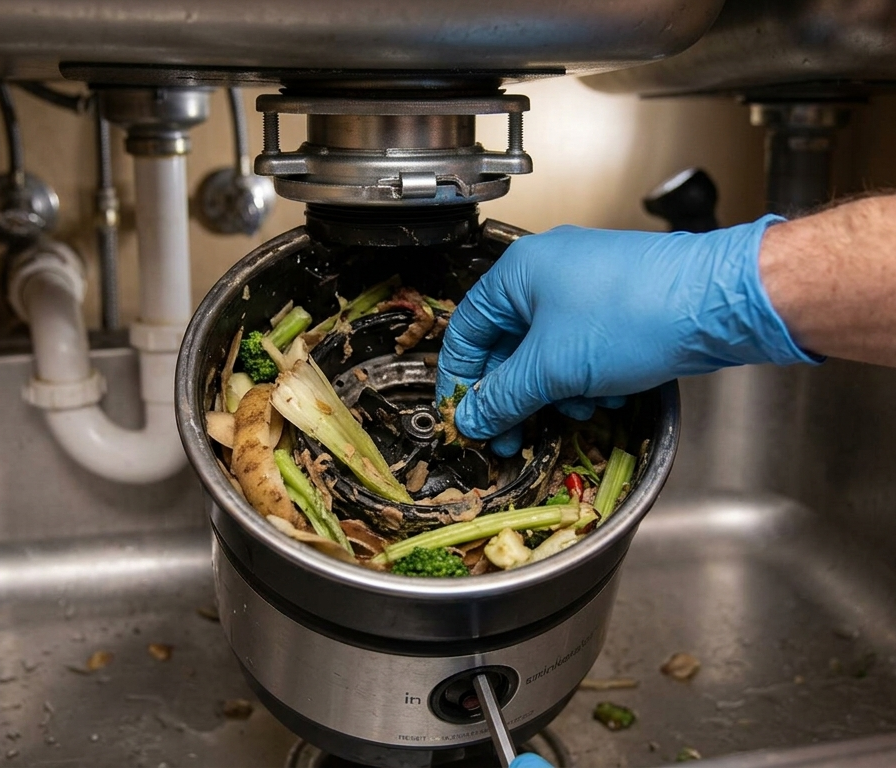
    Step 3: Remove Debris

    Use pliers or tongs to safely remove any blockage. Avoid forcing objects deeper.

    Step 4: Flush with Water

    Run warm water to loosen grease and smaller particles.

    Step 5: Use a Plunger

    Apply steady pressure to dislodge the clog from the drain.

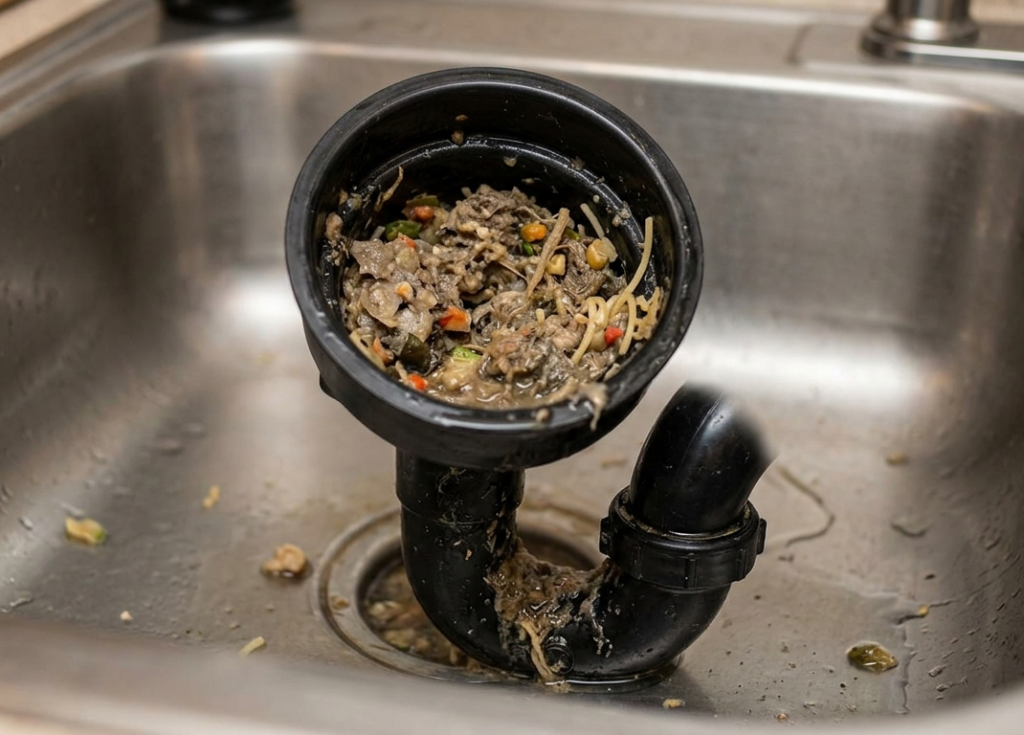
    Step 6: Clean the P-Trap

    Remove and clean the curved pipe under the sink to clear deeper blockages.

    Process Insight:

    Working step-by-step prevents damage and ensures the clog is fully removed instead of partially shifted. Most clogs resolve within these steps when performed correctly.

    Quick Fix vs Permanent Fix: What Should You Do?

    Not all fixes are equal.

    Quick Fix:

    • plunging
    • flushing with water
    • temporary removal of debris

    Permanent Fix:

    • cleaning internal chamber
    • removing grease buildup
    • changing usage habits

    Decision Rule:

    If clog repeats → use permanent fix
    If clog is rare → quick fix is enough

    How to Fix a Garbage Disposal That Is Humming

    A humming disposal indicates that the motor is receiving power but cannot rotate due to a jam.

    Step-by-Step Fix:

    Step 1: Turn Off Power

    Always begin with complete power disconnection.

    Step 2: Insert Allen Wrench

    Locate the hex socket underneath the disposal unit.

    Step 3: Rotate the Motor

    Turn the wrench back and forth to loosen the jammed impeller.

    Step 4: Remove Internal Blockage

    Check inside the chamber and remove any stuck debris.

    Step 5: Restore Power and Test

    Reconnect power and run the unit to confirm normal operation.

    Mechanical Insight:

    Manual rotation releases pressure inside the motor and frees stuck components without causing damage, making it the safest fix for jams.


    How to Reset a Garbage Disposal

    Clogged Garbage Disposal

    Garbage disposals include a built-in reset mechanism that shuts off power when the motor overheats or jams.

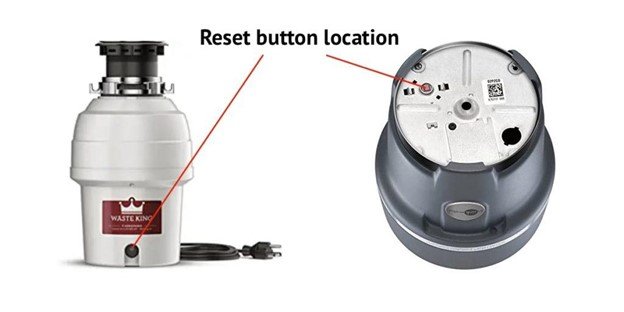
    Reset Steps:

    1. Turn off power
    2. Locate the red reset button underneath
    3. Press until it clicks
    4. Restore power

    When Reset Works:

    • After clearing jams
    • After overheating events
    • After electrical interruptions

    Important Note:

    If the reset button trips repeatedly, the issue may be internal damage or motor failure, requiring replacement.

    How to Clear a Drain Connected to the Disposal

    Sometimes the disposal itself is functional, but the drain line is clogged.

    Signs of Drain Blockage:

    • Standing water in sink
    • Disposal runs normally
    • No unusual sounds

    Fix Methods:

    • Use a plunger
    • Clean the P-trap
    • Use a drain snake for deeper clogs

    Important Insight:

    Avoid chemical cleaners as they damage internal components and seals. Mechanical cleaning methods are safer and more effective.


    How Garbage Disposal Clogs Affect Your Sink Drain System

    How to Fix a Clogged Garbage Disposal

    The disposal is connected directly to your sink’s plumbing system, which includes the P-trap and main drain pipe.

    How Blockages Spread:

    • waste exits disposal into P-trap
    • grease sticks to pipe walls
    • debris accumulates behind grease
    • full blockage forms

    Resulting Problems:

    • slow drainage
    • foul odors
    • water backup

    Critical Insight:

    Many “disposal clogs” are actually pipe clogs located beyond the unit.

    What Tools Do You Need for Repair?

    Using the correct tools improves safety and efficiency.

    Essential Tools:

    • Allen wrench for motor rotation
    • Pliers or tongs for debris removal
    • Plunger for clogs
    • Flashlight for inspection
    • Screwdriver for disassembly

    Additional Tools:

    • Drain snake for deeper clogs
    • Bucket for P-trap cleaning
    • Gloves for protection

    Tool Insight:

    Most repairs can be completed with basic tools found in a typical household toolkit.

    When Should You Replace Instead of Repair?

    Not all garbage disposals are worth repairing.

    Replace if:

    • Motor does not respond after reset
    • Frequent clogs occur
    • Unit is over 10 years old
    • Water leaks from bottom

    Cost Insight:

    Replacing an old unit is often more cost-effective than repeated repairs, especially when efficiency and reliability are compromised.

    Cost to Fix a Clogged Garbage Disposal (DIY vs Plumber)

    Understanding cost helps make the right decision.

    DIY Cost:

    • tools: $10–$50
    • time: 30–60 minutes

    Professional Cost:

    • plumber visit: $100–$300
    • replacement: $200–$600+

    Cost Insight:

    Simple clogs are best handled DIY. Complex issues justify professional repair.

    Common Mistakes to Avoid

    Avoiding mistakes ensures successful repair.

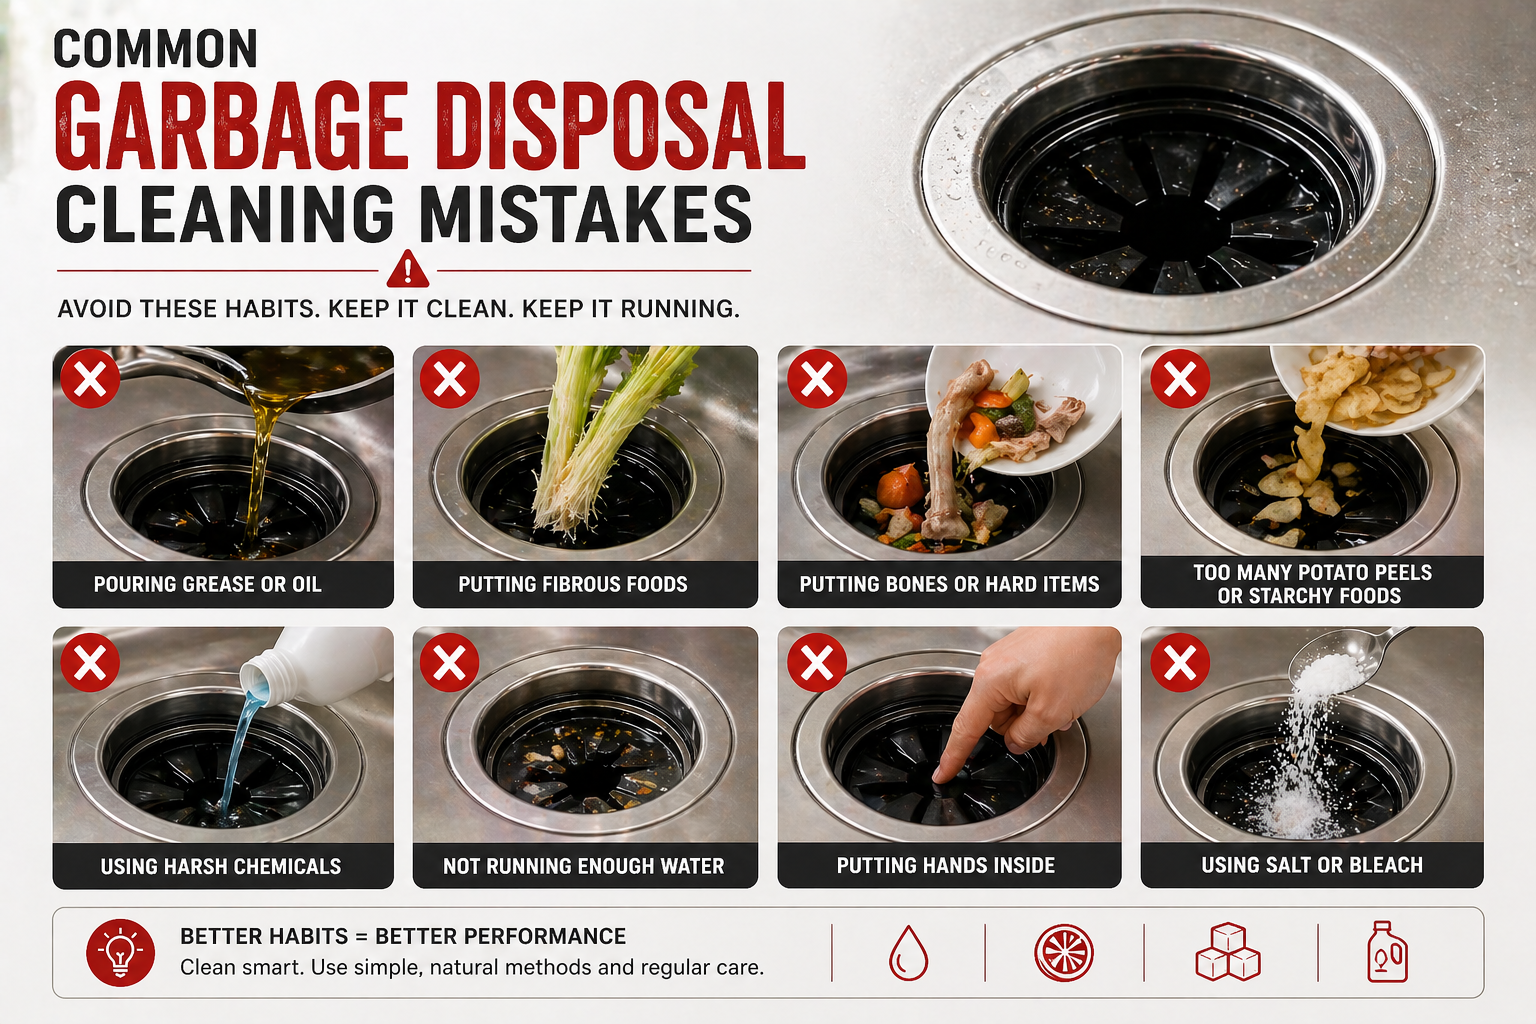
    Common Errors:

    • Ignoring power safety
    • Using chemical cleaners
    • Forcing jammed components
    • Misdiagnosing the problem

    Key Rule:

    Always identify the cause before applying a solution. Random fixes often worsen the issue.

    When You Should NOT Attempt DIY Repair

    DIY is not always safe or effective.

    Avoid DIY If:

    • electrical wiring is damaged
    • disposal leaks from bottom
    • motor does not respond
    • unit overheats repeatedly

    Safety Insight:

    Attempting complex repairs without expertise can cause injury or further damage.


    How Weight and Waste Type Affect Disposal Performance

    Clogged Garbage Disposal

    Garbage disposals are designed for specific types of waste.

    High-Risk Waste:

    • Grease and oils
    • Bones
    • Fibrous vegetables

    Safe Waste:

    • Soft food scraps
    • Small leftovers

    Insight:

    Proper usage reduces strain on the motor and prevents frequent clogs.

    How to Prevent Future Clogs

    Prevention is more effective than repair.

    Prevention Tips:

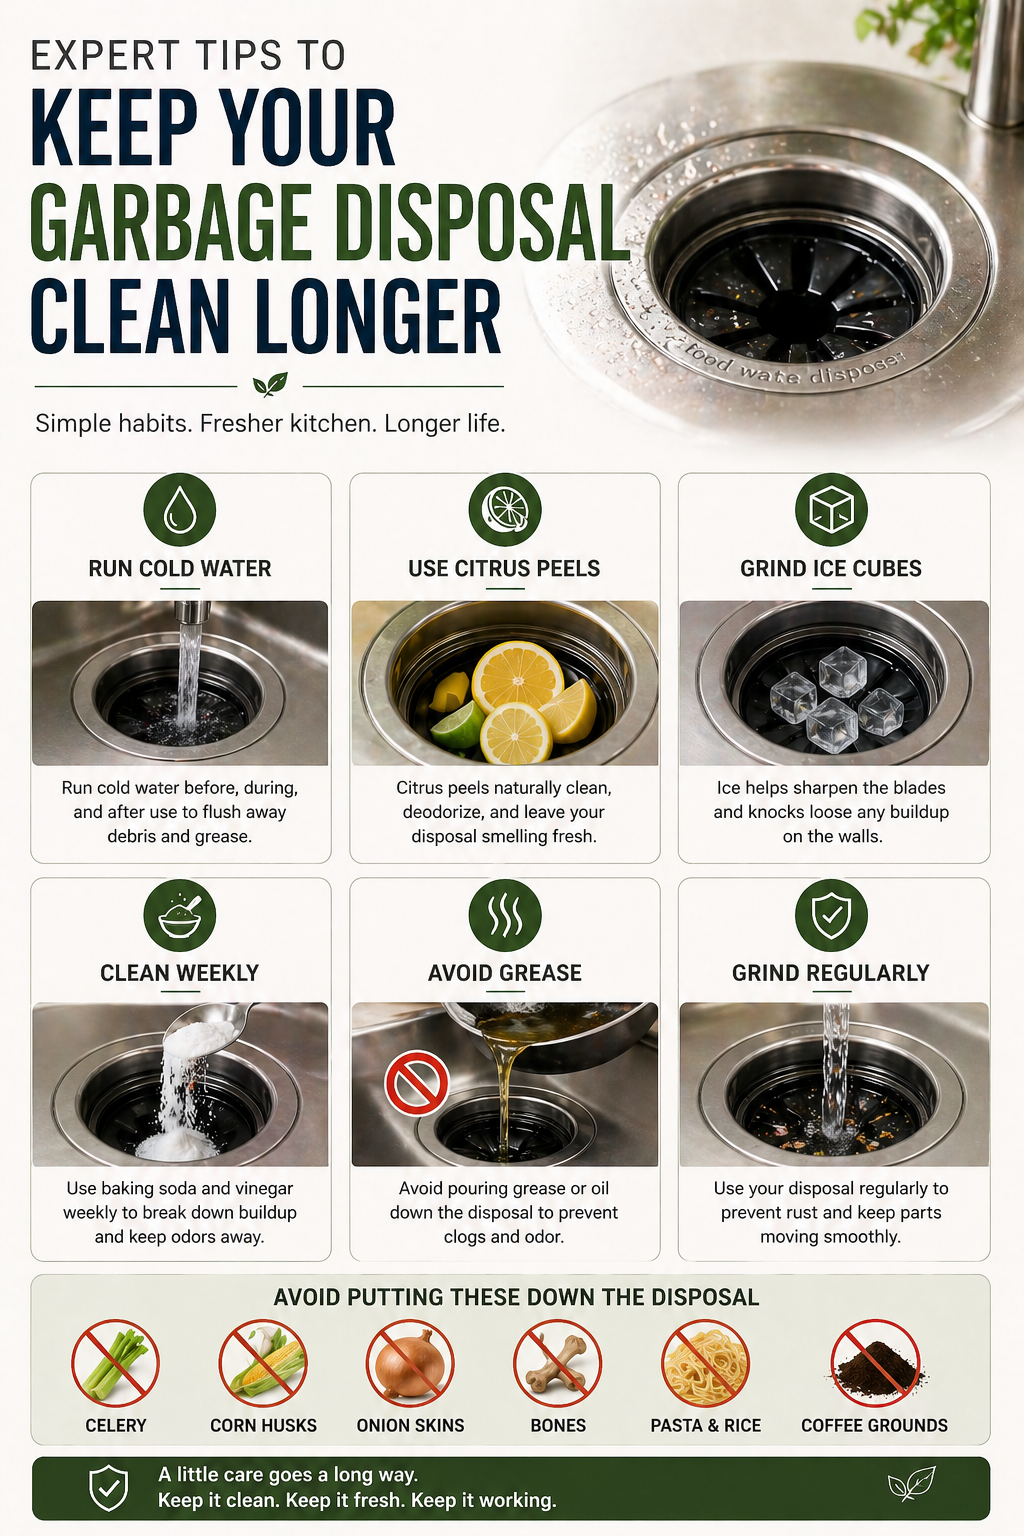
    • Run cold water during use
    • Avoid grease disposal
    • Cut waste into smaller pieces
    • Clean regularly

    Maintenance Routine:

    • Weekly flushing
    • Occasional baking soda cleaning
    • Regular inspection

    Insight:

    Consistent habits significantly extend disposal lifespan.

    Advanced Garbage Disposal Maintenance System

    Preventing clogs requires a consistent system, not occasional cleaning.

    Daily Usage Rules:

    • always run cold water during operation
    • avoid dumping grease
    • feed waste gradually

    Weekly Maintenance:

    • flush with water for 30–60 seconds
    • grind small ice cubes to clean chamber

    Monthly Cleaning:

    • use baking soda and vinegar
    • rinse thoroughly

    Food Waste Guide:

    Avoid:

    • grease
    • bones
    • fibrous foods

    Safe:

    • soft scraps
    • small leftovers

    Key Insight:

    Proper maintenance reduces clog risk by over 70%.


    Real-World Case Study: Repeated Clog Issue

    Clogged Garbage Disposal

    A household experienced constant clogs due to improper usage.

    Problem:

    • Grease buildup
    • Overloading disposal

    Solution:

    • Deep cleaning
    • Behavior change

    Result:

    • No clogs for 6 months
    • Improved efficiency

    DIY vs Professional Repair

    DIY:

    • Cost-effective
    • Suitable for minor issues

    Professional:

    • Required for complex problems
    • Ensures safety

    Recommendation:

    Start with DIY. Call a professional if the issue persists.

    Garbage Disposal Troubleshooting Decision Guide

    SymptomCauseSolution
    HummingJamAllen wrench
    No powerElectricalReset
    Slow drainClogPlunger
    LeakSeal issueReplace

    Expert Insight: Why Most Fixes Fail

    Most failures occur due to incorrect diagnosis.

    • 60% clogs
    • 30% jams
    • 10% electrical

    Final Insight:

    Fixing the root cause ensures long-term performance.


    What Happens If You Ignore a Clogged Garbage Disposal?

    Clogged Garbage Disposal

    Ignoring a clog can lead to serious issues.

    Consequences:

    • pipe damage
    • motor burnout
    • water leakage
    • increased repair costs

    Long-Term Impact:

    Small clogs become major plumbing problems if untreated.

    What Most Homeowners Get Wrong About Garbage Disposal Repairs

    Most people focus on quick fixes rather than proper diagnosis.

    Reality Breakdown:

    • 60% issues = clogs
    • 30% = jams
    • 10% = electrical

    Insight:

    Understanding the system prevents repeated failures.

    Can a Clogged Garbage Disposal Damage Your Plumbing?

    Yes, and it often does over time.

    How Damage Occurs:

    • pressure buildup in pipes
    • corrosion from trapped waste
    • leaks due to blockages

    Prevention Insight:

    Fixing clogs early protects both disposal and plumbing system.

    FAQ Section

    Why is my garbage disposal humming?

    It is jammed and needs manual rotation.

    Can I fix it without tools?

    Only minor clogs can be fixed this way.

    Is boiling water safe?

    Yes, but not for grease clogs.

    Can grease damage disposal?

    Yes, it solidifies and blocks pipes.

    How long do disposals last?

    8–15 years.

    Can a clogged disposal burn out the motor?

    Yes, prolonged jams can overheat and damage the motor.

    Why does my disposal trip the breaker?

    Overload or electrical fault causes breaker trips.

    Can I run water while fixing it?

    No, only after clearing blockages.

    Is it safe to use vinegar regularly?

    Yes, in moderation for cleaning.


  • How to Clean a Garbage Disposal (Step-by-Step Guide That Actually Works

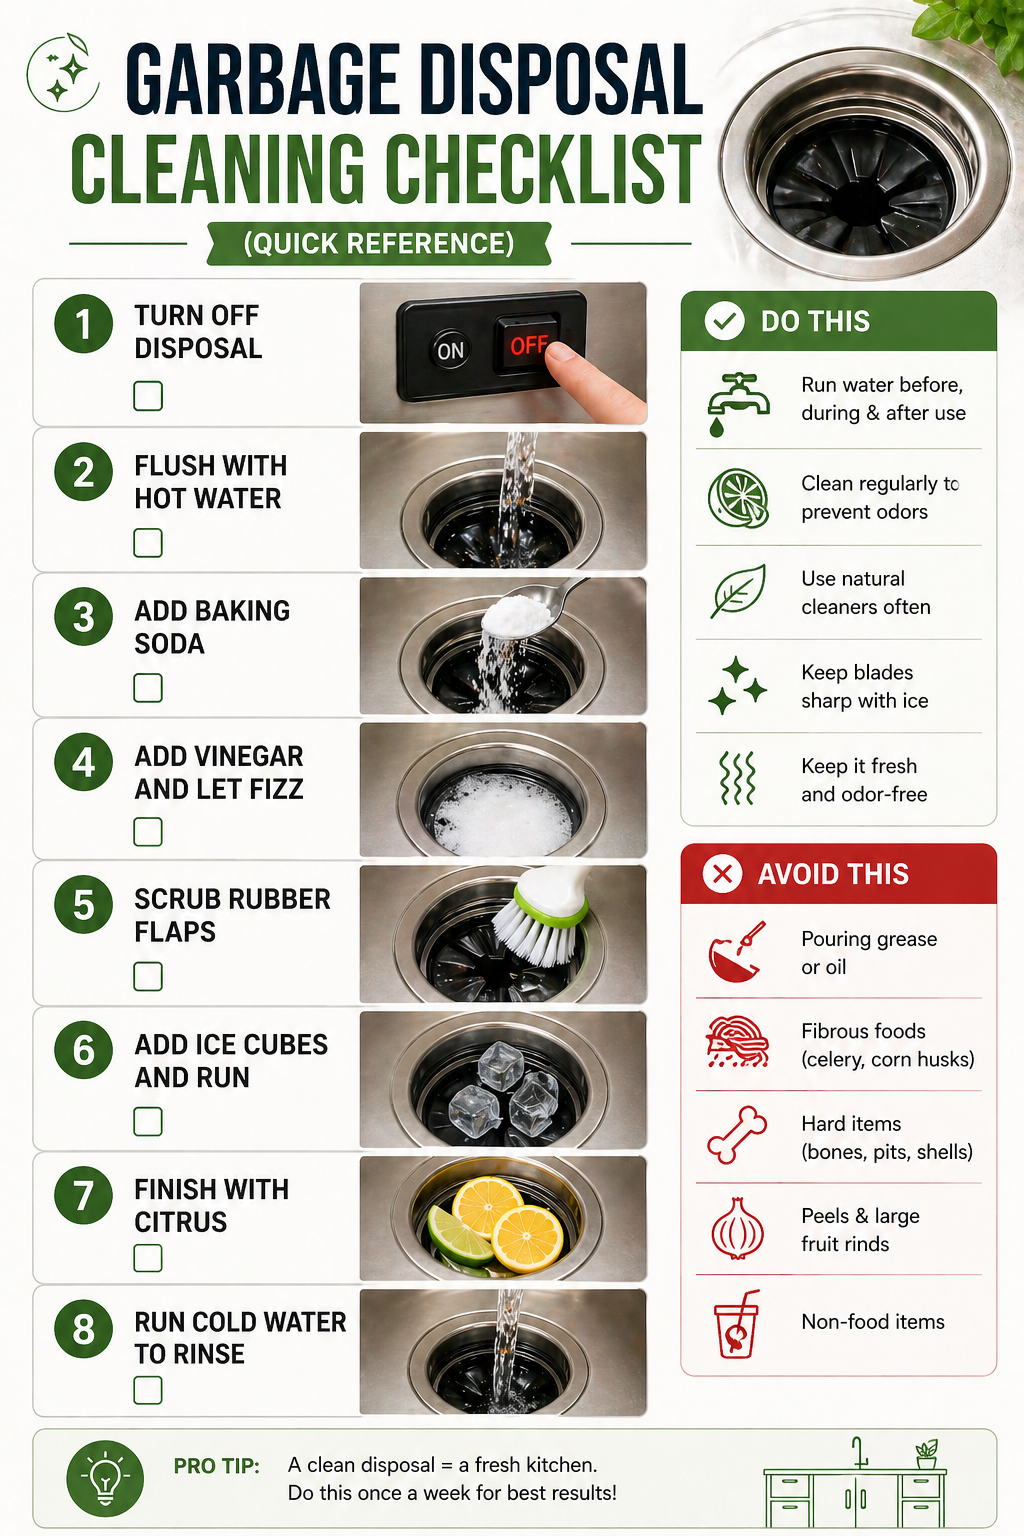
    To clean a garbage disposal, turn off power, flush with cold water and dish soap, scrub the splash guard, use baking soda and vinegar to break down buildup, then run ice and citrus peels to remove debris and odor completely.


    How to Choose the Right Cleaning Method

    The right cleaning method depends on whether your garbage disposal has odor, grease buildup, trapped debris, or long-term neglect.

    Not all disposal problems require the same solution. Many homeowners waste time repeating ineffective methods because they don’t match the cleaning approach to the actual issue. For example, using citrus peels might improve smell temporarily, but it won’t remove grease buildup or trapped debris. Similarly, baking soda and vinegar work well for organic residue but won’t fully dislodge solid particles stuck inside the chamber.

    A smarter approach is to diagnose the problem first and then apply a targeted cleaning method. This not only saves time but also improves results and prevents unnecessary wear on the disposal. Choosing the correct method ensures that you’re solving the root cause instead of masking symptoms.

    Cleaning decision system:

    • Bad smell → baking soda + vinegar
    • Grease buildup → dish soap + hot water (then cold rinse)
    • Debris stuck → ice + salt cleaning
    • Heavy buildup → full deep cleaning process

    Practical tip:

    • Combine methods if multiple issues exist
    • Repeat cleaning cycle for severe odor
    • Always finish with cold water flush

    Decision clarity:
    If your disposal smells AND drains slowly, you likely have both grease and debris buildup, which requires a combination approach instead of a single method.

    What Is the Best Way to Clean a Garbage Disposal?

    The best way combines physical cleaning + chemical breakdown + odor neutralization for complete results.

    Most homeowners think running water is enough, but that only clears loose debris. Real buildup happens inside the grinding chamber, under the splash guard, and along the drain walls. Over time, grease residue and microscopic food particles stick to surfaces, forming a layer that traps bacteria. This is why disposals start smelling even when they look clean from the top.

    A complete cleaning approach targets every layer of contamination. Mechanical scrubbing removes stuck debris, while natural reactions like baking soda and vinegar break down organic waste. Ice helps knock loose hardened particles, and citrus oils neutralize odor compounds. This multi-layer strategy ensures both hygiene and performance improvement.

    Best cleaning system includes:

    • Scrubbing splash guard (main odor source)
    • Baking soda + vinegar reaction
    • Ice + salt mechanical cleaning
    • Citrus peel deodorizing
    • Cold water flushing

    Why this method works better:

    • Targets hidden buildup, not just surface waste
    • Eliminates odor-causing bacteria, not just smell
    • Improves grinding efficiency and drainage

    Decision clarity:
    If your disposal smells, feels slow, or hasn’t been cleaned in weeks, this full method is required. Quick rinsing alone won’t solve the root problem.


    How to Clean a Garbage Disposal Step by Step

    Follow this structured process for a complete and safe clean.

    Cleaning a garbage disposal isn’t just about throwing in ingredients. The order matters because each step prepares the unit for the next. For example, flushing first removes loose debris so that baking soda and vinegar can directly target buildup instead of being diluted. Similarly, scrubbing the splash guard early removes the biggest source of odor before deeper cleaning begins.

    This step-by-step system is designed to cover all contamination zones, from visible surfaces to internal components. Skipping steps leads to partial cleaning, which is why many people notice smells returning quickly. A structured process ensures long-lasting results instead of temporary fixes.

    Step-by-step process:

    • Turn off power completely
    • Flush with cold water + dish soap
    • Scrub splash guard thoroughly
    • Add baking soda + vinegar (10–15 mins)
    • Run ice + salt for internal cleaning
    • Add citrus peels for freshness
    • Final cold water rinse

    Real-world tip:

    • Always use cold water during operation
    • Never insert hands inside disposal
    • Use a brush for safe internal cleaning

    Decision clarity:
    If your disposal smells mildly, follow the full process once. If odor is strong, repeat vinegar + baking soda twice for deeper breakdown.


    How to clean a garbage disposal

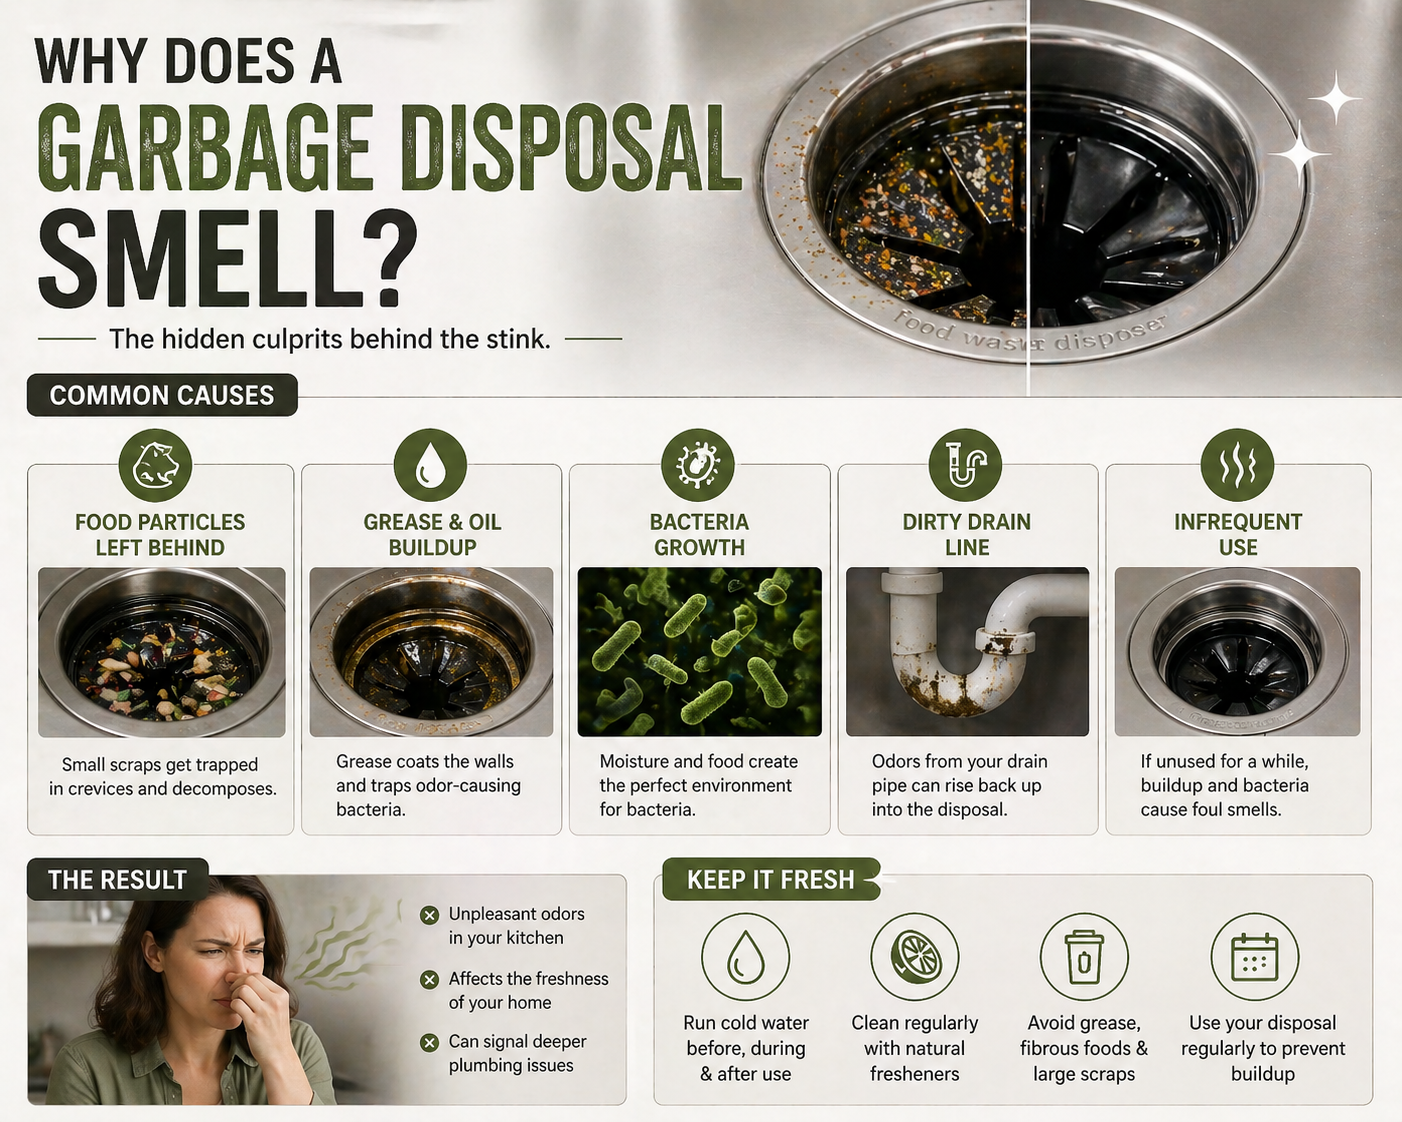
    Why Does a Garbage Disposal Smell?

    Smell is caused by decomposing food particles + trapped grease + bacterial activity.

    Garbage disposals operate in a dark, moist environment, which is ideal for bacterial growth. When food particles get trapped in crevices, they begin to decompose. This process releases sulfur compounds, which are responsible for the classic “rotten egg” smell. The issue becomes worse when grease is involved, as it forms a sticky layer that holds onto waste and prevents proper flushing.

    Another overlooked factor is the splash guard. This rubber component traps food particles underneath its folds, where water flow cannot reach effectively. Even if the grinding chamber is clean, a dirty splash guard can continuously release odor, making it seem like the entire system is dirty.

    Main odor sources:

    • Food waste stuck in chamber
    • Grease coating internal surfaces
    • Bacterial growth in moist areas
    • Dirty splash guard folds

    Why odor persists:

    • Incomplete cleaning methods
    • Lack of regular maintenance
    • Using only water without scrubbing

    Decision clarity:
    If smell returns quickly after cleaning, the issue is likely grease buildup or splash guard contamination, not just surface debris.


    How to Remove Bad Smell from Garbage Disposal

    Removing odor requires targeting the source, not masking the smell.

    Many people use lemon peels alone, which only provides temporary freshness. True odor removal happens when the bacteria and organic residue causing the smell are eliminated. This means combining cleaning agents with mechanical action to break down buildup and flush it out completely.

    Different odor intensities require different approaches. Mild smells can be fixed with baking soda and citrus, while strong odors often require repeated cleaning cycles and deeper scrubbing. Understanding this distinction helps avoid frustration when simple methods don’t work.

    Odor removal methods:

    • Mild odor → baking soda + vinegar
    • Moderate odor → add ice + salt cleaning
    • Strong odor → deep clean + repeat cycle
    • Grease smell → dish soap + hot water flush

    What works best:

    • Combine methods, don’t rely on one
    • Focus on splash guard cleaning
    • Repeat process if needed

    Decision clarity:
    If odor disappears after one cycle, maintenance is enough. If not, perform a full deep clean to remove underlying buildup.


    How to Deep Clean a Garbage Disposal (Monthly Method)

    Deep cleaning removes hidden buildup and bacterial layers that regular cleaning misses.

    Over time, a thin layer called biofilm forms inside the disposal. This layer consists of bacteria and organic residue that stick firmly to surfaces. Regular cleaning may reduce odor but won’t completely remove this layer. Deep cleaning is necessary to reset the system and restore hygiene.

    This process involves dismantling accessible parts like the splash guard, soaking them, and manually scrubbing areas that water flow cannot reach. It’s especially important for households that use disposals frequently or process greasy foods.

    Deep cleaning process:

    • Turn off power
    • Remove and soak splash guard
    • Scrub chamber manually
    • Use baking soda + vinegar
    • Run ice + salt cycle
    • Finish with citrus

    Benefits:

    • Removes hardened grease
    • Eliminates biofilm
    • Restores fresh smell
    • Improves performance

    Decision clarity:
    If your disposal smells even after regular cleaning, deep cleaning is required at least once every 3–4 weeks.


    How to clean a garbage disposal

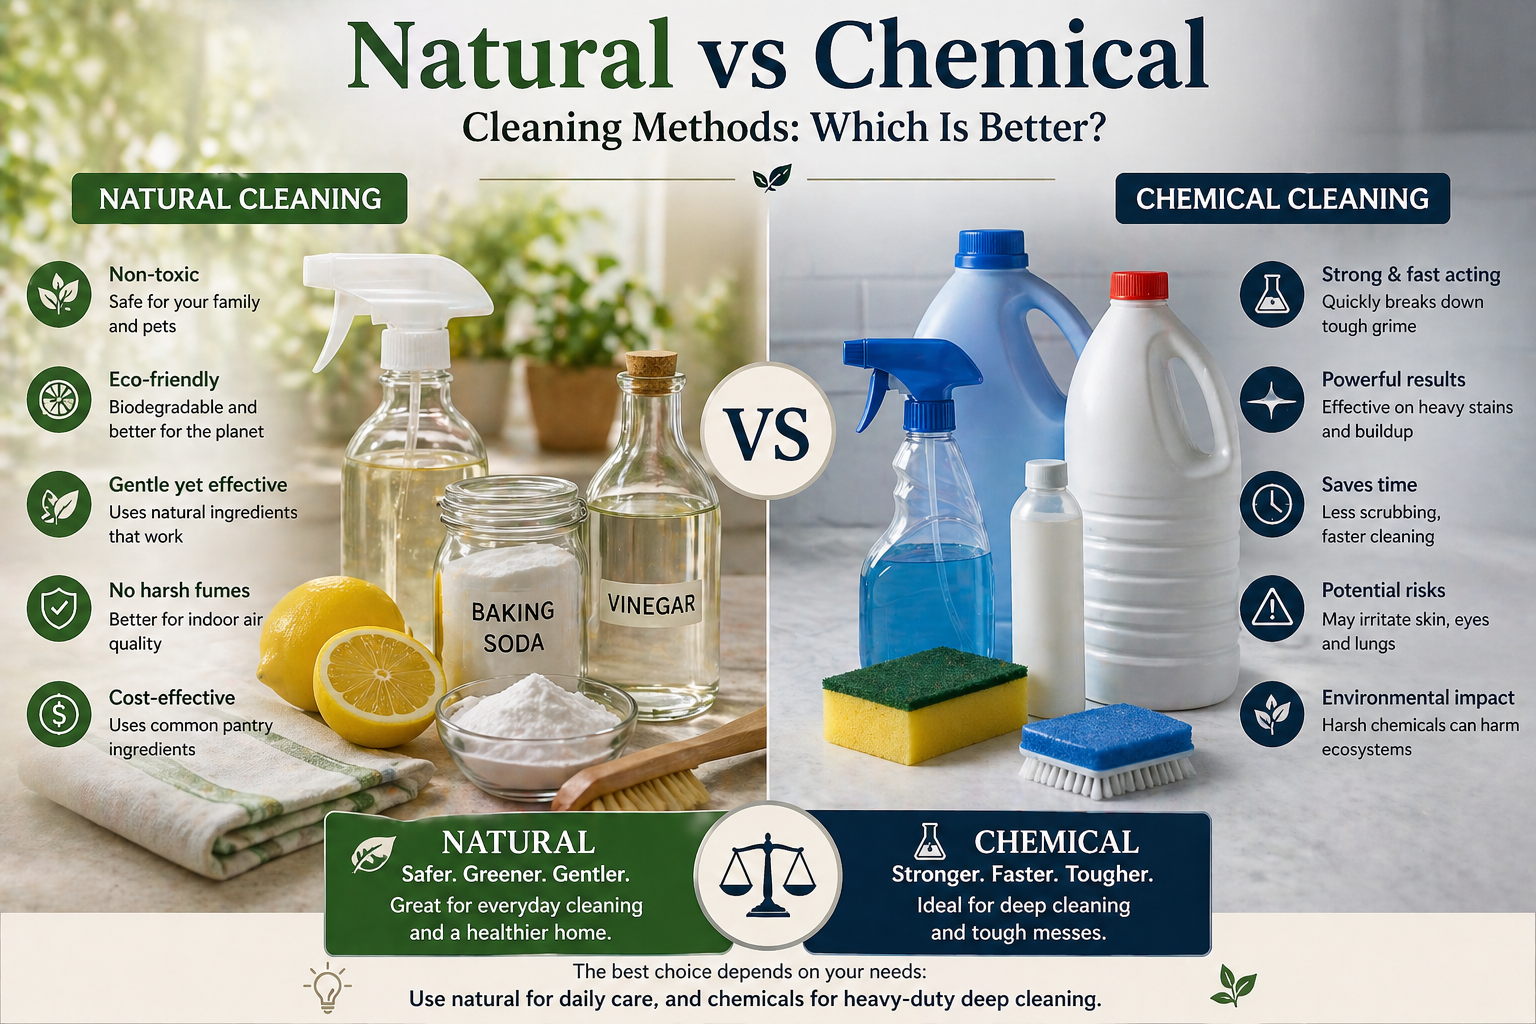
    Natural vs Chemical Cleaning Methods: Which Is Better?

    Natural methods are safer, while chemical cleaners are stronger but riskier.

    Cleaning methods like baking soda and vinegar are effective for natural routine maintenance. They are safe for pipes, environmentally friendly, and cost-effective. However, they may require repeated use for heavy buildup. Chemical cleaners, on the other hand, are designed for stronger action but can damage internal components if overused.

    The key is knowing when to use each method. For most households, natural cleaning is sufficient. Chemical cleaners should only be used occasionally when buildup becomes severe and cannot be removed through regular methods.

    Comparison:

    • Natural → safe, eco-friendly, consistent use
    • Chemical → powerful, occasional use only
    • Bleach → avoid due to damage risk

    Best strategy:

    • Weekly natural cleaning
    • Monthly deep cleaning
    • Rare chemical use if needed

    Decision clarity:
    If your disposal is maintained regularly, natural methods are enough. Chemical cleaners are only for neglected systems.


    Why These Cleaning Methods Work

    Garbage disposal cleaning works by combining chemical reactions and mechanical action to break down organic waste, dissolve grease, and remove bacteria.

    Each cleaning method targets a specific type of buildup inside the disposal. Baking soda acts as a mild abrasive and deodorizer, while vinegar contains acetic acid that reacts with organic matter and helps dissolve residue. When combined, they create a foaming reaction that penetrates tight spaces and loosens trapped particles. This is why the mixture is effective for odor removal and light cleaning.

    Mechanical methods like ice and salt work differently. Ice creates friction inside the grinding chamber, knocking loose debris that has hardened over time. Salt enhances this effect by adding abrasion, helping scrub internal surfaces. Citrus peels add a final layer of freshness by releasing natural oils that neutralize odor compounds instead of just masking them.

    How each method contributes:

    • Baking soda → neutralizes odor and loosens buildup
    • Vinegar → dissolves residue and kills bacteria
    • Ice → dislodges stuck debris
    • Salt → increases scrubbing power
    • Citrus → neutralizes odor compounds

    Why combination works best:

    • Covers both chemical and physical cleaning
    • Targets multiple problem layers
    • Provides longer-lasting results

    Decision clarity:
    If a single method doesn’t solve the problem, it’s because you’re only addressing one layer of buildup. Combining methods ensures complete cleaning.


    How Often Should You Clean a Garbage Disposal?

    Cleaning frequency depends on usage and food type.

    Garbage disposals that handle greasy or fibrous foods require more frequent cleaning. In contrast, light-use disposals may only need maintenance every two weeks. The key is consistency. Waiting until odor appears means buildup has already formed, making cleaning harder and less effective.

    A structured cleaning schedule prevents accumulation and keeps the disposal running efficiently. This also reduces long-term wear and potential plumbing issues.

    Recommended schedule:

    • Light use → every 2 weeks
    • Normal use → weekly
    • Heavy use → 2–3 times/week

    Deep cleaning:

    • Every 3–4 weeks

    Signs you need cleaning:

    • Bad odor
    • Slow drainage
    • Unusual noise
    • Visible residue

    Decision clarity:
    If you cook daily, treat disposal cleaning as part of your weekly kitchen routine, not an occasional task.

    What Should You Never Put in a Garbage Disposal?

    Certain materials cause clogs, damage, and long-term issues.

    Garbage disposals are designed for soft food waste, not everything. Hard items can damage components, while fibrous foods wrap around moving parts. Grease is especially problematic because it coats pipes and traps debris, leading to blockages over time.

    Understanding what to avoid is just as important as cleaning. Prevention reduces the need for frequent maintenance and extends the lifespan of the disposal.

    Avoid these:

    • Grease and oil
    • Coffee grounds
    • Eggshells
    • Fibrous foods (celery, corn husk)
    • Bones
    • Pasta and rice

    Why they’re harmful:

    • Grease hardens in pipes
    • Fibers wrap around impellers
    • Starches expand and clog

    Decision clarity:
    If your disposal clogs frequently, your usage habits—not your cleaning routine—are likely the problem.


    How to clean a garbage disposal

    Garbage Disposal Cleaning Checklist (Quick Reference)

    Use this as a weekly maintenance system.

    A checklist simplifies cleaning and ensures no critical step is missed. Most disposal issues happen because cleaning is inconsistent or incomplete. Following a structured routine eliminates buildup before it becomes a problem.

    This checklist is designed for efficiency, allowing you to maintain your disposal in under 10 minutes while preventing long-term issues.

    Weekly checklist:

    • Run cold water before and after use
    • Clean splash guard
    • Use baking soda + vinegar
    • Add citrus peels
    • Run ice occasionally

    Monthly:

    • Deep clean process

    Benefits:

    • Prevents odor buildup
    • Maintains performance
    • Reduces repair risk

    Decision clarity:
    Consistency beats intensity. A simple weekly routine is more effective than occasional deep cleaning.


    How Long Does It Take to Clean a Garbage Disposal?

    Cleaning a garbage disposal typically takes between 5 to 25 minutes depending on the level of buildup and the method used.

    Time expectations are important because many users either rush the process or assume cleaning requires too much effort. In reality, most disposal cleaning tasks can be completed quickly if done regularly. A simple rinse and deodorizing cycle takes only a few minutes, while a full deep clean requires slightly more time but delivers significantly better results.

    The duration depends on how long buildup has been accumulating. A lightly used disposal can be cleaned in under 10 minutes, while a neglected one may require repeated cycles and scrubbing. Understanding these time ranges helps set realistic expectations and encourages consistent maintenance instead of delay.

    Time breakdown:

    • Quick clean → 5–10 minutes
    • Standard clean → 10–15 minutes
    • Deep clean → 20–25 minutes

    What affects cleaning time:

    • Amount of grease buildup
    • Frequency of cleaning
    • Type of food waste processed
    • Whether deep cleaning is required

    Decision clarity:
    If cleaning takes longer than 25 minutes, the disposal likely has heavy buildup or underlying issues that may require deeper intervention.


    When Cleaning Doesn’t Work: Signs You Need Repair

    Not all problems are cleaning-related.

    If your disposal continues to malfunction after thorough cleaning, the issue may be mechanical. Components like the motor or impeller can wear out over time, and blockages deeper in the plumbing system may require professional intervention.

    Recognizing these signs early helps avoid further damage and costly repairs.

    Warning signs:

    • Disposal won’t turn on
    • Humming sound only
    • Frequent clogs
    • Water backing up

    Possible causes:

    • Jammed impeller
    • Motor failure
    • Drain blockage

    Decision clarity:
    If cleaning doesn’t restore normal function, stop troubleshooting and consult a plumber to avoid worsening the issue.


    Expert Tips to Keep Your Garbage Disposal Clean Longer

    Prevention reduces effort and extends lifespan.

    Most disposal problems are caused by daily habits, not lack of cleaning. Small changes in how you use the disposal can significantly reduce buildup and odor formation. These habits are simple but highly effective when applied consistently.

    Maintaining a clean disposal isn’t about frequent deep cleaning—it’s about smart usage and routine care.

    Best practices:

    • Always use cold water
    • Run disposal regularly
    • Cut large food pieces
    • Avoid overloading
    • Clean splash guard weekly

    Long-term benefits:

    • Fewer odors
    • Better performance
    • Longer lifespan
    • Reduced repair costs

    Decision clarity:
    Adopt these habits and your disposal will stay clean with minimal effort.

    Expert Insight: What Professionals Recommend

    Professional plumbers recommend weekly maintenance cleaning and proper usage habits to extend garbage disposal lifespan by up to 30–40%.

    From a professional perspective, most garbage disposal failures are preventable. Plumbers often see units that fail prematurely due to grease buildup, improper usage, and lack of routine cleaning. According to industry experience, disposals that are maintained weekly and used correctly last significantly longer and perform more efficiently.

    Experts emphasize that cleaning alone is not enough. Proper usage habits, such as avoiding problematic foods and running cold water consistently, play an equally important role. Combining preventive habits with regular cleaning creates a balanced system that minimizes wear and reduces the likelihood of clogs or mechanical failure.

    Professional recommendations:

    • Clean disposal weekly using natural methods
    • Deep clean once every 3–4 weeks
    • Avoid grease and fibrous foods
    • Always run cold water during use
    • Inspect and clean splash guard regularly

    Long-term benefits:

    • Extended disposal lifespan
    • Reduced repair costs
    • Improved performance
    • Consistent odor control

    Decision clarity:
    If you follow both cleaning routines and proper usage habits, your garbage disposal will remain efficient and problem-free for years.

    Recommended Tools for Cleaning a Garbage Disposal

    Using the right tools makes garbage disposal cleaning safer, faster, and more effective.

    While most cleaning can be done using household items, having a few dedicated tools can significantly improve results. Tools designed for disposal cleaning help reach areas that are otherwise difficult to clean, such as the inner chamber and underside of the splash guard. They also reduce the risk of injury by allowing you to clean without inserting your hands into the unit.

    Choosing the right tools depends on how frequently you clean your disposal and the level of buildup you typically encounter. For regular maintenance, simple tools are sufficient, while deeper cleaning may benefit from specialized products.

    Useful tools:

    • Long-handle scrub brush
    • Disposal cleaning pods
    • Natural enzyme cleaners
    • Flexible cleaning wand

    Why tools matter:

    • Improve cleaning efficiency
    • Reach hidden areas
    • Reduce safety risks
    • Enhance long-term maintenance

    Decision clarity:
    If you clean your disposal regularly, basic tools are enough. If buildup is frequent, investing in specialized cleaning tools will save time and effort.


    Common Garbage Disposal Cleaning Mistakes

    Most garbage disposal problems are caused by incorrect cleaning habits rather than lack of cleaning.

    Many homeowners unknowingly make mistakes that either reduce cleaning effectiveness or create new problems. One of the most common errors is using hot water while running the disposal. While hot water helps dissolve grease temporarily, it allows it to travel deeper into the pipes where it cools and solidifies, leading to clogs. Another frequent mistake is relying only on deodorizing methods like lemon peels without actually removing buildup.

    Ignoring the splash guard is another critical oversight. This area traps the most food particles and bacteria, making it the primary source of odor. Additionally, using harsh chemicals like bleach can damage internal components and harm plumbing systems over time. Understanding and avoiding these mistakes ensures that your cleaning routine is both effective and safe.

    Common mistakes:

    • Using hot water during grinding
    • Using bleach or harsh chemicals
    • Ignoring splash guard cleaning
    • Overloading disposal with waste
    • Skipping regular maintenance

    Better approach:

    • Use cold water during operation
    • Clean splash guard weekly
    • Use natural cleaning methods consistently

    Decision clarity:
    If your disposal smells or clogs frequently despite cleaning, your method is likely incorrect rather than insufficient.


    FAQs

    Can I use vinegar in my garbage disposal?

    Yes, vinegar is safe and helps break down buildup and kill bacteria.

    Does ice sharpen garbage disposal blades?

    No, disposals don’t have sharp blades. Ice helps clean by dislodging debris.

    Is bleach safe for garbage disposal?

    No, bleach can damage components and harm pipes.

    How long does cleaning take?

    Basic cleaning takes 10–15 minutes. Deep cleaning takes 20–25 minutes.

    Why does my disposal still smell after cleaning?

    Most likely the splash guard or drain pipes are still dirty.

    Can I clean disposal without removing it?

    Yes, all cleaning steps can be done while installed.

    How do you clean a garbage disposal quickly?

    For a quick clean, run cold water, add dish soap, then pour baking soda and vinegar. Let it sit for 10 minutes, rinse, and finish with citrus peels for freshness.

    What is the best natural cleaner for a garbage disposal?

    Baking soda and vinegar are the best natural cleaners as they break down organic waste, neutralize odors, and clean safely without damaging the disposal or pipes.

    Can I use vinegar and baking soda in my garbage disposal?

    Yes, they are safe and effective together. The foaming reaction helps loosen debris and remove odor when left for 10–15 minutes before rinsing.

    How often should I clean my garbage disposal?

    Clean it at least once a week and perform a deep clean every 3–4 weeks. Heavy usage may require more frequent maintenance.

    Why does my garbage disposal still smell after cleaning?

    The most common reason is a dirty splash guard or buildup in the drain. Re-clean thoroughly and focus on hidden areas like rubber flaps.

    Is it safe to use bleach in a garbage disposal?

    No, bleach can damage internal components and pipes. Use safer alternatives like baking soda, vinegar, or enzyme cleaners instead.

    Does ice really clean a garbage disposal?

    Yes, ice helps dislodge stuck debris through mechanical action. It works even better when combined with salt for added scrubbing power.

    What can I put in my garbage disposal to make it smell better?

    Citrus peels like lemon or orange help neutralize odors and leave a fresh scent. Always clean the disposal first for best results.

    Can a clogged garbage disposal be fixed by cleaning?

    Yes, minor clogs caused by food buildup can often be cleared with cleaning methods. Severe blockages may require manual removal or repair.

    What is the safest way to clean a garbage disposal?

    Turn off power, use cold water, and clean with baking soda, vinegar, and a brush. Avoid putting hands inside and skip harsh chemicals.

  • How to Unclog a Toilet with Dish Soap

    Yes, dish soap can help unclog a toilet when the blockage is soft, minor, and close enough to loosen with lubrication and hot water. The safest method is to add dish soap, wait several minutes, pour in hot but not boiling water, and flush only when the bowl level looks stable. This is a first-response fix, not a solution for severe blockages or foreign objects. This

    Can dish soap actually unclog a toilet?

    Dish soap can help unclog a toilet when the blockage is soft, minor, and not caused by a solid object.

    Dish soap can work because it reduces friction around the clog and helps soften or lubricate material that is stuck in the trap. That is why many DIY guides recommend it for minor toilet paper clogs or soft organic blockages, especially when you do not have a plunger nearby. It is not magic, though. It works best when the clog is partial, not when the toilet is packed with wipes, dense paper mass, or a solid object.

    In real homes, this method is most useful in the awkward middle situation where the toilet is not fully overflowing but clearly not draining correctly. The bowl still holds water, the flush is weak, and you want a low-risk fix before turning the problem into a mess. That is the right mindset for this method. Treat it like a smart first step, not a guaranteed cure. If the water keeps rising or the bowl is already near the rim, control the overflow risk first instead of flushing again.

    When Should You Try Dish Soap First?

    Dish soap is worth trying first when the clog is fresh, the toilet still drains a little, and the blockage is likely caused by toilet paper or soft waste rather than a solid object. Current home-repair and plumber-backed guidance consistently treats the soap-and-hot-water method as a safer first move for minor clogs, especially when a plunger is not available. It is not designed for every situation, but it is one of the lowest-risk ways to test whether the blockage can loosen without force.

    • Try dish soap first when the clog is recent
    • Try it when the toilet still drains slowly instead of not at all
    • Try it when the blockage is likely toilet paper or soft waste
    • Skip it when wipes, toys, or other objects may be lodged
    • Skip it when the toilet backs up repeatedly

    Do not rely on it when

    • A toy, wipe, pad, or other object may be stuck
    • The toilet is backing up repeatedly
    • Water is already close to overflowing
    • Multiple fixtures in the home are draining badly

    This method is consistently recommended as a minor-clog fix, while deeper or harder blockages are better handled with a plunger, auger, or plumber.


    What If the Toilet Bowl Is Already Full?

    How to Unclog a Toilet with Dish Soap

    If the toilet bowl is already full, do not flush again. That is the most important first move because another flush can turn a simple clog into an overflow problem. Overflow guidance consistently recommends shutting off the water at the toilet’s shutoff valve if the level keeps rising. If the bowl is high but stable, let the water settle before adding anything. When you do use the dish soap method, pour slowly and avoid dumping in too much hot water at once.

    • Do not flush again while the bowl is high
    • Turn off the shutoff valve if water keeps rising
    • Wait for the water level to settle if possible
    • Add soap gently, not aggressively
    • Pour hot, not boiling, water only when the bowl looks stable

    Why does dish soap help loosen a toilet clog?

    Dish soap helps by lubricating the trapway and reducing friction around soft material stuck in the drain path.

    The core reason is lubrication. Dish soap coats the surfaces inside the trapway and around the clog, which can help stuck material slide through more easily once hot water is added. Some guides also describe it as helping soften the blockage enough to get things moving again. The method is simple, but the logic matters because it tells you what kind of clog it is meant for. It is not dissolving a hard object. It is assisting movement in a tight, slippery space.

    That is why decision clarity matters more than the hack itself. If the clog was caused by too much toilet paper, a heavy flush, or a soft waste buildup, dish soap has a fair chance. If someone flushed wipes, paper towels, hygiene products, or a child’s object, lubrication alone usually will not solve the problem. Readers often fail with this method not because it is useless, but because they apply it to the wrong blockage. Good DIY advice should separate soft clogs from structural or foreign-object problems before the first step even begins.

    What dish soap can help with

    • Soft toilet paper buildup
    • Organic waste clogs
    • Partial blockages near the trap
    • No-plunger emergency situations

    What dish soap usually cannot fix

    • Flushable wipes
    • Plastic items or toys
    • Dense long-standing blockages
    • Sewer line or recurring drain problems

    This is why the method belongs in a wider unclogging decision system, not as a one-size-fits-all answer.

    How to unclog a toilet with dish soap step by step

    Add dish soap first, wait a few minutes, pour in hot non-boiling water, and flush only when the bowl level looks stable.

    Start by checking the water level. If the bowl is already too full, do not flush again. Add dish soap directly into the bowl and let it sink toward the drain. Current DIY guidance varies on quantity, but the common range is about 1/4 cup to 1 cup, depending on the source and the severity of the clog. Then wait long enough for the soap to reach the blockage. Guidance commonly recommends anywhere from 5 to 30 minutes before the next step.

    After the waiting period, pour in hot, not boiling, water. This is one of the most important safety points in the whole article. Several current sources warn against boiling water because it can crack porcelain or damage PVC-related plumbing components. Pour the hot water steadily, not aggressively, and give the bowl a moment to settle. If the water level drops or the bowl looks more stable, try one careful flush. If it rises again, stop there and move to the next tool rather than forcing another flush.

    Step-by-step process

    • Add dish soap to the bowl
    • Wait 5 to 30 minutes
    • Pour in hot, non-boiling water
    • Watch the bowl level before flushing
    • Flush once, carefully
    • Escalate if there is no improvement

    Quick decision rule

    • Bowl level drops = the method is helping
    • Bowl level stays the same = clog may still be partially stuck
    • Bowl level rises = stop and switch methods

    These time ranges and safety steps match current guidance from major home-repair and plumbing-adjacent sources.


    How long should you wait, and what result should you expect?

    How to Unclog a Toilet with Dish Soap

    Most minor soft clogs show improvement within 5 to 30 minutes if the method is going to work.

    One weakness in most competing content is that it tells readers what to do but not what success should actually look like. Dish soap is not a “seconds” fix in most cases. Current guidance usually suggests waiting at least a few minutes, with many sources landing between 5, 10, 15, and 30 minutes depending on the version of the method. That tells us something important. The method works by gradually improving movement around the clog, not by breaking it apart instantly.

    In practice, success often appears in stages. First, the bowl may stop looking tense or overfilled. Then the water may slowly lower. Only after that should you expect a cleaner flush. If you try once and nothing changes, a second attempt may still be reasonable if the water level is safe and the clog is likely soft. But if there is zero movement after one or two careful rounds, that is your decision point. At that stage, more waiting usually does not add much value. A plunger or toilet auger becomes the better next step.

    Realistic time expectations

    • Light soft clog: 5 to 10 minutes
    • Moderate soft clog: 10 to 30 minutes
    • No change after 1 to 2 attempts: switch methods
    • Repeated overflow risk: stop DIY flushing
    Clog situationDish soap likely to helpBest next move
    Mild toilet paper clogHighDish soap + hot water
    Soft organic blockageMedium to highDish soap, then careful flush
    Wipes or hygiene productLowToilet auger
    Suspected foreign objectVery lowAuger or plumber
    Repeated recurring clogLowProfessional inspection

    The decision point matters more than the exact minute count. Good DIY results come from knowing when to stop.


    How to Unclog a Toilet with Dish Soap

    Is Dish Soap Better Than Other Toilet Unclogging Methods?

    Dish soap is not the strongest toilet-unclogging method, but it is often one of the safest first methods for a soft clog. Current guidance positions plunging as the quickest and most effective solution for many standard toilet clogs, while a toilet auger is the better step when the blockage sits deeper in the trap or resists plunging. Dish soap fits earlier in the decision chain because it can loosen minor buildup without force, scratching, or harsh chemicals. That makes it useful, but only within the right limits.

    MethodBest ForStrength
    Dish soap + hot waterMinor soft clogsLow-risk first step
    PlungerMost standard clogsFastest next tool
    Toilet augerDeeper tough clogsStronger escalation
    PlumberRepeated or severe issuesBest for persistent problems

    Real-World Example of When the Dish Soap Method Makes Sense

    A practical example helps readers understand the method better than theory alone. Imagine a toilet that clogged right after a heavy toilet paper flush. The bowl is high, but not yet overflowing, and there is no plunger nearby. This is the kind of situation where dish soap makes sense as a first-response fix. The likely blockage is soft, recent, and still close enough to respond to lubrication and hot water. In many similar DIY guides, that is exactly the type of clog the method is meant for.

    Now imagine the outcome. The soap goes in first, the water is allowed to settle, and hot non-boiling water is poured in slowly. After waiting, the bowl level begins to lower slightly. That small change is the signal that the method is working. If nothing changed at all, the next smart step would be a plunger, not endless repetition. The lesson is simple. Dish soap works best when the clog is soft, recent, and clearly not caused by a wipe, toy, or another solid object.

    • Best case for this method is a fresh soft clog
    • Early bowl-level movement is a positive signal
    • No movement means the next tool should change
    • Solid objects usually require escalation faster

    What should you not do when using this method?

    Do not use boiling water, panic flush a full bowl, or keep repeating the method when there is no visible progress.

    The biggest mistake is panic flushing. If the bowl is already high, another flush can turn a manageable clog into a bathroom cleanup emergency. The second mistake is using boiling water. Several current home-repair sources explicitly warn that boiling water can crack the porcelain or harm plumbing materials, which turns a cheap fix into an expensive repair. The third mistake is assuming this method can solve every type of blockage. It cannot.

    Another common error is pouring too aggressively or working too fast. The dish soap method works best when the soap has time to move downward and the added hot water is controlled. Dumping water too quickly can raise the level before the soap has done anything useful. Readers also underestimate the importance of stopping when the signals are wrong. If the toilet makes no progress, backs up again, or has a history of recurring clogs, the problem may be deeper than a single soft blockage. That is not the moment to keep experimenting. That is the moment to change tools.

    Do not do these things

    • Do not use boiling water
    • Do not flush repeatedly while water is high
    • Do not assume wipes behave like toilet paper
    • Do not keep repeating the method with no progress
    • Do not ignore signs of a deeper plumbing problem

    Watch for these red flags

    • Gurgling or repeated backups
    • Water rising close to the rim
    • Slow drainage after multiple attempts
    • Other nearby drains acting up too

    These warnings line up with current DIY and plumber-backed guidance on safe toilet unclogging.


    When should you use a plunger, a toilet auger, or call a plumber?

    Use a plunger for standard clogs, a toilet auger for deeper resistance, and a plumber for repeated or severe blockage.

    A plunger is usually the next step when dish soap does not produce visible improvement. If the clog is still close enough to respond to pressure, plunging can finish what the lubrication started. A toilet auger is the better choice when the blockage feels deeper, tougher, or physically stuck. Current plumber-backed guidance highlights the toilet auger as one of the most effective and toilet-safe tools for deeper clogs because it is designed specifically for the shape of the toilet trap.

    A plumber becomes the right call when the problem stops looking like a one-off clog. That includes repeated blockages, signs of sewage backup, multiple slow drains, or any suspicion that something solid has been flushed and lodged inside. This is where many DIY articles stay vague, but readers need a firm threshold. Home maintenance content performs better when it removes hesitation. If the method failed cleanly, you use another tool. If the situation looks bigger than one toilet bowl, you stop treating it as a bowl-only issue.

    Choose your next step like this

    • Dish soap failed, but bowl is stable → use a plunger
    • Clog feels deeper or repeated → use a toilet auger
    • Object may be stuck → skip the soap retry and escalate
    • Multiple fixtures are affected → call a plumber
    • Overflow or sewage signs appear → call a plumber immediately

    This tool progression matches the safest path from light DIY to deeper intervention.

    How can you prevent toilet clogs in the future?

    Most toilet clogs are prevented by flushing only waste and toilet paper and avoiding oversized paper loads.

    Prevention is less about tricks and more about flush discipline. The simplest rule is still the most effective one: only flush human waste and toilet paper. Current guidance on no-plunger alternatives and toilet clog prevention repeatedly points back to excessive paper use and inappropriate items as the most common causes of clogs. That matters because most readers do not need a better hack. They need better prevention habit.

    The real-world fix is to reduce the conditions that make emergency methods necessary. Encourage smaller paper loads, teach children what not to flush, and pay attention to recurring weak flushes. A toilet that clogs often may not just be dealing with user behavior. It may have a developing trap issue, partial blockage, or low-flush performance problem that needs a different solution. Smart home advice should always separate accidental misuse from repeat system weakness, because the long-term answer is not more dish soap. There are fewer clog triggers and faster escalation when the pattern changes.

    Prevention checklist

    • Flush only waste and toilet paper
    • Avoid oversized paper loads
    • Never flush wipes, towels, or hygiene products
    • Watch for repeated slow flush behavior
    • Act early before a partial clog becomes a full blockage

    This closing section helps the page rank for preventive intent while strengthening topical authority around toilet-clog troubleshooting.


    When to Use Dish Soap and When to Stop

    Dish soap is a smart first method when the clog is minor, soft, and recent, especially if the toilet still drains a little and you do not have a plunger in hand. Current guidance supports using soap with hot, not boiling, water because the combination can help lubricate and loosen soft material while staying gentler than harsh chemical options. The value of this method is not that it works on every clog. The value is that it helps you test a likely soft blockage with low risk before moving to stronger tools.

    The stopping point is just as important as the starting point. If the bowl level stays high, the clog keeps returning, or the toilet shows no improvement after one or two careful attempts, the method has already told you what you need to know. It is time to switch to a plunger, a toilet auger, or a plumber depending on the severity. That decision clarity is what turns a simple DIY page into genuinely helpful home advice.

    • Use dish soap for soft, likely paper-based clogs
    • Use hot water, never boiling water
    • Stop if the bowl level rises or nothing changes
    • Escalate faster for deep, repeated, or object-related clogs

    FAQ Section

    Can dish soap unclog a toilet without a plunger?

    Yes, it can help with a minor soft clog by lubricating the blockage and improving movement when followed with hot, non-boiling water. It is most useful as a first-response method, not a guaranteed fix for severe clogs.

    How much dish soap should I use in a clogged toilet?

    Current DIY guidance commonly ranges from about 1/4 cup to 1 cup, depending on the source and how stubborn the clog seems.

    How long should dish soap sit in the toilet?

    Most guidance falls between 5 and 30 minutes. Light clogs may improve sooner, while mild to moderate soft clogs may need more waiting time.

    Should I pour boiling water into the toilet?

    No. Use hot water, not boiling water. Current sources warn that boiling water can crack porcelain and may damage plumbing materials.

    Will dish soap work on wipes or a solid object?

    Usually not. This method is much better for toilet paper and soft organic clogs than for wipes, toys, or other solid obstructions.

    What should I do if the toilet is still clogged after one try?

    If the bowl is stable, move to a plunger or toilet auger. If there is overflow risk, recurring backup, or signs of a deeper problem, call a plumber.

    Is dish soap safe for toilet pipes?

    The current guidance around this method presents it as a common low-risk DIY option for minor clogs, especially compared with more aggressive approaches. The main safety concern is not the soap itself. It is using boiling water or forcing repeated overflow conditions.

    When should I call a plumber instead of trying another hack?

    Call a plumber when the clog keeps returning, multiple drains are affected, sewage signs appear, or a foreign object may be lodged in the toilet.

  • Bathroom Wall Cabinets (Complete Guide)

    Bathroom wall cabinets are wall-mounted storage units designed to organize toiletries, medicines, and essentials without occupying floor space. They come in types like surface-mounted, recessed, mirrored, and corner cabinets. The best choice depends on your bathroom size, humidity level, storage needs, and wall structure.

    Bathroom wall cabinets: (Quick Summary)

    • Save floor space and reduce clutter
    • Improve organization and hygiene
    • Work best in small and medium bathrooms
    • Last 5–20 years depending on material
    • Cost between $30 and $800+ globally

    What Are Bathroom Wall Cabinets?

    Bathroom wall cabinets are vertical storage units fixed to the wall, typically above sinks, toilets, or unused wall space. Their primary function is to maximize storage without using floor area, making them essential in modern bathroom layouts.

    Traditionally, bathrooms relied heavily on vanity cabinets for storage. However, as urban homes became smaller, the need for vertical storage solutions increased. Wall cabinets evolved to fill this gap by offering accessible storage without overcrowding the space.

    From a functional standpoint, wall cabinets help divide storage into zones. Daily-use items such as toothbrushes and skincare products are kept within easy reach, while less frequently used items remain stored but organized. This improves both usability and hygiene.

    In modern bathroom design systems, these cabinets are not standalone pieces. They are part of a broader bathroom organization strategy that includes vanities, shelves, and concealed storage. When used correctly, they reduce clutter, improve accessibility, and enhance the overall look of the bathroom.

    What Types of Bathroom Wall Cabinets Exist?

    Bathroom wall cabinets are designed in multiple formats, each suited for specific layouts and use cases.

    Surface-Mounted Cabinets

    These are installed directly onto the wall surface. They are easy to install and do not require structural modification.

    They are ideal for rental homes or quick renovations. However, since they project outward, they require enough clearance to avoid obstructing movement in tight bathrooms.

    Best for: Quick installation, rental spaces, and budget setups.

    Recessed (In-Wall) Cabinets

    Recessed cabinets are built into the wall cavity, creating a flush and minimal appearance.

    They save more space than surface-mounted cabinets and are preferred in modern designs. However, installation requires cutting into the wall and ensuring no plumbing or electrical lines are affected.

    Best for: Minimalist bathrooms and long-term home setups.

    Mirrored Cabinets (Medicine Cabinets)

    These combine a storage cabinet with a front-facing mirror. They are typically installed above the sink.

    Advanced models include LED lighting and anti-fog technology, making them highly functional.

    Best for: Compact bathrooms and dual-purpose functionality.

    Corner Cabinets

    These are designed to fit into unused corners. They make use of otherwise wasted space.

    While storage capacity is limited, they are highly effective in small bathrooms.

    Best for: Small bathrooms with limited wall space.

    Open + Closed Combination Cabinets

    These combine open shelves with closed compartments.

    They allow quick access to frequently used items while keeping clutter hidden.

    Best for: Balanced storage and display.


    Bathroom Wall Cabinets vs Vanity Cabinets — What’s the Difference?

    Bathroom Wall Cabinets vs Vanity Cabinets — What’s the Difference?

    Bathroom wall cabinets and vanity cabinets serve different purposes, and understanding their differences helps in making the right storage decision.

    Wall cabinets are mounted above ground level, typically on unused vertical surfaces. Their primary advantage is space efficiency. They do not occupy floor space, making them ideal for small bathrooms. They are best used for storing lightweight items such as toiletries, medicines, and personal care products.

    Vanity cabinets, on the other hand, are installed below the sink and rest on the floor. They provide significantly more storage capacity and are designed to hold heavier items like cleaning supplies, extra towels, and plumbing fixtures. However, they consume floor space, which can make small bathrooms feel more cramped.

    From a design perspective, wall cabinets contribute to a clean and open look, while vanity cabinets provide a grounded, functional base. In most modern bathrooms, both are used together to create a balanced storage system.

    Another key difference is accessibility. Wall cabinets offer easy access to frequently used items at eye level, while vanity cabinets require bending or reaching down.

    The best approach is not to choose one over the other but to use both strategically. Wall cabinets handle daily essentials, while vanity cabinets manage bulk storage. This combination maximizes efficiency and maintains a clutter-free environment.

    What Are the Best Bathroom Wall Cabinets by Use Case?

    The best cabinet depends on how your bathroom is used and the conditions inside it.

    Use CaseBest Cabinet TypeReason
    Small BathroomSlim wall-mountedSaves space
    Luxury BathroomSolid wood + LEDPremium appearance
    High HumidityPVC / AluminumWater resistant
    Rental HomesSurface-mountedEasy installation
    Minimalist DesignRecessed cabinetClean look

    Choosing based on use case ensures both performance and long-term satisfaction.


    How to Choose the Right Bathroom Wall Cabinet?

    Selecting the right cabinet involves more than picking a design. It requires evaluating space, usage, and environmental conditions.

    Step 1: Measure Your Space

    Measure width, height, and depth. Standard depth ranges from 4 to 12 inches.

    If your bathroom is small, choose shallow cabinets to prevent obstruction.

    Step 2: Check Wall Strength

    Concrete walls support heavy cabinets. Drywall requires anchors or studs.

    Ignoring wall strength can lead to installation failure.

    Step 3: Evaluate Storage Needs

    Identify what you plan to store. Toiletries, medicines, and cleaning items require different shelf configurations.

    Adjustable shelves offer flexibility.

    Step 4: Consider Accessibility

    Install cabinets at a comfortable height. Standard placement is 48–60 inches from the floor.

    Step 5: Choose Material Based on Environment

    Humidity plays a major role. Bathrooms with poor ventilation require moisture-resistant materials.

    Step 6: Match Design Style

    Ensure the cabinet complements your bathroom theme. Consistency improves visual appeal.

    Practical Decision Framework

    • If bathroom < 40 sq ft → choose slim cabinet
    • If humidity is high → choose PVC or aluminum
    • If aesthetic is priority → choose recessed or mirrored cabinet
    • If installation must be simple → choose surface-mounted

    What Is the Best Material for Bathroom Wall Cabinets?

    Material selection determines durability, maintenance, and performance.

    Material Comparison Table

    MaterialDurabilityWater ResistanceLifespanBest Use
    MDFMediumModerate5–10 yearsBudget setups
    Solid WoodHighLow10–20 yearsLuxury bathrooms
    PVC / WPCHighExcellent10–15 yearsHumid areas
    Stainless SteelVery HighExcellent15–25 yearsIndustrial style
    AluminumHighExcellent10–20 yearsLightweight setups

    How Does Humidity Affect Bathroom Cabinets?

    Humidity is the biggest factor affecting cabinet lifespan.

    MDF absorbs moisture, which leads to swelling and deformation over time. Solid wood can warp if not properly sealed. Metal cabinets resist moisture but may develop rust if not treated.

    PVC and aluminum perform best because they do not absorb water. This makes them ideal for high-humidity environments such as coastal areas or poorly ventilated bathrooms.

    Key Insight:
    PVC cabinets can last up to twice as long as MDF cabinets in humid conditions.

    Humidity Resistance Score

    MaterialScore (10)
    PVC / WPC10
    Aluminum9
    Stainless Steel9
    MDF6
    Solid Wood5

    What Problems Do Bathroom Wall Cabinets Solve?

    Bathroom wall cabinets solve several practical problems that most users face daily but often overlook.

    The first major issue is countertop clutter. Without proper storage, items like toothbrushes, skincare products, and medicines accumulate around the sink. This not only reduces usable space but also creates a messy and unhygienic environment. Wall cabinets eliminate this problem by providing a dedicated storage area above the working zone.

    Another problem is inefficient space usage. Bathrooms, especially in urban homes, are often compact. Floor cabinets take up valuable space and restrict movement. Wall cabinets use vertical space instead, keeping the floor clear and improving overall accessibility.

    Hygiene is another concern. Items left exposed on open surfaces are more likely to collect dust, water splashes, and bacteria. Closed cabinets protect these items, maintaining cleanliness and reducing contamination risk.

    Storage accessibility is also improved. Instead of searching through multiple drawers or shelves, items can be organized systematically within a cabinet. Adjustable shelves further enhance usability by accommodating different item sizes.

    Finally, wall cabinets contribute to visual organization. A clutter-free bathroom appears larger and more comfortable. This improves both user experience and perceived value of the space.

    In short, bathroom wall cabinets transform disorganized, inefficient bathrooms into structured, functional spaces.

    Are Bathroom Wall Cabinets Good for Small Bathrooms?

    Yes. Wall cabinets are one of the most effective solutions for small bathrooms.

    They utilize vertical space, keeping the floor clear and improving movement.

    Are Bathroom Wall Cabinets Good for Small Bathrooms?

    Space Optimization Strategies

    • Install above the toilet
    • Use narrow cabinets on side walls
    • Combine mirror + cabinet
    • Stack vertically instead of using wide units

    Mini Case Example

    A compact bathroom (5×7 ft) improved storage efficiency by 40% after installing a slim cabinet above the toilet. Counter clutter reduced significantly, and daily items became easier to access.


    Bathroom Wall Cabinets vs Shelves — Which Is Better?

    Both serve different purposes.

    FeatureCabinetsShelves
    Storage CapacityHighMedium
    ProtectionYesNo
    AccessibilityModerateHigh
    AestheticCleanOpen

    Practical Insight

    Cabinets are better for concealed storage and hygiene. Shelves work best for decorative or frequently used items.

    A hybrid setup provides the best balance.


    What Is the Ideal Size and Placement for Bathroom Wall Cabinets?

    The ideal size depends on your bathroom layout and user comfort.

    Bathroom SizeRecommended WidthPlacement
    Small12–24 inchesAbove toilet
    Medium24–36 inchesAbove sink
    Large36–48 inchesFeature wall

    Placement Guidelines

    • Maintain eye-level accessibility
    • Avoid blocking mirrors or lighting
    • Keep safe distance from water sources

    How to Install Bathroom Wall Cabinets (Step-by-Step)?

    Proper installation ensures safety and durability.

    Step-by-Step Process

    1. Mark position using a level
    2. Locate wall studs
    3. Drill pilot holes
    4. Install brackets
    5. Mount cabinet
    6. Check alignment

    What Wall Type Is Best for Installation?

    • Concrete walls: Strong and reliable
    • Drywall: Requires anchors or studs
    • Tile walls: Need careful drilling

    Safety Considerations

    • Avoid drilling into plumbing lines
    • Do not overload cabinets
    • Use proper mounting hardware

    How Much Weight Can Bathroom Wall Cabinets Hold?

    Weight capacity depends on installation and wall type.

    • Stud-mounted cabinets: 50–100 lbs
    • Drywall with anchors: 20–40 lbs

    Overloading can cause structural damage.

    How Much Do Bathroom Wall Cabinets Cost Globally?

    TypePrice Range
    Basic MDF$30–$100
    PVC Cabinets$100–$300
    Premium Wood$300–$800
    Designer Units$800+

    Cost Factors

    • Material
    • Size
    • Features
    • Installation

    ROI Insight

    Well-designed cabinets improve usability and can increase property appeal during resale.


    Which Bathroom Wall Cabinet Is Right for You?

    Which Bathroom Wall Cabinet Is Right for You?

    Choosing the right bathroom wall cabinet depends on how your bathroom is used daily. A one-size-fits-all approach does not work because storage needs vary significantly between users.

    For families, storage demand is higher. Multiple users mean more toiletries, hygiene products, and daily essentials. In such cases, wider cabinets with adjustable shelves are the best choice. They allow organized storage and prevent overcrowding.

    For individuals or single users, compact cabinets are more practical. A mirrored cabinet above the sink often provides enough storage while serving dual functionality. This setup reduces the need for additional fixtures and keeps the layout simple.

    Rental homes require flexibility. Surface-mounted cabinets are ideal because they are easy to install and remove without permanent wall modifications. This avoids damage and maintains compliance with rental agreements.

    For luxury or high-end bathrooms, aesthetics and integration matter more. Recessed cabinets with LED lighting and soft-close mechanisms create a premium look. These cabinets blend into the wall and enhance the overall design.

    For small bathrooms, narrow vertical cabinets or corner units are the best fit. They utilize unused wall space without interfering with movement.

    The correct choice depends on three factors: available space, number of users, and humidity level. Aligning these ensures both functionality and long-term satisfaction.

    How Long Do Bathroom Wall Cabinets Last?

    MaterialLifespan
    MDF5–10 years
    Wood10–20 years
    PVC10–15 years
    Metal15–25 years

    Failure Causes

    • Moisture exposure
    • Poor installation
    • Low-quality materials

    Maintenance Tips

    • Clean regularly
    • Avoid water accumulation
    • Inspect hinges

    What Do Experts Recommend for Bathroom Wall Cabinets?

    Professionals prioritize durability, moisture resistance, and long-term usability over aesthetics alone. In real-world installations, the most common failure point in bathroom wall cabinets is material breakdown due to humidity. For this reason, experts consistently recommend PVC, WPC, or aluminum cabinets for bathrooms with poor ventilation or high moisture exposure. These materials do not absorb water, which prevents swelling, warping, and long-term structural damage.

    For homeowners planning permanent installations, recessed cabinets are often the preferred choice. They provide a seamless, built-in look that integrates with the wall, increasing both visual appeal and property value. Interior designers frequently use recessed cabinets in modern bathrooms because they reduce visual clutter and create a cleaner layout.

    In contrast, for rental properties or temporary setups, surface-mounted cabinets are the practical recommendation. They are easier to install, require minimal structural changes, and can be removed without damaging walls.

    Experts also emphasize correct installation over cabinet quality alone. A high-end cabinet installed on weak drywall without proper anchoring can fail faster than a mid-range cabinet properly mounted into wall studs. This is why installation method, wall type, and load distribution are critical factors.

    The key takeaway is simple: match the cabinet to your environment. Moisture level, wall structure, and usage frequency should guide your decision more than design trends.

    How Do You Maintain Bathroom Wall Cabinets?

    Proper maintenance extends lifespan.

    Cleaning by Material

    • MDF: Use dry cloth
    • Wood: Use mild cleaner
    • PVC: Use damp cloth
    • Metal: Prevent rust buildup

    Mold Prevention

    • Ensure ventilation
    • Use moisture absorbers
    • Keep doors slightly open

    How Do Bathroom Wall Cabinets Impact Design?

    Cabinets influence both function and aesthetics.

    They create visual balance and define storage zones. Choosing the right color and finish enhances the bathroom’s theme.

    Design Tips

    • Match cabinet with vanity
    • Use light colors for small spaces
    • Use mirrors to create illusion of space

    Quick Decision Guide

    Choosing the right bathroom wall cabinet becomes simple when you follow a structured decision approach based on your specific needs.

    If your bathroom is small or under 40 square feet, a slim wall-mounted cabinet is the most efficient option. It saves space and prevents obstruction while still providing essential storage.

    If your bathroom experiences high humidity or poor ventilation, material selection becomes critical. PVC or aluminum cabinets are the safest choices because they resist moisture and maintain structural integrity over time.

    For users focused on aesthetics, recessed cabinets are the best option. They integrate into the wall, creating a seamless and modern appearance. This is especially effective in minimalist or luxury bathroom designs.

    If installation convenience is your priority, surface-mounted cabinets are the easiest to work with. They require minimal tools and can be installed quickly without major structural changes.

    For multi-user households, choose cabinets with multiple shelves and larger width. This ensures that storage remains organized even with increased usage.

    This decision framework removes guesswork. Instead of focusing only on design, it aligns your choice with space, environment, and functionality. That is what ensures long-term performance and satisfaction.

    What Are the Latest Bathroom Wall Cabinet Trends?

    Modern trends focus on functionality and minimalism.

    • LED-lit cabinets
    • Smart cabinets with charging ports
    • Recessed minimalist designs
    • Matte finishes

    These trends improve both usability and visual appeal.

    What Mistakes Should You Avoid When Buying Bathroom Wall Cabinets?

    • Choosing wrong material for humidity
    • Ignoring wall strength
    • Selecting incorrect size
    • Poor placement

    Avoiding these mistakes ensures long-term performance.

    Are Bathroom Wall Cabinets Worth It?

    Yes. They provide high utility, improve organization, and enhance aesthetics.

    They are especially valuable in small bathrooms where space optimization is critical.

    Expert Buying Checklist

    • Measure space
    • Choose moisture-resistant material
    • Check wall strength
    • Select proper size
    • Match design

    FAQ Section

    What is the standard depth of bathroom wall cabinets?

    4–12 inches depending on storage needs.

    Can cabinets be installed above toilets?

    Yes, it is a common and effective placement.

    Are wooden cabinets suitable for bathrooms?

    Yes, if properly sealed.

    Do cabinets require drilling?

    Most do, for secure installation.

    What is the ideal installation height?

    48–60 inches from the floor.

    Which material lasts longest?

    Metal and PVC offer the best durability.

  • Bathroom Cabinets: Complete Guide to Types, Materials, and Smart Storage

    Bathroom cabinets are storage units designed to organize toiletries, protect items from moisture, and enhance bathroom functionality. The best cabinets combine water-resistant materials, efficient internal layout, and the right installation type to match space, usage, and humidity conditions.

    Bathroom cabinets are not just storage boxes. They are engineered to survive moisture, daily use, and temperature changes while maintaining structure and appearance over time.

    What Are Bathroom Cabinets and How Do They Work?

    Bathroom cabinets are enclosed storage systems installed in bathrooms to store personal care items, cleaning supplies, and accessories.

    They work by:

    • protecting contents from moisture exposure
    • organizing items using shelves and drawers
    • maximizing vertical and hidden storage space

    Modern cabinets also integrate mirrors, lighting, and soft-close hardware for improved usability.


    What Are the Different Types of Bathroom Cabinets?

    Different Types of Bathroom Cabinets

    Bathroom cabinets come in multiple configurations based on space and function.

    Common Types:

    Wall-Mounted Cabinets

    Installed above sinks or toilets. Ideal for saving floor space.

    Freestanding Cabinets

    Placed directly on the floor. Offer larger storage capacity.

    Vanity Cabinets

    Integrated with sinks. Combine storage with functional design.

    Recessed Cabinets

    Built into the wall cavity. Provide hidden storage without occupying space.

    How Do You Choose the Right Bathroom Cabinets?

    Choosing the right cabinet depends on space, moisture level, and usage.

    Key Decision Factors:

    • Bathroom size
    • Storage needs
    • Humidity exposure
    • Installation type
    • Design compatibility

    Practical Rule:

    Small bathrooms benefit from vertical or wall-mounted cabinets, while larger bathrooms can support freestanding or double vanity cabinets.

    Homeaholic recommends prioritizing function first, then design.

    What Is the Difference Between Bathroom Cabinets and Vanities?

    Bathroom cabinets and vanities are often confused, but they serve different purposes.

    Bathroom Cabinets:

    • Used purely for storage
    • Installed on walls or floors
    • Do not include sink integration

    Bathroom Vanities:

    • Combine cabinet + sink + countertop
    • Serve both storage and functional washing needs

    Key Decision Rule:

    If your goal is storage expansion, choose cabinets.
    If your goal is sink replacement with storage, choose a vanity.

    Practical Insight:

    Many modern bathrooms combine both to maximize space and usability.

    Which Materials Are Best for Bathroom Cabinets?

    Material determines durability, moisture resistance, and lifespan.

    Material Comparison Table

    MaterialMoisture ResistanceDurabilityBest Use
    Solid WoodMediumHighLuxury bathrooms
    MDFLow–MediumMediumBudget interiors
    PlywoodHighHighBest overall choice
    PVCVery HighMediumHigh humidity areas
    Stainless SteelExcellentVery HighModern, industrial bathrooms

    Why Bathroom Cabinets Fail: Swelling, Warping, and Mold Explained

    Why Bathroom Cabinets Fail

    Bathroom cabinets fail primarily due to moisture exposure, poor material selection, and weak sealing. Understanding failure patterns helps prevent early replacement.

    Swelling and Expansion

    MDF and low-grade wood absorb moisture through edges. This causes panels to expand, lose shape, and permanently deform.

    Warping

    Uneven humidity causes wood panels to bend. This leads to misaligned doors and uneven gaps.

    Mold Growth Inside Cabinets

    Poor ventilation traps humidity inside cabinets, especially under sinks. This creates mold-prone environments.

    Laminate Peeling

    Low-quality laminates separate from the base material when exposed to steam and water.

    Prevention Rule

    Always use sealed edges, moisture-resistant materials, and proper ventilation to prevent long-term damage.

    Key Insight:

    Plywood offers the best balance of strength and moisture resistance, while PVC is ideal for extreme humidity environments.

    Wall-Mounted vs Freestanding Bathroom Cabinets: Which Is Better?

    Both types serve different needs.

    FeatureWall-MountedFreestanding
    Space efficiencyHighMedium
    Storage capacityMediumHigh
    Cleaning easeEasyModerate
    InstallationComplexSimple

    Recommendation:

    Wall-mounted cabinets are best for modern compact spaces, while freestanding cabinets work better in larger bathrooms.


    Bathroom Cabinets Hardware Explained: Hinges, Rails, and Longevity

    Bathroom Cabinets Hardware Explained

    Hardware quality directly affects cabinet lifespan.

    Soft-Close Hinges

    • Prevent door slamming
    • Reduce wear over time
    • Last longer than standard hinges

    Drawer Rails

    • Ball-bearing rails provide smoother operation
    • Cheap rails fail within 2–3 years

    Handle vs Handleless Design

    • Handles offer durability
    • Push-to-open systems require higher-quality mechanisms

    Key Insight:

    Hardware failure is one of the most common reasons cabinets feel “old” even when structure is intact.

    What Is the Ideal Size and Depth for Bathroom Cabinets?

    Cabinet size directly affects usability and comfort.

    Standard Dimensions:

    • Depth: 18–24 inches
    • Height: 30–36 inches
    • Width: 24–60 inches

    Small Bathroom Tip:

    Use narrow cabinets (12–18 inches depth) to avoid crowding.


    How to Calculate the Right Cabinet Size for Your Bathroom?

    Choosing the correct size ensures comfort and usability.

    Basic Calculation Method:

    1. Measure total bathroom width
    2. Leave at least 30 inches clearance for movement
    3. Allocate remaining space for cabinet width

    Depth Selection Rule:

    • Small bathrooms → 12–18 inches
    • Standard bathrooms → 18–24 inches
    • Large bathrooms → 24+ inches

    Height Consideration:

    • Standard vanity height: 32–36 inches
    • Wall-mounted cabinets should align with eye level

    Interactive Bathroom Cabinets Size Calculator

    Use this simple method to estimate the ideal cabinet size for your bathroom layout.

    Step-by-Step Input Method:

    1. Measure total bathroom width (in inches)
    2. Subtract minimum movement clearance (30–36 inches)
    3. Divide remaining space for cabinet allocation

    Example Calculation:

    • Bathroom width: 72 inches
    • Clearance space: 36 inches
    • Remaining space: 36 inches
    • Ideal cabinet width = 30–36 inches

    Quick Reference Table:

    Bathroom WidthRecommended Cabinet Size
    48”18–24” cabinet
    60”24–30” cabinet
    72”30–36” cabinet
    96”+48–60” cabinet

    Homeaholic Insight:

    Oversized cabinets reduce usability more than they increase storage.


    How Do Bathroom Cabinets Perform in Humid Environments?

     Bathroom Cabinets Performance in Humid Environments

    Humidity is the biggest threat to cabinet durability.

    Common Effects:

    • swelling
    • warping
    • mold growth
    • laminate peeling

    Best Solutions:

    • waterproof coatings
    • sealed edges
    • moisture-resistant materials

    Are Bathroom Cabinets Waterproof or Water-Resistant?

    No cabinet is completely waterproof unless made from non-porous materials like PVC or stainless steel.

    Water-Resistant Cabinets:

    • Treated wood or plywood
    • Laminated surfaces
    • Sealed edges

    Waterproof Cabinets:

    • PVC cabinets
    • Metal cabinets

    Important Distinction:

    Water-resistant cabinets can handle humidity,
    but waterproof cabinets can handle direct water exposure.

    Homeaholic Recommendation:

    Use waterproof cabinets near sinks and water-prone areas.

    Material Stress Test Comparison: Heat, Water, and Load

    Different materials react differently under stress conditions.

    MaterialWater ExposureHeat ResistanceLoad Strength
    MDFPoorMediumLow
    PlywoodGoodHighHigh
    PVCExcellentMediumMedium
    SteelExcellentVery HighVery High

    Key Insight:

    Plywood provides the best balance across all stress factors, making it the most reliable long-term material.

    Moisture Performance Matrix

    MaterialHumidity Performance
    MDFPoor (swells easily)
    WoodModerate
    PlywoodGood
    PVCExcellent
    SteelExcellent

    Real-World Case Study: Bathroom Cabinets Failure in High Humidity

    A small bathroom using MDF cabinets experienced swelling and edge damage within 18 months due to poor ventilation.

    After replacing with PVC cabinets:

    • no swelling after 4 years
    • improved durability
    • zero maintenance issues

    This shows how material choice directly affects lifespan.

    How Much Do Bathroom Cabinets Cost Globally?

    Costs vary based on material, size, and customization.

    Average Price Range:

    • Basic cabinets: $100–$500
    • Mid-range: $500–$1,500
    • Premium/custom: $1,500–$5,000+

    Cost Drivers:

    • material type
    • hardware quality
    • custom design
    • installation complexity

    What Factors Affect Bathroom Cabinets Pricing?

    Pricing is not just about material.

    Key Pricing Factors:

    • Material quality
    • Cabinet size
    • Hardware type
    • Customization level
    • Installation complexity
    • Brand reputation

    Hidden Cost Insight:

    Cheap cabinets often cost more long-term due to early replacement.

    How Long Do Bathroom Cabinets Last?

    Cabinet lifespan depends on material and usage.

    MaterialLifespan
    MDF3–7 years
    Wood8–15 years
    Plywood10–20 years
    PVC10–15 years
    Steel15–25 years

    How to Maintain Bathroom Cabinets for Maximum Lifespan?

    Proper maintenance can extend cabinet life by years.

    Maintenance Routine:

    • Wipe moisture immediately
    • Clean surfaces weekly
    • Check hinges every 3–6 months
    • Re-seal edges if damaged

    Ventilation Rule:

    Bathrooms without ventilation reduce cabinet lifespan by up to 50%.

    Long-Term Insight:

    Maintenance is the cheapest way to delay cabinet replacement.

    What Are Common Bathroom Cabinets Problems and How to Avoid Them?

    Common Issues:

    • swelling due to water exposure
    • loose hinges
    • mold buildup
    • peeling laminates

    Prevention:

    • use moisture-resistant materials
    • install proper ventilation
    • avoid water accumulation
    • maintain sealing and edges

    How to Maximize Storage with Bathroom Cabinets?

    Storage efficiency matters more than cabinet size.

    Smart Storage Tips:

    • use adjustable shelves
    • install drawer dividers
    • choose vertical cabinets
    • use hidden compartments

    How to Design Bathroom Cabinets Storage for Maximum Efficiency

    Storage efficiency depends on layout, not just cabinet size.

    Drawer vs Shelf Efficiency

    • Drawers provide easier access and visibility
    • Shelves offer larger storage but lower accessibility

    Vertical vs Horizontal Storage

    • Vertical cabinets maximize small bathroom space
    • Horizontal cabinets work better in large bathrooms

    Hidden Storage Optimization

    • Use internal organizers
    • Add pull-out trays
    • Install under-sink compartments

    Efficiency Rule:

    A well-designed cabinet can store 30–50% more usable items than a poorly organized one of the same size.

    Bathroom Cabinets Storage Planner (Smart Layout System)

    Design your cabinet layout based on usage zones.

    Step 1: Categorize Items

    • Daily use items (toothbrush, skincare)
    • Weekly use items (towels, cleaning supplies)
    • Rare use items (backup products)

    Step 2: Assign Storage Zones

    ZonePlacement
    Top shelvesRare use items
    Middle shelvesDaily use items
    Bottom areaHeavy or bulky items

    Step 3: Optimize Accessibility

    • Use drawers for small items
    • Use shelves for large items
    • Add dividers for organization

    Efficiency Insight:

    Proper zoning improves accessibility by up to 50% compared to random storage.

    Storage Efficiency Comparison

    Cabinet TypeEfficiency Score
    RecessedHigh
    Wall-mountedMedium
    FreestandingMedium
    VanityHigh

    What Most Homeowners Get Wrong About Bathroom Cabinets?

    Most people choose cabinets based on appearance alone.

    In reality:

    • 60% of failures come from moisture damage
    • 25% from poor installation
    • 15% from low-quality hardware

    Material and installation matter more than design.

    DIY vs Custom Bathroom Cabinets: Which Should You Choose?

    DIY Cabinets:

    • lower cost
    • limited customization

    Custom Cabinets:

    • perfect fit
    • higher durability
    • premium design

    Recommendation:

    Custom cabinets are better for long-term performance and space optimization.

    Ready-Made vs Custom Bathroom Cabinets: Which Is Better?

    Ready-Made Cabinets:

    • Lower cost
    • Faster installation
    • Limited size options

    Custom Cabinets:

    • Perfect fit
    • Better material control
    • Higher long-term value

    Decision Rule:

    Choose ready-made for budget and speed.
    Choose custom for durability and precision.

    Bathroom Cabinets Installation: Key Considerations

    Proper installation prevents long-term issues.

    Key Points:

    • secure wall anchoring
    • level alignment
    • moisture sealing
    • correct height positioning

    Bathroom Cabinets Installation Mistakes That Cause Long-Term Damage

    Improper installation leads to structural failure.

    Common Mistakes:

    • Weak wall anchoring
    • Installing on hollow drywall without support
    • Incorrect leveling
    • Ignoring tile drilling risks

    Wall Load Insight:

    Floating cabinets must be anchored into studs or concrete walls.
    Failure to do so can lead to collapse under weight.

    Expert Insight: Why Moisture Resistance Matters More Than Design

    Most homeowners choose cabinets based on appearance. However, moisture resistance determines whether cabinets last 2 years or 15 years.

    Homeaholic experts recommend always prioritizing material performance over aesthetics in high-humidity environments.

    Real-World Case Study: Small Bathroom Storage Upgrade

    A compact bathroom with limited storage used a traditional freestanding cabinet.

    Problem:

    • cluttered countertop
    • poor accessibility
    • inefficient storage

    Upgrade:

    Installed wall-mounted vertical cabinet with internal organizers.

    Result:

    • 40% increase in usable storage
    • cleaner layout
    • improved accessibility

    How Bathroom Cabinets Impact Overall Bathroom Value

    Bathroom cabinets directly influence property value.

    Value Impact Factors:

    • material quality
    • design consistency
    • storage functionality
    • durability

    Real Estate Insight:

    Upgraded cabinets can increase perceived bathroom value significantly during resale.

    Bathroom Cabinets Design Trends (Global Perspective)

    Modern bathroom cabinet design is evolving globally.

    Current Trends:

    • Floating cabinets for minimalist spaces
    • Handleless push-to-open designs
    • Matte finishes over gloss
    • Integrated lighting systems
    • Natural wood textures

    Design Insight:

    Minimalist cabinets are gaining popularity due to space efficiency and modern aesthetics.


    Bathroom Cabinet Expert QC Guide

    Bathroom Cabinets Buying Checklist (Expert QC Guide)

    Use this checklist before purchasing:

    • Material is moisture-resistant
    • Edges are fully sealed
    • Hinges are soft-close and durable
    • Cabinet size fits space correctly
    • Ventilation is considered
    • Warranty is provided

    Homeaholic Recommendation:

    Always inspect edge sealing and internal structure, not just external design.

    Bathroom Cabinets Comparison Tool (Decision Matrix)

    Use this comparison system to choose the best cabinet type for your needs.

    Cabinet Type Comparison

    FeatureWall-MountedFreestandingRecessedVanity
    Space SavingHighMediumVery HighMedium
    Storage CapacityMediumHighMediumHigh
    Installation ComplexityHighLowVery HighMedium
    CostMediumLow–MediumHighMedium–High
    Best ForSmall bathroomsLarge bathroomsMinimalist spacesFunctional use

    Material Comparison

    MaterialMoisture ResistanceDurabilityBest Use
    MDFLowMediumBudget use
    PlywoodHighHighStandard best choice
    PVCVery HighMediumHigh humidity
    SteelExcellentVery HighPremium durability

    Decision Rule:

    • Choose wall-mounted for small spaces
    • Choose freestanding for storage capacity
    • Choose PVC or steel for humid environments
    • Choose plywood for long-term balance

    FAQ Section

    What is the best material for bathroom cabinets?

    Plywood and PVC are the best choices due to high moisture resistance and durability.

    Are MDF cabinets suitable for bathrooms?

    They are budget-friendly but prone to swelling in humid conditions.

    What is the difference between vanity and cabinet?

    A vanity includes a sink, while a cabinet is purely for storage.

    How deep should a bathroom cabinet be?

    Standard depth ranges from 18 to 24 inches.

    Can bathroom cabinets be waterproof?

    PVC and stainless steel cabinets offer near waterproof performance.

    Are floating cabinets strong enough?

    Yes, when properly installed with wall anchors.

    How to prevent mold in cabinets?

    Ensure ventilation and avoid moisture buildup.

    How often should cabinets be replaced?

    Typically, every 10–20 years depending on material.

    Can bathroom cabinets rot from inside?

    Yes, especially MDF cabinets exposed to hidden moisture over time.

    Are soft-close hinges worth it?

    Yes, they significantly extend cabinet lifespan and reduce wear.

    What is the weight limit of floating cabinets?

    Typically 50–100 kg depending on installation and wall type.

    Can water seep through laminate edges?

    Yes, if edges are not properly sealed.

    Why do cabinet doors become uneven?

    Hinge loosening or structural warping causes misalignment.

  • Bathroom Sink Cabinet Ideas That Balance Storage, Durability, and Style

    Bathroom sink cabinets do far more than hide plumbing. They determine how well a bathroom handles moisture, how easy it is to stay organized, and whether the space feels calm or constantly cluttered. The best bathroom sink cabinet ideas prioritize material durability, smart storage, and sink compatibility before appearance.

    When those fundamentals are right, style becomes effortless. This guide is a cornerstone foundation when it comes to discussing different bathroom sink cabinet ideas, stamping several deciding factors to help you decide the right bathroom sink cabinet for you.

    How Do You Choose the Right Bathroom Sink Cabinet?

    The right bathroom sink cabinet is chosen by solving practical problems first. Moisture exposure, plumbing layout, storage needs, and sink type all shape what will work long term.

    Start with the environment. Bathrooms experience humidity, splashes, and temperature changes daily. A cabinet that performs well in a bedroom or hallway can fail quickly in a bathroom. Material choice and construction quality matter more here than almost anywhere else in the home.

    Next, consider storage behavior. Ask what needs to live inside the cabinet. Towels, cleaning supplies, toiletries, and spare rolls all require different access patterns. A cabinet that looks sleek but forces items to pile up on the countertop quickly becomes frustrating.

    Finally, confirm sink compatibility. Not every cabinet supports every sink type. Choosing these elements together avoids expensive rework later.


    What Types of Bathroom Sink Cabinets Are Available?

    Bathroom Sink Cabinet Ideas

    Bathroom sink cabinets fall into a few main structural categories, each suited to different layouts and preferences.

    Freestanding cabinets sit directly on the floor and offer strong structural support. They hide plumbing easily and tend to be forgiving during installation. Floating cabinets mount to the wall, creating a lighter visual look and making floor cleaning easier, but they require solid wall support.

    Corner cabinets make use of tight layouts where standard cabinets would block movement. Compact vanities are designed for powder rooms and small bathrooms where space is limited. Full-width cabinets work best in master bathrooms where storage demand is higher.

    Understanding these categories helps narrow choices quickly.


    Which Materials Work Best for Bathroom Sink Cabinets?

    Material choice determines how well a cabinet survives moisture over time.

    Solid wood offers strength and natural beauty but must be sealed properly to resist humidity. Plywood performs well in bathrooms because it resists swelling better than many alternatives. MDF is common in mid-range cabinets but is vulnerable to water damage if coatings fail.

    In real-world bathroom conditions, MDF cabinets exposed to frequent humidity or minor leaks often show edge swelling or surface bubbling within 3–5 years if protective coatings are compromised. This is why sealed edges and proper ventilation matter as much as the material itself.

    Particle board is the least durable option in wet environments. It may look fine initially but can swell and crumble when exposed to leaks or repeated humidity. Metal and PVC cabinets resist moisture well but have a more limited aesthetic range.

    As a general rule, moisture resistance and edge sealing matter more than surface finish alone.


    Are Floating Bathroom Sink Cabinets Better Than Freestanding Ones?

    Bathroom Sink Cabinet Ideas

    Floating cabinets are popular because they make bathrooms feel larger and more modern. They expose more floor space and create a clean visual break between wall and floor.

    However, durability depends on installation quality. Floating cabinets must be anchored into studs or reinforced walls to support the weight of the cabinet, sink, and contents. Poor installation leads to sagging or wall damage over time.

    Freestanding cabinets distribute weight to the floor and tolerate heavier sinks more easily. They are often better for traditional bathrooms or where wall reinforcement is limited.

    Neither option is universally better. The right choice depends on structure, sink weight, and long-term expectations.


    Which Sink Types Work With Different Cabinet Designs?

    Sink type and cabinet design are tightly linked.

    Vessel sinks sit on top of the cabinet and require lower cabinet heights to remain comfortable. They reduce internal storage because plumbing must rise higher inside the cabinet. Undermount sinks integrate smoothly with countertops and preserve interior space, making them practical for storage-focused designs.

    Integrated sinks are molded into the countertop and simplify cleaning while reducing joint failures. Drop-in sinks are flexible and budget-friendly but create visible edges that collect moisture if not sealed carefully.

    Matching sink type to cabinet structure avoids awkward ergonomics and wasted space.


    Are Drawers Better Than Doors in Bathroom Sink Cabinets?

    Bathroom Sink Cabinet Ideas

    In most cases, drawers outperform doors for daily storage.

    Drawers allow full visibility and prevent items from disappearing into the back of the cabinet. Deep drawers can increase usable storage by 25 to 40 percent compared with standard shelves. They also make it easier to organize smaller items.

    The challenge is plumbing. Sink traps and supply lines can block drawer space if not planned correctly. Many modern cabinets use U-shaped drawers or split configurations to work around pipes.

    Doors still make sense for large items or where plumbing layouts are unpredictable. The best cabinets often combine both.


    Bathroom Sink Cabinet Ideas

    What Bathroom Sink Cabinet Ideas’ Sizes

    Work Best for Small Bathrooms?

    Small bathrooms demand careful proportioning.

    Cabinets between 24 and 36 inches wide suit most compact layouts. Floating cabinets visually expand the room by exposing floor space. Shallow-depth cabinets reduce crowding without sacrificing basic storage.

    Tall storage should be placed elsewhere rather than forcing oversized cabinets under the sink. In tight spaces, fewer but better-designed storage zones outperform bulky furniture.

    Choosing the smallest cabinet that meets real storage needs keeps the room functional and comfortable.


    How Long Do Bathroom Sink Cabinets Last and What Affects Longevity?

    A quality bathroom sink cabinet typically lasts 10 to 20 years, depending on materials, installation, and maintenance.

    Moisture exposure is the biggest factor in failure. Cabinets fail when water penetrates seams, edges, or unsealed cutouts. Poor ventilation accelerates this process.

    Hardware quality also matters. Soft-close hinges and runners reduce stress and extend lifespan. Cheap hardware often fails long before the cabinet body does.

    Regular wiping of spills and occasional inspection of seals significantly extends cabinet life.


    What Are the Most Common Bathroom Sink Cabinet Mistakes to Avoid?

    Many cabinet problems come from decisions made too early or too quickly.

    One common mistake is choosing materials based on appearance alone. Cabinets that look premium can still fail if their cores are not moisture resistant. Another issue is ignoring plumbing clearance, which leads to unusable drawers or awkward storage.

    Overcrowding is another frequent error. Installing the largest possible cabinet often restricts movement and makes the bathroom feel cramped. Finally, inadequate ventilation allows humidity to linger and damage cabinetry over time. Avoiding these mistakes requires thinking beyond the showroom display.


    Bathroom Sink Cabinet Ideas’ Materials Compared

    MaterialMoisture ResistanceDurabilityCost RangeBest Use Case
    Solid WoodModerateHighHighWell-ventilated bathrooms
    PlywoodGoodHighMidLong-term durability
    MDFModerateMediumMidBudget-conscious designs
    Particle BoardLowLowLowShort-term or low-use spaces
    PVC / MetalExcellentHighMid to HighHigh-humidity environments

    This comparison helps align expectations with reality.


    Bathroom Sink Cabinet Selection Checklist

    Before finalizing a cabinet, confirm the following.

    Material resists bathroom moisture
    Sink type matches cabinet height and structure
    Drawer layout accommodates plumbing
    Cabinet size fits the room comfortably
    Installation method supports long-term load
    Ventilation reduces humidity buildup

    If all boxes are checked, the cabinet is likely to perform well for years.

    In small apartment bathrooms, one of the most common renovation regrets is choosing a deep cabinet that blocks movement and traps moisture behind the sink. Switching to a shallower floating cabinet with proper wall clearance often solves both issues without reducing usable storage, proving that proportion matters more than size.


    What Bathroom Sink Cabinet Sizes Work Best for Small Bathrooms?

    At Homeaholic, bathroom sink cabinets are treated as functional systems, not just furniture. Material behavior, plumbing clearance, moisture exposure, and daily use patterns are considered before visual style is finalized.

    This approach prevents common failures like swelling, sagging drawers, and wasted storage. When cabinets are designed around real conditions, they stay reliable and visually calm long after trends fade.


    Frequently Asked Questions About Bathroom Sink Cabinets

    What material is best for bathroom sink cabinets?

    Plywood and properly sealed solid wood perform best in most bathrooms.

    Are floating bathroom cabinets durable?

    Yes, when installed correctly into reinforced walls.

    Do drawers work under bathroom sinks?

    They do if designed to accommodate plumbing.

    How long should a bathroom sink cabinet last?

    Quality cabinets often last 10 to 20 years with proper care.

    Are cheap bathroom cabinets worth it?

    They can work short term but often fail faster in humid environments.

    Do bathroom cabinets need ventilation?

    Yes. Ventilation reduces moisture buildup and extends lifespan.


  • Unveiling the Comedy Canvas: A Deep Dive into the Hilarity of Whimsical Shower Curtains

    Funny shower curtain has brought a new twist into the evolution of home decor. Unlike previous curtains that were simple and only for functionality purposes, these curtains have now become the unexpected heroes of bathroom decoration turning the once utilitarian space into a humorous and fantasy place. We’ll dive into the hilarious shower curtains of twelve that might change your shower experience forever.

    1. Rubber Ducky Invasion

    Shower Curtain

    The “Rubber Ducky Invasion” shower curtain captures the whimsical charm of childhood. Imagine the happiness of coming into your shower and realizing that there is an entire army of rubber duckies all on their own individual quests! It is a wonderful little tribute to nostalgia, those happy bath times and an uplifting quick-fix for moods. A simple everyday activity becomes a happy moment because the colours are so vivid and the whole idea of a rubber duck parade is crazy.

    2. Punder the Sea

    Shower Curtain

    This “Punder the Sea” shower curtain is an excellent linguistic treat for people who appreciate the funny combination between language and marine life. Jump into the world of funny puns as funny sea creatures become the main theme of this underwater performance. An interesting work of art that evokes laughter and stimulates the mind by combining comic wordplay with sea beauty. It’s just an amusing take-home message that even at the bottom of the ocean, we can still find laughable moments.

    3. Llama Drama

    Shower Curtain

    “Llama Drama” shower curtain has llamas as the main characters, which are animals with long necks and mysterious looks. Each llama looks as if in the performance of some brilliant theatrical action but makes the room funny to you. It’s a fun look at the eccentric personalities of llamas and transforms any shower into a llama-themed amusement spot. The curtain’s blend of grace and ridiculousness is what makes the bathroom setting comical and charming.

    4. Cat-Astrophe Chronicles Shower Curtain

    Shower Curtain

    Cat lovers, brace yourself for a cat inspired journey entitled “The Cat-astrophe Chronicles” towel rod. The comic masterpiece is about the cats, which always behave unexpectedly and can make you laugh. The curtain features everything from acrobatic feats to unexpected games that happen while having cats in the household. It is not just a home decoration; it celebrates the playful tricks that make cats so popular pets.

    5. Out-of-This-World Humour

    Shower Curtain

    Upgrade your bathroom decor to levels never reached before with this Out-Of-This-World Humour shower curtain. Cosmic comedy makes your ordinary shower routine a whimsical encounter with aliens, UFOs, and funny space scenes. Playful images and out-of-the-world alien confrontations are intergalactic jovial feelings. It’s beyond the common life’s journey, where ordinary is extraordinary, and the laughter is out of this world.

    6. Avocado Avant-Garde

    Shower Curtain

    “Avocado Avant-Garde” shower curtain combines healthy living and humour. A treat for the eyes, the illustrations in this curtain comprise witty puns based on the universal green fruit. A statement, no less than decor—a proclaim that even healthy stuff can be served with some jolliness. Your everyday routine will now be spiced up with healthy consciousness and good humour thanks to the curtain.

    7. Sloth Sanctuary

    Shower Curtain

    Sloth sanctuary will be the theme of this shower curtain which takes place in a leisure mode of sloth. In doing so, these cute creatures in the act of merriment, cease to be mere decorations and turn into gentle reminders to slow down and appreciate the small moments in life. It is a veil that turns the bathroom into a temple of peace and laughter.

    8. Superhero Splash

    Shower Curtain

    Let the “Superhero Splash” shower curtain liberate your hidden hero. To make your bathroom more amusing, you can use comic book-style illustrations of superheroes caught in funny scenes. Celebrating the super-feats of superheroes is one thing, but finding the humour in the everyday lives of heroes is another. You will laugh your heart out in your bathroom while these caped crusaders are playing behind the curtain!

    9. Zen with a Twist

    Shower Curtain

    Add calmness and light humour to your bathroom using a “Zen with a Twist” shower curtain. This smart combination of serene zen imagery with unexpected and funny surprises forms the basis of balanced interior. It is not just a visual appeal but also brings thoughts and makes one laugh simultaneously. The merger of calmness and comedy transform your shower into reflection and laughter spot.

    10. Whale of a Tale

    Shower Curtain

    Let us explore a world of story telling in the “Whale of a Tale” shower curtain. These provide comical and engaging descriptions of how majestic whales go through some humorous activities to give your bathroom a nice touch. It is more than a curtain. It is an invitation for you to tell your stories while taking a shower. The bathroom becomes a canvas for storytelling, as the shower transforms into the chapters of bizarre watery adventures.

    11. Emoji Extravaganza

    Shower Curtain

    Use the “Emoji extravaganza” shower curtain to express yourself in the universal language of emoticons. This interesting and lively curtain shows several funny faces and symbols that will fill your bathroom with fun and emotion. It’s not only for decoration; it reflects feelings, a reflection of your daily moods. The bathroom turns into a jovial place where laughing and expression intertwine with the curtain.

    Conclusion

    The funny shower curtains provide us with more than mere decor options. Rather, it reveals an alternate world of innovation, humour, and self-expression. Each curtain is either like the nostalgia of rubber duckies for those born in the seventies and eighties like me or, the comical antics of animals or the linguistic delight of puns, whichever you may find yourself enjoying. These curtains move past their utilitarian function; they act as major characters in the theatres of our daily jokes, happiness, and unforeseen escapades in the bathroom. Therefore, you should go out on a mission to acquire the perfect shower curtain that reveals the comedy canvas where it becomes a funny story with every wash off.